Embed Size (px)
Citation preview
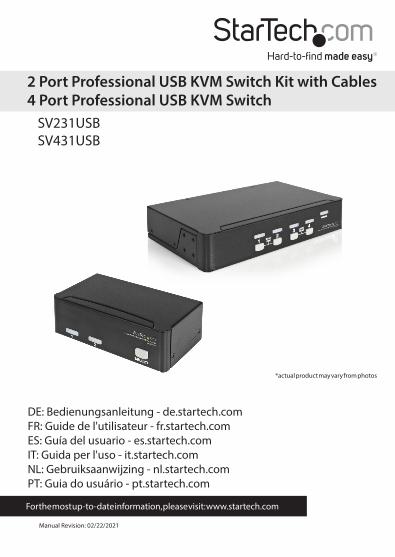
Manual Revision: 02/22/2021
For the most up-to-date information, please visit: www.startech.com
DE: Bedienungsanleitung - de.startech.comFR: Guide de l'utilisateur - fr.startech.comES: Guía del usuario - es.startech.comIT: Guida per l'uso - it.startech.comNL: Gebruiksaanwijzing - nl.startech.comPT: Guia do usuário - pt.startech.com
SV231USBSV431USB
2 Port Professional USB KVM Switch Kit with Cables4 Port Professional USB KVM Switch
*actual product may vary from photos

Instruction Manual
FCC Compliance StatementThis equipment has been tested and found to comply with the limits for a Class A digital device, pursuant to part 15 of the FCC Rules. These limits are designed to provide reasonable protection against harmful interference in a residential installation. This equipment generates, uses and can radiate radio frequency energy and, if not installed and used in accordance with the instructions, may cause harmful interference to radio communications. However, there is no guarantee that interference will not occur in a particular installation. If this equipment does cause harmful interference to radio or television reception, which can be determined by turning the equipment off and on, the user is encouraged to try to correct the interference by one or more of the following measures:
• Reorient or relocate the receiving antenna.
• Increase the separation between the equipment and receiver.
• Connect the equipment into an outlet on a circuit different from that to which the receiver is connected.
• Consult the dealer or an experienced radio/TV technician for help.
Industry Canada StatementThis Class A digital apparatus complies with Canadian ICES-003.
Cet appareil numérique de la classe [A] est conforme à la norme NMB-003 du Canada.
CAN ICES-3 (A)/NMB-3(A)
This device complies with Industry Canada licence-exempt RSS standard(s). Operation is subject to the following two conditions:
(1) This device may not cause interference, and (2) This device must accept any interference, including interference that may cause undesired operation of the device.
Le présent appareil est conforme aux CNR d’Industrie Canada applicables aux appareils radio exempts de licence.
L’exploitation est autorisée aux deux conditions suivantes: (1) l’appareil ne doit pas produire de brouillage, et (2) l’utilisateur de l’appareil doit accepter tout brouillage radioélectrique subi, même si le brouillage est susceptible d’en compromettre le fonctionnement.
Use of Trademarks, Registered Trademarks, and other Protected Names and SymbolsThis manual may make reference to trademarks, registered trademarks, and other protected names and/or symbols of third-party companies not related in any way to StarTech.com. Where they occur these references are for illustrative purposes only and do not represent an endorsement of a product or service by StarTech.com, or an endorsement of the product(s) to which this manual applies by the third-party company in question. Regardless of any direct acknowledgement elsewhere in the body of this document, StarTech.com hereby acknowledges that all trademarks, registered trademarks, service marks, and other protected names and/or symbols contained in this manual and related documents are the property of their respective holders.
Instruction Manuali
Table of ContentsIntroduction ............................................................................................1
Features ........................................................................................................................................................ 1
Packaging Contents ................................................................................................................................. 1
System Requirements .............................................................................................................................. 1
Accessory Products from StarTech.com..............................................2Computer Connection ............................................................................................................................ 4
Operation ..................................................................................................................................................... 5
Rack Mount Kit for SV431USB (optional) .......................................................................................... 6
Specifications ..........................................................................................7
Troubleshooting .....................................................................................8
Technical Support ..................................................................................9
Warranty Information ............................................................................9
Instruction Manual1
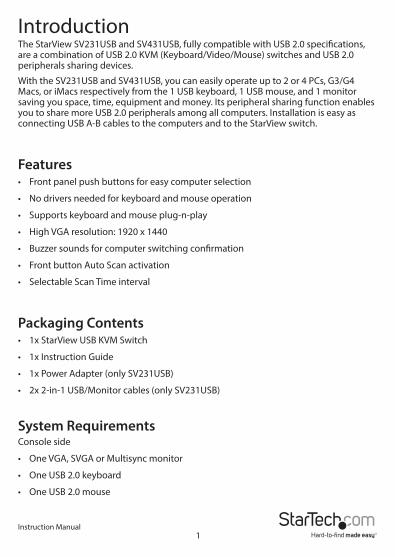
IntroductionThe StarView SV231USB and SV431USB, fully compatible with USB 2.0 specifications, are a combination of USB 2.0 KVM (Keyboard/Video/Mouse) switches and USB 2.0 peripherals sharing devices.
With the SV231USB and SV431USB, you can easily operate up to 2 or 4 PCs, G3/G4 Macs, or iMacs respectively from the 1 USB keyboard, 1 USB mouse, and 1 monitor saving you space, time, equipment and money. Its peripheral sharing function enables you to share more USB 2.0 peripherals among all computers. Installation is easy as connecting USB A-B cables to the computers and to the StarView switch.
Features• Front panel push buttons for easy computer selection
• No drivers needed for keyboard and mouse operation
• Supports keyboard and mouse plug-n-play
• High VGA resolution: 1920 x 1440
• Buzzer sounds for computer switching confirmation
• Front button Auto Scan activation
• Selectable Scan Time interval
Packaging Contents• 1x StarView USB KVM Switch
• 1x Instruction Guide
• 1x Power Adapter (only SV231USB)
• 2x 2-in-1 USB/Monitor cables (only SV231USB)
System RequirementsConsole side
• One VGA, SVGA or Multisync monitor
• One USB 2.0 keyboard
• One USB 2.0 mouse
Instruction Manual2
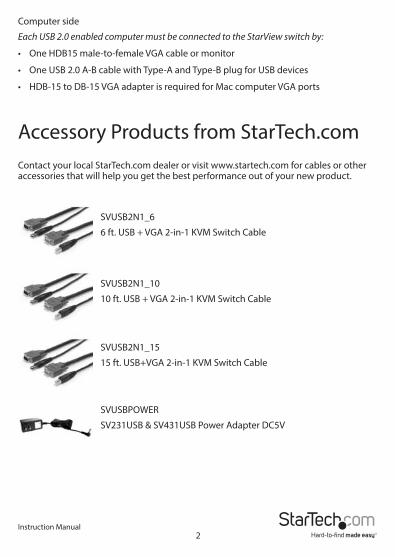
Computer side
Each USB 2.0 enabled computer must be connected to the StarView switch by:
• One HDB15 male-to-female VGA cable or monitor
• One USB 2.0 A-B cable with Type-A and Type-B plug for USB devices
• HDB-15 to DB-15 VGA adapter is required for Mac computer VGA ports
Accessory Products from StarTech.comContact your local StarTech.com dealer or visit www.startech.com for cables or other accessories that will help you get the best performance out of your new product.
SVUSB2N1_6
6 ft. USB + VGA 2-in-1 KVM Switch Cable
SVUSB2N1_10
10 ft. USB + VGA 2-in-1 KVM Switch Cable
SVUSB2N1_15
15 ft. USB+VGA 2-in-1 KVM Switch Cable
SVUSBPOWER
SV231USB & SV431USB Power Adapter DC5V
Instruction Manual3
The following BIOS setup changes are necessary for PC users and not necessary for Mac users:
1. In STANDARD CMOS, set HALT ON ERROR to ALL BUT KEYBOARD
2. In PNP and PCI SETUP, set PNP OS INSTALLED to YES and set USB IRQ to ENABLED Note: The StarView switch is applicable for USB 2.0 keyboard and mouse switching from one computer to the other. If you plan to share other peripherals such as a CCD camera, printer or scanner, it is necessary to shut down the driver of the computer before switching to another computer. Because port switching is equivalent to unplugging the USB cable from one computer and plugging it into another one, some USB drivers check attached USB peripherals all the time and do not accept plug-n-play functions.
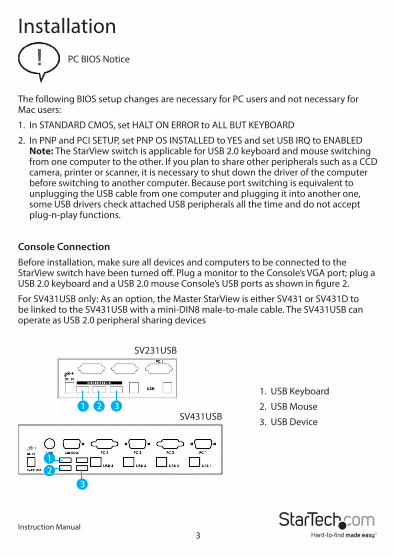
Console ConnectionBefore installation, make sure all devices and computers to be connected to the StarView switch have been turned off. Plug a monitor to the Console’s VGA port; plug a USB 2.0 keyboard and a USB 2.0 mouse Console’s USB ports as shown in figure 2.
For SV431USB only: As an option, the Master StarView is either SV431 or SV431D to be linked to the SV431USB with a mini-DIN8 male-to-male cable. The SV431USB can operate as USB 2.0 peripheral sharing devices
InstallationPC BIOS Notice
1. USB Keyboard
2. USB Mouse
3. USB Device
SV231USB
SV431USB
Instruction Manual4
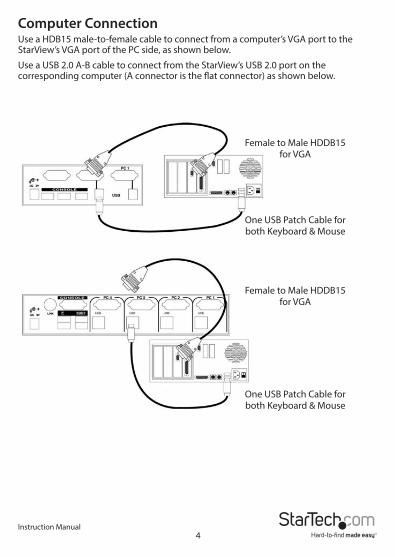
Computer ConnectionUse a HDB15 male-to-female cable to connect from a computer’s VGA port to the StarView’s VGA port of the PC side, as shown below.
Use a USB 2.0 A-B cable to connect from the StarView’s USB 2.0 port on the corresponding computer (A connector is the flat connector) as shown below.
Female to Male HDDB15for VGA
One USB Patch Cable forboth Keyboard & Mouse
Female to Male HDDB15for VGA
One USB Patch Cable forboth Keyboard & Mouse
Instruction Manual5
OperationFront Panel
1. On-line LED and Selected LED: When the LED turns green, the connected computer is powered-on When a computer is selected its corresponding red LED illuminates.
2. Push buttons: Each computer has a button associated with it on the front panel for selection.
Auto Scan
Auto Scan automically scans through computers one by one in a fixed interval (see Scan Time below). Note: Keyboard or mouse is not operable during Auto Scan.
• For SV231USB It sets the scan interval for Auto Scan. The Scan Time options are 3, 8, 15 and 30 seconds. Note: Scan Time is automically set to the default of 3 seconds when the KAG switch loses power.
• For SV431USB To activate Auto Scan, press down front panel push buttons “3” and “4” simultaneously.The port LED flashes during Auto Scan. Auto Scan is effective for powered-on computers only. To exit the Auto Scan mode, just tap any one of the push buttons. To change the Scan Time interval, press both fron panel buttons “1” and “2” simultaneously. The SV431USB beeps 1, 2, 3, or 4 times for Scan Time of 3, 8, 15, or 30 seconds respectively.
Instruction Manual6
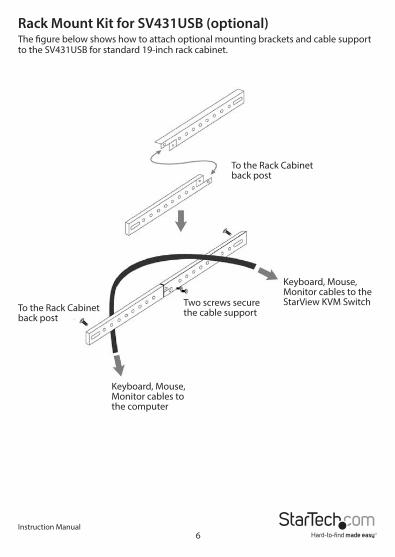
Rack Mount Kit for SV431USB (optional)The figure below shows how to attach optional mounting brackets and cable support to the SV431USB for standard 19-inch rack cabinet.
To the Rack Cabinetback post
Keyboard, Mouse,Monitor cables to theStarView KVM SwitchTwo screws secure
the cable support
Keyboard, Mouse,Monitor cables tothe computer
To the Rack Cabinetback post

Instruction Manual7
SpecificationsSV431USB SV231USB
# of Computers Supported 4 2
Front Panel Push Button 4 1
Hot Plug & Play Yes
Auto Scan Interval 3, 8, 15, 30 seconds
Cabel Length (Max) 30m (100ft) for VGA 5m (15ft) for USB
Compter Online LED 4 2
Computer Selected LED 4 2
VGA 1920 x 1440, DDC2B
Computer Peripheral Connector, Monitor
USB Type B x 4 HDB-15 Male x 4
USB Type B x 2 HDB-15 Male x 2
Console Peripheral Connector, Monitor
USB Type A x 4 HDB-15 Female x 1
USB Type A x 3 HDB-15 Female x 1
H x W x D (mm) (in) size 44x 124 x 130 1.7 x 8.7 x 5.1
Compact
40x 124 x 70 1.6 x 4.9 x 2.7
Micro
Weight (g) (oz.) 900 31.74
420 14.8
Instruction Manual8
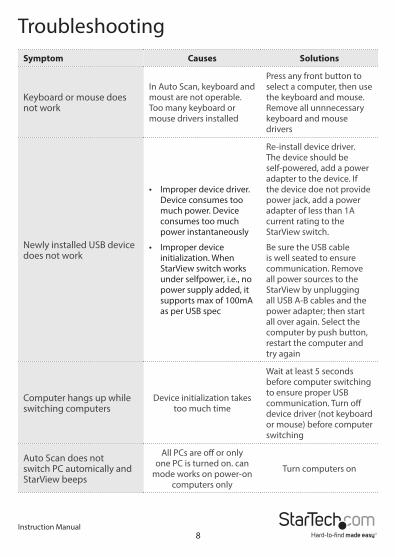
TroubleshootingSymptom Causes Solutions
Keyboard or mouse does not work
In Auto Scan, keyboard and moust are not operable. Too many keyboard or mouse drivers installed
Press any front button to select a computer, then use the keyboard and mouse. Remove all unnnecessary keyboard and mouse drivers
Newly installed USB device does not work
• Improper device driver. Device consumes too much power. Device consumes too much power instantaneously
• Improper device initialization. When StarView switch works under selfpower, i.e., no power supply added, it supports max of 100mA as per USB spec
Re-install device driver. The device should be self-powered, add a power adapter to the device. If the device doe not provide power jack, add a power adapter of less than 1A current rating to the StarView switch.
Be sure the USB cable is well seated to ensure communication. Remove all power sources to the StarView by unplugging all USB A-B cables and the power adapter; then start all over again. Select the computer by push button, restart the computer and try again
Computer hangs up while switching computers
Device initialization takes too much time
Wait at least 5 seconds before computer switching to ensure proper USB communication. Turn off device driver (not keyboard or mouse) before computer switching
Auto Scan does not switch PC automically and StarView beeps
All PCs are off or only one PC is turned on. can
mode works on power-on computers only
Turn computers on
Instruction Manual9
Technical SupportStarTech.com’s lifetime technical support is an integral part of our commitment to provide industry-leading solutions. If you ever need help with your product, visit www.startech.com/support and access our comprehensive selection of online tools, documentation, and downloads.For the latest drivers/software, please visit www.startech.com/downloads
Warranty InformationThis product is backed by a two year warranty. In addition, StarTech.com warrants its products against defects in materials and workmanship for the periods noted, following the initial date of purchase. During this period, the products may be returned for repair, or replacement with equivalent products at our discretion. The warranty covers parts and labor costs only. StarTech.com does not warrant its products from defects or damages arising from misuse, abuse, alteration, or normal wear and tear.
Limitation of LiabilityIn no event shall the liability of StarTech.com Ltd. and StarTech.com USA LLP (or their officers, directors, employees or agents) for any damages (whether direct or indirect, special, punitive, incidental, consequential, or otherwise), loss of profits, loss of business, or any pecuniary loss, arising out of or related to the use of the product exceed the actual price paid for the product. Some states do not allow the exclusion or limitation of incidental or consequential damages. If such laws apply, the limitations or exclusions contained in this statement may not apply to you.

Hard-to-find made easy. At StarTech.com, that isn’t a slogan. It’s a promise.
StarTech.com is your one-stop source for every connectivity part you need. From the latest technology to legacy products — and all the parts that bridge the old and new — we can help you find the parts that connect your solutions.
We make it easy to locate the parts, and we quickly deliver them wherever they need to go. Just talk to one of our tech advisors or visit our website. You’ll be connected to the products you need in no time.
Visit www.startech.com for complete information on all StarTech.com products and to access exclusive resources and time-saving tools.
StarTech.com is an ISO 9001 Registered manufacturer of connectivity and technology parts. StarTech.com was founded in 1985 and has operations in the United States, Canada, the United Kingdom and Taiwan servicing a worldwide market.