Embed Size (px)
Citation preview
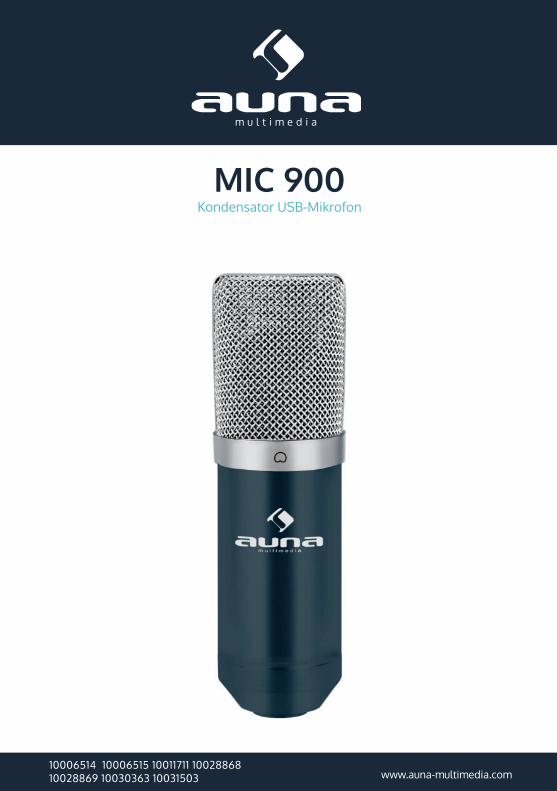
www.auna-multimedia.com10006514 10006515 10011711 1002886810028869 10030363 10031503
Kondensator USB-MikrofonMIC 900
2
Sehr geehrter Kunde,
zunächst möchten wir Ihnen zum Erwerb Ihres Gerätes gratulieren.
Bitte lesen Sie die folgenden Anschluss- und Anwendungshinweise sorgfältig durch und befolgen Sie diese um möglichen technischen Schäden vorzubeugen.
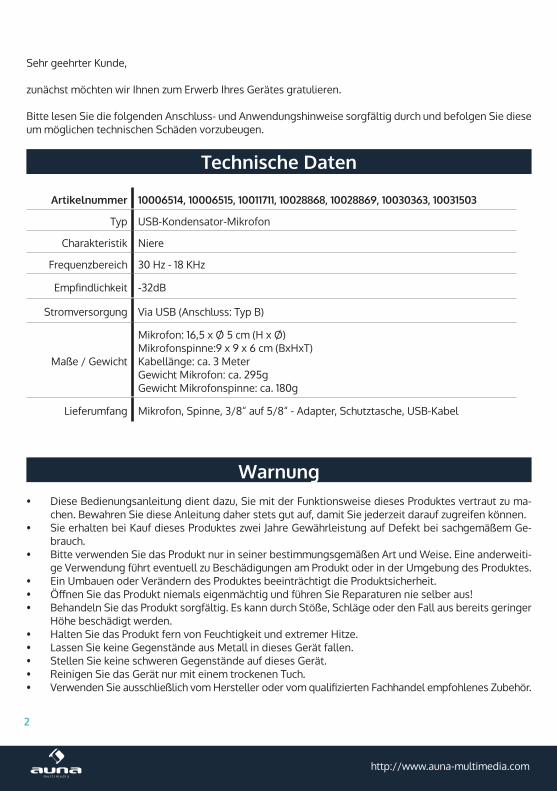
Technische Daten
Artikelnummer 10006514, 10006515, 10011711, 10028868, 10028869, 10030363, 10031503
Typ USB-Kondensator-Mikrofon
Charakteristik Niere
Frequenzbereich 30 Hz - 18 KHz
Empfindlichkeit -32dB
Stromversorgung Via USB (Anschluss: Typ B)
Maße / Gewicht
Mikrofon: 16,5 x Ø 5 cm (H x Ø)Mikrofonspinne:9 x 9 x 6 cm (BxHxT)Kabellänge: ca. 3 MeterGewicht Mikrofon: ca. 295gGewicht Mikrofonspinne: ca. 180g
Lieferumfang Mikrofon, Spinne, 3/8“ auf 5/8“ - Adapter, Schutztasche, USB-Kabel
Warnung• Diese Bedienungsanleitung dient dazu, Sie mit der Funktionsweise dieses Produktes vertraut zu ma-
chen. Bewahren Sie diese Anleitung daher stets gut auf, damit Sie jederzeit darauf zugreifen können.• Sie erhalten bei Kauf dieses Produktes zwei Jahre Gewährleistung auf Defekt bei sachgemäßem Ge-
brauch. • Bitte verwenden Sie das Produkt nur in seiner bestimmungsgemäßen Art und Weise. Eine anderweiti-
ge Verwendung führt eventuell zu Beschädigungen am Produkt oder in der Umgebung des Produktes.• Ein Umbauen oder Verändern des Produktes beeinträchtigt die Produktsicherheit.• Öffnen Sie das Produkt niemals eigenmächtig und führen Sie Reparaturen nie selber aus!• Behandeln Sie das Produkt sorgfältig. Es kann durch Stöße, Schläge oder den Fall aus bereits geringer
Höhe beschädigt werden.• Halten Sie das Produkt fern von Feuchtigkeit und extremer Hitze.• Lassen Sie keine Gegenstände aus Metall in dieses Gerät fallen.• Stellen Sie keine schweren Gegenstände auf dieses Gerät.• Reinigen Sie das Gerät nur mit einem trockenen Tuch.• Verwenden Sie ausschließlich vom Hersteller oder vom qualifizierten Fachhandel empfohlenes Zubehör.

3
Die Gewährleistung verfällt bei Fremdeingriffen in das Gerät.
Kleine Objekte/Verpackungsteile (Plastikbeutel, Karton, etc.)Bewahren Sie kleine Objekte (z.B. Schrauben und anderes Montagematerial, Speicherkarten) und Verpackungsteile außerhalb der Reichweite von Kindern auf, damit sie nicht von diesen verschluckt werden können. Lassen Sie kleine Kinder nicht mit Folie spielen. Es besteht Erstickungsgefahr!
Transport des GerätesBitte bewahren Sie die Originalverpackung auf. Um ausreichenden Schutz beim Transport des Gerätes zu erreichen, verpacken Sie das Gerät in der Originalverpackung.
Reinigung der äußeren OberflächeVerwenden Sie keine flüchtigen Flüssigkeiten, wie Insektensprays. Durch zu starken Druck beim Abwischen können die Oberflächen beschädigt werden. Gummi- oder Plastikteile sollten nicht über einen längeren Zeitraum mit dem Gerät in Kontakt sein. Nutzen Sie ein trockenes Tuch.
Technische AnforderungenDas Mikrofonsignal wird über einen USB-Anschluss an einen Computer gesendet. Über diesen wird es auf mit Strom versorgt.
Ihr Computer muss folgende Mindestanforderungen erfüllen:
PC Mac
Intel oder AMD CPU, 1GHz oder besser G4/G5, 800MHz oder besser
Mindestens 512MB RAM Mindestens 512MB RAM
USB 2.0-Anschluss USB 2.0-Anschluss
Windows XP/Vista Mac OS X 10.3.9 (Panther) oder besser
Installation• Starten Sie Ihren Computer.• Schließen das Mikrofon an einem freien USB-Anschluss an
Hinweis: Das Betriebssystem installiert automatisch die benötigten Treiben.• Wählen Sie das Mikrofon als Eingangsquelle für die von Ihnen verwendete Aufnahmesoftware.
Windows:• Stellen Sie die Aufnahmelautstärke über die Windows-Lautstärkeregler ein (Lautsprechersystem auf
der Taskleiste).• (Optional:) Wählen Sie Mikrofon unter Systemeinstellungen->Sounds und Audiogeräte-> Audio-Tab
als Soundaufnahmegerät aus.

4
Mac OS:
• Stellen Sie die Aufnahmelautstärke über das Audio Midi Setup ein. Hinweis: Das Mikrofon ist nun betriebsbereit.
• (Optional:) Wählen Sie Mikrofon im Audio Midi Setup im Audio Devices-Tab als Standard-Soundauf-nahmegerät aus.
Hinweise zu Montage und NutzungUm den gewünschten Klang zu erreichen, testen Sie verschiedene Position zur Schallquelle. Bewegen Sie das Mikrofon ruhig im Aufnahmeraum und testen verschiedene Abstände und Winkel. Erst wenn Sie den passenden Grundton erreicht haben, sollten Sie Equalizer und Klangprozessoren verwenden.Wegen dem extrem linearen Frequenzgang und der hohen Klangauflösung des Mikrofons sollte „EQing“ nicht notwendig für Hochfrequenzen sein. Dieses beeinflusst das Eingangssignal nur zu stark und erhöht den Störton unnötig. Das Mikrofon verfügt über die Klarheit, die zur Aufnahme und Abmischen notwendig ist.
Das Mikrofon verfügt über einen Adapter, der auf europäische und amerikanische Mikrofonhalter passt. Lösen Sie den Adapter von Mikrofon, befestigen Sie diesen am Mikrofonhalter und fixieren dann das Mik-rofon auf dem Adapter. Das Mikrofon sollte aufrecht befestigt werden und der Schall sollte in einem rechten Winkel auf dieses eintreffen. Testen Sie verschiedene Positionen bis Sie den gewünschten Klang erzielen. Falls nötig können Sie es auch mit dem Scharnier vertikal verstellen.NOTIZ: Behandeln Sie das Mikrofon und den Adapter sorgsam. Setzen Sie die Gewinde keiner zu großen Gewalt aus.Sie können das Mikrofon natürlich auch ohne diesen Adapter auf einen passenden, von Ihnen gekauften Mikrofonständer montieren.
Singen/sprechen Sie in die Vorderseite (mit auna-Logo bedruckt) des Mikrofons, um die besten Ergebnisse zu erzielen:
5
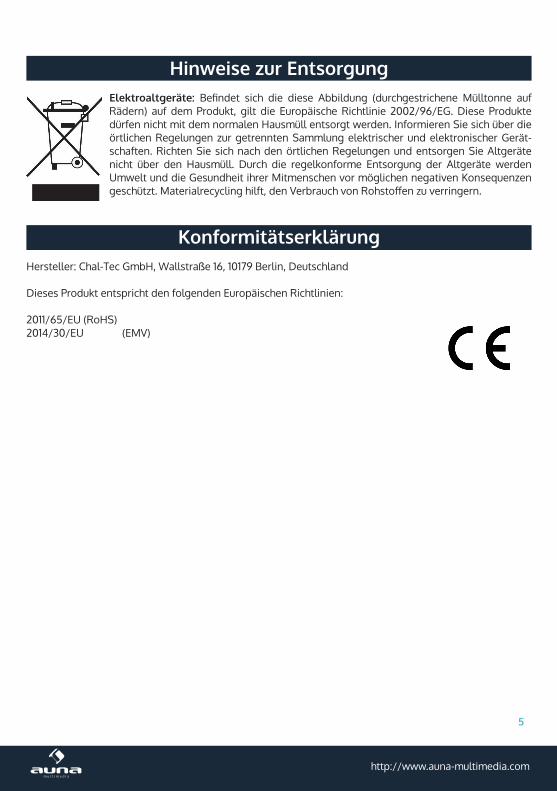
Hinweise zur EntsorgungElektroaltgeräte: Befi ndet sich die diese Abbildung (durchgestrichene Mülltonne auf Rädern) auf dem Produkt, gilt die Europäische Richtlinie 2002/96/EG. Diese Produkte dürfen nicht mit dem normalen Hausmüll entsorgt werden. Informieren Sie sich über die örtlichen Regelungen zur getrennten Sammlung elektrischer und elektronischer Gerät-schaften. Richten Sie sich nach den örtlichen Regelungen und entsorgen Sie Altgeräte nicht über den Hausmüll. Durch die regelkonforme Entsorgung der Altgeräte werden Umwelt und die Gesundheit ihrer Mitmenschen vor möglichen negativen Konsequenzen geschützt. Materialrecycling hilft, den Verbrauch von Rohstoff en zu verringern.
KonformitätserklärungHersteller: Chal-Tec GmbH, Wallstraße 16, 10179 Berlin, Deutschland
Dieses Produkt entspricht den folgenden Europäischen Richtlinien:
2011/65/EU (RoHS)2014/30/EU (EMV)

6
Dear Customer,
Congratulations on purchasing this product. Please read and follow these instructions, in order to avoid damaging the item. We do not cover any damages that may arise from improper use of the item or the disregard of the safety instructions.
Technical Data
Article # 10006514, 10006515, 10011711, 10028868, 10028869, 10030363, 10031503
Type USB Condenser Mikrophone
Pattern Cardioid
Requency range 30 Hz - 18 KHz
Sensitivity -32dB
Power supply Via USB (Connection: type B)
Dimensions / Weight
Mikrophone: 16,5 x Ø 5 cm (H x Ø)Shockmount: 9 x 9 x 6 cm (BxHxT)Cable: ~ 3mWeight mikrophone: 295gWeight shockmount: ca. 180g
In the box Mikrophone, shockmount, adapter (3/8“ to 5/8“), pouch, USB cable
Safety advice• Read all instructions before using.• To protect against a fire, electric shock or personal injury, do not immerse cord, electric plugs or device
in water or other liquids.• Do not expose the appliance to extreme temperatures. The appliance shall be used in moderate cli-
mates.• The use of attachments that are not recommended by the appliance manufacturer may result in fire,
electric shock or personal injury.• Do not open the unit by removing any cover parts. Do not attempt to repair the unit. Any repairs or
servicing should be done by qualified personell only. • Only qualified persons may perform technical work on the product. The product may not be
opened or changed. The components cannot be serviced by the user. The manufacturer is not respon-sible for any radio or TV interference caused by unauthorized modifications.
• The appliance is not a toy. Do not let children play with it. Never let children insert foreign objects into the appliance.
• Never clean the surface of the device with solvents, paint thinners, cleansers or other chemical prod-

7
ucts. Instead, use a soft, dry cloth or soft brush.• This appliance is to be used with 12V car power supply.• Save these instructions.
Small objects: Keep small objects (i.e. screws, mounting material, memory cards etc.) and packaging out of the range of children. Do not let Children play with foil. Choking hazard!
Transporting the device: Please keep the original packaging. To gain sufficient protection of the device while shipment or transportation, make sure to put it back in its original packaging.
Cleaning the surface: Do not use any volatile liquids, detergents or the like. Use a clean dry cloth.
Technical requirementsYour microphone comes with a USB connector. The audio signal is sent from the microphone to the com-puter through this connection. At the same time the computer uses the USB connection to supply the mi-crophone with the necessary power. A connection is made by using the included USB cable with type-B connector.
NOTE: Use only the included cable to ensure an optimal signal quality and a reliable power supply. To oper-ate the microphone, your computer needs to meet the following system requirements:
Windows PC Mac
Intel or AMD CPU, 1GHz or higher G4/G5, 800MHz or higher
minimum 512MB RAM minimum 512MB RAM
USB 2.0 interface USB 2.0 interface
Windows XP/Vista Mac OS X 10.3.9 (Panther) or higher
Initial OperationBefore you can use your microphone, connect it to a free USB port on your computer. For initial operation of your microphone, complete the following steps:
• Power up your computer.• Connect your microphone to a free USB port on your computer
NOTE: Your operating system automatically installs the required drivers.• Select the microphone as input source in your preferred audio software application.
Windows:• Adjust the recording level as required, using the Windows Volume Control panel. (Shortcut: Loud-
speaker icon found in the taskbar)
8
• Select the microphone in the pull-down menu of Sound recording by clicking on Sounds and Audio Devices in the Control Panel and then clicking the tab Audio
• Mac OS:
• Adjust the recording level as required, using Audio Midi Setup in Mac OS.NOTE: Your microphone is now ready for use.
• • (Optional:) Wählen Sie Mikrofon im Audio Midi Setup im Audio Devices-Tab als Standard-Soun-
daufnahmegerät aus.
Mounting and OperationTo get the sound you want, try changing the mic position relative to the sound source oreven move the microphone around in the recording room of your studio. Adjusting the angle at which walls face the sound source can also be helpful. Only when the desired basic sound has been achieved, should you start to use equalizers and signal processors,if any at all (remember: less is often more!). Due to the extremely linear frequency response and the high sonic resolution of your microphone, there is no need for high-frequency “EQing” that can heavily influence the signal and unnecessarily increase the noise level. The microphone provides that much-desired transparency which often gets lost during recording and mixing.
There is an adapter on your microphone that lets you mount it on mic stands with either metric (Europe) or imperial-gauge threads (North America).
First dismantle the microphone from the stand mount adapter by detaching the fine-thread shoulder screw at the bottom end of the microphone. Fasten the adapter onto the microphone stand, place the microphone into it and tighten the screw again. Basically, the microphone in the stand mount adapter should stand upright and face the sound source at a right angle. The angle of the microphone to the sound source influences the sound of the recording; therefore, experi-ment with different positions until you achieve the desired sound. To this end, you can rotate the mic in the stand mount adapter by loosening the screw somewhat and tightening it again. If necessary, you can bend the microphone out of its vertical position by using the hinge on the microphone stand.
NOTE: Please make sure to handle the microphone shaft with attention and care to avoid damaging the screw thread. In no situation should you ever apply excessive force.
Of course, you can detach the microphone from the stand mount adapter and attach it to a commercially available suspension mount.
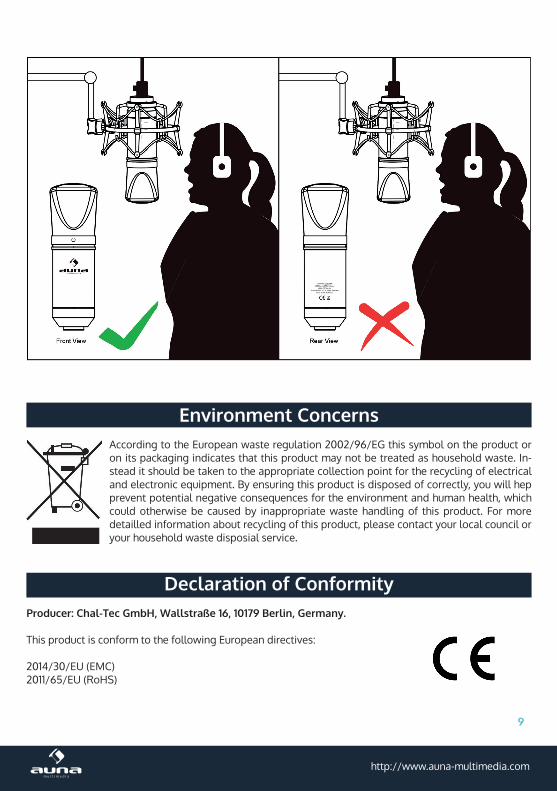
Make sure to speak/sing into the front side (see logo print) of the microphone for the best sound:
9
Environment ConcernsAccording to the European waste regulation 2002/96/EG this symbol on the product or on its packaging indicates that this product may not be treated as household waste. In-stead it should be taken to the appropriate collection point for the recycling of electrical and electronic equipment. By ensuring this product is disposed of correctly, you will hep prevent potential negative consequences for the environment and human health, which could otherwise be caused by inappropriate waste handling of this product. For more detailled information about recycling of this product, please contact your local council or your household waste disposial service.
Declaration of ConformityProducer: Chal-Tec GmbH, Wallstraße 16, 10179 Berlin, Germany.
This product is conform to the following European directives:
2014/30/EU (EMC)2011/65/EU (RoHS)

10
Chère cliente, cher client,
Toutes nos félicitations pour l’acquisition de ce nouvel appareil. Veuillez lire attentivement et respecter les consignes suivantes de branchements et d’utilisation pour éviter d’éventuels dommages techniques.
Fiche technique
Numéro d’article 10006514, 10006515, 10011711, 10028868, 10028869, 10030363, 10031503
Type Microphone USB à condensateur
Caractéristique Cardioïde
Réponse en fréquences 30 Hz - 18 KHz
Sensibilité -32 dB
Alimentation électrique Par USB (connecteur : type B)
Dimensions / poids
Microphone : 16,5 x Ø 5 cm (H x Ø)Suspension : 9 x 9 x 6 cm (L x H x P)Longueur du câble : env. 3 mètresPoids microphone : env. 295 gPoids suspension : env. 180 g
Contenu de l’emballage
Microphone, suspension, adaptateur 3/8 “ - 5/8 “, sacoche de protection, câble USB
Avertissement• Ce mode d’emploi sert à vous familiariser aux fonctions de ce produit. Conservez-le bien afin de pou-
voir vous y référer à tout moment.• L’achat de ce produit donne droit à une garantie de deux ans en cas de défectuosité de l’appareil sous
réserve d’une utilisation appropriée de celui-ci.• Veiller à utiliser le produit conformément à l’usage pour lequel il a été conçu. Une mauvaise utilisation
est susceptible d’endommager le produit ou son environnement.• Tout démontage ou toute modification de l’appareil porte atteinte à la sécurité du produit. Attention
aux risques de blessure !• Ne jamais ouvrir le produit de son propre chef et ne jamais le réparer soi-même !• Manipuler le produit avec précaution. Les chocs, les coups ou les chutes - même de faible hauteur -
peuvent endommager l’appareil.• Ne pas exposer le produit à l’humidité ou à une chaleur extrême.• Ne pas introduire d’objets métalliques dans cet appareil.• Ne pas poser d’objets lourds sur l’appareil.• Nettoyer l’appareil uniquement avec un chiffon sec.• Ne pas obstruer les ouvertures d’aération.• Utiliser uniquement les accessoires recommandés par le fabricant ou par une entreprise spécialisée
et qualifiée.

11
Toute modification apportée à l’appareil entraîne l’annulation de la garantie.
Petits objets / pièces d’emballage (sac plastique, carton, etc.)Tenir les petits objets (par exemple les vis et le matériel d’assemblage, les cartes mémoire) et le matériel d’emballage hors de la portée des enfants pour éviter qu’ils ne les avalent. Empêcher les enfants de jouer avec les films de protection. Il existe un risque d’étouffement !
Transport de l’appareilConserver l’emballage d’origine. Pour garantir une protection suffisante de l’appareil pendant son trans-port, emballer l’appareil dans son emballage d’origine.
Nettoyage en surface de l’appareil Ne pas utiliser de liquides volatiles comme ceux contenus dans les bombes insecticides. Une pression trop importante exercée sur la surface de l’appareil pendant le nettoyage peut l’endommager. Éviter le contact prolongé du caoutchouc ou du plastique avec l’appareil. Utiliser un chiffon sec.
Configuration technique requiseLe signal du microphone est envoyé par la connexion USB d’un ordinateur. C’est l’ordinateur qui alimente également le micro en électricité. L’ordinateur doit répondre aux caractéristiques techniques suivantes :
PC Mac
Intel ou AMD CPU, 1 GHz ou plus G4/G5, 800 MHz ou plus
Au moins 512 MB RAM Au moins 512 MB RAM
Connecteur USB 2.0 Connecteur USB 2.0
Windows XP/Vista Mac OS X 10.3.9 (Panther) ou plus
Installation• Démarrer l’ordinateur.• Brancher le microphone à un connecteur USB libre.• Remarque : le système d’exploitation installe automatiquement les pilotes nécessaires• Sélectionner le microphone comme source d’entrée pour le logiciel d’enregistrement utilisé.
Windows :
• Régler le volume de l’enregistrement avec le volume du haut-parleur Windows (dans les paramètres du haut-parleur de la barre des tâches).
• (Optionnel :) Sélectionner Microphone en tant qu’appareil d’enregistrement sonore dans Paramètres Système -> Sons et appareils audio -> onglet Audio.

12
Mac OS :
• Régler le volume de l’enregistrement avec Audio Mini Setup. Remarque : le microphone est à présent prêt à l’emploi.
• (Optionnel :) Sélectionner Microphone en tant qu’appareil d’enregistrement sonore standard dans l’onglet Audio Devices de Audio Mini Setup.
Consignes d’installation et d’utilisationPour obtenir le son souhaité, tester plusieurs positions par rapport à la source sonore. Déplacer lente-ment le microphone dans la salle d’enregistrement et essayer différentes distances et orientations. Utiliser l’égaliseur et les processeurs audio uniquement lorsque le un son global convenable a été atteint.
En raison de la réponse en fréquence extrêmement linéaire et de la haute définition sonore du microphone, « EQing » n’est pas nécessaire pour les fréquences élevées. Celui-ci perturberait trop fortement le signal d’entrée et augmenterait les bruits parasites. Le microphone offre une clarté nécessaire à l’enregistrement et au mixage.
Le microphone dispose d’un adaptateur qui convient pour les supports de microphone européens et américains. Retirer l’adaptateur du microphone, le fixer au support de microphone puis fixer le micro à l’adaptateur. Le microphone doit être monté à la verticale et la source sonore doit l’atteindre en angle droit. Essayer plusieurs positions jusqu’à obtenir le son souhaité. Si nécessaire, il est possible d’ajuster le micro verticalement à l’aide de la charnière.
REMARQUE : manipuler le microphone et l’adaptateur avec précaution. Ne pas trop serrer les fixations.Bien entendu, il est possible de monter le microphone sans adaptateur sur tout autre pied de micro adapté.

13
Information sur le recyclageAppareils électriques et électroniques usagésVous trouverez sur le produit l’image ci-contre (une poubelle sur roues, barrée d‘une croix), ce qui indique que le produit se trouve soumis à la directive européenne 2002/96/CE. Renseignez-vous sur les dispositions en vigueur dans votre région con-cernant la collecte séparée des appareils électriques et électroniques. Respectez-les et ne jetez pas les appareils usagés avec les ordures ménagères. La mise au rebut correcte du produit usagé permet de préserver l’environnement et la santé. Le recyclage des matériaux contribue à la préservation des ressources naturelles.
Déclaration de conformitéFabricant : Chal-Tec GmbH, Wallstraße 16, 10179 Berlin, Allemagne.
Ce produit est conforme aux directives européennes suivantes :
2011/65/EU (RoHS)2014/30/EU (CEM)