Embed Size (px)
Citation preview
Edition: 2015 – Revisione 0 - GBR - DE/EN/IT
Originalfassung
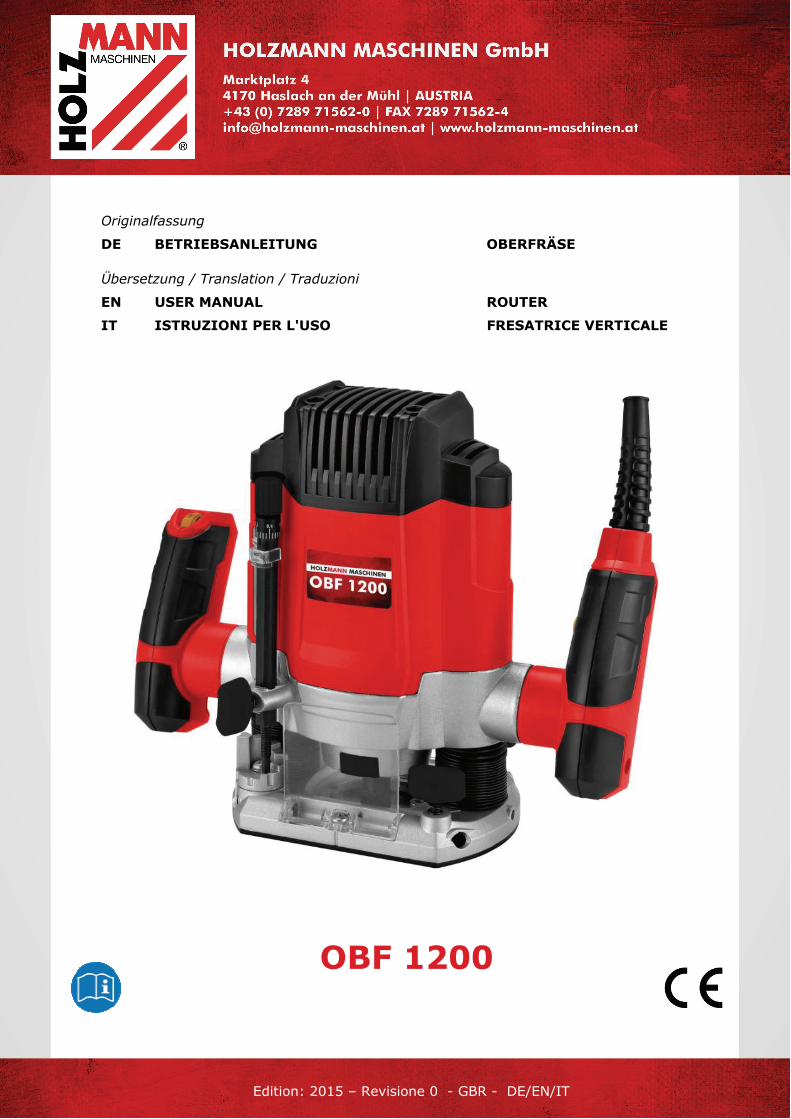
DE BETRIEBSANLEITUNG OBERFRÄSE
Übersetzung / Translation / Traduzioni
EN USER MANUAL ROUTER
IT ISTRUZIONI PER L'USO FRESATRICE VERTICALE
OBF 1200
INHALT /INDEX / INDICE
HOLZMANN MASCHINEN GmbH www.holzmann-maschinen.at 2
OBF 1200
1 INHALT /INDEX / INDICE
1 INHALT /INDEX / INDICE 2
2 SICHERHEITSZEICHEN / SAFETY SIGNS / SEGNALI DI SICUREZZA 5
3 TECHNIK / TECHNIC / COMPONENTI 7
3.1 Hauptkomponenten und Bedienelemente / Main components and Controls / Componenti principali e elementi di comando ............................................................ 7
3.2 Technische Daten / Technical data / Dati tecnici .............................................. 11
4 VORWORT 12
5 SICHERHEIT 13
5.1 Bestimmungsmäßige Verwendung .................................................................... 13
5.2 Unzulässige Verwendung .................................................................................. 13
5.3 Allgemeine Sicherheitshinweise ........................................................................ 13
5.4 Restrisiken ........................................................................................................ 14
6 BETRIEB 15
6.1 Vor Inbetriebnahme .......................................................................................... 15 6.1.1 Montage Absaugstutzen (Abb. 2-3 / Pos.1) .................................................... 15 6.1.2 Montage Parallelanschlag (Abb.4 / Pos.21) ..................................................... 15 6.1.3 Montage Zirkelspitze (Abb.5) ........................................................................ 15 6.1.4 Montage Führungshülse (Abb. 6-7 / Pos.20) ................................................... 15 6.1.5 Montage / Demontage Fräswerkzeug (Abb. 8-11) ........................................... 15 6.1.6 Justieren der Endanschläge (Abb. 13/ Pos. 15) ............................................... 16
6.2 Bedienung ......................................................................................................... 16 6.2.1 EIN- / Ausschalter (Abb. 16/Pos. 4) ............................................................... 16 6.2.2 Drehzahlregelung (Abb. 17/Pos. 11) ............................................................. 17 6.2.3 Einstellung der Frästiefe (Abb. 17/Pos. 11) .................................................... 17 6.2.4 Fräsen ...................................................................................................... 17 6.2.5 Stufenweise Fräsen ..................................................................................... 18 6.2.6 Fräsen von Kreisen mit der Zirkelspitze (13) ................................................... 18 6.2.7 Fräsen mit dem Parallelanschlag (21) ............................................................ 18 6.2.8 Freihandfräsen ........................................................................................... 18 6.2.9 Form- und Kantenfräsen (Abb. 19) ............................................................... 19
7 WARTUNG 19
7.1 Reinigung .......................................................................................................... 20
7.2 Entsorgung ........................................................................................................ 20
INHALT /INDEX / INDICE
HOLZMANN MASCHINEN GmbH www.holzmann-maschinen.at 3
OBF 1200
8 PREFACE (EN) 21
9 SAFETY 22
9.1 Intended Use ..................................................................................................... 22
9.2 Prohibited use ................................................................................................... 22
9.3 General safety ................................................................................................... 22
9.4 Residual risks .................................................................................................... 23
10 OPERATION 24
10.1 Before commissioning ................................................................................... 24 10.1.1 Extraction port assembly (Fig. 2-3 / Pos.1) ............................................... 24 10.1.2 Parallel stop assembly (Fig. 4 / Pos.21) .................................................... 24 10.1.3 Fitting the compass point (Fig. 5) ............................................................ 24 10.1.4 Guide sleeve assembly (Fig. 6-7 / Pos.20) ................................................ 24 10.1.5 Fitting / Removing the cutting tool (Fig. 8-11) ........................................... 24 10.1.6 Adjusting the end stops (Fig. 13/ Pos. 15) ................................................ 25
10.2 Operation ...................................................................................................... 25 10.2.1 ON / OFF switch (Fig. 16 / Pos. 4) ........................................................... 25 10.2.2 Speed control (Fig. 17/ Pos. 11) .............................................................. 25 10.2.3 Adjusting the routing depth (Fig. 17/ Pos. 11) ........................................... 26 10.2.4 Routing ................................................................................................ 26 10.2.5 Routing in stages ................................................................................... 27 10.2.6 Routing circles with the compass point (13) ............................................... 27 10.2.7 Routing with the parallel stop (21) ............................................................ 27 10.2.8 Free-hand routing .................................................................................. 27 10.2.9 Shape and edge cutting (Fig. 19) ............................................................ 27
11 MAINTENANCE 28
11.1 Cleaning ........................................................................................................ 28
12 PREFAZIONE (IT) 29
13 SICUREZZA 30
13.1 Uso conforme previsto .................................................................................. 30
13.2 Uso improprio non ammesso ......................................................................... 30
13.3 Avvertenze di sicurezza................................................................................. 30
13.4 Rischi Residui ................................................................................................ 31
14 USO 32
14.1 Prima della messa in servizio ........................................................................ 32 14.1.1 Montaggio bocchettone di aspirazione (Fig. 2-3 / Pos.1) .............................. 32
INHALT /INDEX / INDICE
HOLZMANN MASCHINEN GmbH www.holzmann-maschinen.at 4
OBF 1200
14.1.2 Montaggio arresto parallelo (Fig.4 / Pos.21) ............................................... 32 14.1.3 Montaggio punta a compasso (Fig.5) ......................................................... 32 14.1.4 Montaggio manicotto di guida (Fig. 6-7 / Pos.20) ........................................ 32 14.1.5 Montaggio/smontaggio utensile di fresatura (Fig. 8-11) ............................... 32 14.1.6 Regolazione degli arresti di finecorsa (Fig. 13/ Pos. 15 ............................... 33
14.2 Uso ................................................................................................................ 33 14.2.1 Interruttore ON/OFF (Fig. 16/Pos. 4. ......................................................... 33 14.2.2 Regolazione del numero di giri (Fig. 17/Pos. 11 ......................................... 34 14.2.3 Regolazione della profondità di fresatura (Fig. 17/ Pos. 11 .......................... 34 14.2.4 Fresatura .............................................................................................. 34 14.2.5 Fresatura progressiva ............................................................................. 35 14.2.6 Fresare cerchi con la punta a compasso (13) .............................................. 35 14.2.7 Fresatura con l’arresto parallelo (21) ........................................................ 35 14.2.8 Fresatura a mano libera .......................................................................... 35 14.2.9 Fresature sagomate e di bordi (Fig. 19) ..................................................... 36
15 MANUTENZIONE 36
15.1 Pulizia ........................................................................................................... 37
15.2 Smaltimento .................................................................................................. 37
16 ELEKTRISCHE SCHALTUNGEN / WIRING DIAGRAM / CIRCUITI ELETTRICI 38
17 ERSATZTEILE / SPARE PARTS / PARTI DI RICAMBIO 39
17.1 Ersatzteilbestellung / spare parts order / Ordinazione delle parti di ricambio .................................................................................................................. 39
17.2 Explosionszeichnungen und Stücklisten / Exploded views and parts lists / Disegni esplosi e distinte dei pezzi .......................................................................... 41
17.3 Ersatzteilliste / spare part list / Lista parti di ricambio ................................ 42
18 EG-KONFORMITÄTSERKLÄRUNG/CE-CERTIFICATE OF CONFORMITY/DICHIARAZIONE DI CONFORMITÀ CE 44
19 GARANTIEERKLÄRUNG 46
20 GUARANTEE TERMS 47
21 DICHIARAZIONE DI GARANZIA 48
SICHERHEITSZEICHEN / SAFETY SIGNS / SEGNALI DI SICUREZZA
HOLZMANN MASCHINEN GmbH www.holzmann-maschinen.at 5
OBF 1200
2 SICHERHEITSZEICHEN / SAFETY SIGNS / SEGNALI DI SICUREZZA
DE SICHERHEITSZEICHEN BEDEUTUNG DER SYMBOLE
EN SAFETY SIGNS DEFINITION OF SYMBOLS
IT SEGNALI DI SICUREZZA SIGNIFICATO DEI SIMBOLI
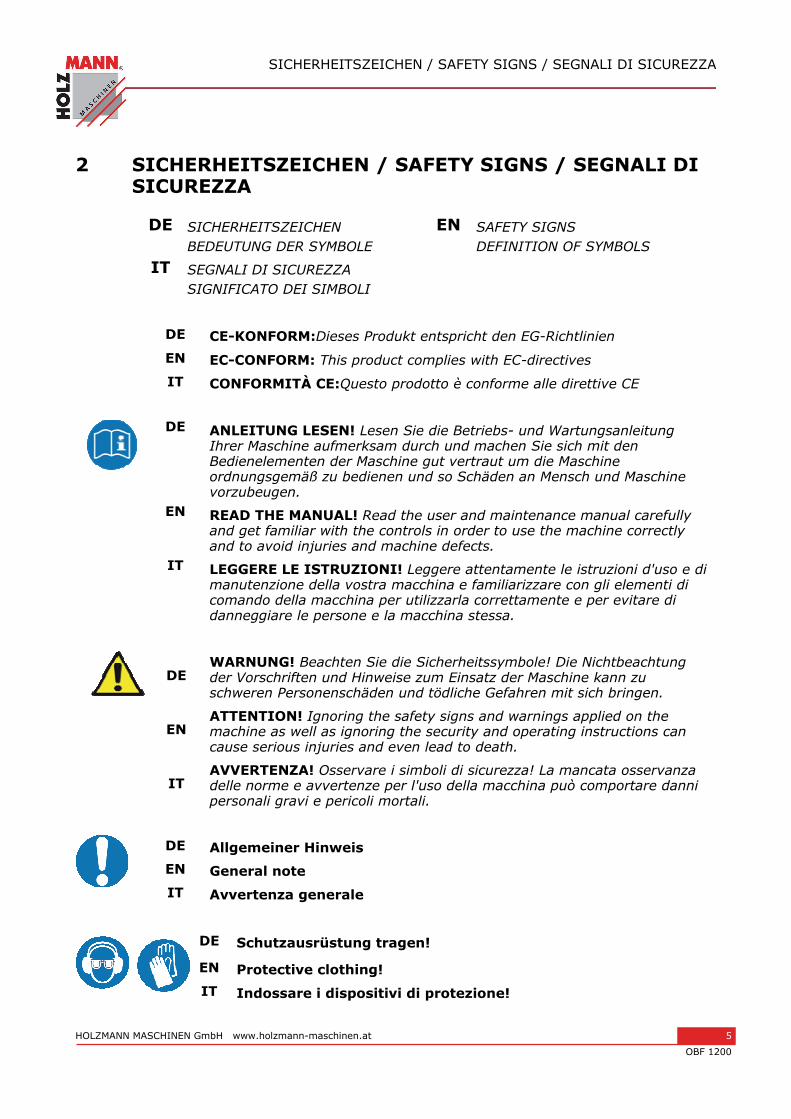
DE CE-KONFORM:Dieses Produkt entspricht den EG-Richtlinien EN EC-CONFORM: This product complies with EC-directives IT CONFORMITÀ CE:Questo prodotto è conforme alle direttive CE
DE ANLEITUNG LESEN! Lesen Sie die Betriebs- und Wartungsanleitung
Ihrer Maschine aufmerksam durch und machen Sie sich mit den Bedienelementen der Maschine gut vertraut um die Maschine ordnungsgemäß zu bedienen und so Schäden an Mensch und Maschine vorzubeugen.
EN READ THE MANUAL! Read the user and maintenance manual carefully and get familiar with the controls in order to use the machine correctly and to avoid injuries and machine defects.
IT LEGGERE LE ISTRUZIONI! Leggere attentamente le istruzioni d'uso e di manutenzione della vostra macchina e familiarizzare con gli elementi di comando della macchina per utilizzarla correttamente e per evitare di danneggiare le persone e la macchina stessa.
DE WARNUNG! Beachten Sie die Sicherheitssymbole! Die Nichtbeachtung der Vorschriften und Hinweise zum Einsatz der Maschine kann zu schweren Personenschäden und tödliche Gefahren mit sich bringen.
EN ATTENTION! Ignoring the safety signs and warnings applied on the machine as well as ignoring the security and operating instructions can cause serious injuries and even lead to death.
IT AVVERTENZA! Osservare i simboli di sicurezza! La mancata osservanza delle norme e avvertenze per l'uso della macchina può comportare danni personali gravi e pericoli mortali.
DE Allgemeiner Hinweis EN General note IT Avvertenza generale
DE Schutzausrüstung tragen!
EN Protective clothing! IT Indossare i dispositivi di protezione!

SICHERHEITSZEICHEN / SAFETY SIGNS / SEGNALI DI SICUREZZA
HOLZMANN MASCHINEN GmbH www.holzmann-maschinen.at 6
OBF 1200
DE Nur geschultes Personal!
EN Only trained staff!
IT Solo personale addestrato!
DE Bedienung mit Schmuck verboten!
EN Operation with jewelry forbidden!
IT Vietato l'uso con gioielli!
DE Bedienung mit Krawatte verboten!
EN Operation with tie forbidden!
IT Vietato l'uso con cravatta!
DE Bedienung mit offenem Haar verboten!
EN Operation with long hair forbidden!
IT Vietato l'uso con capelli sciolti!
DE Gefährliche elektrische Spannung!
EN High voltage!
IT Tensione elettrica pericolosa!
DE Warnung vor Schnittverletzungen!
EN Warning about cut injuries!
IT Attenzione alle lesioni da taglio!
DE Warnung vor rotierenden Teilen!
EN Warning of rotating parts!
IT Attenzione alle parti rotanti!
DE Maschine vor Wartung und Pausen ausschalten und Netzstecker ziehen!
EN Stop and pull out the power plug before any break and engine maintenance!
IT Spegnere la macchina prima della manutenzione e delle pause e scollegare la spina di rete!
TECHNIK / TECHNIC / COMPONENTI
HOLZMANN MASCHINEN GmbH www.holzmann-maschinen.at 7
OBF 1200
3 TECHNIK / TECHNIC / COMPONENTI
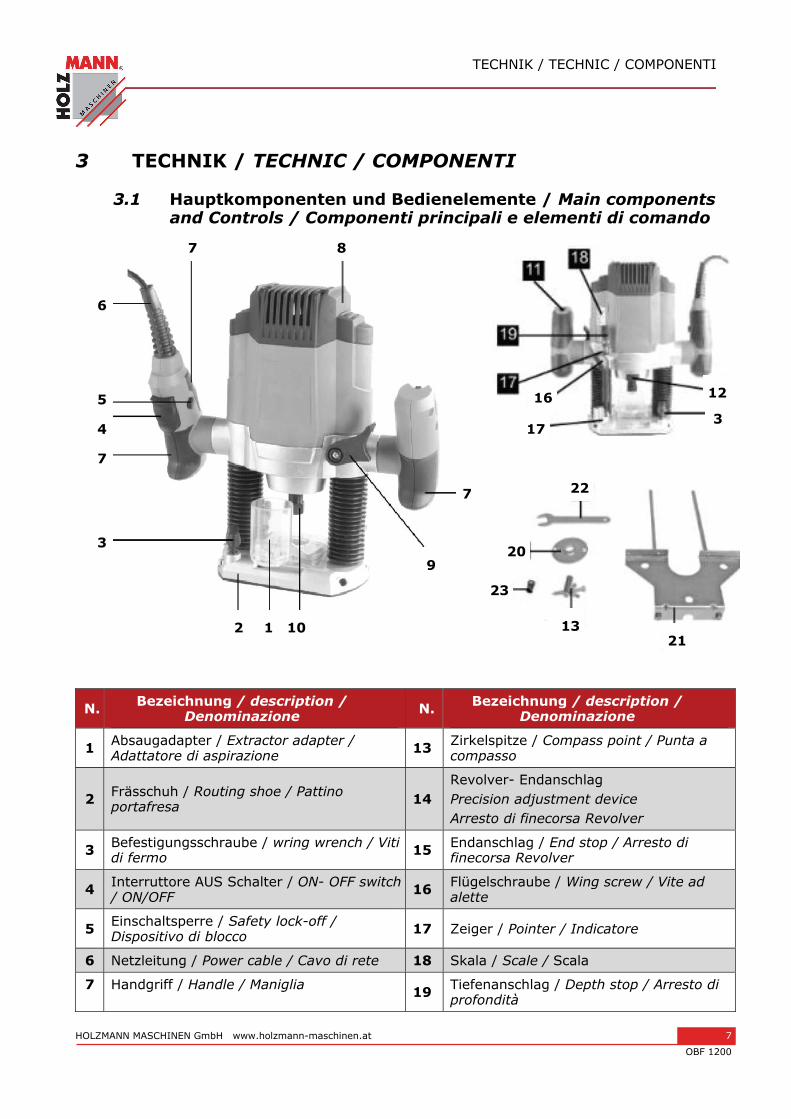
3.1 Hauptkomponenten und Bedienelemente / Main components and Controls / Componenti principali e elementi di comando
N. Bezeichnung / description / Denominazione N. Bezeichnung / description /
Denominazione
1 Absaugadapter / Extractor adapter / Adattatore di aspirazione 13 Zirkelspitze / Compass point / Punta a
compasso
2 Frässchuh / Routing shoe / Pattino portafresa 14
Revolver- Endanschlag Precision adjustment device Arresto di finecorsa Revolver
3 Befestigungsschraube / wring wrench / Viti di fermo 15 Endanschlag / End stop / Arresto di
finecorsa Revolver
4 Interruttore AUS Schalter / ON- OFF switch / ON/OFF 16 Flügelschraube / Wing screw / Vite ad
alette
5 Einschaltsperre / Safety lock-off / Dispositivo di blocco 17 Zeiger / Pointer / Indicatore
6 Netzleitung / Power cable / Cavo di rete 18 Skala / Scale / Scala
7 Handgriff / Handle / Maniglia 19 Tiefenanschlag / Depth stop / Arresto di profondità
1 2
3
7
4
5
6
7 8
7
9
10
12
316
17
22
20
23
13 21

TECHNIK / TECHNIC / COMPONENTI
HOLZMANN MASCHINEN GmbH www.holzmann-maschinen.at 8
OBF 1200
8 Motorgehäuse / Motor casing / Cassa di motore 20 Führungshülse / Guide sleeve / Manicotto
di guida
9 Spanngriff / Fixing handle / Maniglia di serraggio 21 Parallelanschlag / Parallel stop / Arresto
parallelo
10 Spannmutter / Clamp nut / Dado di arresto 22 Gabelschlüssel / Open-ended wrench / Chiave fissa
11 Drehzahlregelung / Speed control / Regolazione del numero di giri 23 Ø 6mm Spannzange / Ø 6mm Clamp /
Pinza portautensili Ø 6mm
12 Spindelarretierung / Spindle lock / Blocco mandrino
TECHNIK / TECHNIC / COMPONENTI
HOLZMANN MASCHINEN GmbH www.holzmann-maschinen.at 9
OBF 1200
TECHNIK / TECHNIC / COMPONENTI
HOLZMANN MASCHINEN GmbH www.holzmann-maschinen.at 10
OBF 1200
TECHNIK / TECHNIC / COMPONENTI
HOLZMANN MASCHINEN GmbH www.holzmann-maschinen.at 11
OBF 1200
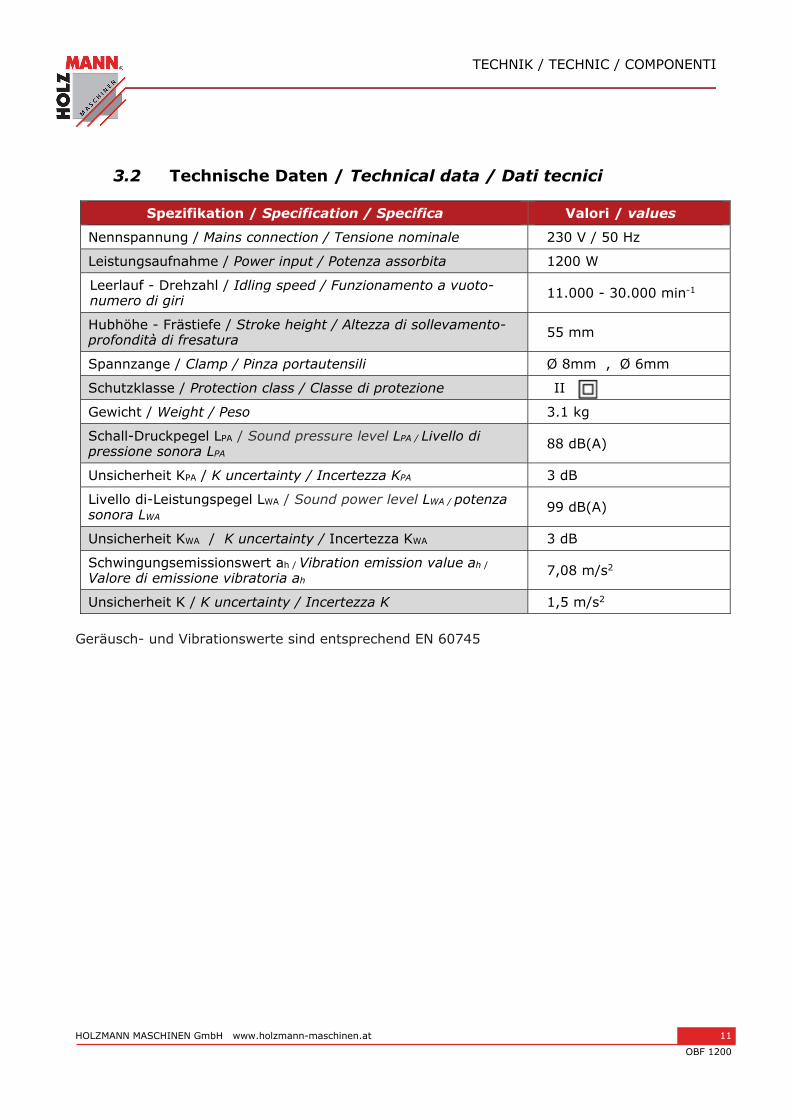
3.2 Technische Daten / Technical data / Dati tecnici
Spezifikation / Specification / Specifica Valori / values
Nennspannung / Mains connection / Tensione nominale 230 V / 50 Hz
Leistungsaufnahme / Power input / Potenza assorbita 1200 W
Leerlauf - Drehzahl / Idling speed / Funzionamento a vuoto-numero di giri 11.000 - 30.000 min-1
Hubhöhe - Frästiefe / Stroke height / Altezza di sollevamento-profondità di fresatura 55 mm
Spannzange / Clamp / Pinza portautensili Ø 8mm , Ø 6mm
Schutzklasse / Protection class / Classe di protezione II
Gewicht / Weight / Peso 3.1 kg
Schall-Druckpegel LPA / Sound pressure level LPA / Livello di pressione sonora LPA 88 dB(A)
Unsicherheit KPA / K uncertainty / Incertezza KPA 3 dB
Livello di-Leistungspegel LWA / Sound power level LWA / potenza sonora LWA 99 dB(A)
Unsicherheit KWA / K uncertainty / Incertezza KWA 3 dB
Schwingungsemissionswert ah / Vibration emission value ah /
Valore di emissione vibratoria ah 7,08 m/s2
Unsicherheit K / K uncertainty / Incertezza K 1,5 m/s2 Geräusch- und Vibrationswerte sind entsprechend EN 60745
VORWORT
HOLZMANN MASCHINEN GmbH www.holzmann-maschinen.at 12
OBF 1200
4 VORWORT
Sehr geehrter Kunde!
Diese Bedienungsanleitung enthält Informationen und wichtige Hinweise zur Inbetriebnahme und Handhabung der Oberfräse OBF 1200. Die Bedienungsanleitung ist Bestandteil der Maschine und darf nicht entfernt werden. Bewahren Sie sie für spätere Zwecke auf und legen Sie diese Anleitung der Maschine bei, wenn sie an Dritte weitergegeben wird!
Bitte beachten Sie die Sicherheitshinweise!
Lesen Sie vor Inbetriebnahme diese Anleitung aufmerksam durch. Der sachgemäße Umgang wird Ihnen dadurch erleichtert, Missverständnissen und etwaigen Schäden
wird vorgebeugt. Halten Sie sich an die Warn- und Sicherheitshinweise. Missachtung kann zu ernsten Verletzungen führen.
Durch die ständige Weiterentwicklung unserer Produkte können Abbildungen und Inhalte geringfügig abweichen. Sollten Sie Fehler feststellen, informieren Sie uns bitte.
Technische Änderungen vorbehalten!
Kontrollieren Sie die Ware nach Erhalt unverzüglich und vermerken Sie etwaige Beanstandungen bei der Übernahme durch den Zusteller auf dem Frachtbrief! Transportschäden sind innerhalb von 24 Stunden separat bei uns zu melden. Für nicht vermerkte Transportschäden kann Holzmann keine Gewährleistung übernehmen.
Urheberrecht © 2015 Diese Dokumentation ist urheberrechtlich geschützt. Die dadurch verfassungsmäßigen Rechte bleiben vorbehalten! Insbesondere der Nachdruck, die Übersetzung und die Entnahme von Fotos und Abbildungen werden gerichtlich verfolgt – Gerichtsstand ist 4020 Linz. Österreich!
Kundendienstadressen
HOLZMANN MASCHINEN GmbH AT-4170 Haslach, Marktplatz 4 Tel 0043 7289 71562 – 0 Fax 0043 7289 71562 – 4
SICHERHEIT
HOLZMANN MASCHINEN GmbH www.holzmann-maschinen.at 13
OBF 1200
5 SICHERHEIT
5.1 Bestimmungsmäßige Verwendung
Die Maschine darf nur in technisch einwandfreiem Zustand sowie bestimmungsgemäß, sicherheits- und gefahrenbewusst benutzt werden! Störungen, welche die Sicherheit beeinträchtigen können, umgehend beseitigen lassen! Es ist generell untersagt, sicherheitstechnische Ausrüstungen der Maschine zu ändern oder unwirksam zu machen! Für eine andere oder darüber hinausgehende Benutzung und daraus resultierende Sachschäden oder Verletzungen übernimmt HOLZMANN-MASCHINEN keine Verantwortung oder Garantieleistung.
5.2 Unzulässige Verwendung
Der Betrieb der Maschine unter Bedingungen außerhalb der oben genannten Grenzen ist nicht zulässig.
Der Betrieb der Maschine ohne die vorgesehenen Schutzvorrichtungen ist unzulässig. die Demontage der Schutzvorrichtungen ist untersagt. Unzulässig ist ferner jegliche Art und Weise des Betriebes, der in einem oder mehreren
Punkten nicht konform ist mit den Sicherheitsbestimmungen und sonstigen Betriebs- und Wartungsanweisungen in dieser Bedienungsanleitung.
5.3 Allgemeine Sicherheitshinweise
Warnschilder und/oder Aufkleber an der Maschine, die unleserlich sind oder entfernt wurden, sind umgehend zu erneuern!
Zur Vermeidung von Fehlfunktionen, Schäden und gesundheitlichen Beeinträchtigungen sind folgende Hinweise UNBEDINGT zu beachten:
Für eine ausreichende Beleuchtung im Arbeitsbereich der Maschine sorgen! Bei Müdigkeit, Unkonzentriertheit bzw. unter Einfluss von Medikamenten, Alkohol oder Drogen ist das Arbeiten an der Maschine verboten!
Wenn Sie an der Maschine arbeiten, tragen Sie keinen lockeren Schmuck, weite Kleidung, Krawatten oder langes, offenes Haar. Lose Objekte können sich verfangen und zu Verletzungen führen!
Bei Arbeiten an der Maschine geeignete Schutzausrüstung (Schutzhandschuhe, Schutzbrille, Gehörschutz, …) tragen!
SICHERHEIT
HOLZMANN MASCHINEN GmbH www.holzmann-maschinen.at 14
OBF 1200
Die laufende Maschine darf nie unbeaufsichtigt sein! Vor dem Verlassen des Arbeitsbereiches die Maschine ausschalten und warten, bis der Motor still steht!
Vor Wartungsarbeiten oder Einstellarbeiten ist die Maschine von der Spannungsversorgung zu trennen! Vor dem Trennen der Spannungsversorgung den Hauptschalter ausschalten (OFF). Verwenden Sie das Netzkabel nie zum Transport oder zur Manipulation der Maschine!
Einstellwerkzeuge, Schraubenschlüssel vor dem Einschalten entfernen Fixieren Sie das Werkstück immer mit einem geeigneten Werkzeug. Fixieren Sie das Werkstück nie mit Ihrer Hand! Lagern Sie die Maschine außerhalb der Reichweite von Kindern
HINWEIS
Verhalten im Notfall Für einen eventuell eintretenden Unfall sollte immer ein Verbandskasten nach DIN 13164 griffbereit vorhanden sein. Leiten Sie die der Verletzung entsprechend notwendigen Erste-Hilfe-Maßnahmen ein. Wenn Sie Hilfe anfordern, machen Sie folgende Angaben:
1. Ort des Unfalls
2. Art des Unfalls
3. Zahl der Verletzten
4. Art der Verletzungen
5.4 Restrisiken
WARNUNG
Es ist darauf zu achten, dass jede Maschine Restrisiken aufweist. Bei der Ausführung sämtlicher Arbeiten (auch der einfachsten) ist größte Vorsicht geboten. Ein sicheres Arbeiten hängt von Ihnen ab!
Auch bei Einhaltung aller Sicherheitsbestimmungen und bei bestimmungsgemäßer Verwendung sind folgende Restrisiken zu beachten:
Verletzungsgefahr für die Hände / Finger durch rotierende Fräser während dem Betrieb.
Diese Risiken können minimiert werden, wenn alle Sicherheitsbestimmungen angewendet werden, die Maschine ordentlich gewartet und gepflegt wird und die Maschine bestimmungsgemäß und von entsprechend geschultem Fachpersonal bedient wird.
BETRIEB
HOLZMANN MASCHINEN GmbH www.holzmann-maschinen.at 15
OBF 1200
6 BETRIEB
6.1 Vor Inbetriebnahme
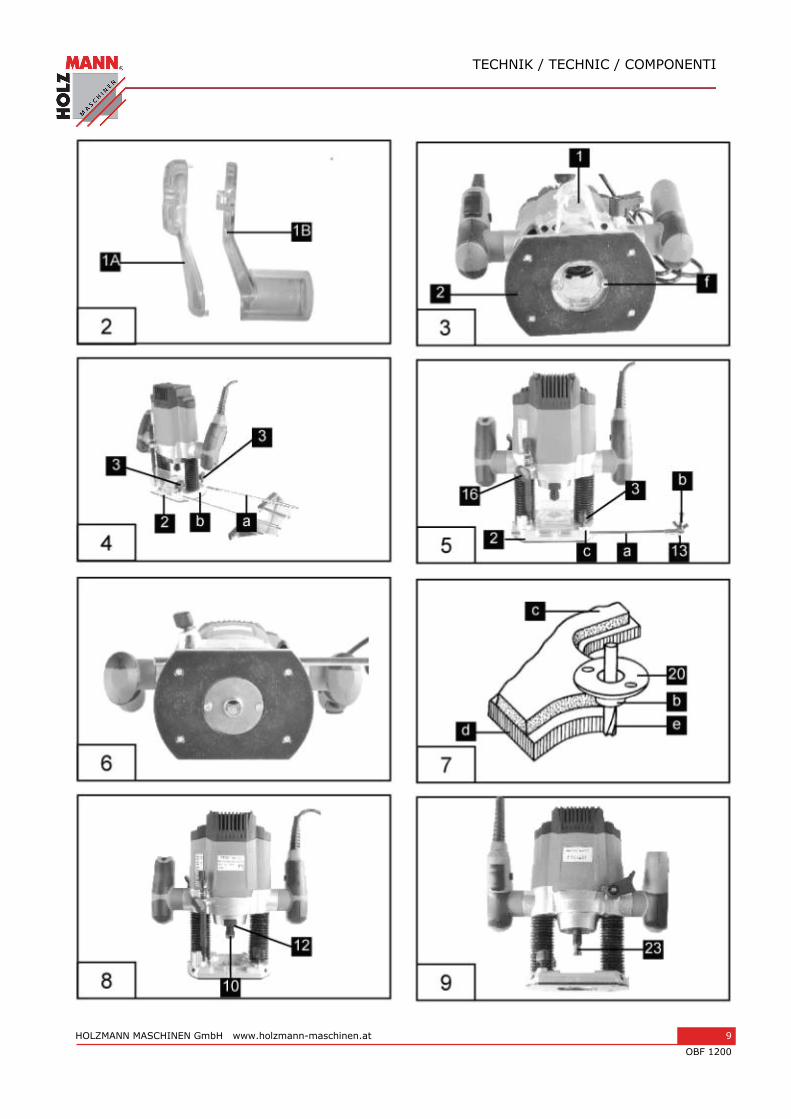
6.1.1 Montage Absaugstutzen (Abb. 2-3 / Pos.1)
Schließen Sie Ihre Oberfräse mit dem Absaugstutzen (1) mit Innen Ø 36mm an eine Absaugung an.
Die beiden Kunststoffschalen (1A und 1B) wie in der Abbildung zusammendrücken. Absaugstutzen (1) mit den beiden Senkkopfschrauben (f) am Frässchuh (2) festschrauben.
6.1.2 Montage Parallelanschlag (Abb.4 / Pos.21)
Führungswellen (a) des Parallelanschlages (21) in die Löcher (b) des Frässchuhs (2) schieben.
Parallelanschlag (21) auf das gewünschte Maß einstellen und mit den Befestigungsschrauben (3) festklemmen.
6.1.3 Montage Zirkelspitze (Abb.5)
Mit der Zirkelspitze (13) -und der zugehörigen Halterung- können Sie kreisrunde Bereiche fräsen.
Klemmen Sie die Zirkelspitze (13) auf das Ende einer der Führungsstangen (a) . Schieben Sie die Führungsstange (a) in ein Loch (c) des Frässchuhs (2) ein. Befestigen Sie
die Führungsstange (a) mit den Befestigungsschrauben (3) am Frässchuh (2). Stellen Sie den gewünschten Radius zwischen Zirkelspitze (13) und Fräser ein. Positionieren Sie die Zirkelspitze (13) in der Mitte des zu fräsenden Kreises. Lockern Sie,
falls notwendig, die Flügelschraube (b) der Zirkelspitze (13) und verlängern / verkürzen Sie den nach unten zeigenden Teil der Zirkelspitze (13).
6.1.4 Montage Führungshülse (Abb. 6-7 / Pos.20)
Führungshülse (20) mit den beiden Senkkopfschrauben (f) am Frässchuh (2) befestigen. Die Führungshülse (20) wird mit dem Anlaufring (b) an der Schablone (c) entlang geführt. Das Werkstück (d) muss um die Differenz "Aussenkante Anlaufring" und "Aussenkante
Fräser" (e) größer sein, um eine exakte Kopie zu erhalten.
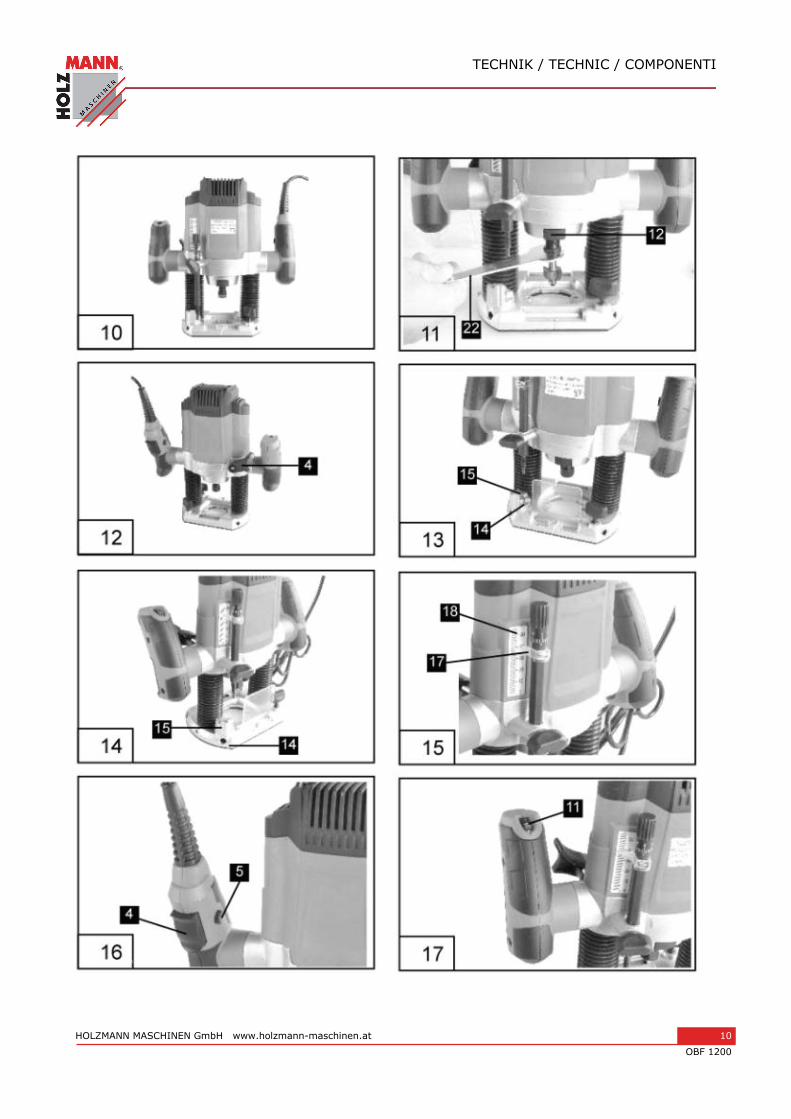
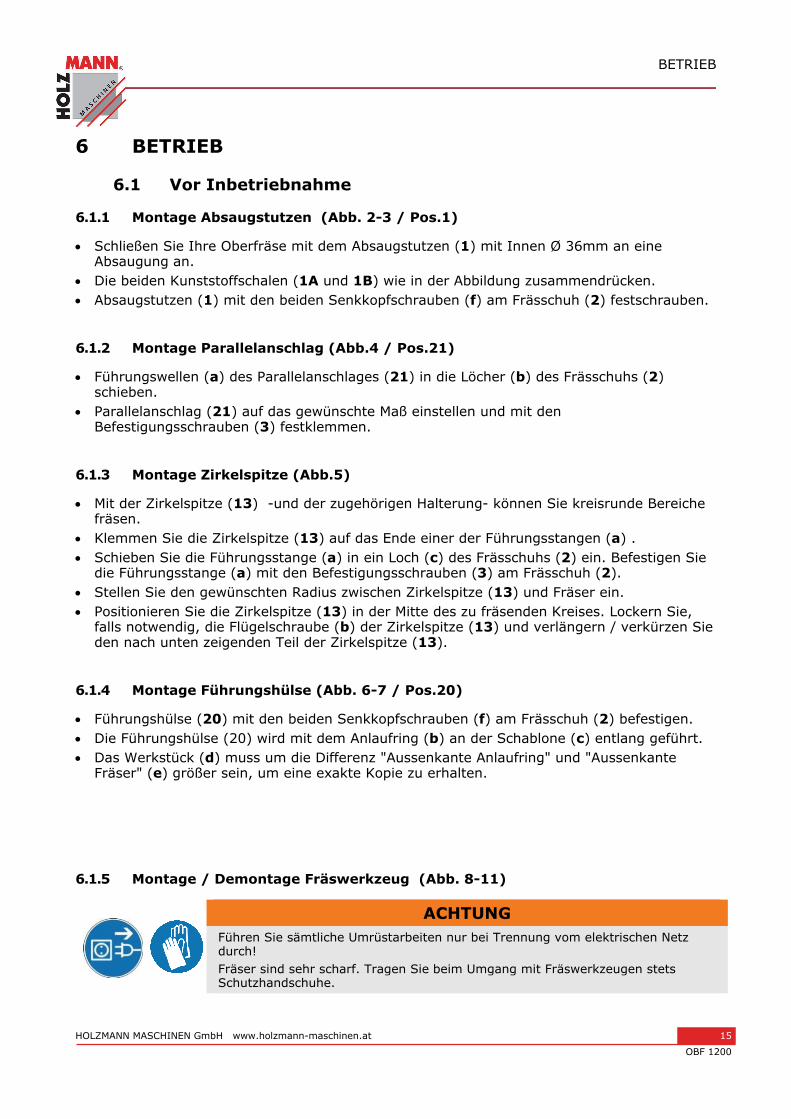
6.1.5 Montage / Demontage Fräswerkzeug (Abb. 8-11)
ACHTUNG Führen Sie sämtliche Umrüstarbeiten nur bei Trennung vom elektrischen Netz durch! Fräser sind sehr scharf. Tragen Sie beim Umgang mit Fräswerkzeugen stets Schutzhandschuhe.
BETRIEB
HOLZMANN MASCHINEN GmbH www.holzmann-maschinen.at 16
OBF 1200
In diese Oberfräse können Fräser mit einem Schaftdurchmesser von 6mm und 8mm eingesetzt werden. Sie können u.a. Fräser aus folgenden Materialien verwenden: HSS - geeignet zur Bearbeitung von Weichhölzern TCT - geeignet zur Bearbeitung von Harthölzern, Spanplatten, Kunststoffen und Aluminium. Mutter, Spannzange und Schaft des Fräsers vor dem Einsetzen reinigen. Spindelarretierung (12) drücken und durch gleichzeitiges drehen die Spindel einrasten
lassen. Lösen Sie die Spannmutter (10) mit dem Gabelschlüssel (22). Nehmen Sie gegebenenfalls den zu demontierenden Fräser aus der Spannzange (23) Wählen Sie das für Ihre Anwendung geeignete Fräswerkzeug und Spannzange aus. Setzen Sie nun die Spannzange (23) und Mutter in die Frässpindel (10) ein. Führen Sie den Schaft des Fräsers in die Spannzange ein. Halten Sie die Spindelarretierung (12) gedrückt. Ziehen Sie die Spannmutter (10) mit dem Gabelschlüssel (22) fest. Der Fräser muss mindestens 20mm weit in die Spannzange (23) eingeführt werden. Überprüfen Sie vor der Inbetriebnahme des Gerätes den festen Sitz und Rundlauf des
Fräswerkzeuges!
6.1.6 Justieren der Endanschläge (Abb. 13/ Pos. 15)
Die Endanschläge (15) können je nach Bedarf in der Höhe justiert werden. Lösen Sie hierzu die Kontermutter am Endanschlag (15) und drehen Sie ihn mit Hilfe eines Schraubendrehers auf die gewünschte Anschlaghöhe.
6.2 Bedienung
ACHTUNG
Vor Inbetriebnahme Einstell- und Montagewerkzeuge entfernen.
- Benutzen Sie keine qualitativ minderwertige oder beschädigte Fräswerkzeuge. Benutzen Sie nur Fräswerkzeuge mit einem Schaftdurchmesser von 6 - 8mm. Die Fräser müssen außerdem für die jeweilige Leerlauf-Drehzahl ausgelegt sein.
- Sichern Sie das zu bearbeitende Werkstück, damit es während des Arbeitens nicht weggeschleudert werden kann. Benutzen Sie Spannvorrichtungen.
- Führen Sie das Netzkabel immer nach hinten weg! - Nie über Metallteile, Schrauben, Nägel usw. fräsen.
6.2.1 EIN- / Ausschalter (Abb. 16/Pos. 4)
Zum Einschalten Einschaltsperre (5) betätigen und Ein-/ Ausschalter (4) drücken. Zum Ausschalten Ein-/ Ausschalter loslassen.
BETRIEB
HOLZMANN MASCHINEN GmbH www.holzmann-maschinen.at 17
OBF 1200
6.2.2 Drehzahlregelung (Abb. 17/Pos. 11)
Die geeignete Drehzahl ist abhängig vom zu bearbeitenden Material und dem Durchmesser des Fräsers. Wählen Sie mit dem Schalter Drehzahlregulierung (11) eine Drehzahl im Bereich von 11.000 bis 30.000 min-1 aus. Sie können aus 7 verschiedenen Schalterpositionen auswählen. Die Drehzahlen in den verschiedenen Schalterpositionen lauten wie folgt: Schalterposition 1: ca. 11.000 min-1 (minimale Drehzahl) Schalterposition 2: ca. 12.000 min-1 Schalterposition 3: ca. 15.000 min-1 Schalterposition 4: ca. 18.000 min-1 Schalterposition 5: ca. 22.000 min-1 Schalterposition 6: ca. 26.000 min-1
Schalterposition 7: ca. 30.000 min-1 (maximale Drehzahl) Drehzahl erhöhen: Drehzahlregler (11) in Plus-Richtung bewegen. Drehzahl verringern: Drehzahlregler (11) in Minus-Richtung bewegen.
6.2.3 Einstellung der Frästiefe (Abb. 17/Pos. 11)
Maschine auf Werkstück auflegen. Befestigungsschraube (16) unter zuhilfenahme der Skala auf die gewünschte Frästiefe
einstellen und mit der Befestigungsschraube fixieren. Eingestellte Frästiefe an einem Probewerkstück testen.
6.2.4 Fräsen
Die Maschine mit dem Netzstecker am Stromnetz verbinden. Fassen Sie das Gerät an seinen beiden Handgriffen (7) an. Platzieren Sie die Oberfräse auf dem Werkstück. Stellen Sie die Frästiefe entsprechend Punkt 6.2.3 ein. Wählen Sie die Drehzahl entsprechend Punkt 6.2.2 und schalten Sie das Gerät ein. ( siehe
Punkt 6.2.1) Testen Sie die Einstellungen des Gerätes anhand eines Teststückes. Lassen Sie das Gerät die volle Geschwindigkeit erreichen. Senken Sie erst dann den Fräser
auf seine Arbeitshöhe und blockieren Sie das Gerät mit dem Sperrgriff (9). Fräsrichtung: Der Fräser dreht sich im Uhrzeigersinn. Das Fräsen muss immer gegen die Umlaufrichtung erfolgen um Unfälle zu vermeiden (Abb. 18) Vorschub: Es ist sehr wichtig , das Werkstück mit dem richtigen Vorschub zu bearbeiten. Wir empfehlen, dass Sie vor dem Bearbeiten des eigentlichen Werkstücks Testfräsungen mit dem gleichen Werkstücktyp -Material- durchführen. Auf diese Weise lassen sich die geeignetsten Arbeitsgeschwindigkeiten am Besten herausfinden.
BETRIEB
HOLZMANN MASCHINEN GmbH www.holzmann-maschinen.at 18
OBF 1200
Zu niedriger Vorschub: Der Fräser könnte sich zu stark erhitzen. Falls brennbares Material wie etwa Holz bearbeitet wird, könnte sich das Werkstück entzünden. Zu hoher Vorschub: Der Fräser könnte beschädigt werden. Das Fräsergebnis ist roh und uneben. Lassen Sie den Fräser vollständig auslaufen, bevor Sie das Werkstück entfernen oder bevor Sie die Oberfräse ablegen.
6.2.5 Stufenweise Fräsen
Je nach Härte des zu bearbeitenden Materials und Frästiefe ist in mehreren Stufen vorzugehen. Justieren Sie die Endanschläge entsprechend Punkt 6.1.6 Soll in mehreren Stufen gefräst werden, so drehen Sie den Revolver-Endanschlag (14) nach
dem Einstellen der Frästiefe entsprechend Punkt 6.2.3 so, dass sich der Tiefenanschlag (19) über dem höchsten Endanschlag (15) befindet.
Fräsen Sie in dieser Einstellung. Nach Beendigung des ersten Fräsdurchganges Endanschlag-Revolver (14) so einstellen, dass sich der Tiefenanschlag (19) über dem mittleren Endanschlag (15) befindet. Führen Sie auch in dieser Einstellung einen Fräsvorgang durch.
Nun niedrigsten Endanschlag (15) einstellen und Fräsung zu Ende führen.
6.2.6 Fräsen von Kreisen mit der Zirkelspitze (13)
Zum Fräsen von Kreisen um einen Mittelpunkt gehen Sie wie folgt vor: Zirkelspitze (13) entsprechend Punkt 6.1.3 montieren und einstellen. Zirkelspitze (13) auf den Mittelpunkt des zu fräsenden Kreises setzen und andrücken Fräsung entsprechend Punkt 6.2.4 ausführen.
6.2.7 Fräsen mit dem Parallelanschlag (21)
Zum Fräsen entlang einer geradlinigen Werkstückaussenkante gehen Sie wie folgt vor: Montieren Sie den Parallelanschlag (21) entsprechend Punkt 6.1.2 Führen Sie den Parallelanschlag (21) an der Aussenkante des Werkstückes entlang. Fräsung entsprechend Punkt 6.2.4 ausführen.
6.2.8 Freihandfräsen
Die Oberfräse kann auch ganz ohne Führungsstangen betrieben werden. Beim Freihandfräsen können Sie kreative Fräsarbeiten, wie etwa das Erstellen von Schriftzügen, vornehmen. Benutzen Sie hierfür nur eine sehr flache Fräseinstellung! Beachten Sie beim Bearbeiten des Werkstückes die Drehrichtung der Fräser (Abb. 18)
WARTUNG
HOLZMANN MASCHINEN GmbH www.holzmann-maschinen.at 19
OBF 1200
6.2.9 Form- und Kantenfräsen (Abb. 19)
Für Form- (a) und Kantenfräsungen (b) können auch spezielle Fräser mit Anlaufring verwendet werden. Fräser montieren. Maschine vorsichtig an das Werkstück heranführen. Den Führungszapfen oder Kugellager (c) mit leichtem Druck am Werkstück entlangführen. Je nach Material ist bei größeren Frästiefen in mehreren Stufen vorzugehen. Halten Sie bei allen Fräsarbeiten die Oberfräse in beiden Händen.
ACHTUNG Nach dem Arbeiten mit der Oberfräse bleibt das Fräswerkzeug für relativ lange Zeit sehr heiß !
7 WARTUNG
Am Gerät befinden sich nur wenige von Ihnen zu wartenden Komponenten. Es ist nicht notwendig, die Maschine zu demontieren. Reparaturen nur durch den Fachmann durchführen lassen! Zubehör: Verwenden Sie nur von HOLZMANN empfohlenes Zubehör! Wenden Sie sich bei Fragen und Problemen an unsere Kundenbetreuung.
ACHTUNG
Bei Reinigung und Instandhaltung bei angeschlossener Maschine: Sachschaden und schwere Verletzungen durch unbeabsichtigtes Einschalten der Maschine möglich!Daher gilt: Vor Wartungsarbeiten Maschine ausschalten und von der Spannungsversorgung trennen
Störungen oder Defekte, die die Sicherheit der Maschine beeinträchtigen können, umgehend beseitigen lassen. Die vollständige und gänzliche Reinigung garantiert eine lange Lebensdauer der Maschine und stellt eine Sicherheitsvoraussetzung dar. Verwenden Sie ausschließlich milde Reinigungsmittel, d.h. kein Benzin, Petroleum, Soda etc. Prüfen Sie regelmäßig, ob die Warn- und Sicherheitshinweise an der Maschine vorhanden und in einwandfrei leserlichem Zustand sind. Prüfen Sie vor jedem Betrieb den einwandfreien Zustand der Sicherheitseinrichtungen. Bei Lagerung der Maschine darf diese nicht in einem feuchten Raum aufbewahrt werden und muss gegen den Einfluss von Witterungsbedingungen geschützt werden. Kontrollieren Sie zumindest monatlich alle Schraubverbindungen auf Festigkeit.
WARTUNG
HOLZMANN MASCHINEN GmbH www.holzmann-maschinen.at 20
OBF 1200
7.1 Reinigung
Nach jeder Inbetriebnahme muss die Maschine und alle ihre Teile gründlich gereinigt werden.
HINWEIS
Der Einsatz von Lösungsmitteln, aggressiven Chemikalien oder Scheuermitteln führt zu Sachschäden an der Maschine! Daher gilt: Bei der Reinigung nur Wasser und wenn notwendig milde Reinigungsmittel verwenden!
Halten Sie die Schutzvorrichtungen, Luftschlitze und Motorengehäuse so staub- und
schmutzfrei wie möglich. Reiben Sie das Gerät mit einem sauberen Tuch ab oder blasen Sie es mit Druckluft bei niedrigem Druck aus.
Wir empfehlen, dass Sie das Gerät direkt nach jeder Benutzung reinigen. Reinigen Sie das Gerät regelmäßig mit einem feuchten Tuch und etwas Schmierseife. Achten Sie darauf dass kein Wasser in das Geräteinnere gelangen kann.
7.2 Entsorgung
Entsorgen Sie Ihre Maschine nicht im Restmüll. Kontaktieren Sie Ihre lokalen Behörden für Informationen bzgl. der verfügbaren Entsorgungsmöglichkeiten. Wenn Sie bei Ihrem Fachhändler eine neue Holzbandsäge oder gleichwertiges Gerät kaufen, ist dieser verpflichtet, Ihre alte fachgerecht zu entsorgen.
PREFACE (EN)
HOLZMANN MASCHINEN GmbH www.holzmann-maschinen.at 21
OBF 1200
8 PREFACE (EN)
Dear Customer!
This manual contains information and important instructions for the installation and correct use of the router OBF 1200. Following the usual commercial name of the device (see cover) is substituted in this manual with the name "machine". This manual is part of the product and shall not be stored separately from the product. Save it for later reference and if you let other people use the product, add this instruction manual to the product.
Please read and obey the security instructions! Before first use read this manual carefully. It eases the correct use of the product and prevents misunderstanding and damages of product and the user’s health.
Due to constant advancements in product design, construction pictures and content may diverse slightly. However, if you discover any errors, inform us please. Technical specifications are subject to changes!
Please check the product contents immediately after receipt for any eventual transport damage or missing parts. Claims from transport damage or missing parts must be placed immediately after initial product receipt and unpacking before putting the product into operation. Please understand that later claims cannot be accepted anymore.
Copyright © 2015 This document is protected by international copyright law. Any unauthorized duplication, translation or use of pictures, illustrations or text of this manual will be pursued by law. Court of jurisdiction is the Landesgericht Linz or the competent court for 4170 Haslach, Austria!
CUSTOMER SERVICE CONTACT
HOLZMANN MASCHINEN GmbH 4170 Haslach, Marktplatz 4 AUSTRIA Tel 0043 7289 71562 - 0 Fax 0043 7289 71562 – 4 [email protected]
SAFETY
HOLZMANN MASCHINEN GmbH www.holzmann-maschinen.at 22
OBF 1200
9 SAFETY
9.1 Intended Use
The machine must only in perfect technical condition and intended use, safely and used risk-conscious! Faults which may impair safety, must be rectified immediately!
It is generally forbidden to modify safety equipment of the machine or to make ineffective!
For another usage and resulting damages or injuries HOLZMANN MASCHINEN doesn’t assume any responsibility or guarantees.
9.2 Prohibited use
The operation of the machine under conditions outside the limits listed above is not permitted.
The operation of the machine without the protection provided devices is not permitted. the dismantling of protective devices is prohibited. Inadmissible is also all manner of operation, the non-compliant in one or more points with
the safety regulations and other operating and maintenance instructions in this manual.
9.3 General safety
Warning labels and / or stickers on the machine that are illegible or have been removed are to be replaced immediately! To avoid malfunctions, damage or physical injury following instructions MUST be observed:
Provide adequate lighting in the work area of the machine! With fatigue, lack of concentration or under medication, alcohol or drugs that work on the machine is prohibited!
If you are working on the machine, you do not wear loose jewelry, loose clothing, neckties or long, loose hair. Loose objects may get caught and cause injury!
When working on the machine type of protective equipment (Protective gloves, safety glasses, hearing protection, ...) wear
SAFETY
HOLZMANN MASCHINEN GmbH www.holzmann-maschinen.at 23
OBF 1200
The running machine must never be left unattended! Switch the machine off before leaving the work area and wait until the engine is at a standstill!
Before carrying out maintenance or adjustment work the machine must be disconnected from the power supply! Off the main switch before disconnecting the power supply (OFF). Use the power cord never for transportation or manipulation of the machine!
Remove adjustment tools and wrenches before turning Always fix the workpiece with a suitable tool. Fix the workpiece never with your hands! Store the machine out of reach of children
NOTICE
Emergency procedure A first aid kit in accordance with DIN 13164 should always be readily available for a possible accident. Initiate the violation in accordance with the necessary first aid measures. When requesting support, provide the following details:
1. Place of accident
2. Type of accident
3. Number of injured people
4. Injury type(s)
9.4 Residual risks
WARNING
It is important to ensure that each machine having residual risks. During the execution of all work (even the simplest) extreme caution. A safe work depends on you!
Also in compliance with all safety regulations and if used properly following residual risks are noted:
Risk of injury to hands / fingers through rotating cutter during the operation. These risks can be minimized if all safety regulations are applied, the machine is properly maintained and cared for and the machine as intended and serviced by a trained service professional. In spite of all safety devices is and remains their healthy common sense and your corresponding technical qualification / training on the operation of a machine's most important safety factor!
OPERATION
HOLZMANN MASCHINEN GmbH www.holzmann-maschinen.at 24
OBF 1200
10 OPERATION
10.1 Before commissioning
10.1.1 Extraction port assembly (Fig. 2-3 / Pos.1)
Connect your router to the suction (1) with inner Ø 36mm at an extraction. Squeeze the two plastic shells (1A and 1B) as in the picture. Suction (1) with the two countersunk screws (f) on Routing shoe (2) with screws.
10.1.2 Parallel stop assembly (Fig. 4 / Pos.21)
Push the guide shafts (a) of the parallel stop (21) into the holes (b) on the routing shoe (2).
Set the parallel stop (21) to the required dimension and secure in place with the fixing screws (3).
10.1.3 Fitting the compass point (Fig. 5)
With the compass point (13) -and the associated support- you can mill circular areas. Clamp the compass point (13) on the end of one of the guide rod (a). Slide the guide bar (a) in a hole (c) of routing shoe (2) a. Fasten the guide bar (a) with the
fastening screws (3) on routing shoe (2). Set the desired radius between circle tip (13) and cutter a. Place the compass point (13) in the middle of the circle to be milled. Loosen, if necessary,
the wing nut (b) the compass point (13) and extend / shorten the downward part of the compass point (13).
10.1.4 Guide sleeve assembly (Fig. 6-7 / Pos.20)
Fasten the guide sleeve (20) with the two countersunk screws (f) on routing shoe (2). The guide sleeve (20) with the thrust ring (b) on the template (c) guided along. The workpiece (d) must make up the difference "outer edge ring fence" and "outer edge
router" (e) must be greater in order to obtain an exact copy.
10.1.5 Fitting / Removing the cutting tool (Fig. 8-11)
ATTENTION Perform all refitting only separation from the mains by! Cutters are very sharp. When handling with milling cutters Always wear protective gloves.
In this router cutters can be used with a shank diameter of 6mm and 8mm. You can among other things Cutters made of the materials used: HSS - geeignet zur Bearbeitung von Weichhölzern TCT - suitable for machining hardwoods, particle board, plastics and aluminum. Clean nut, collet and shaft of the mill prior to insertion.
OPERATION
HOLZMANN MASCHINEN GmbH www.holzmann-maschinen.at 25
OBF 1200
Press the spindle lock (12) and allow the spindle to engage by turning it at the same time. Loosen the clamping nut (10) with the spanner (22). Remove the cutter to be dismantled if necessary from the collet (23) Select the suitable for your application and milling chuck. Now put the collet (23) and nut into the spindle (10) a. Insert the shank of the cutter into the collet Run. Press and hold the spindle lock (12). Tighten the clamping nut (10) with the spanner (22). The cutter must be inserted at least 20 mm wide into the collet chuck (23). Before putting the device into the tight fit and concentricity of the mill!
10.1.6 Adjusting the end stops (Fig. 13/ Pos. 15)
The end stops (15) can be adjusted in height according to requirements. To do this, loosen the lock nut on the stop (15) and turn it with a screwdriver to the desired stop level.
10.2 Operation
ATTENTION
Before commissioning, remove adjustment and assembly tools.
- Do not use poor quality or damaged cutters. Only use cutters with a shank diameter of 6 -
8mm. The router must also be rated for the idling speed. - Secure the workpiece to be machined so that it can not be thrown during the operation. Use
clamps. - Run the power cord to the rear away! - Milling Never on metal parts, screws, nails, etc.
10.2.1 ON / OFF switch (Fig. 16 / Pos. 4)
Press the safety lock-off (5) and then press the ON / OFF switch (4) to switch on the machine. Release the ON / OFF switch to switch off the machine.
10.2.2 Speed control (Fig. 17/ Pos. 11)
The appropriate speed depends on the material to be worked and the diameter of the cutter. Use the switch speed control (11) has a speed in the range 11000-30000 min-1. You can choose from 7 different switch positions. The speeds in the various switch positions are as follows: switch position 1: ca. 11.000 min-1 (minimum speed) switch position 2: ca. 12.000 min-1 switch position 3: ca. 15.000 min-1 switch position 4: ca. 18.000 min-1 switch position 5: ca. 22.000 min-1
switch position 6: ca. 26.000 min-1
switch position 7: ca. 30.000 min-1 (maximum speed)
OPERATION
HOLZMANN MASCHINEN GmbH www.holzmann-maschinen.at 26
OBF 1200
Increase speed: Moving speed controller (11) in the plus direction. Decrase speed: Moving speed controller (11) in the minus direction.
10.2.3 Adjusting the routing depth (Fig. 17/ Pos. 11)
Put machine on workpiece. Setting the mounting screw (16) using the scale to the desired routing depth and fix it with
the fixing screw. Test set routing depth on a test workpiece.
10.2.4 Routing
To avoid damage to the router, make sure there are no foreign objects attached to the workpiece. Connect the machine with the power cord to the power supply. Hold the tool using both of its handles (7). Place the router on the workpiece. Adjust the cutting depth according to point 10.2.3. Select the speed as described in point 10.2.2, and turn on the machine (see point 10.2.1) Test the machine settings using on the basis of a test piece. Do not leave the device reach full speed. Lower until the cutter to its working height and
lock the device with the locking grip (9). Cutting direction: The cutting tools rotates clockwise. That routing must always be against the rotation to avoid accidents (Fig. 18) Feed speed It is very important to machine the workpiece with the correct feed speed. We recommend that you perform test routing with the same type of workpiece -material- before routing the actual workpiece. In this way, the most suitable feed speeds let's find the best. Feed speed to low: The cutter could heat up too much. If combustible material such as wood processing, the workpiece could ignite. Feed speed to high: The cutter may be damaged. The cutting result is rough and uneven. Let the router to drain completely before removing the workpiece or putting down the routerbefore you take the plunge router.
OPERATION
HOLZMANN MASCHINEN GmbH www.holzmann-maschinen.at 27
OBF 1200
10.2.5 Routing in stages
Depending on the hardness of the material and cutting depth to be machined is to proceed in several stages. Adjust the stops according to point 10.1.6 Should be routing in several stages, so turning the end stop revolver (14) after adjusting
the cutting depth according to point 10.2.3 so that there is the depth stop (19) above the highest end stop (15).
Now route in this setting. Adjust so after completion of the first routing operation adjust the end stop revolver (14), so that the depth stop (19) is over the end stop (15). Perform well in this setting by a routing operation.
Set Now lowest end stop (15) and lead to the end milling.
10.2.6 Routing circles with the compass point (13)
For cutting circles around a center point, proceed as follows: Fit the compass point (13) assembly and adjustment in accordance with section 10.1.3. Compass point (13) put on the center of the circle to be routing and press Complete the routing operation as described in point 10.2.4
10.2.7 Routing with the parallel stop (21)
For routing along a straight workpiece outer edges proceed as follows: Fit the parallel stop (21) as described in point 10.1.2 Guide the parallel stop (21) on the outer edge of the workpiece along. complete the routing operation as described in point 10.2.4
10.2.8 Free-hand routing
The router can also be operated without guide rods. In freehand routing for creative work such as production of logos. For this, use only a very flat routing adjustment ! When editing of the workpiece, the direction of rotation of the cutter (Fig. 18)
10.2.9 Shape and edge cutting (Fig. 19)
Special cutters with a guide ring may be used for cutting shapes (a) and edges (b). Fit the cutter Carefully guide the machine on to the workpiece. Guide the guide journal or ball bearing (c) along the workpiece with gentle pressure. Depending on the material, proceed with larger cutting depths in several stages. Keep all milling the router in two hands.
ATTENTION
After working with the router, the milling tool for a relatively long time is very hot!
MAINTENANCE
HOLZMANN MASCHINEN GmbH www.holzmann-maschinen.at 28
OBF 1200
11 MAINTENANCE
On the device there are few of them serviceable components. It is not necessary to dismantle the machine. Have repairs carried out only by a specialist! Accessories: Only use Holzmann Accessories! If you have any questions or problems, our customer support department.
DANGER During cleaning and maintenance with connected machine: Property damage and serious injury from inadvertent switching on the machine!
Therefore: Switch the machine off and disconnect it from the power supply before any maintenance works or cleaning is carried out
Any faults or defects which may affect the safety of the machine, must be rectified immediately. The complete and utter cleansing ensures a long service life of the machine and constitutes a safety requirement. Use only mild detergent, ie no gasoline, kerosene, etc. Soda Regularly check whether the warning and safety information on the machine available and properly legible condition. Check before every use the perfect condition of the safety devices. When storing the machine should this not be kept in a humid place and needs to be protected from the influence of weather conditions. Check at least monthly all screwed connections for tightness.
11.1 Cleaning
Keep the safety devices, air vents and the motor housing dust and dirt as possible. Wipe the
equipment with a clean cloth or blow it with compressed air at low pressure. We recommend that you clean the device immediately after each use. Clean the appliance regularly with a damp cloth and some soft soap. Ensure that no water can seep into the device.
Disposal
Do not dispose of the machine in residual waste. Contact your local authorities for information regarding the available disposal options. When you buy at your local dealer for a replacement unit, the latter is obliged to exchange your old
NOTE
The use of solvents, harsh chemicals or abrasive cleaners leads to damage to the machine! Therefore: When cleaning water and mild detergent if necessary use.
PREFAZIONE (IT)
HOLZMANN MASCHINEN GmbH www.holzmann-maschinen.at 29
OBF 1200
12 PREFAZIONE (IT)
Gentile Cliente,
Queste istruzioni per l'uso contengono informazioni e importanti avvertenze sulla messa in servizio e uso della fresa verticale OBF 1200. Le istruzioni per l'uso sono una componente della macchina e non devono essere rimosse. Conservarle per consultazione futura e accluderle alla macchina in caso di cessione della stessa a terzi!
Osservare le istruzioni per la sicurezza!
Prima della messa in servizio, leggere attentamente queste istruzioni. In questo modo si facilita l'uso corretto, e si prevengono incomprensioni e danni eventuali.
Attenersi alle avvertenze e alle istruzioni per la sicurezza. La violazione può causare gravi lesioni.
A causa del costante sviluppo dei nostri prodotti è possibile che le immagini e i contenuti siano leggermente differenti. Se doveste riscontrare errori, siete pregati di informarci.
Con riserva di modifiche tecniche!
Al ricevimento della merce controllatela immediatamente e fate annotare eventuali contestazioni al momento della consegna, all'addetto al recapito, sulla lettera di vettura! I danni di trasporto devono essere segnalati separatamente a noi entro 24 ore. Holzmann non può assumere alcuna garanzia per danni da trasporto non annotati.
Copyright © 2015 Questa documentazione è protetta da copyright. Con riserva dei diritti costituzionali risultanti! In particolare saranno perseguite legalmente la riproduzione, traduzione e il prelievo di foto e immagini. Foro competente è 4020 Linz. Austria!
Indirizzi per l'assistenza clienti
HOLZMANN MASCHINEN GmbH AT-4170 Haslach, Marktplatz 4 Tel 0043 7289 71562 – 0 Fax 0043 7289 71562 – 4
SICUREZZA
HOLZMANN MASCHINEN GmbH www.holzmann-maschinen.at 30
OBF 1200
13 SICUREZZA
13.1 Uso conforme previsto
Usare la macchina solo in condizioni tecniche perfette e conformemente alla destinazione d'uso, nel rispetto delle norme di sicurezza e consapevoli dei pericoli! Far rimuovere immediatamente le anomalie che possono pregiudicare la sicurezza! In generale è vietato modificare e rendere inefficaci i dispositivi tecnici di sicurezza della macchina! Per un uso diverso o che esula da questo e per danni materiali o lesioni da questo derivanti HOLZMANN-MASCHINEN non si assume alcuna responsabilità o non fornisce alcuna garanzia.
13.2 Uso improprio non ammesso
Non è consentito l'uso della macchina in condizioni che esulano dai limiti indicati nel manuale presente.
Non è consentito l'uso della macchina senza i dispositivi di protezione previsti. La rimozione o la disattivazione dei dispositivi di sicurezza è vietata. È inoltre inammissibile qualsiasi tipo di utilizzo che non sia conforme in uno o più punti alle
norme di sicurezza e altre istruzioni d’uso e manutenzione contenute nel presente manuale per l’uso.
13.3 Avvertenze di sicurezza
I segnali di avvertimento e/o le etichette applicate sulla macchina, che sono illeggibili o sono stati rimossi, devono essere sostituiti immediatamente!
Per evitare malfunzionamenti, danni materiali o danni alla salute osservare TASSATIVAMENTE le istruzioni seguenti:
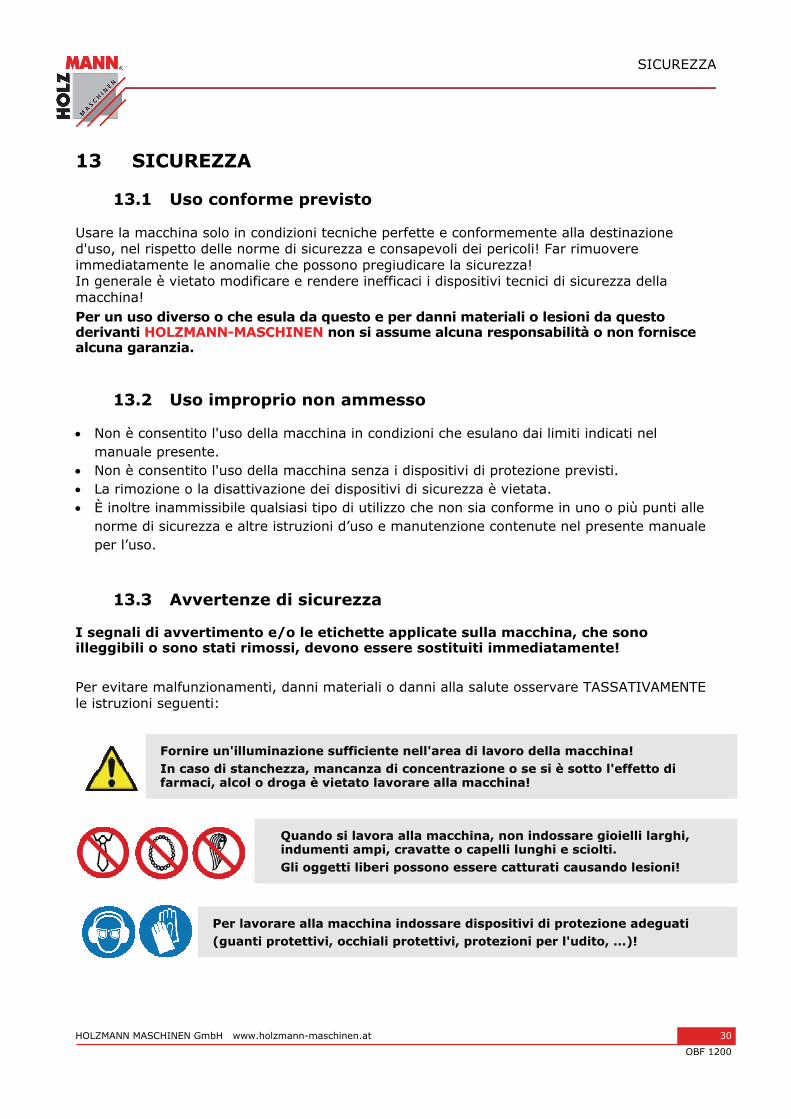
Fornire un'illuminazione sufficiente nell'area di lavoro della macchina! In caso di stanchezza, mancanza di concentrazione o se si è sotto l'effetto di farmaci, alcol o droga è vietato lavorare alla macchina!
Quando si lavora alla macchina, non indossare gioielli larghi, indumenti ampi, cravatte o capelli lunghi e sciolti. Gli oggetti liberi possono essere catturati causando lesioni!
Per lavorare alla macchina indossare dispositivi di protezione adeguati (guanti protettivi, occhiali protettivi, protezioni per l'udito, ...)!
SICUREZZA
HOLZMANN MASCHINEN GmbH www.holzmann-maschinen.at 31
OBF 1200
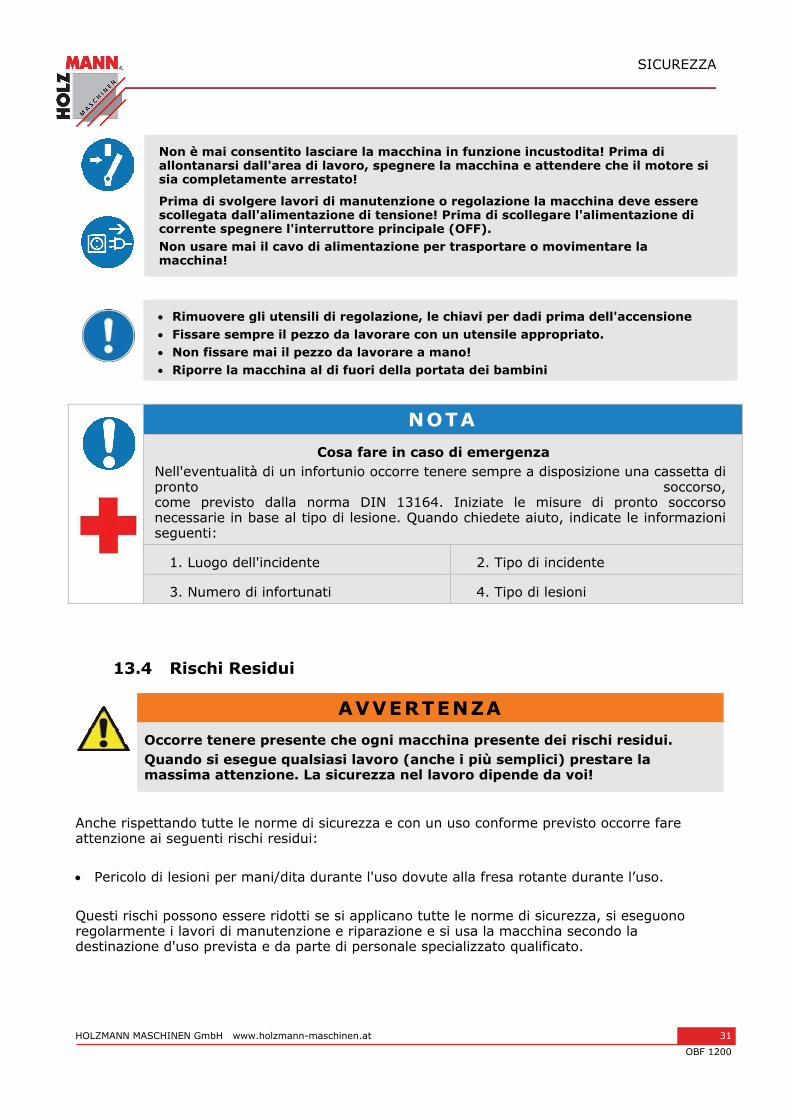
Non è mai consentito lasciare la macchina in funzione incustodita! Prima di allontanarsi dall'area di lavoro, spegnere la macchina e attendere che il motore si sia completamente arrestato!
Prima di svolgere lavori di manutenzione o regolazione la macchina deve essere scollegata dall'alimentazione di tensione! Prima di scollegare l'alimentazione di corrente spegnere l'interruttore principale (OFF). Non usare mai il cavo di alimentazione per trasportare o movimentare la macchina!
Rimuovere gli utensili di regolazione, le chiavi per dadi prima dell'accensione Fissare sempre il pezzo da lavorare con un utensile appropriato. Non fissare mai il pezzo da lavorare a mano! Riporre la macchina al di fuori della portata dei bambini
NOTA
Cosa fare in caso di emergenza Nell'eventualità di un infortunio occorre tenere sempre a disposizione una cassetta di pronto soccorso, come previsto dalla norma DIN 13164. Iniziate le misure di pronto soccorso necessarie in base al tipo di lesione. Quando chiedete aiuto, indicate le informazioni seguenti:
1. Luogo dell'incidente
2. Tipo di incidente
3. Numero di infortunati
4. Tipo di lesioni
13.4 Rischi Residui
AVVERTENZA
Occorre tenere presente che ogni macchina presente dei rischi residui. Quando si esegue qualsiasi lavoro (anche i più semplici) prestare la massima attenzione. La sicurezza nel lavoro dipende da voi!
Anche rispettando tutte le norme di sicurezza e con un uso conforme previsto occorre fare attenzione ai seguenti rischi residui:
Pericolo di lesioni per mani/dita durante l'uso dovute alla fresa rotante durante l’uso.
Questi rischi possono essere ridotti se si applicano tutte le norme di sicurezza, si eseguono regolarmente i lavori di manutenzione e riparazione e si usa la macchina secondo la destinazione d'uso prevista e da parte di personale specializzato qualificato.
USO
HOLZMANN MASCHINEN GmbH www.holzmann-maschinen.at 32
OBF 1200
14 USO
14.1 Prima della messa in servizio
14.1.1 Montaggio bocchettone di aspirazione (Fig. 2-3 / Pos.1)
Allacciare la fresa verticale tramite il bocchettone di aspirazione (1) con Ø interno 36mm ad un impianto di aspirazione.
Comprimere i due gusci in plastica (1A e 1B) come illustrato in figura. Serrare il bocchettone di aspirazione (1) con le due viti a testa piatta (f) al pattino
portafresa (2).
14.1.2 Montaggio arresto parallelo (Fig.4 / Pos.21)
Inserire gli alberi guida (a) dell’arresto parallelo (21) nei fori (b) del pattino portafresa (2). Regolare l’arresto parallelo (21) alla misura desiderata e serrare con le viti di fissaggio (3).
14.1.3 Montaggio punta a compasso (Fig.5)
Con la punta a compasso (13) e la rispettiva punta supporto è possibile fresare aree circolari.
Serrare la punta a compasso (13) sull’estremità di una delle aste di guida (a) . Inserire l’asta di guida(a) nel foro (c) del pattino portafresa (2). Fissare l’asta di guida (a)
con le viti di fissaggio (3) al pattino portafresa (2). Regolare il raggio desiderato tra la punta a compasso (13) e la fresatrice. Posizionare la punta a compasso (13) al centro del cerchio da fresare. Allentare, se
necessario, la vite ad alette (b) della punta a compasso (13) e allungare/accorciare la parte rivolta verso il basso della punta a compasso (13).
14.1.4 Montaggio manicotto di guida (Fig. 6-7 / Pos.20)
Serrare il manicotto di guida (20) con le due viti a testa piatta (f) al pattino portafresa (2). Il manicotto di guida (20) viene guidato con l’anello di spinta (b) per lungo sulla sagoma
(c). Il pezzo da lavorare (d) deve essere superiore alla differenza di "bordo esterno anello di
spinta" e "bordo esterno fresatrice (e) per ottenere una copia esatta.
14.1.5 Montaggio/smontaggio utensile di fresatura (Fig. 8-11)
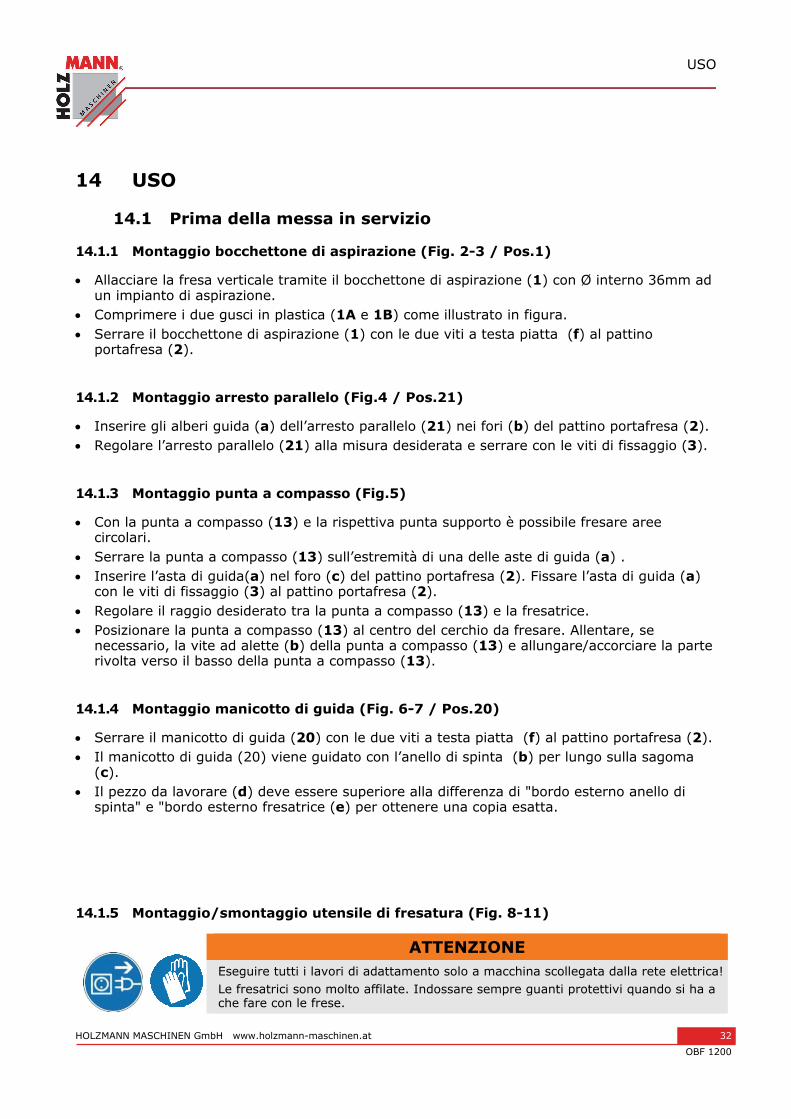
ATTENZIONE Eseguire tutti i lavori di adattamento solo a macchina scollegata dalla rete elettrica!Le fresatrici sono molto affilate. Indossare sempre guanti protettivi quando si ha a che fare con le frese.
USO
HOLZMANN MASCHINEN GmbH www.holzmann-maschinen.at 33
OBF 1200
In questa fresatrice verticale si possono utilizzare frese con un diametro del codolo compreso tra 6mm e 8mm. Si possono utilizzare tra l’altro frese nei seguenti materiali: HSS - indicate per lavorare legni teneri TCT - indicate per lavorare legni duri, pannelli truciolari, plastica e alluminio. Pulire i dadi, pinza portautensili e codolo della fresa prima dell’utilizzo. Premere il blocco mandrino (12) e ruotando contemporaneamente incastrare il mandrino. Allentare il dado di arresto (10) con la chiave fissa (22). Eventualmente togliere la fresa da smontare della pinza portautensili (23) Selezionare l'utensile di fresatura appropriato per l'applicazione e la pinza. Inserire quindi la pinza portautensili (23) e il dado nel mandrino portafresa (10). Introdurre il codolo della fresa nella pinza portautensili. Tenere premuto il blocco del mandrino (12). Stringere il dado di arresto (10) con la chiave fissa (22). La fresa deve essere inserita almeno a 20 mm di distanza dalla pinza portauntesili (23). Prima di mettere in servizio l’apparecchio verificare che sia bene in sede e controllare la
coassialità dell’utensile di fresatura!
14.1.6 Regolazione degli arresti di finecorsa (Fig. 13/ Pos. 15
Gli arresti di finecorsa (15), all’occorrenza, si possono regolare in altezza. Allentare a questo scopo il controdado dell’arresto di finecorsa (15) e ruotarlo fino all’altezza desiderata con un cacciavite.
14.2 Uso
ATTENZIONE
Prima della messa on servizio togliere gli utensili di regolazione e montaggio.
- Non utilizzare utensili di fresatura di bassa qualità o danneggiati. Utilizzare solo utensili di fresatura con diametro del codolo di 6-8 mm. Le frese devono essere progettate anche per il rispettivo regime minimo.
- Fissare il pezzo in modo che non possa essere scagliato via durante il lavoro. Utilizzare dispositivi di serraggio.
- Guidare il cavo di rete sempre all’indietro. - Non fresare su parti metalliche, viti, chiodi, ecc.
14.2.1 Interruttore ON/OFF (Fig. 16/Pos. 4.
Per accendere, azionare la leva di blocco (5) e premere l’interruttore On/Off (4). Per spegnere rilasciare l’interruttore On/Off.
USO
HOLZMANN MASCHINEN GmbH www.holzmann-maschinen.at 34
OBF 1200
14.2.2 Regolazione del numero di giri (Fig. 17/Pos. 11
Il numero di giri adatto dipende dal materiale e dal diametro della fresa. Selezionare con l’interruttore regolazione dl numero di giri (11) un numero di giri compreso tra 11.000 e 30.000 min-1. È possibile scegliere tra 7 diverse posizioni dell’interruttore. I numeri di giri nelle diverse posizioni dell’interruttore sono i seguenti: Posizione interruttore 1: ca. 11.000 min-1 (numero di giri minimo) Posizione interruttore 2: ca. 12.000 min-1 Posizione interruttore 3 : ca. 15.000 min-1 Posizione interruttore 4: ca. 18.000 min-1 Posizione interruttore 5: ca. 22.000 min-1 Posizione interruttore 6: ca. 26.000 min-1
Posizione interruttore 7: ca. 30.000 min-1 (numero di giri massimo) Aumentare il numero di giri: Spostare il regolatore del numero di giri (11) nella direzione Più. Ridurre il numero di giri: Spostare il regolatore del numero di giri (11) nella direzione Meno.
14.2.3 Regolazione della profondità di fresatura (Fig. 17/ Pos. 11
Posizionare la macchina sul pezzo. Regolare la vite di fissaggio (16) fino alla profondità di fresatura desiderata utilizzando la
scala e fissare con la vite di fissaggio. Testare la profondità di fresatura su un pezzo di prova.
14.2.4 Fresatura
Collegare la macchina alla rete elettrica con la spina. Afferrare l’apparecchio tenendolo per le due impugnature (7). Sistemare la fresatrice verticale sul pezzo da lavorare. Impostare la profondità di fresatura come da punto 6.2.3. Selezionare il numero di giri come da punto 6.2.2 e accendere l’apparecchio. (vedere punto
6.2.1) Testare le impostazione dell’apparecchio con un pezzo di prova. Lasciare che l’apparecchio raggiunga la piena velocità. Abbassare solo a questo punto la
fresa sull'altezza di lavoro e bloccare il dispositivo con la maniglia di bloccaggio (9). Senso di fresatura: La fresatrice ruota in senso orario. La fresatura deve avvenire sempre contro il senso di rotazione per evitare incidenti (Fig. 18) Avanzamento: È molto importante che il pezzo venga lavorato con il corretto avanzamento. Si consiglia, prima di lavorare sul pezzo effettivo, di eseguire delle fresature di prova con del materiale simile a quello del pezzo. In questo modo è possibile capire meglio la velocità di lavoro più idonea.
USO
HOLZMANN MASCHINEN GmbH www.holzmann-maschinen.at 35
OBF 1200
Avanzamento troppo basso: La fresatrice può surriscaldarsi eccessivamente. Se di lavora del materiale infiammabile come il legno, il pezzo potrebbe incendiarsi. Avanzamento troppo elevato: La fresa potrebbe danneggiarsi: il risultato di fresatura è grossolano e irregolare. Lasciare fermare completamente la fresa prima di togliere il pezzo o prima di appoggiare la fresatrice verticale.
14.2.5 Fresatura progressiva
A seconda della durezza del materiale d lavorare e la profondità di fresatura si deve procedere il più passaggi. Impostare l’arresto di finecorsa come da punto 6.1.6. Se si deve fresare in diversi passaggi, girare l’arresto di finecorsa revolver (14) dopo aver
impostato la profondità di fresatura come da punto 6.2.3 , in modo che l’arresto di profondità (19) si trovi sopra l’arresto di finecorsa massimo (15).
Fresare come quest’impostazione. Terminato il primo passaggio di fresatura impostare il revolver dell’arresto di finecorsa (14) in modo che l’arresto di profondità (19) si trovi sopra l’arresto di finecorsa centrale (15). Eseguire una fresatura anche in quest’impostazione.
Regolare l’arresto di finecorsa minimo (15) e portare a termine la fresatura.
14.2.6 Fresare cerchi con la punta a compasso (13)
Per fresare cerchi attorno a un punto centrale procedere come segue: Montare e regolare a punta a compasso (13) come da punto 6.1.3. Collocare la punta a compasso (13) al centro del cerchio da fresare e premere. Eseguire la fresatura come da punto 6.2.4.
14.2.7 Fresatura con l’arresto parallelo (21)
Per fresare lungo un bordo esterno del pezzo rettilineo procedere come segue: Montare l’arresto parallelo (21) come da punto 6.1.2 Guidare l’arresto parallelo (21) lungo il bordo esterno del pezzo. Eseguire la fresatura come da punto 6.2.4.
14.2.8 Fresatura a mano libera
La fresatrice verticale può essere utilizzata anche senza aste di guida. Co la fresatura a mano libera è possibile realizzare lavori di fresatura creativi, come ad esempio realizzare delle scritte. Utilizzare in questo caso solo un’impostazione di fresatura molto piana! Quando si lavora il pezzo osservare il senso di rotazione della fresa (Fig. 18)
MANUTENZIONE
HOLZMANN MASCHINEN GmbH www.holzmann-maschinen.at 36
OBF 1200
14.2.9 Fresature sagomate e di bordi (Fig. 19)
Per fresare sagome e bordi (a) (b) si possono utilizzare speciali frese con anello di spinta. Montare la fresa. Guidare la macchina con cautela sul pezzo. Guidare longitudinalmente i perni di guida o il cuscinetto a sfere (c) sul pezzo con una
leggera pressione. In base al materiale è possibile procedere in più passaggi nel caso di profondità di fresature elevate. Tenere la fresatrice verticale con entrambe le mani durante tutti i lavori di fresatura.
ATTENZIONE Terminato il lavoro con la fresatrice verticale l’utensile di fresatura resta caldo per un tempo relativamente lungo!
15 MANUTENZIONE
Sull'apparecchio ci sono solo poche componenti che richiedono la vostra manutenzione. Non è necessario smontare la macchina. Far eseguire le riparazioni solo a personale specializzato! Accessori: Usare solo accessori raccomandati da HOLZMANN! Per domande e problemi rivolgersi al nostro centro di assistenza clienti.
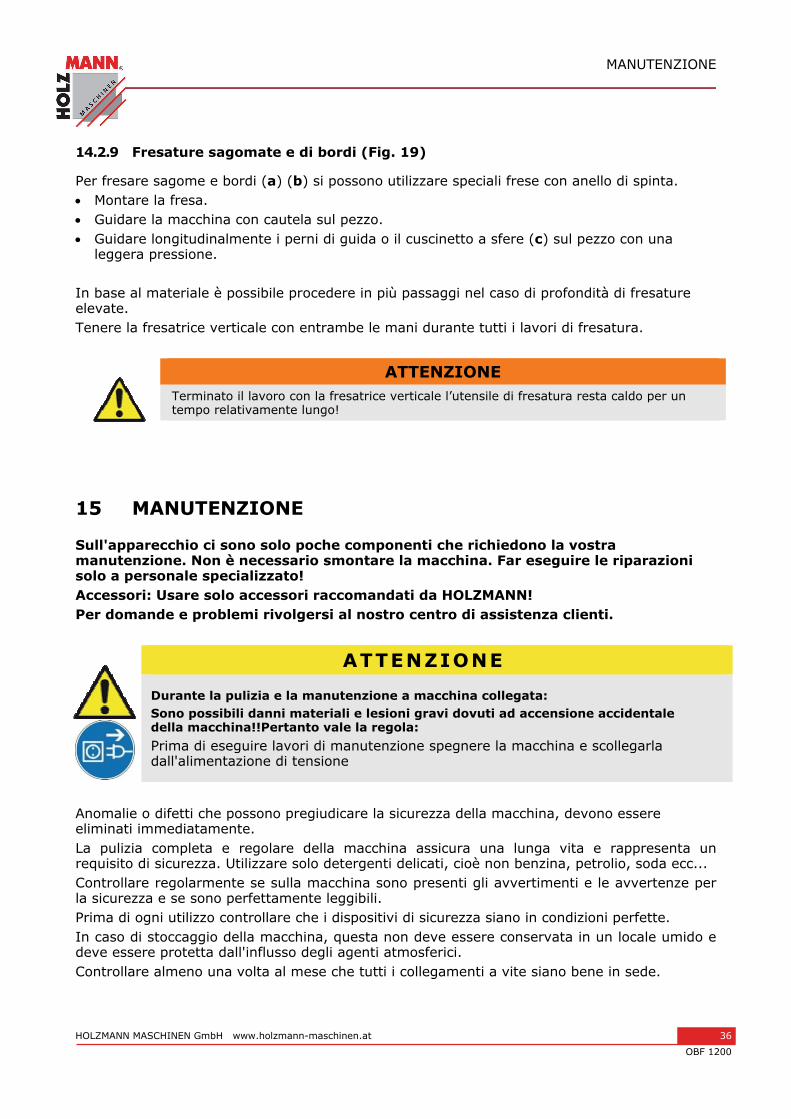
ATTENZIONE
Durante la pulizia e la manutenzione a macchina collegata: Sono possibili danni materiali e lesioni gravi dovuti ad accensione accidentale della macchina!!Pertanto vale la regola: Prima di eseguire lavori di manutenzione spegnere la macchina e scollegarla dall'alimentazione di tensione
Anomalie o difetti che possono pregiudicare la sicurezza della macchina, devono essere eliminati immediatamente. La pulizia completa e regolare della macchina assicura una lunga vita e rappresenta un requisito di sicurezza. Utilizzare solo detergenti delicati, cioè non benzina, petrolio, soda ecc... Controllare regolarmente se sulla macchina sono presenti gli avvertimenti e le avvertenze per la sicurezza e se sono perfettamente leggibili. Prima di ogni utilizzo controllare che i dispositivi di sicurezza siano in condizioni perfette. In caso di stoccaggio della macchina, questa non deve essere conservata in un locale umido e deve essere protetta dall'influsso degli agenti atmosferici. Controllare almeno una volta al mese che tutti i collegamenti a vite siano bene in sede.
MANUTENZIONE
HOLZMANN MASCHINEN GmbH www.holzmann-maschinen.at 37
OBF 1200
15.1 Pulizia
Dopo ogni messa in servizio la macchina e tutte le componenti devono essere pulite a fondo.
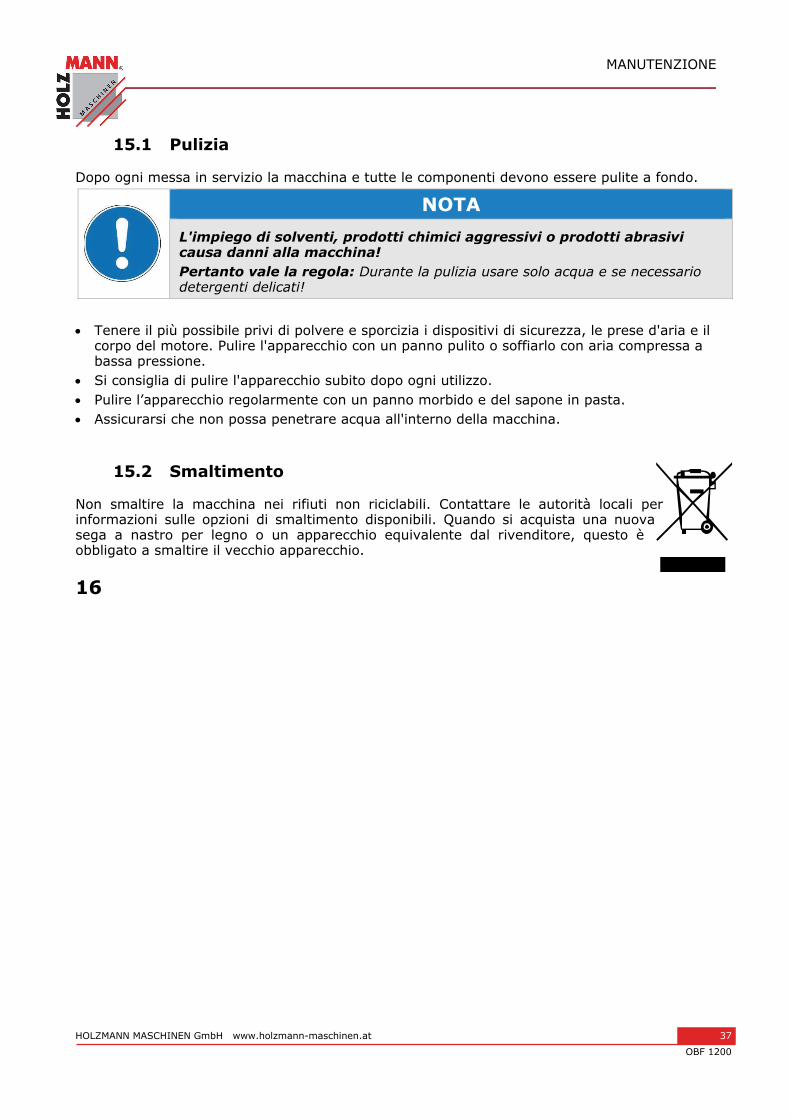
NOTA
L'impiego di solventi, prodotti chimici aggressivi o prodotti abrasivi causa danni alla macchina! Pertanto vale la regola: Durante la pulizia usare solo acqua e se necessario detergenti delicati!
Tenere il più possibile privi di polvere e sporcizia i dispositivi di sicurezza, le prese d'aria e il
corpo del motore. Pulire l'apparecchio con un panno pulito o soffiarlo con aria compressa a bassa pressione.
Si consiglia di pulire l'apparecchio subito dopo ogni utilizzo. Pulire l’apparecchio regolarmente con un panno morbido e del sapone in pasta. Assicurarsi che non possa penetrare acqua all'interno della macchina.
15.2 Smaltimento
Non smaltire la macchina nei rifiuti non riciclabili. Contattare le autorità locali per informazioni sulle opzioni di smaltimento disponibili. Quando si acquista una nuova sega a nastro per legno o un apparecchio equivalente dal rivenditore, questo è obbligato a smaltire il vecchio apparecchio.
16
ELEKTRISCHE SCHALTUNGEN / WIRING DIAGRAM / CIRCUITI ELETTRICI
HOLZMANN MASCHINEN GmbH www.holzmann-maschinen.at 38
OBF 1200
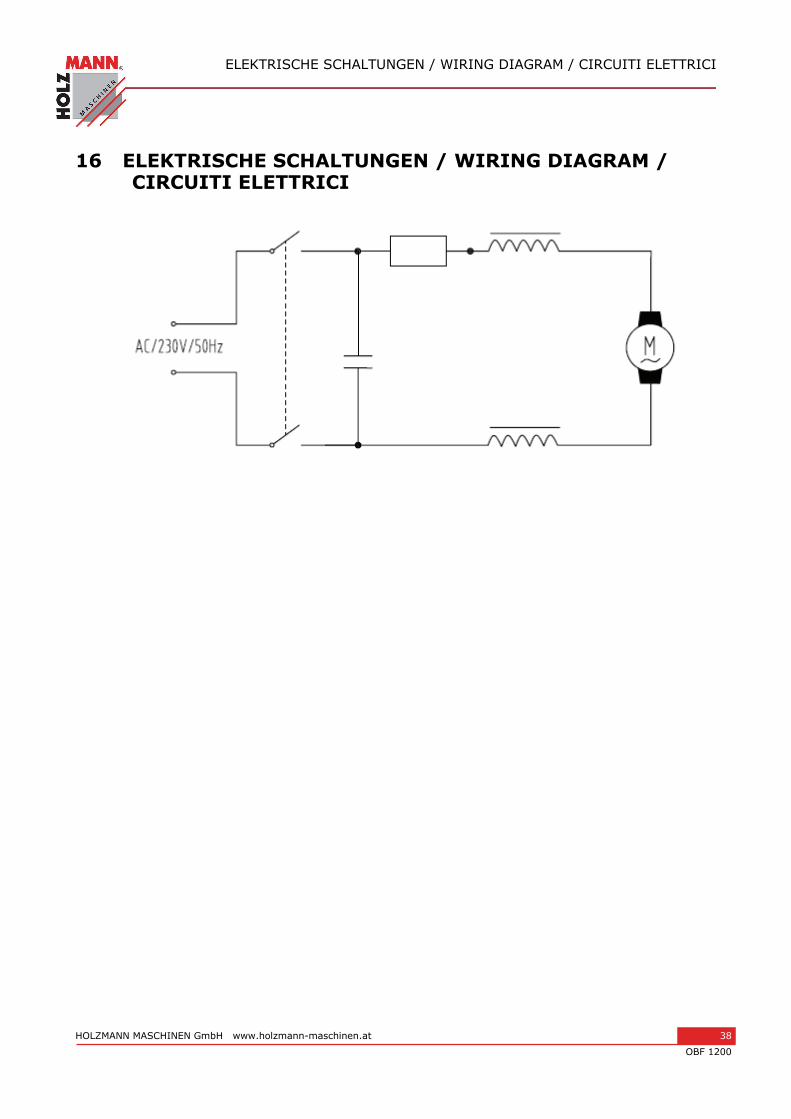
16 ELEKTRISCHE SCHALTUNGEN / WIRING DIAGRAM / CIRCUITI ELETTRICI
ERSATZTEILE / SPARE PARTS / PARTI DI RICAMBIO
HOLZMANN MASCHINEN GmbH www.holzmann-maschinen.at 39
OBF 1200
17 ERSATZTEILE / SPARE PARTS / PARTI DI RICAMBIO
17.1 Ersatzteilbestellung / spare parts order / Ordinazione delle parti di ricambio
Mit Holzmann-Ersatzteilen verwenden Sie Ersatzteile, die ideal aufeinander abgestimmt sind. Die optimale Passgenauigkeit der Teile verkürzen die Einbauzeiten und erhöhen die Lebensdauer.
HINWEIS
Der Einbau von anderen als Originalersatzteilen führt zum Verlust der Garantie! Daher gilt: Beim Tausch von Komponenten/Teilen nur Originalersatzteile verwenden
Beim Bestellen von Ersatzteilen verwenden Sie bitte das Serviceformular, das Sie am Ende dieser Anleitung finden. Geben Sie stets Maschinetype, Ersatzteilnummer sowie Bezeichnung an. Um Missverständnissen vorzubeugen, empfehlen wir mit der Ersatzteilbestellung eine Kopie der Ersatzteilzeichnung beizulegen, auf der die benötigten Ersatzteile eindeutig markiert sind.
Bestelladresse sehen Sie unter Kundendienstadressen im Vorwort dieser Dokumentation. With original Holzmann spare parts you use parts that are attuned to each other shorten the installation time and elongate your products lifespan.
IMPORTANT
The installation of other than original spare parts voids the warranty! So you always have to use original spare parts
When you place a spare parts order please use the service formular you can find in the last chapter of this manual. Always take a note of the machine type, spare parts number and partname. We recommend to copy the spare parts diagram and mark the spare part you need.
You find the order address in the preface of this operation manual.
ERSATZTEILE / SPARE PARTS / PARTI DI RICAMBIO
HOLZMANN MASCHINEN GmbH www.holzmann-maschinen.at 40
OBF 1200
Con le parti di ricambio Holzmann utilizzate pezzi di ricambio che combaciano e sono adatti tra loro. L'esattezza di adattamento ottimale dei pezzi accorcia i tempi di montaggio e aumenta la durata di vita.
NOTA
Il montaggio di altre parti di ricambio diverse da quelle originali causa la perdita della garanzia!
Pertanto vale la regola: Per la sostituzione di componenti/parti utilizzare solo parti di ricambio originali
Per ordinare parti di ricambio usare il modulo dell'assistenza che trovate al termine di queste istruzioni. Indicare sempre il tipo di macchina, il numero di parte di ricambio e la denominazione. Per evitare incomprensioni, si raccomanda di allegare agli ordini di parti di ricambio una copia del disegno delle parti di ricambio, su cui sono contrassegnate le parti di ricambio richieste.
L'indirizzo per gli ordini si trova sotto gli indirizzi dei centri di assistenza clienti nella prefazione di questa documentazione.
ERSATZTEILE / SPARE PARTS / PARTI DI RICAMBIO
HOLZMANN MASCHINEN GmbH www.holzmann-maschinen.at 41
OBF 1200
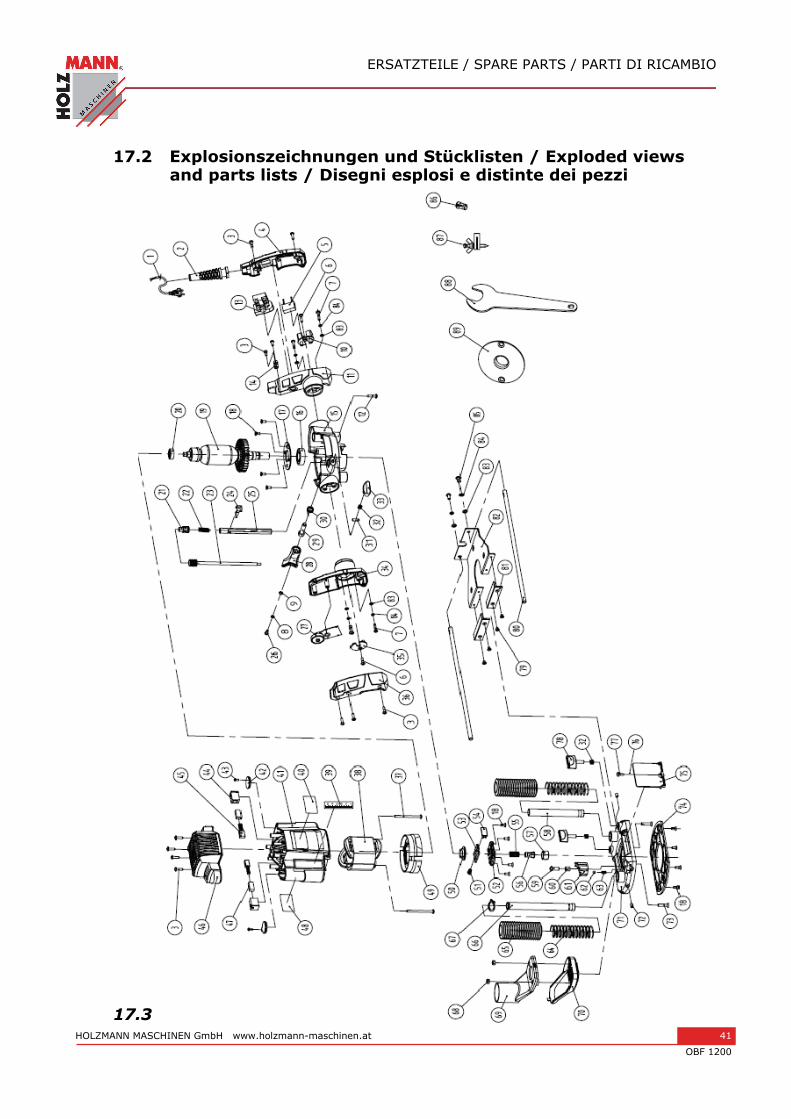
17.2 Explosionszeichnungen und Stücklisten / Exploded views and parts lists / Disegni esplosi e distinte dei pezzi
17.3
ERSATZTEILE / SPARE PARTS / PARTI DI RICAMBIO
HOLZMANN MASCHINEN GmbH www.holzmann-maschinen.at 42
OBF 1200
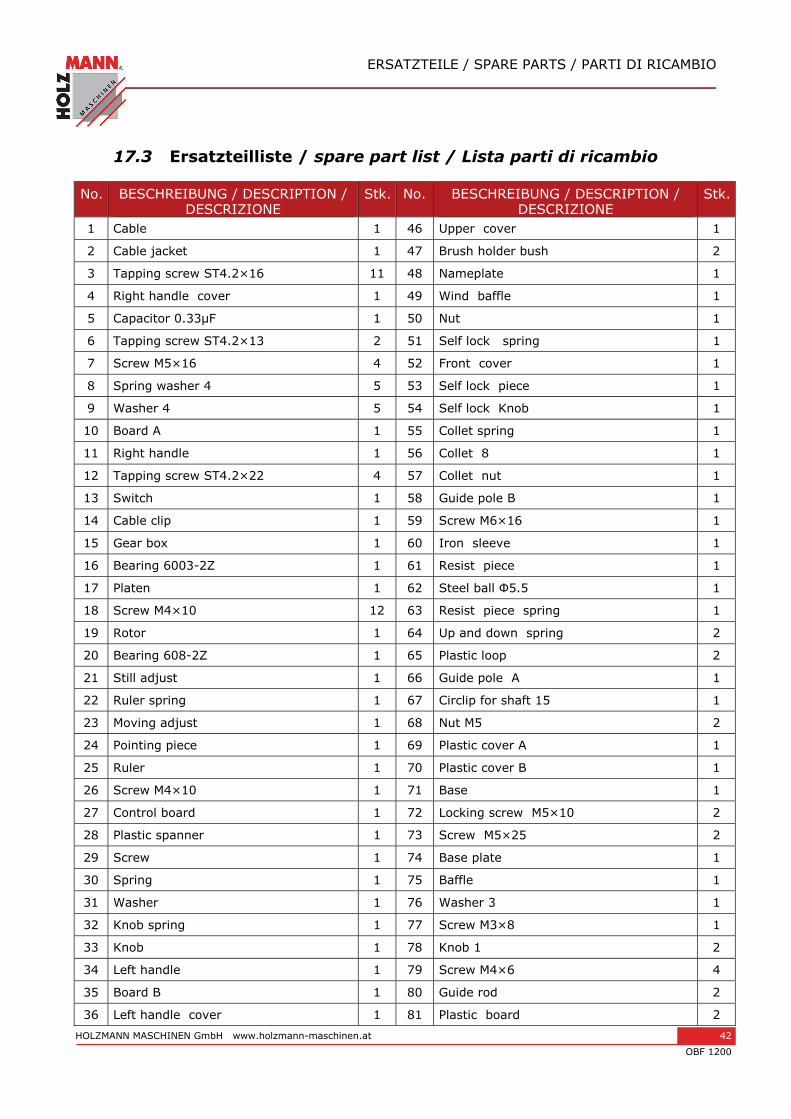
17.3 Ersatzteilliste / spare part list / Lista parti di ricambio
No. BESCHREIBUNG / DESCRIPTION / DESCRIZIONE
Stk. No. BESCHREIBUNG / DESCRIPTION / DESCRIZIONE
Stk.
1 Cable 1 46 Upper cover 1
2 Cable jacket 1 47 Brush holder bush 2
3 Tapping screw ST4.2×16 11 48 Nameplate 1
4 Right handle cover 1 49 Wind baffle 1
5 Capacitor 0.33μF 1 50 Nut 1
6 Tapping screw ST4.2×13 2 51 Self lock spring 1
7 Screw M5×16 4 52 Front cover 1
8 Spring washer 4 5 53 Self lock piece 1
9 Washer 4 5 54 Self lock Knob 1
10 Board A 1 55 Collet spring 1
11 Right handle 1 56 Collet 8 1
12 Tapping screw ST4.2×22 4 57 Collet nut 1
13 Switch 1 58 Guide pole B 1
14 Cable clip 1 59 Screw M6×16 1
15 Gear box 1 60 Iron sleeve 1
16 Bearing 6003-2Z 1 61 Resist piece 1
17 Platen 1 62 Steel ball Φ5.5 1
18 Screw M4×10 12 63 Resist piece spring 1
19 Rotor 1 64 Up and down spring 2
20 Bearing 608-2Z 1 65 Plastic loop 2
21 Still adjust 1 66 Guide pole A 1
22 Ruler spring 1 67 Circlip for shaft 15 1
23 Moving adjust 1 68 Nut M5 2
24 Pointing piece 1 69 Plastic cover A 1
25 Ruler 1 70 Plastic cover B 1
26 Screw M4×10 1 71 Base 1
27 Control board 1 72 Locking screw M5×10 2
28 Plastic spanner 1 73 Screw M5×25 2
29 Screw 1 74 Base plate 1
30 Spring 1 75 Baffle 1
31 Washer 1 76 Washer 3 1
32 Knob spring 1 77 Screw M3×8 1
33 Knob 1 78 Knob 1 2
34 Left handle 1 79 Screw M4×6 4
35 Board B 1 80 Guide rod 2
36 Left handle cover 1 81 Plastic board 2
ERSATZTEILE / SPARE PARTS / PARTI DI RICAMBIO
HOLZMANN MASCHINEN GmbH www.holzmann-maschinen.at 43
OBF 1200
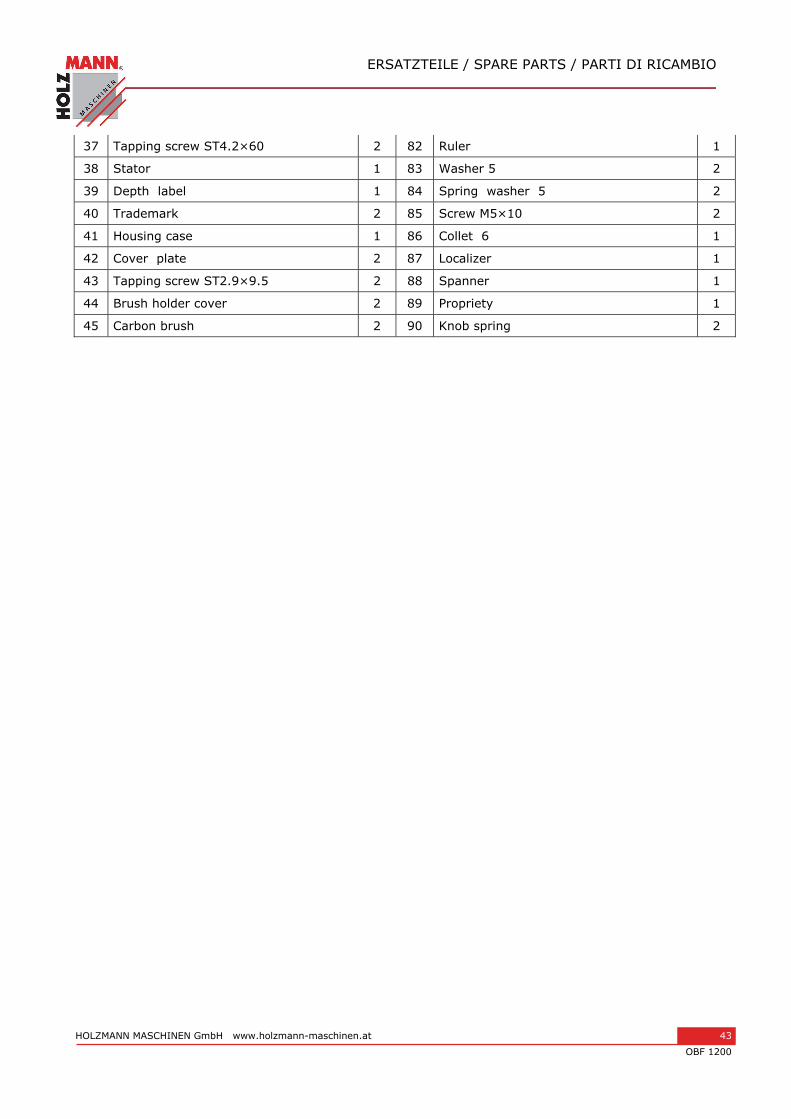
37 Tapping screw ST4.2×60 2 82 Ruler 1
38 Stator 1 83 Washer 5 2
39 Depth label 1 84 Spring washer 5 2
40 Trademark 2 85 Screw M5×10 2
41 Housing case 1 86 Collet 6 1
42 Cover plate 2 87 Localizer 1
43 Tapping screw ST2.9×9.5 2 88 Spanner 1
44 Brush holder cover 2 89 Propriety 1
45 Carbon brush 2 90 Knob spring 2
EG-KONFORMITÄTSERKLÄRUNG/CE-CERTIFICATE OF CONFORMITY/DICHIARAZIONE DI CONFORMITÀ CE
HOLZMANN MASCHINEN GmbH www.holzmann-maschinen.at 44
OBF 1200
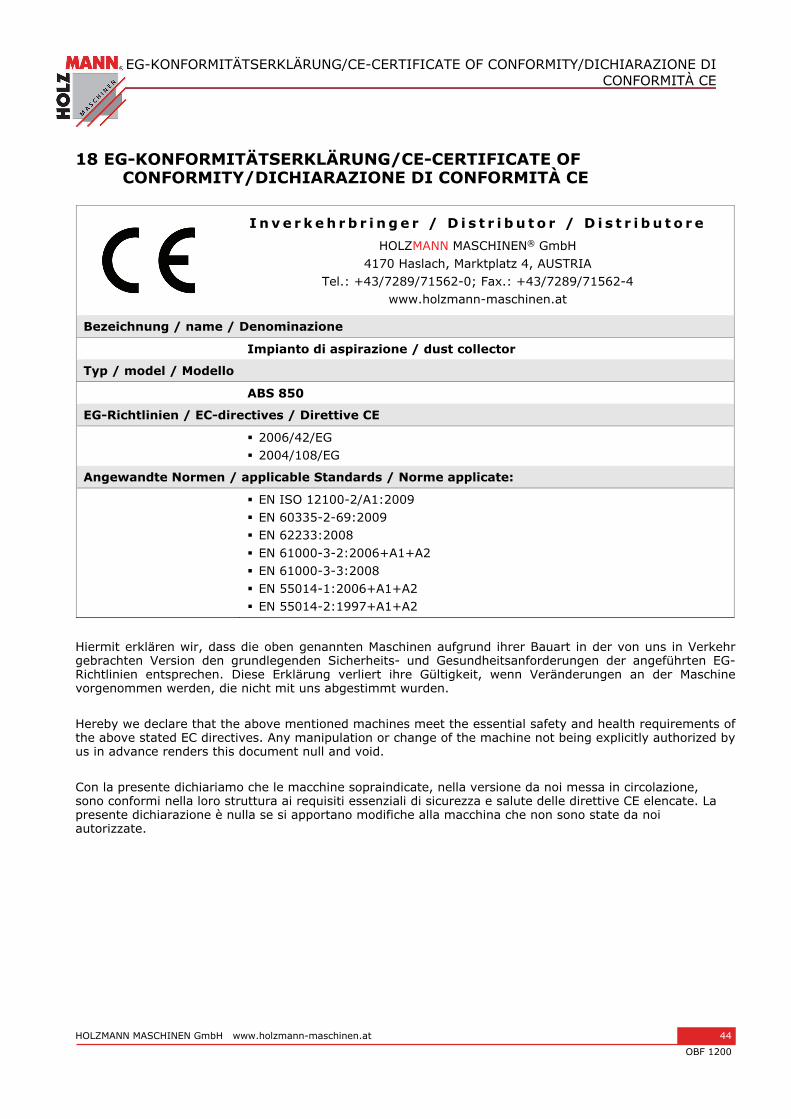
18 EG-KONFORMITÄTSERKLÄRUNG/CE-CERTIFICATE OF CONFORMITY/DICHIARAZIONE DI CONFORMITÀ CE
I n v e r k e h r b r i n g e r / D i s t r i b u t o r / D i s t r i b u t o r e HOLZMANN MASCHINEN® GmbH
4170 Haslach, Marktplatz 4, AUSTRIA Tel.: +43/7289/71562-0; Fax.: +43/7289/71562-4
www.holzmann-maschinen.at
Bezeichnung / name / Denominazione
Impianto di aspirazione / dust collector
Typ / model / Modello
ABS 850
EG-Richtlinien / EC-directives / Direttive CE
2006/42/EG 2004/108/EG
Angewandte Normen / applicable Standards / Norme applicate:
EN ISO 12100-2/A1:2009 EN 60335-2-69:2009 EN 62233:2008 EN 61000-3-2:2006+A1+A2 EN 61000-3-3:2008 EN 55014-1:2006+A1+A2 EN 55014-2:1997+A1+A2
Hiermit erklären wir, dass die oben genannten Maschinen aufgrund ihrer Bauart in der von uns in Verkehr gebrachten Version den grundlegenden Sicherheits- und Gesundheitsanforderungen der angeführten EG-Richtlinien entsprechen. Diese Erklärung verliert ihre Gültigkeit, wenn Veränderungen an der Maschine vorgenommen werden, die nicht mit uns abgestimmt wurden. Hereby we declare that the above mentioned machines meet the essential safety and health requirements of the above stated EC directives. Any manipulation or change of the machine not being explicitly authorized by us in advance renders this document null and void. Con la presente dichiariamo che le macchine sopraindicate, nella versione da noi messa in circolazione, sono conformi nella loro struttura ai requisiti essenziali di sicurezza e salute delle direttive CE elencate. La presente dichiarazione è nulla se si apportano modifiche alla macchina che non sono state da noi autorizzate.

EG-KONFORMITÄTSERKLÄRUNG/CE-CERTIFICATE OF CONFORMITY/DICHIARAZIONE DI CONFORMITÀ CE
HOLZMANN MASCHINEN GmbH www.holzmann-maschinen.at 45
OBF 1200
Christian Eckerstorfer Techn. Dokumentation / techn.
Documentation HOLZMANN-MASCHINEN
A-4170 Haslach, Marktplatz 4
Klaus Schörgenhuber Geschäftsführer / Director
Haslach, 10.04.2015
Ort / Datum place/date
GARANTIEERKLÄRUNG
HOLZMANN MASCHINEN GmbH www.holzmann-maschinen.at 46
OBF 1200
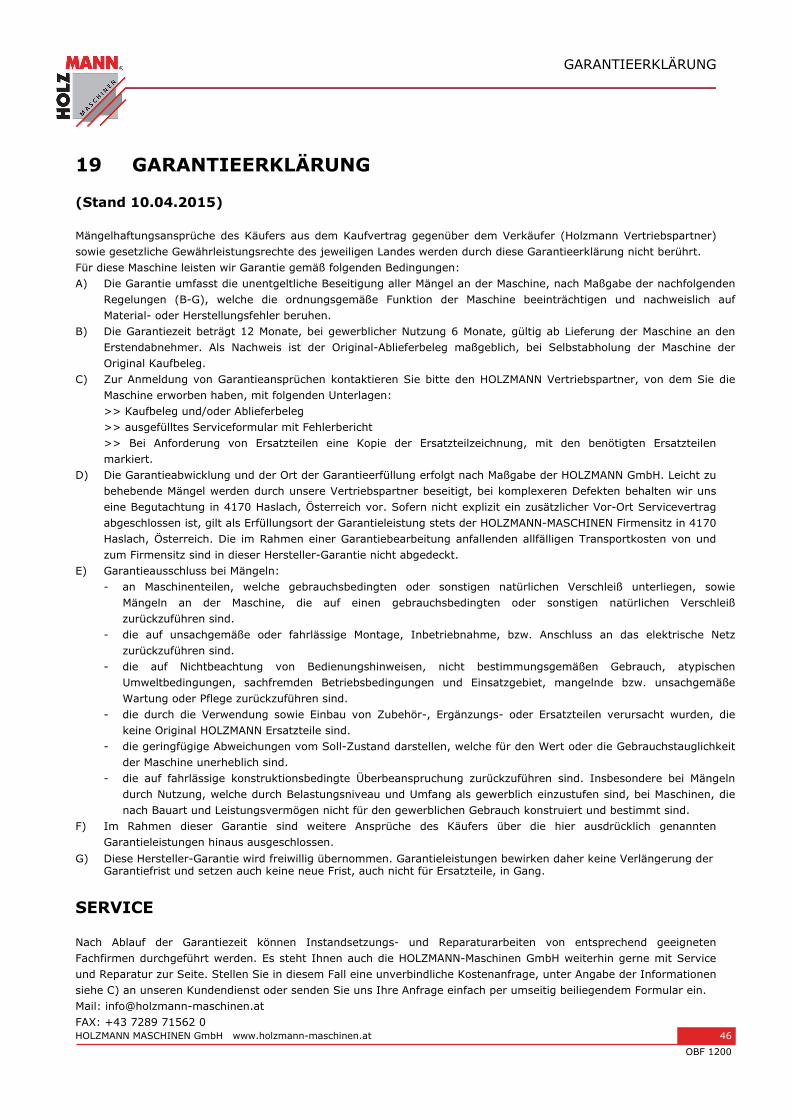
19 GARANTIEERKLÄRUNG
(Stand 10.04.2015) Mängelhaftungsansprüche des Käufers aus dem Kaufvertrag gegenüber dem Verkäufer (Holzmann Vertriebspartner) sowie gesetzliche Gewährleistungsrechte des jeweiligen Landes werden durch diese Garantieerklärung nicht berührt. Für diese Maschine leisten wir Garantie gemäß folgenden Bedingungen: A) Die Garantie umfasst die unentgeltliche Beseitigung aller Mängel an der Maschine, nach Maßgabe der nachfolgenden
Regelungen (B-G), welche die ordnungsgemäße Funktion der Maschine beeinträchtigen und nachweislich auf Material- oder Herstellungsfehler beruhen.
B) Die Garantiezeit beträgt 12 Monate, bei gewerblicher Nutzung 6 Monate, gültig ab Lieferung der Maschine an den Erstendabnehmer. Als Nachweis ist der Original-Ablieferbeleg maßgeblich, bei Selbstabholung der Maschine der Original Kaufbeleg.
C) Zur Anmeldung von Garantieansprüchen kontaktieren Sie bitte den HOLZMANN Vertriebspartner, von dem Sie die Maschine erworben haben, mit folgenden Unterlagen: >> Kaufbeleg und/oder Ablieferbeleg >> ausgefülltes Serviceformular mit Fehlerbericht >> Bei Anforderung von Ersatzteilen eine Kopie der Ersatzteilzeichnung, mit den benötigten Ersatzteilen markiert.
D) Die Garantieabwicklung und der Ort der Garantieerfüllung erfolgt nach Maßgabe der HOLZMANN GmbH. Leicht zu behebende Mängel werden durch unsere Vertriebspartner beseitigt, bei komplexeren Defekten behalten wir uns eine Begutachtung in 4170 Haslach, Österreich vor. Sofern nicht explizit ein zusätzlicher Vor-Ort Servicevertrag abgeschlossen ist, gilt als Erfüllungsort der Garantieleistung stets der HOLZMANN-MASCHINEN Firmensitz in 4170 Haslach, Österreich. Die im Rahmen einer Garantiebearbeitung anfallenden allfälligen Transportkosten von und zum Firmensitz sind in dieser Hersteller-Garantie nicht abgedeckt.
E) Garantieausschluss bei Mängeln: - an Maschinenteilen, welche gebrauchsbedingten oder sonstigen natürlichen Verschleiß unterliegen, sowie
Mängeln an der Maschine, die auf einen gebrauchsbedingten oder sonstigen natürlichen Verschleiß zurückzuführen sind.
- die auf unsachgemäße oder fahrlässige Montage, Inbetriebnahme, bzw. Anschluss an das elektrische Netz zurückzuführen sind.
- die auf Nichtbeachtung von Bedienungshinweisen, nicht bestimmungsgemäßen Gebrauch, atypischen Umweltbedingungen, sachfremden Betriebsbedingungen und Einsatzgebiet, mangelnde bzw. unsachgemäße Wartung oder Pflege zurückzuführen sind.
- die durch die Verwendung sowie Einbau von Zubehör-, Ergänzungs- oder Ersatzteilen verursacht wurden, die keine Original HOLZMANN Ersatzteile sind.
- die geringfügige Abweichungen vom Soll-Zustand darstellen, welche für den Wert oder die Gebrauchstauglichkeit der Maschine unerheblich sind.
- die auf fahrlässige konstruktionsbedingte Überbeanspruchung zurückzuführen sind. Insbesondere bei Mängeln durch Nutzung, welche durch Belastungsniveau und Umfang als gewerblich einzustufen sind, bei Maschinen, die nach Bauart und Leistungsvermögen nicht für den gewerblichen Gebrauch konstruiert und bestimmt sind.
F) Im Rahmen dieser Garantie sind weitere Ansprüche des Käufers über die hier ausdrücklich genannten Garantieleistungen hinaus ausgeschlossen.
G) Diese Hersteller-Garantie wird freiwillig übernommen. Garantieleistungen bewirken daher keine Verlängerung der Garantiefrist und setzen auch keine neue Frist, auch nicht für Ersatzteile, in Gang.
SERVICE Nach Ablauf der Garantiezeit können Instandsetzungs- und Reparaturarbeiten von entsprechend geeigneten Fachfirmen durchgeführt werden. Es steht Ihnen auch die HOLZMANN-Maschinen GmbH weiterhin gerne mit Service und Reparatur zur Seite. Stellen Sie in diesem Fall eine unverbindliche Kostenanfrage, unter Angabe der Informationen siehe C) an unseren Kundendienst oder senden Sie uns Ihre Anfrage einfach per umseitig beiliegendem Formular ein. Mail: [email protected] FAX: +43 7289 71562 0
GUARANTEE TERMS
HOLZMANN MASCHINEN GmbH www.holzmann-maschinen.at 47
OBF 1200
20 GUARANTEE TERMS
(applicable from 10.04.2015)
Please consult our troubleshooting section for initial problem solving. Feel free to contact your HOLZMANN reseller or us for Customer Support! Warranty claims based on your sales contract with your HOLZMANN retailer, including your statutory rights, shall not be affected by this guarantee declaration. HOLZMANN-MASCHINEN grants guarantee according to following conditions: A) The guarantee covers the correction of deficiencies to the tool/product, at no charge, if it can be verified adequately that the deficiencies were caused by a material or manufacturing fault. B) The guarantee period lasts 12 months, and is reduced to 6 months for tools in commercial use. The guarantee period begins from the time the new tool is purchased from the first end user. The starting date is the date on the original delivery receipt, or the sales receipt in the case of pickup by the customer. C) Please lodge your guarantee claims to your HOLZMANN reseller you acquired the claimed tool from with following information: >> Original Sales receipt and/or delivery receipt >> Service form (see next page) filed, with a sufficient deficiency report >> for spare part claims: a copy of the respective exploded drawing with the required spare parts being marked clear and unmistakable. D) The Guarantee handling procedure and place of fulfillment is determined according to HOLZMANNs sole discretion in accordance with the HOLZMANN retail partner. If there is no additional Service contract made including on-site service, the place of fulfillment is principally the HOLZMANN Service Center in Haslach, Austria. Transport charges for sending to and from our Service Center are not covered in this guarantee. E) The Guarantee does not cover:
- Wear and tear parts like belts, provided tools etc., except to initial damage which has to be claimed immediately after receipt and initial check of the product.
- Defects in the tool caused by non-compliance with the operating instructions, improper assembly, insufficient power supply, improper use, abnormal environmental conditions, inappropriate operating conditions, overload or insufficient servicing or maintenance.
- Damages being the causal effect of performed manipulations, changes, additions made to the product. - Defects caused by using accessories, components or spare parts other than original HOLZMANN spare parts. - Slight deviations from the specified quality or slight appearance changes that do not affect functionality or value of the
tool. - Defects resulting from a commercial use of tools that - based on their construction and power output - are not designed
and built to be used within the frame of industrial/commercial continuous load. F) Claims other than the right to correction of faults in the tool named in these guarantee conditions are not covered by our guarantee. G) This guarantee is voluntary. Therefore Services provided under guarantee do not lengthen or renew the guarantee period for the tool or the replaced part.
SERVICE After Guarantee and warranty expiration specialist repair shops can perform maintenance and repair jobs. But we are still at your service as well with spare parts and/or product service. Place your spare part / repair service cost inquiry by filing the SERVICE form on the following page and send it:
via Mail to [email protected]
or via Fax to: +43 7289 71562 4
DICHIARAZIONE DI GARANZIA
HOLZMANN MASCHINEN GmbH www.holzmann-maschinen.at 48
OBF 1200
21 DICHIARAZIONE DI GARANZIA
(Versione 10.04.2015) Non vengono toccati da questa dichiarazione di garanzia i diritti di garanzia per vizi della cosa dell'acquirente in forza del contratto di vendita nei confronti del venditore (distributori Holzmann), nonché i diritti di garanzia previsti dalla legge del paese in questione. Per questa macchina forniamo garanzia alle seguenti condizioni: D) La garanzia copre l'eliminazione gratuita di tutti i difetti della macchina, in linea con le seguenti regole (B-G), che
pregiudicano il regolare funzionamento della macchina e si fondano su difetti materiali o di produzione. E) Il periodo di garanzia è di 12 mesi, 6 mesi in caso di uso industriale, valido dalla consegna della macchina al primo
acquirente finale. Come prova fa fede la ricevuta di consegna originale, in caso di ritiro personale della macchina lo scontrino di acquisto originale.
F) Per notificare diritti di garanzia, contattare il distributore HOLZMANN, da cui avete acquistato la macchina, con la seguente documentazione: >> Scontrino di acquisto e/o ricevuta di consegna >> Modulo assistenza compilato con rapporto di errore >> In caso di richiesta di parti di ricambio una copia del disegno delle parti di ricambio, con contrassegnati i pezzi di ricambio richiesti.
D) La gestione della garanzia e il luogo di adempimento della garanzia avviene in conformità con HOLZMANN GmbH. I difetti di facile eliminazione vengono risolti dai nostri partner distributori, in caso di difetti complessi ci riserviamo di effettuare una perizia a 4170 Haslach, Austria. Se non viene espressamente stipulato un contratto aggiuntivo di assistenza in loco, si considera sempre come il luogo di adempimento della garanzia la HOLZMANN MASCHINEN con sede legale a 4170 Haslach, Austria. I costi di trasporto per la gestione della garanzia dalla e verso la sede aziendale non sono contemplati nella presente garanzia del produttore.
E) Esclusione di garanzia in caso di difetti: - sulle componenti meccaniche, che sono soggette a usura legata all'uso o altra usura naturale e difetti alla
macchina riconducibili a usura legata all'uso o altra usura naturale. - che sono riconducibili a montaggio, messa in servizio o allacciamento alla rete elettrica impropri o negligenti. - che sono riconducibili a inosservanza delle istruzioni per l'uso, uso improprio, atipiche condizioni ambientali,
condizioni operative estranee al settore e campo di utilizzo, mancata o errata manutenzione o cura. - che sono causati da utilizzo e montaggio di accessori, parti di ricambio, integrative, che non sono parti di
ricambio originali HOLZMANN. - che costituiscono differenze minime rispetto alla condizione richiesta, che sono irrilevanti per il valore o l'idoneità
d'uso della macchina. - che sono riconducibili a un sovraccarico negligente derivante dalle caratteristiche di costruzione. In particolare in
caso di difetti dovuti a utilizzo, che sono classificabili come industriali per livello di sollecitazione ed entità, in caso di macchine che per costruzione e prestazioni non sono progettate e destinate all'uso industriale.
F) Nell'ambito della presente garanzia si escludono ulteriori diritti dell'acquirente sulle prestazioni di garanzia qui espressamente citate.
G) Questa garanzia del produttore viene messa in atto volontariamente. Le prestazioni in garanzia non causano pertanto alcun prolungamento del termine di garanzia e non innescano alcun nuovo termine, nemmeno per le parti di ricambio.
ASSISTENZA Trascorso il periodo di garanzia i lavori di manutenzione e riparazione possono essere eseguiti da ditte specializzate opportune. Anche la HOLZMANN-Maschinen GbmH continua a essere a vostra disposizione per l'assistenza e le riparazioni. In tal caso inoltrate una richiesta di preventivo senza impegno, indicando le informazioni come da punto C) al nostro servizio assistenza clienti o inviateci semplicemente la vostra richiesta tramite il modulo allegato. Mail: [email protected] FAX: +43 7289 71562 0
PRODUKTBEOBACHTUNG
HOLZMANN MASCHINEN GmbH www.holzmann-maschinen.at 49
OBF 1200
22 PRODUKTBEOBACHTUNG PRODUCT EXPERIENCE FORM
Wir beobachten unsere Produkte auch nach der Auslieferung.
We observe the quality of our delivered products in the frame of a Quality Management policy.
Um einen ständigen Verbesserungsprozess gewährleisten zu können, sind wir von Ihnen und Ihren Eindrücken beim Umgang mit unseren Produkten abhängig:
Your opinion is essential for further product development and product choice. Please let us know about your:
- Probleme, die beim Gebrauch des Produktes auftreten
- Impressions and suggestions for improvement.
- Fehlfunktionen, die in bestimmten Betriebssituationen auftreten
- experiences that may be useful for other users and for product design
- Erfahrungen, die für andere Benutzer wichtig sein können
- Experiences with malfunctions that occur in specific operation modes
Wir bitten Sie, derartige Beobachtungen zu notieren und an diese per E-Mail, Fax oder Post an uns zu senden:
We would like to ask you to note down your experiences and observations and send them to us via FAX, E-Mail or by post:
OSSERVAZIONE DEL PRODOTTO
Anche dopo la consegna teniamo i nostri prodotti sotto osservazione.
Per garantire un processo di miglioramento continuo, contiamo su di voi e sulle vostre impressioni riguardo ai nostri prodotti:
- Problemi che si verificano quando si utilizza il prodotto
- Malfunzionamenti che si verificano in particolari situazioni di funzionamento
- Esperienze, che possono essere importanti per gli altri utenti
Vi preghiamo di prendere nota di tali osservazioni e di inviarcele per e-mail, fax o per posta:
PRODUCT EXPERIENCE FORM
HOLZMANN MASCHINEN GmbH www.holzmann-maschinen.at 50
OBF 1200
Meine Beobachtungen / My experiences / Le mie osservazioni:
N a m e / n a m e / N o m e : P r o d u k t / p r o d u c t / P r o d o t t o : K a u f d a t u m / p u r c h a s e d a t e / D a t a d i a c q u i s t o : E r w o r b e n v o n / p u r c h a s e d f r o m / A c q u i s t a t o d a : E - M a i l / e - m a i l / e - m a i l : V i e l e n D a n k f ü r I h r e M i t a r b e i t ! / T h a n k y o u f o r y o u r k i n d c o o p e r a t i o n ! / V i r i n g r a z i a m o p e r l a c o l l a b o r a z i o n e !
KONTAKTADRESSE / CONTACT / CONTATTO: HOLZMANN MASCHINEN GmbH 4170 Haslach, Marktplatz 4, AUSTRIA Tel : +43 7289 71562 0 Fax: +43 7289 71562 4 [email protected]