Embed Size (px)
Citation preview
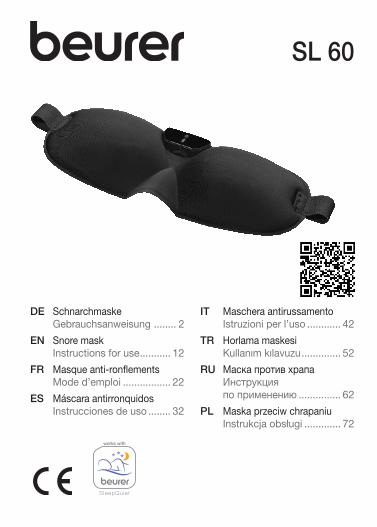
DE Schnarchmaske Gebrauchsanweisung ........ 2
EN Snore mask Instructions for use ........... 12
FR Masque anti-ronflements Mode d’emploi ................. 22
ES Máscara antirronquidos Instrucciones de uso ........ 32
IT Maschera antirussamento Istruzioni per l’uso ............ 42
TR Horlama maskesi Kullanım kılavuzu .............. 52
RU Маска против храпа Инструкция по применению ............... 62
PL Maska przeciw chrapaniu Instrukcja obsługi ............. 72
SL 60
2
Inhaltsverzeichnis1. Zum Kennenlernen ...................32. Zeichenerklärung......................43. Hinweise ....................................44. Gerätebeschreibung ................55. Inbetriebnahme .........................65.1 Schnarchmaske mit „beurer
SleepQuiet“ App verbinden ......... 65.2 Schnarchmaske anlegen ............. 65.3 Anwendung ................................. 7
6. Akku aufladen .........................7 7. Datenübertragung auf
Smartphone ............................8 8. Reinigung und Pflege .............8 9. Entsorgung ...........................1010. Technische Daten .................1011. Garantie / Service .................11
DEUTSCH
Sehr geehrte Kundin, sehr geehrter Kunde,wir freuen uns, dass Sie sich für ein Produkt unseres Sortimentes entschieden haben. Unser Name steht für hochwertige und eingehend geprüfte Qualitäts-produkte aus den Bereichen Wärme, Gewicht, Blutdruck, Körpertemperatur, Puls, Sanfte Therapie, Massage, Luft und Beauty.Mit freundlicher EmpfehlungIhr beurer-Team
Lieferumfang Überprüfen Sie den Lieferumfang auf äußere Unversehrtheit der Kartonverpa-ckung und auf die Vollständigkeit des Inhalts. Vor dem Gebrauch ist sicher-zustellen, dass das Gerät und Zubehör keine sichtbaren Schäden aufweisen und jegliches Verpackungsmaterial entfernt wird. Benutzen Sie es im Zwei-felsfall nicht und wenden Sie sich an Ihren Händler oder an die angegebene Kundendienstadresse.
1x Schnarchmaske1x Micro-USB Ladekabel
Lesen Sie diese Gebrauchsanweisung sorgfältig durch, bewahren Sie sie für den späteren Gebrauch auf, machen Sie sie anderen Benutzern zugänglich und beachten Sie die Hinweise.
3
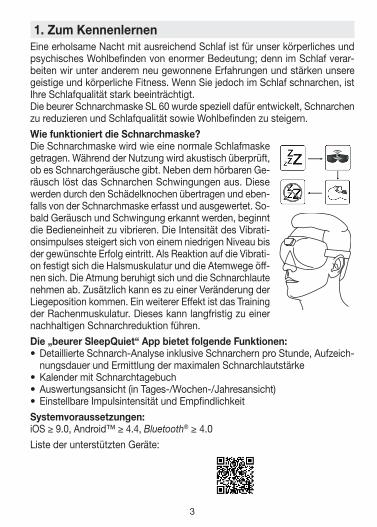
1. Zum KennenlernenEine erholsame Nacht mit ausreichend Schlaf ist für unser körperliches und psychisches Wohlbefinden von enormer Bedeutung; denn im Schlaf verar-beiten wir unter anderem neu gewonnene Erfahrungen und stärken unsere geistige und körperliche Fitness. Wenn Sie jedoch im Schlaf schnarchen, ist Ihre Schlafqualität stark beeinträchtigt.Die beurer Schnarchmaske SL 60 wurde speziell dafür entwickelt, Schnarchen zu reduzieren und Schlafqualität sowie Wohlbefinden zu steigern.Wie funktioniert die Schnarchmaske?Die Schnarchmaske wird wie eine normale Schlafmaske getragen. Während der Nutzung wird akustisch überprüft, ob es Schnarchgeräusche gibt. Neben dem hörbaren Ge-räusch löst das Schnarchen Schwingungen aus. Diese werden durch den Schädelknochen übertragen und eben-falls von der Schnarchmaske erfasst und ausgewertet. So-bald Geräusch und Schwingung erkannt werden, beginnt die Bedieneinheit zu vibrieren. Die Intensität des Vibrati-onsimpulses steigert sich von einem niedrigen Niveau bis der gewünschte Erfolg eintritt. Als Reaktion auf die Vibrati-on festigt sich die Halsmuskulatur und die Atemwege öff-nen sich. Die Atmung beruhigt sich und die Schnarchlaute nehmen ab. Zusätzlich kann es zu einer Veränderung der Liegeposition kommen. Ein weiterer Effekt ist das Training der Rachenmuskulatur. Dieses kann langfristig zu einer nachhaltigen Schnarchreduktion führen.Die „beurer SleepQuiet“ App bietet folgende Funktionen:•Detaillierte Schnarch-Analyse inklusive Schnarchern pro Stunde, Aufzeich-
nungsdauer und Ermittlung der maximalen Schnarchlautstärke•Kalender mit Schnarchtagebuch•Auswertungsansicht (in Tages-/Wochen-/Jahresansicht)•Einstellbare Impulsintensität und EmpfindlichkeitSystemvoraussetzungen:iOS ≥ 9.0, Android™ ≥ 4.4, Blue tooth® ≥ 4.0Liste der unterstützten Geräte:
4
2. ZeichenerklärungFolgende Symbole werden in dieser Gebrauchsanweisung verwendet:
WARNUNG Warnhinweis auf Verletzungsgefahren oder Gefahren für Ihre Gesundheit
ACHTUNG Sicherheitshinweis auf mögliche Schäden am Gerät/Zubehör
HinweisHinweis auf wichtige Informationen
Entsorgung gemäß Elektro- und Elektronik-Altgeräte EG-Richtli-nie –WEEE (Waste Electrical and Electronic Equipment)
21
PAPVerpackung umweltgerecht entsorgen
Hersteller
Dieses Produkt erfüllt die Anforderungen der geltenden europä-ischen und nationalen Richtlinien.
3. Hinweise
WARNUNG
•Die abnehmbare Bedieneinheit der Schnarchmaske ist nur spritzwassergeschützt.•Halten Sie die abnehmbare Bedieneinheit der Schnarchmaske von Wasser fern!•Schützen Sie die Schnarchmaske vor Stößen, Feuchtigkeit, Schmutz, starken
Temperaturschwankungen und direkter Sonneneinstrahlung.•Halten Sie Kinder von Schnarchmaske und Verpackungsmaterial fern. Es be-
steht Erstickungsgefahr! •Halten Sie die abnehmbare Bedieneinheit der Schnarchmaske von Wärme-
quellen fern und verwenden Sie ihn nicht in der Nähe (~1 m) von Kurz- oder Mikrowellengeräten.
•Verwenden und lagern Sie die Schnarchmaske in einer Umgebungstempe-ratur zwischen 0°C bis 60°C. Höhere oder niedrigere Temperaturen können die Schnarchmaske beschädigen.
5
•Verwenden Sie zum Reinigen der abnehmbaren Bedieneinheit der Schnarch-maske keine chemischen Reiniger oder Scheuermittel. Reinigen Sie die abnehmbare Bedieneinheit von Zeit zu Zeit mit einem 70%-Isopropyl-Al-kohol-Pad. Die Schnarchmaske selbst ist maschinenwaschbar bei 30°C (Extra-Schonwaschgang).
•Wenn Flüssigkeit aus einer Akkuzelle mit Haut oder Augen in Kontakt kommt, die betroffene Stelle mit Wasser auswaschen und ärztliche Hilfe aufsuchen.
•Schützen Sie Akkus vor übermäßiger Wärme.•Explosionsgefahr! Keine Akkus ins Feuer werfen.•Keine Akkus zerlegen, öffnen oder zerkleinern.•Laden Sie den Akku vor der ersten Inbetriebnahme vollständig auf. •Laden Sie den Akku mindestens einmal alle 3 Monate vollständig auf.•Akkus müssen vor dem Gebrauch korrekt geladen werden. Die Hinweise
des Herstellers bzw. die Angaben in dieser Gebrauchsanweisung für das korrekte Laden sind stets einzuhalten.
4. Gerätebeschreibung
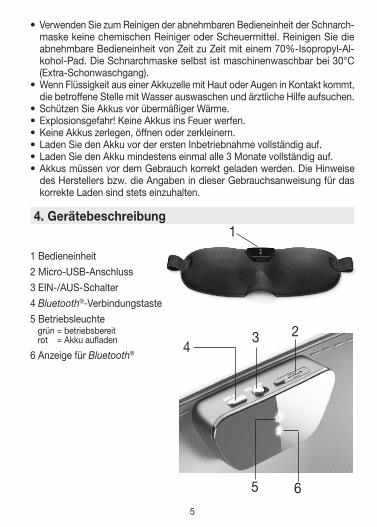
1 Bedieneinheit2 Micro-USB-Anschluss 3 EIN-/AUS-Schalter4 Blue tooth®-Verbindungstaste5 Betriebsleuchte
grün = betriebsbereitrot = Akku aufladen
6 Anzeige für Blue tooth®
3 2
65
4
1
6
5. Inbetriebnahme
5.1 Schnarchmaske mit „beurer SleepQuiet“ App verbindenSie können die Basisfunktionen der Schnarchmaske auch ohne „beurer SleepQuiet“ App verwenden. Die Zusatzfunktionen wie Aufzeichnung, Sta-tistik, Kalender und Einstellungen stehen Ihnen nur in Verbindung mit der „beurer SleepQuiet“ App zur Verfügung.Um Ihre Schnarchmaske mit der „beurer SleepQuiet“ App zu verbinden, ge-hen Sie wie folgt vor:1. Vergewissern Sie sich, dass Ihr Smartphone mit dem Internet verbunden ist.2. Aktivieren Sie Blue tooth® auf Ihrem Smartphone.3. Laden Sie die kostenlose „beurer SleepQuiet“ App im Apple App Store (iOS)
oder bei Google Play (AndroidTM) herunter.
Je nach Einstellungen des Smartphones können für die Internetverbindung oder Datenübertragung zusätz-liche Kosten anfallen.
4. Starten Sie die „beurer SleepQuiet“ App und folgen Sie den Anweisungen.
5.2 Schnarchmaske anlegen1. Um einen optimalen Tragekomfort zu gewährleisten, verstellen Sie den
Klettverschluss auf der Rückseite der Schnarchmaske auf Ihre gewünsch-te Größe. Achten Sie darauf, dass die Schnarchmaske nicht zu eng oder zu locker anliegt.
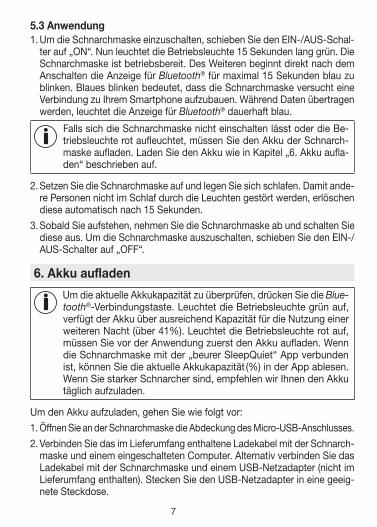
2. Setzen Sie die Schnarchmaske wie eine normale Schlafmaske auf.
Vergewissern Sie sich, dass die Kunststoffplat-te auf der Rückseite der Schnarchmaske mit leichtem Druck die Stirn berührt. Nur so kann eine optimale Schnarcherkennung gewährleis-tet werden.
7
5.3 Anwendung1. Um die Schnarchmaske einzuschalten, schieben Sie den EIN-/AUS-Schal-
ter auf „ON“. Nun leuchtet die Betriebsleuchte 15 Sekunden lang grün. Die Schnarchmaske ist betriebsbereit. Des Weiteren beginnt direkt nach dem Anschalten die Anzeige für Blue tooth® für maximal 15 Sekunden blau zu blinken. Blaues blinken bedeutet, dass die Schnarchmaske versucht eine Verbindung zu Ihrem Smartphone aufzubauen. Während Daten übertragen werden, leuchtet die Anzeige für Blue tooth® dauerhaft blau.
Falls sich die Schnarchmaske nicht einschalten lässt oder die Be-triebsleuchte rot aufleuchtet, müssen Sie den Akku der Schnarch-maske aufladen. Laden Sie den Akku wie in Kapitel „6. Akku aufla-den“ beschrieben auf.
2. Setzen Sie die Schnarchmaske auf und legen Sie sich schlafen. Damit ande-re Personen nicht im Schlaf durch die Leuchten gestört werden, erlöschen diese automatisch nach 15 Sekunden.
3. Sobald Sie aufstehen, nehmen Sie die Schnarchmaske ab und schalten Sie diese aus. Um die Schnarchmaske auszuschalten, schieben Sie den EIN-/AUS-Schalter auf „OFF“.
6. Akku aufladen
Um die aktuelle Akkukapazität zu überprüfen, drücken Sie die Bluetooth®-Verbindungstaste. Leuchtet die Betriebsleuchte grün auf, verfügt der Akku über ausreichend Kapazität für die Nutzung einer weiteren Nacht (über 41%). Leuchtet die Betriebsleuchte rot auf, müssen Sie vor der Anwendung zuerst den Akku aufladen. Wenn die Schnarchmaske mit der „beurer SleepQuiet“ App verbunden ist, können Sie die aktuelle Akkukapazität (%) in der App ablesen. Wenn Sie starker Schnarcher sind, empfehlen wir Ihnen den Akku täglich aufzuladen.
Um den Akku aufzuladen, gehen Sie wie folgt vor:1. Öffnen Sie an der Schnarchmaske die Abdeckung des Micro-USB-Anschlusses.2. Verbinden Sie das im Lieferumfang enthaltene Ladekabel mit der Schnarch-
maske und einem eingeschalteten Computer. Alternativ verbinden Sie das Ladekabel mit der Schnarchmaske und einem USB-Netzadapter (nicht im Lieferumfang enthalten). Stecken Sie den USB-Netzadapter in eine geeig-nete Steckdose.
8
3. Während des Ladevorgangs blinkt die Betriebsleuchte grün. Sobald der Akku vollständig geladen ist, leuchtet die Betriebsleuchte dauerhaft grün.
4. Im Normalfall dauert eine vollständige Aufladung des Akkus ca. 2 Stunden. Sobald der Akku vollständig geladen ist, stecken Sie das Ladekabel aus dem Computer bzw. der Steckdose und dem USB-Netzadapter und der Schnarchmaske.
5. Bei vollem Akku beträgt die Akkulaufzeit ca. 2 bis 3 Tage. Die Betriebsleuchte leuchtet rot, sobald die Akkukapazität bei unter 41% liegt.
7. Datenübertragung auf SmartphoneUm die aufgezeichneten Daten von Ihrer Schnarchmaske in die „beurer SleepQuiet“ App zu übertragen, befolgen Sie die folgenden Handlungsschritte:1. Aktivieren Sie Blue tooth® auf Ihrem Smartphone.2. Öffnen Sie die „beurer SleepQuiet“ App. 3. Schieben Sie den EIN/AUS-Schalter an der Schnarchmaske auf „ON“. Die
Anzeige für Blue tooth® blinkt blau. Sobald die Schnarchmaske mit Ihrem Smartphone verbunden ist, leuchtet die Anzeige für Blue tooth® dauerhaft blau. Die aufgezeichneten Daten werden nun auf das Smartphone übertra-gen. Dies kann bei großer Datenmenge einige Zeit in Anspruch nehmen. Nachdem die Daten übertragen wurden erlischt die Anzeige für Blue tooth®.
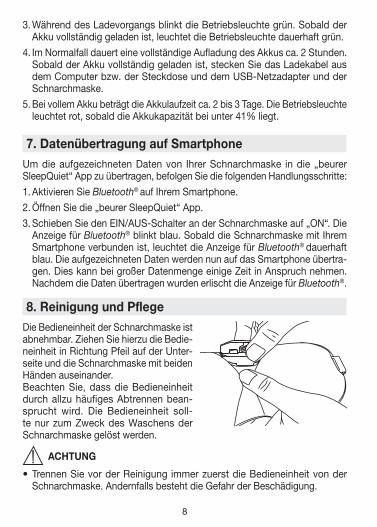
8. Reinigung und PflegeDie Bedieneinheit der Schnarchmaske ist abnehmbar. Ziehen Sie hierzu die Bedie-neinheit in Richtung Pfeil auf der Unter-seite und die Schnarchmaske mit beiden Händen auseinander.Beachten Sie, dass die Bedieneinheit durch allzu häufiges Abtrennen bean-sprucht wird. Die Bedieneinheit soll-te nur zum Zweck des Waschens der Schnarchmaske gelöst werden.
ACHTUNG
•Trennen Sie vor der Reinigung immer zuerst die Bedieneinheit von der Schnarchmaske. Andernfalls besteht die Gefahr der Beschädigung.
9
ACHTUNG
•Die Bedieneinheit der Schnarchmaske darf niemals mit Wasser oder mit an-deren Flüssigkeiten in Kontakt kommen. Sie kann sonst beschädigt werden.
Verwenden Sie zur Reinigung der Bedieneinheit ein in 70%-Isopropyl-Alko-hol getränktes Wattepad. Verwenden Sie keine chemischen Reiniger oder Scheuermittel.
ACHTUNG
•Beachten Sie, dass die Schnarchmaske nicht chemisch gereinigt, ausge-wrungen, maschinell getrocknet, gemangelt oder gebügelt werden darf. Andernfalls kann die Schnarchmakse beschädigt werden.
Die Schnarchmaske ist maschinenwaschbar. Schließen Sie hierzu den Klett-verschluss auf der Rückseite der Schnarchmaske und legen Sie sie in einen Kissenbezug oder Waschbeutel. Stellen Sie die Waschmaschine auf einen besonders schonenden Waschgang bei 30°C ein (Extra-Schonwaschgang).Waschen Sie die Schnarchmaske aus ökologischen Gründen nur zusammen mit anderen Textilien. Benutzen Sie ein Feinwaschmittel und dosieren Sie es nach Angaben des Herstellers.
ACHTUNG
•Beachten Sie, dass die Schnarchmaske durch das Waschen beansprucht wird.
Die Schnarchmaske sollte deshalb während der gesamten Lebensdauer max. 10 Mal in einer Waschmaschine gewaschen werden. Lassen Sie die Schnarch-maske flach ausgebreitet auf einem Wäscheständer trocknen.
ACHTUNG
•Verbinden Sie die Schnarchmaske mit der Bedieneinheit erst wieder, wenn die Schnarchmaske vollständig trocken ist. Andernfalls kann die Bedienein-heit beschädigt werden.
10
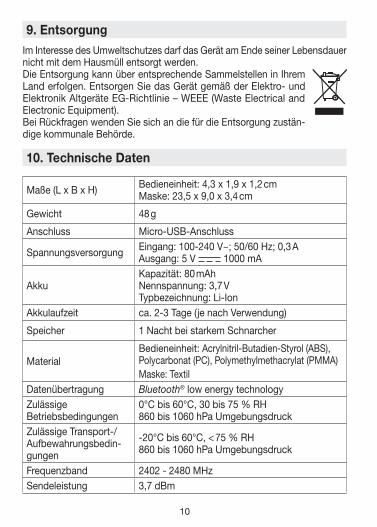
9. Entsorgung Im Interesse des Umweltschutzes darf das Gerät am Ende seiner Lebensdauer nicht mit dem Hausmüll entsorgt werden. Die Entsorgung kann über entsprechende Sammelstellen in Ihrem Land erfolgen. Entsorgen Sie das Gerät gemäß der Elektro- und Elektronik Altgeräte EG-Richtlinie – WEEE (Waste Electrical and Electronic Equipment).Bei Rückfragen wenden Sie sich an die für die Entsorgung zustän-dige kommunale Behörde.
10. Technische Daten
Maße (L x B x H) Bedieneinheit: 4,3 x 1,9 x 1,2 cmMaske: 23,5 x 9,0 x 3,4 cm
Gewicht 48 g
Anschluss Micro-USB-Anschluss
Spannungsversorgung Eingang: 100-240 V~; 50/60 Hz; 0,3 AAusgang: 5 V 1000 mA
AkkuKapazität: 80 mAhNennspannung: 3,7 VTypbezeichnung: Li-Ion
Akkulaufzeit ca. 2-3 Tage (je nach Verwendung)
Speicher 1 Nacht bei starkem Schnarcher
MaterialBedieneinheit: Acrylnitril-Butadien-Styrol (ABS), Polycarbonat (PC), Polymethylmethacrylat (PMMA)Maske: Textil
Datenübertragung Blue tooth® low energy technologyZulässige Betriebsbedingungen
0°C bis 60°C, 30 bis 75 % RH860 bis 1060 hPa Umgebungsdruck
Zulässige Transport-/ Aufbewahrungsbedin-gungen
-20°C bis 60°C, < 75 % RH860 bis 1060 hPa Umgebungsdruck
Frequenzband 2402 - 2480 MHzSendeleistung 3,7 dBm
11
Wir garantieren hiermit, dass dieses Produkt der europäischen RED Richtlinie 2014/53/EU entspricht.Kontaktieren Sie bitte die genannte Serviceadresse, um detailliertere Angaben – wie zum Beispiel die CE – Konformitätserklärung – zu erhalten.
11. Garantie / Service
Wir leisten 3 Jahre Garantie ab Kaufdatum für Material- und Fabrikationsfehler des Produktes. Die Garantie gilt nicht:• Im Falle von Schäden, die auf unsachgemäßer Bedienung beruhen.•Für Verschleißteile.•Bei Eigenverschulden des Kunden.•Sobald das Gerät durch eine nicht autorisierte Werkstatt geöffnet wurde.Die gesetzlichen Gewährleistungen des Kunden bleiben durch die Garantie un-berührt. Für Geltendmachung eines Garantiefalles innerhalb der Garantiezeit ist durch den Kunden der Nachweis des Kaufes zu führen. Die Garantie ist inner-halb eines Zeitraumes von 3 Jahren ab Kaufdatum gegenüber der Beurer GmbH, Söflinger Str. 218, 89077 Ulm (Germany) geltend zu machen.
Bitte wenden Sie sich im Falle von Reklamationen an unseren Service unter folgendem Kontakt:Service Hotline:Tel.: +49 (0) 731 / 39 89-144E-Mail: [email protected]
Fordern wir Sie zur Übersendung des defekten Produktes auf, ist das Produkt an folgende Adresse zu senden:Beurer GmbHServicecenterLessingstraße 10b89231 Neu-UlmGermany
Irrtu
m u
nd Ä
nder
unge
n vo
rbeh
alte
n

12
Table of contents1. Getting to know your device..132. Signs and symbols .................143. Notes .......................................144. Device description .................155. Initial use .................................165.1 Connecting the snore mask to
the “beurer SleepQuiet” app ..... 165.2 Putting on the snore mask......... 165.3 Use ............................................ 17
6. Charging the battery ............17 7. Transferring data to your
smartphone ...........................18 8. Cleaning and maintenance ..18 9. Disposal ................................1910. Technical data .......................2011. Warranty/service ..................21
ENGLISH
Dear customer,Thank you for choosing a product from our range. Our name stands for high-quality, thoroughly tested products for applications related to heating, weight, blood pressure, body temperature, pulse, gentle therapy, massage, air and beauty.With kind regards,Your beurer team
Included in delivery Check that the exterior of the delivery cardboard packaging is intact and make sure that all components are present. Before use, ensure that there is no vis-ible damage to the device or accessories and that all packaging material has been removed. If you have any doubts, do not use the device and contact your retailer or the specified Customer Service address.
1x snore mask1x micro USB charging cable
Read these instructions for use carefully and keep them for later use, be sure to make them accessible to other users and observe the information they contain.
13
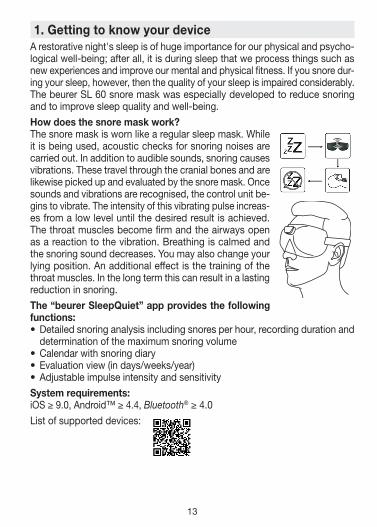
1. Getting to know your deviceA restorative night's sleep is of huge importance for our physical and psycho-logical well-being; after all, it is during sleep that we process things such as new experiences and improve our mental and physical fitness. If you snore dur-ing your sleep, however, then the quality of your sleep is impaired considerably.The beurer SL 60 snore mask was especially developed to reduce snoring and to improve sleep quality and well-being.How does the snore mask work?The snore mask is worn like a regular sleep mask. While it is being used, acoustic checks for snoring noises are carried out. In addition to audible sounds, snoring causes vibrations. These travel through the cranial bones and are likewise picked up and evaluated by the snore mask. Once sounds and vibrations are recognised, the control unit be-gins to vibrate. The intensity of this vibrating pulse increas-es from a low level until the desired result is achieved. The throat muscles become firm and the airways open as a reaction to the vibration. Breathing is calmed and the snoring sound decreases. You may also change your lying position. An additional effect is the training of the throat muscles. In the long term this can result in a lasting reduction in snoring.The “beurer SleepQuiet” app provides the following functions:•Detailed snoring analysis including snores per hour, recording duration and
determination of the maximum snoring volume•Calendar with snoring diary•Evaluation view (in days/weeks/year)•Adjustable impulse intensity and sensitivitySystem requirements:iOS ≥ 9.0, Android™ ≥ 4.4, Blue tooth® ≥ 4.0List of supported devices:
14
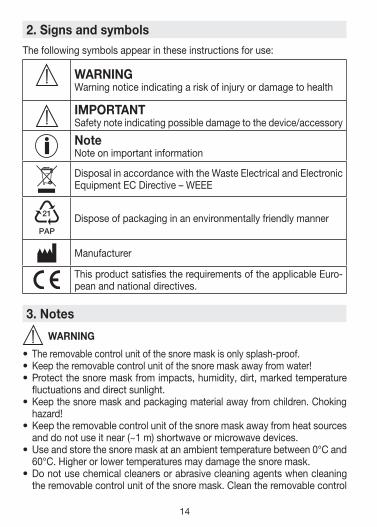
2. Signs and symbolsThe following symbols appear in these instructions for use:
WARNING Warning notice indicating a risk of injury or damage to health
IMPORTANT Safety note indicating possible damage to the device/accessory
NoteNote on important information
Disposal in accordance with the Waste Electrical and Electronic Equipment EC Directive – WEEE
21
PAPDispose of packaging in an environmentally friendly manner
Manufacturer
This product satisfies the requirements of the applicable Euro-pean and national directives.
3. Notes
WARNING
•The removable control unit of the snore mask is only splash-proof.•Keep the removable control unit of the snore mask away from water!•Protect the snore mask from impacts, humidity, dirt, marked temperature
fluctuations and direct sunlight.•Keep the snore mask and packaging material away from children. Choking
hazard! •Keep the removable control unit of the snore mask away from heat sources
and do not use it near (~1 m) shortwave or microwave devices.•Use and store the snore mask at an ambient temperature between 0°C and
60°C. Higher or lower temperatures may damage the snore mask.•Do not use chemical cleaners or abrasive cleaning agents when cleaning
the removable control unit of the snore mask. Clean the removable control
15
unit occasionally with a 70% isopropyl alcohol pad. The snore mask itself is machine washable at 30°C (extra-delicate cycle).
• If your skin or eyes come into contact with fluid from a rechargeable battery cell, flush out the affected areas with water and seek medical assistance.
•Protect batteries from excessive heat.•Risk of explosion! Never throw batteries into a fire.•Do not disassemble, split or crush the batteries.•Fully charge the battery prior to initial use. •Fully charge the battery at least every 3 months.•Batteries must be charged correctly prior to use. The instructions from the
manufacturer and the specifications in these instructions for use regarding correct charging must be observed at all times.
4. Device description
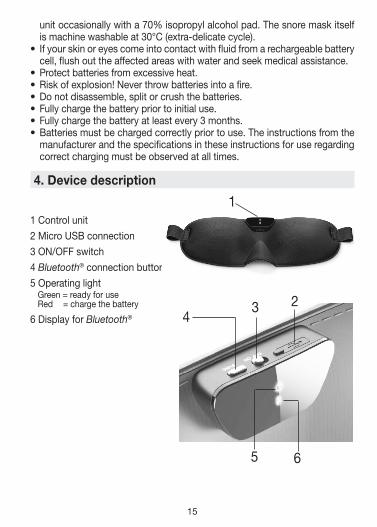
1 Control unit2 Micro USB connection 3 ON/OFF switch4 Blue tooth® connection button5 Operating light
Green = ready for useRed = charge the battery
6 Display for Blue tooth®3 2
65
4
1
16
5. Initial use
5.1 Connecting the snore mask to the “beurer SleepQuiet” appYou can use the basic functions of the snore mask also without the “beurer SleepQuiet” app. The additional features such as recording, statistics, calendar and settings are only available in conjunction with the “beurer SleepQuiet” app.To connect your snore mask with the “beurer SleepQuiet” app, please pro-ceed as follows:1. Ensure that your smartphone is connected to the Internet.2. Activate Blue tooth® on your smartphone.3. Download the free “beurer SleepQuiet” app from the Apple App Store (iOS)
or at Google Play (AndroidTM).
Depending on the smartphone settings, additional charges may be incurred for connecting to the Internet or transferring data.
4. Start the “beurer SleepQuiet” app and follow the instructions.
5.2 Putting on the snore mask1. To ensure optimum wearing comfort, adjust the hook-and-loop fastener on
the back of the snore mask to your desired size. Ensure that the snore mask is not too tight or too loose.
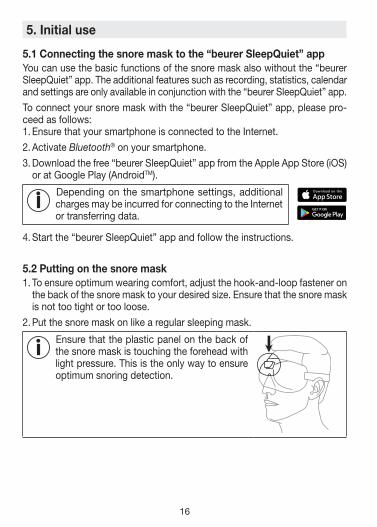
2. Put the snore mask on like a regular sleeping mask.
Ensure that the plastic panel on the back of the snore mask is touching the forehead with light pressure. This is the only way to ensure optimum snoring detection.
17
5.3 Use1. Move the ON/OFF switch to “ON” to switch on the snore mask. The operat-
ing light will now illuminate green for 15 seconds. The snore mask is ready for use. Additionally, the Blue tooth® display will flash blue for a maximum of 15 seconds. The blue flashing indicates that the snore mask is attempting to establish a connection with your smartphone. The Blue tooth® display will continuously illuminate blue while data is being transferred.
If the snore mask does not switch on or the operating light illuminates red, you must charge the batteries of the snore mask. Recharge the battery as described in Chapter “6. Charging the battery”.
2. Put the snore mask on and go to bed. So as not to disturb the sleep of others, the lights on the device switch off automatically after 15 seconds.
3. As soon as you get up, remove the snore mask and switch it off. Move the ON/OFF switch to “OFF” to switch off the snore mask.
6. Charging the battery
To check the current battery capacity, press the Blue tooth® con-nection button. If the operating light is green, the battery has suffi-cient capacity for use for another night (more than 41%). If the operating light is red, you must first charge the battery prior to use. If the snore mask is connected to the “beurer SleepQuiet” app, you will be able to see the current battery capacity (%) in the app. If you are a heavy snorer, we recommend that you charge the battery daily.
To charge the battery, proceed as follows:1. Open the cover of the micro USB connection on the snore mask.2. Connect the charging cable included in delivery to the snore mask and a
computer that is switched on. Alternatively, connect the charging cable to the snore mask and a USB mains adapter (not included in delivery). Insert the USB mains adapter into a suitable socket.
3. Whilst charging, the operating light flashes green. As soon as the battery is fully charged, the operating light will remain green.
4. It usually takes approx. 2 hours to fully charge the battery. As soon as the battery is completely charged, remove the charging cable from the computer or the socket and the USB mains adapter and the snore mask.
18
5. When the battery is fully charged, the battery life is approx. 2 to 3 days. The operating light turns red as soon as the battery capacity is below 41%.
7. Transferring data to your smartphoneTo transfer the recorded data from your snore mask to the “beurer Sleep Quiet” app, proceed as follows:1. Activate Blue tooth® on your smartphone.2. Open the “beurer SleepQuiet” app. 3. Slide the ON/OFF switch on the snore mask to “ON”. The display for Blue
tooth® flashes blue. As soon as the snore mask is connected to your smart-phone, the Blue tooth® display will continuously illuminate blue. The record-ed data is now transferred to the smartphone. For a large volume of data, this may take some time. After data has been transferred, the Blue tooth® display will go out.
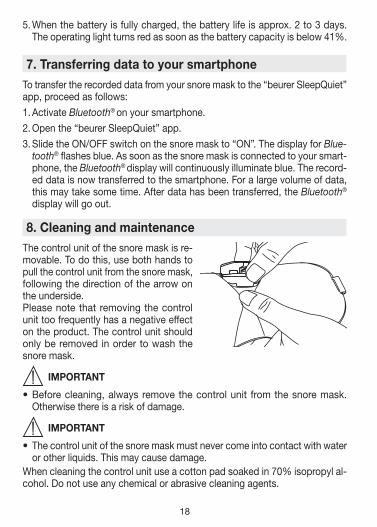
8. Cleaning and maintenanceThe control unit of the snore mask is re-movable. To do this, use both hands to pull the control unit from the snore mask, following the direction of the arrow on the underside.Please note that removing the control unit too frequently has a negative effect on the product. The control unit should only be removed in order to wash the snore mask.
IMPORTANT
•Before cleaning, always remove the control unit from the snore mask. Otherwise there is a risk of damage.
IMPORTANT
•The control unit of the snore mask must never come into contact with water or other liquids. This may cause damage.
When cleaning the control unit use a cotton pad soaked in 70% isopropyl al-cohol. Do not use any chemical or abrasive cleaning agents.
19
IMPORTANT
•Please note that the snore mask must not be chemically cleaned, wrung out, tumble dried, put through a mangle or ironed. Otherwise the snore mask may be damaged.
The snore mask is machine washable. To do this, close the hook-and-loop fastener on the back of the snore mask and place it in a pillow case or wash bag. Set the washing machine to a particularly gentle wash cycle at 30°C (extra-delicate cycle).For ecological reasons, always wash the snore mask together with other tex-tiles. Use a delicate laundry detergent and measure it out according to the manufacturer's instructions.
IMPORTANT
•Please note that washing has a negative effect on the snore mask.The snore mask should therefore be washed in a washing machine a maxi-mum of 10 times during its life. Let the snore mask dry flat on a clothes horse.
IMPORTANT
•Only reattach the control unit to the snore mask when the snore mask is fully dry. Otherwise the control unit may be damaged.
9. Disposal For environmental reasons, do not dispose of the device in the household waste at the end of its useful life. Dispose of the device at a suitable local collection or recycling point in your country. Dispose of the device in accordance with EC Direc-tive – WEEE (Waste Electrical and Electronic Equipment).If you have any questions, please contact the local authorities re-sponsible for waste disposal.
20
10. Technical data
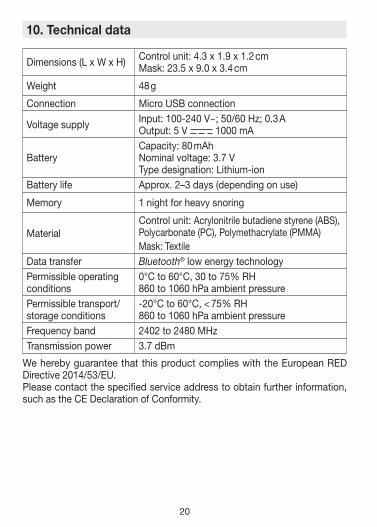
Dimensions (L x W x H) Control unit: 4.3 x 1.9 x 1.2 cmMask: 23.5 x 9.0 x 3.4 cm
Weight 48 g
Connection Micro USB connection
Voltage supply Input: 100-240 V~; 50/60 Hz; 0.3 AOutput: 5 V 1000 mA
BatteryCapacity: 80 mAhNominal voltage: 3.7 VType designation: Lithium-ion
Battery life Approx. 2–3 days (depending on use)
Memory 1 night for heavy snoring
MaterialControl unit: Acrylonitrile butadiene styrene (ABS), Polycarbonate (PC), Polymethacrylate (PMMA)Mask: Textile
Data transfer Blue tooth® low energy technologyPermissible operating conditions
0°C to 60°C, 30 to 75% RH860 to 1060 hPa ambient pressure
Permissible transport/storage conditions
-20°C to 60°C, < 75% RH860 to 1060 hPa ambient pressure
Frequency band 2402 to 2480 MHzTransmission power 3.7 dBm
We hereby guarantee that this product complies with the European RED Directive 2014/53/EU.Please contact the specified service address to obtain further information, such as the CE Declaration of Conformity.
21
Subj
ect t
o er
rors
and
cha
nges
11. Warranty/serviceIn case of a claim under the warranty please contact your local dealer or the local representation which is mentioned in the list “service international”.In case of returning the unit please add a copy of your receipt and a short report of the defect.
The following warranty terms shall apply:1. The warranty period for BEURER products is either 3 years or – if
longer – the country specific warranty period from date of Purchase. In case of a warranty claim, the date of purchase has to be proven by means of the sales receipt or invoice.
2. Repairs (complete unit or parts of the unit) do not extend the warranty period.
3. The warranty shall not be valid for damages because of a. improper treatment, e.g. nonobservance of the user instructions. b. repairs or tampering by the customer or unauthorised third parties. c. transport from the manufacturer to the consumer or during transport
to the service centre. d. The warranty shall not be valid for accessories which are subject to
normal wear and tear (cuff, batteries etc.).4. Liability for direct or indirect consequential losses caused by the unit are
excluded even if the damage to the unit is accepted as a warranty claim.
22
Table des matières1. Familiarisation avec
l’appareil ..................................232. Symboles utilisés ....................243. Remarques ..............................244. Description de l’appareil .......255. Mise en service .......................265.1 Connecter le masque anti-
ronflements à l’application « beurer SleepQuiet » ................ 26
5.2 Placer le masque anti-ronflements ................................ 26
5.3 Utilisation ................................... 27 6. Charger la batterie................27 7. Transfert des données sur
smartphone ...........................28 8. Nettoyage et entretien .........28 9. Élimination ............................3010. Données techniques.............3011. Garantie/Maintenance .........31
FRANÇAIS
Chère cliente, cher client,Nous vous remercions d’avoir choisi l’un de nos produits. Notre société est réputée pour l’excellence de ses produits et les contrôles de qualité auxquels ils sont soumis. Nos produits couvrent les domaines de la chaleur, du poids, de la pression sanguine, de la température corporelle, de la thérapie douce, des massages, de l’amélioration de l’air et de la beauté.Sincères salutations,Votre équipe Beurer
Contenu Vérifiez si l’emballage carton extérieur du kit est intact et si tous les éléments sont inclus. Avant l’utilisation, assurez-vous que l’appareil et les accessoires ne présentent aucun dommage visible et que la totalité de l’emballage a bien été retirée. En cas de doute, ne l’utilisez pas et adressez-vous à votre reven-deur ou au service client indiqué.
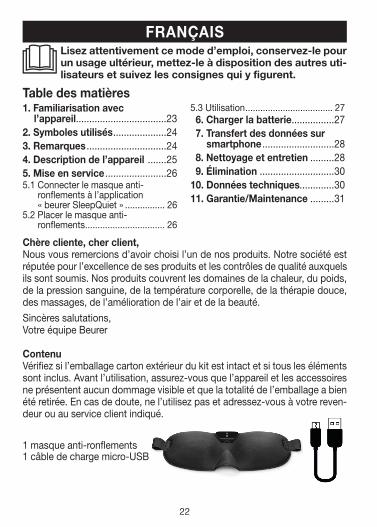
1 masque anti-ronflements1 câble de charge micro-USB
Lisez attentivement ce mode d’emploi, conservez-le pour un usage ultérieur, mettez-le à disposition des autres uti-lisateurs et suivez les consignes qui y figurent.
23
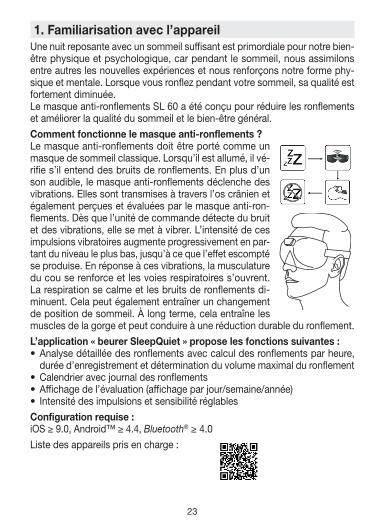
1. Familiarisation avec l’appareilUne nuit reposante avec un sommeil suffisant est primordiale pour notre bien-être physique et psychologique, car pendant le sommeil, nous assimilons entre autres les nouvelles expériences et nous renforçons notre forme phy-sique et mentale. Lorsque vous ronflez pendant votre sommeil, sa qualité est fortement diminuée.Le masque anti-ronflements SL 60 a été conçu pour réduire les ronflements et améliorer la qualité du sommeil et le bien-être général.Comment fonctionne le masque anti-ronflements ?Le masque anti-ronflements doit être porté comme un masque de sommeil classique. Lorsqu’il est allumé, il vé-rifie s’il entend des bruits de ronflements. En plus d’un son audible, le masque anti-ronflements déclenche des vibrations. Elles sont transmises à travers l’os crânien et également perçues et évaluées par le masque anti-ron-flements. Dès que l’unité de commande détecte du bruit et des vibrations, elle se met à vibrer. L’intensité de ces impulsions vibratoires augmente progressivement en par-tant du niveau le plus bas, jusqu’à ce que l’effet escompté se produise. En réponse à ces vibrations, la musculature du cou se renforce et les voies respiratoires s’ouvrent. La respiration se calme et les bruits de ronflements di-minuent. Cela peut également entraîner un changement de position de sommeil. À long terme, cela entraîne les muscles de la gorge et peut conduire à une réduction durable du ronflement.L’application « beurer SleepQuiet » propose les fonctions suivantes :•Analyse détaillée des ronflements avec calcul des ronflements par heure,
durée d’enregistrement et détermination du volume maximal du ronflement•Calendrier avec journal des ronflements•Affichage de l’évaluation (affichage par jour/semaine/année)• Intensité des impulsions et sensibilité réglablesConfiguration requise :iOS ≥ 9.0, Android™ ≥ 4.4, Blue tooth® ≥ 4.0Liste des appareils pris en charge :
24
2. Symboles utilisésVoici les symboles utilisés dans ce mode d’emploi :
AVERTISSEMENT Ce symbole vous avertit des risques de blessures ou des dan-gers pour votre santé
ATTENTION Ce symbole vous avertit des éventuels dommages au niveau de l’appareil ou d’un accessoire
RemarqueIndication d’informations importantesÉlimination conformément à la directive européenne WEEE (Waste Electrical and Electronic Equipment) relative aux déchets d’équipements électriques et électroniques
21
PAPÉliminer l’emballage dans le respect de l’environnement
Fabricant
Ce produit répond aux exigences des directives européennes et nationales en vigueur.
3. Remarques
AVERTISSEMENT
•L’unité de commande amovible du masque anti-ronflements est uniquement protégée contre les éclaboussures.
•Conservez l’unité de commande du masque anti-ronflements éloignée de l’eau !•Protégez le masque anti-ronflements contre les chocs, l’humidité, les saletés,
les fortes variations de température et l’ensoleillement direct.•Éloignez les enfants du masque anti-ronflements et de l’emballage. Ils pour-
raient s’étouffer ! •Conservez l’unité de commande amovible du masque anti-ronflements éloi-
gné des sources de chaleur et ne l’utilisez pas à proximité (~1 m) d’appareils à ondes courtes ou micro-ondes.
•Utilisez et conservez le masque anti-ronflements à une température comprise
25
entre 0°C et 60°C. Des températures plus basses ou plus élevées pourraient endommager le masque anti-ronflements.
•N’utilisez pas de détergent chimique ou abrasif pour nettoyer l’unité de com-mande amovible du masque anti-ronflements. Nettoyez de temps en temps l’unité de commande avec un coton imbibé d’alcool isopropylique à 70 %. Le masque anti-ronflements peut être lavé en machine à 30 °C (cycle extra-délicat).
•Si du liquide de la cellule de batterie entre en contact avec la peau ou les yeux, rincez la zone touchée avec de l’eau et consultez un médecin.
•Protégez les batteries d’une chaleur excessive.•Risque d’explosion ! Ne jetez pas les batteries dans le feu.•Ne démontez, n’ouvrez ou ne cassez pas les batteries.•Avant la première utilisation, chargez complètement la batterie. •Chargez complètement la batterie au moins une fois tous les 3 mois.•Les batteries doivent être chargées correctement avant utilisation. Pour
charger l’appareil, respectez toujours les instructions du fabricant ou les informations contenues dans ce mode d’emploi.
4. Description de l’appareil
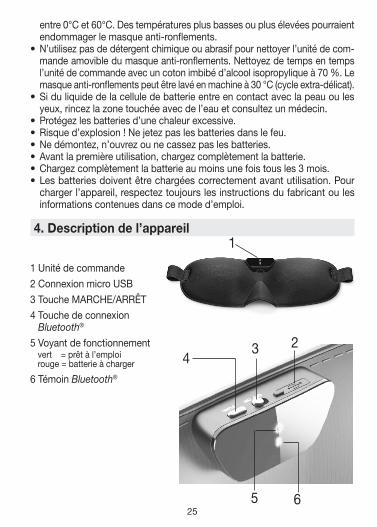
1 Unité de commande2 Connexion micro USB 3 Touche MARCHE/ARRÊT4 Touche de connexion
Blue tooth®
5 Voyant de fonctionnementvert = prêt à l’emploirouge = batterie à charger
6 Témoin Blue tooth®
3 2
65
4
1
26
5. Mise en service
5.1 Connecter le masque anti-ronflements à l’application « beurer SleepQuiet »
Vous pouvez également utiliser les fonctions de base du masque anti-ronfle-ments sans l’application « beurer SleepQuiet ». Les fonctions supplémentaires, comme l’enregistrement, les statistiques, le calendrier et les réglages sont accessibles uniquement depuis l’application « beurer SleepQuiet ».Pour connecter le masque anti-ronflements à l’application « beurer SleepQuiet », procédez comme suit :1. Assurez-vous que votre smartphone est connecté à Internet.2. Activez la fonction Blue tooth® sur votre smartphone.3. Téléchargez l’application gratuite « beurer SleepQuiet » sur l’Apple App Store
(iOS) ou sur Google Play (AndroidTM).
Selon les paramètres du smartphone, la connexion à Internet ou le transfert des données peut entraîner des coûts supplémentaires.
4. Lancez l’application « beurer SleepQuiet » et suivez les instructions.
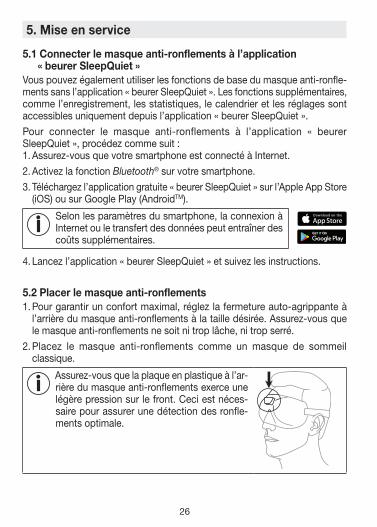
5.2 Placer le masque anti-ronflements1. Pour garantir un confort maximal, réglez la fermeture auto-agrippante à
l’arrière du masque anti-ronflements à la taille désirée. Assurez-vous que le masque anti-ronflements ne soit ni trop lâche, ni trop serré.
2. Placez le masque anti-ronflements comme un masque de sommeil classique.
Assurez-vous que la plaque en plastique à l’ar-rière du masque anti-ronflements exerce une légère pression sur le front. Ceci est néces-saire pour assurer une détection des ronfle-ments optimale.
27
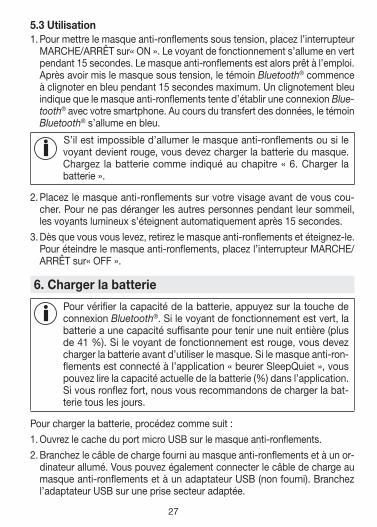
5.3 Utilisation1. Pour mettre le masque anti-ronflements sous tension, placez l’interrupteur
MARCHE/ARRÊT sur « ON ». Le voyant de fonctionnement s’allume en vert pendant 15 secondes. Le masque anti-ronflements est alors prêt à l’emploi. Après avoir mis le masque sous tension, le témoin Blue tooth® commence à clignoter en bleu pendant 15 secondes maximum. Un clignotement bleu indique que le masque anti-ronflements tente d’établir une connexion Bluetooth® avec votre smartphone. Au cours du transfert des données, le témoin Blue tooth® s’allume en bleu.
S’il est impossible d’allumer le masque anti-ronflements ou si le voyant devient rouge, vous devez charger la batterie du masque. Chargez la batterie comme indiqué au chapitre « 6. Charger la batterie ».
2. Placez le masque anti-ronflements sur votre visage avant de vous cou-cher. Pour ne pas déranger les autres personnes pendant leur sommeil, les voyants lumineux s’éteignent automatiquement après 15 secondes.
3. Dès que vous vous levez, retirez le masque anti-ronflements et éteignez-le. Pour éteindre le masque anti-ronflements, placez l’interrupteur MARCHE/ARRÊT sur « OFF ».
6. Charger la batterie
Pour vérifier la capacité de la batterie, appuyez sur la touche de connexion Blue tooth®. Si le voyant de fonctionnement est vert, la batterie a une capacité suffisante pour tenir une nuit entière (plus de 41 %). Si le voyant de fonctionnement est rouge, vous devez charger la batterie avant d’utiliser le masque. Si le masque anti-ron-flements est connecté à l’application « beurer SleepQuiet », vous pouvez lire la capacité actuelle de la batterie (%) dans l’application. Si vous ronflez fort, nous vous recommandons de charger la bat-terie tous les jours.
Pour charger la batterie, procédez comme suit :1. Ouvrez le cache du port micro USB sur le masque anti-ronflements.2. Branchez le câble de charge fourni au masque anti-ronflements et à un or-
dinateur allumé. Vous pouvez également connecter le câble de charge au masque anti-ronflements et à un adaptateur USB (non fourni). Branchez l’adaptateur USB sur une prise secteur adaptée.

28
3. Le voyant de fonctionnement clignote en vert pendant la charge. Quand la batterie est complètement chargée, le voyant de fonctionnement s’allume durablement en vert.
4. Normalement, un chargement complet de la batterie dure environ 2 heures. Dès que la batterie est pleine, débranchez le câble de l’ordinateur ou de la prise et l’adaptateur USB du masque anti-ronflements.
5. Une batterie complètement chargée a une autonomie d’environ 2 à 3 jours. Le voyant de fonctionnement s’allume en rouge dès que l’autonomie de la batterie passe sous 41 %.
7. Transfert des données sur smartphonePour transférer les données enregistrées sur le masque anti-ronflements vers l’application « beurer SleepQuiet », suivez les étapes suivantes :1. Activez la fonction Blue tooth® sur votre smartphone.2. Lancez l’application « beurer SleepQuiet ». 3. Placez l’interrupteur MARCHE/ARRÊT du masque anti-ronflements sur
« ON ». Le témoin Blue tooth® clignote en bleu. Dès que le masque an-ti-ronflements est connecté au smartphone, le témoin Blue tooth® s’allume en bleu. Les données enregistrées sont alors transférées sur le smartphone. En présence d’une grande quantité de données, cela peut prendre un cer-tain temps. À la fin du transfert des données, le témoin Blue tooth® s’éteint.
8. Nettoyage et entretienL’unité de commande du masque an-ti-ronflements est amovible. Il suffit de tirer l’unité de commande dans le sens de la flèche sous l’appareil et de retirer le masque anti-ronflements à l’aide des deux mains.Veuillez noter qu’il n’est pas recomman-dé de détacher trop fréquemment l’unité de commande. Elle ne doit être détachée que pour laver le masque anti-ronflements.
29
ATTENTION
•Avant le nettoyage, détachez toujours l’unité de commande du masque an-ti-ronflements. Sinon, vous risquez d’endommager l’appareil.
ATTENTION
•L’unité de commande du masque anti-ronflements ne doit jamais entrer en contact avec de l’eau ou d’autres liquides. Elle pourrait être endommagée.
Pour nettoyer l’unité de commande, utilisez un coton imbibé d’alcool isopro-pylique à 70 %. N’utilisez pas de produit abrasif ou autre détergent.
ATTENTION
•Le masque anti-ronflements ne doit pas être nettoyé avec des produits chimiques, essoré, séché en machine, cylindré ou repassé. Sinon, le masque pourrait être endommagé.
Le masque anti-ronflements est lavable en machine. Pour ce faire, fermez la fermeture auto-agrippante du masque anti-ronflements et placez-le dans une taie d’oreiller ou dans un sac de lavage. Réglez la machine sur un cycle très doux à 30 °C (cycle extra-délicat).Pour des raisons environnementales, lavez le masque anti-ronflements avec d’autres textiles. Utilisez une lessive pour linge délicat et dosez-la selon les instructions du fabricant.
ATTENTION
•Veuillez noter qu’une exposition trop fréquente du masque anti-ronflements à l’eau n’est pas recommandée.
Par conséquent, vous ne devez laver le masque à la machine qu’au maximum 10 fois pendant sa durée de vie. Laissez sécher le masque anti-ronflements à plat sur un étendoir.
ATTENTION
•Ne rattachez le masque anti-ronflements à l’unité de commande qu’une fois que le masque est complètement sec. Sinon, l’unité de commande pourrait être endommagée.
30
9. Élimination Dans l’intérêt de la protection de l’environnement, l’appareil ne doit pas être jeté avec les ordures ménagères à la fin de sa durée de service. L’élimination doit se faire par le biais des points de collecte compé-tents dans votre pays. Éliminez l’appareil conformément à la direc-tive européenne – WEEE (Waste Electrical and Electronic Equipment) relative aux appareils électriques et électroniques usagés.Pour toute question, adressez-vous aux collectivités locales respon-sables de l’élimination et du recyclage de ces produits.
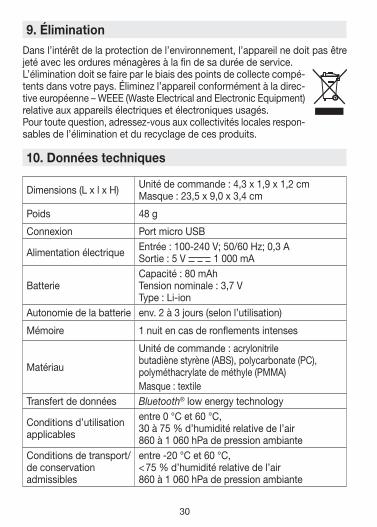
10. Données techniques
Dimensions (L x l x H) Unité de commande : 4,3 x 1,9 x 1,2 cmMasque : 23,5 x 9,0 x 3,4 cm
Poids 48 g
Connexion Port micro USB
Alimentation électrique Entrée : 100-240 V; 50/60 Hz; 0,3 ASortie : 5 V 1 000 mA
BatterieCapacité : 80 mAhTension nominale : 3,7 VType : Li-ion
Autonomie de la batterie env. 2 à 3 jours (selon l’utilisation)
Mémoire 1 nuit en cas de ronflements intenses
Matériau
Unité de commande : acrylonitrile butadiène styrène (ABS), polycarbonate (PC), polyméthacrylate de méthyle (PMMA)Masque : textile
Transfert de données Blue tooth® low energy technology
Conditions d’utilisation applicables
entre 0 °C et 60 °C, 30 à 75 % d’humidité relative de l’air860 à 1 060 hPa de pression ambiante
Conditions de transport/de conservation admissibles
entre -20 °C et 60 °C, < 75 % d’humidité relative de l’air860 à 1 060 hPa de pression ambiante
31
Sous
rése
rve
d’er
reur
s et
de
mod
ifica
tions
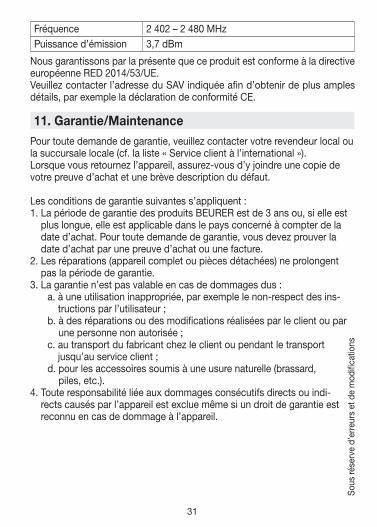
Fréquence 2 402 – 2 480 MHzPuissance d’émission 3,7 dBm
Nous garantissons par la présente que ce produit est conforme à la directive européenne RED 2014/53/UE.Veuillez contacter l’adresse du SAV indiquée afin d’obtenir de plus amples détails, par exemple la déclaration de conformité CE.
11. Garantie/MaintenancePour toute demande de garantie, veuillez contacter votre revendeur local ou la succursale locale (cf. la liste « Service client à l’international »).Lorsque vous retournez l’appareil, assurez-vous d’y joindre une copie de votre preuve d’achat et une brève description du défaut.
Les conditions de garantie suivantes s’appliquent :1. La période de garantie des produits BEURER est de 3 ans ou, si elle est
plus longue, elle est applicable dans le pays concerné à compter de la date d’achat. Pour toute demande de garantie, vous devez prouver la date d’achat par une preuve d’achat ou une facture.
2. Les réparations (appareil complet ou pièces détachées) ne prolongent pas la période de garantie.
3. La garantie n’est pas valable en cas de dommages dus : a. à une utilisation inappropriée, par exemple le non-respect des ins-
tructions par l’utilisateur ; b. à des réparations ou des modifications réalisées par le client ou par
une personne non autorisée ; c. au transport du fabricant chez le client ou pendant le transport
jusqu’au service client ; d. pour les accessoires soumis à une usure naturelle (brassard,
piles, etc.).4. Toute responsabilité liée aux dommages consécutifs directs ou indi-
rects causés par l’appareil est exclue même si un droit de garantie est reconnu en cas de dommage à l’appareil.
32
Índice1. Información general ...............332. Símbolos ..................................343. Indicaciones ............................344. Descripción del aparato ........355. Puesta en funcionamiento .....365.1 Conexión de la máscara
antirronquidos con la aplicación “beurer SleepQuiet” .................. 36
5.2 Colocación de la máscara antirronquidos ........................... 36
5.3 Aplicación .................................. 37 6. Carga de la batería ...............37 7. Transferencia de datos al
smartphone ...........................38 8. Limpieza y cuidado ...............38 9. Eliminación ...........................4010. Datos técnicos ......................4011. Garantía/Asistencia ..............41
ESPAÑOL
Estimada clienta, estimado cliente:Nos alegramos de que haya elegido un producto de nuestra colección. Nues-tro nombre es sinónimo de productos de alta y comprobada calidad en los sectores de energía térmica, peso, tensión sanguínea, temperatura corporal, pulso, tratamiento suave, masaje, aire y belleza.Atentamente,El equipo de Beurer
Artículos suministrados Compruebe que el envoltorio de los artículos suministrados esté intacto y que su contenido esté completo. Antes de utilizar el aparato deberá asegurarse de que ni este ni los accesorios presenten daños visibles y de que se retire el ma-terial de embalaje correspondiente. En caso de duda no lo use y póngase en contacto con su distribuidor o con la dirección de atención al cliente indicada.
1 máscara antirronquidos1 cable de carga micro USB
Lea atentamente estas instrucciones de uso, consérvelas para su futura utilización, póngalas a disposición de otros usuarios y respete las indicaciones.

33
1. Información generalDormir bien y lo suficiente por la noche es muy importante para nuestro bienestar físico y psíquico, ya que durante el sueño nuestro cerebro procesa, entre otras cosas, lo que hemos aprendido durante el día y se refuerza nues-tro bienestar, tanto mental como corporal. Pero si ronca mientras duerme, la calidad de su sueño se verá muy afectada.La máscara antirronquidos SL 60 de beurer ha sido concebida especialmen-te para reducir los ronquidos y aumentar la calidad del sueño y el bienestar.¿Cómo funciona la máscara antirronquidos?La máscara antirronquidos se coloca como un antifaz normal para dormir. Durante su uso, comprueba acústica-mente si se producen ronquidos. Aparte del ruido audible, los ronquidos producen oscilaciones que se transmiten a través del hueso craneal y que son registradas y analiza-das por la máscara antirronquidos. En cuanto se detectan el ruido y las oscilaciones, la unidad de control empieza a vibrar. La intensidad del impulso vibratorio aumenta desde un nivel bajo hasta que se consigue el efecto deseado. Como reacción a la vibración, la musculatura del cuello se refuerza y las vías respiratorias se abren. La respiración se calma y los ronquidos disminuyen. Además, se puede producir un cambio de la postura al dormir. Otro efecto es el entrenamiento de los músculos de la garganta, que a largo plazo puede producir una reducción continuada de los ronquidos.La aplicación “beurer SleepQuiet” ofrece las siguientes funciones:•Análisis detallado de los ronquidos, incluidos ronquidos por hora, duración
del registro y determinación del volumen máximo de los ronquidos•Calendario con diario de ronquidos•Vista de evaluación (visualización por días/semanas/meses)• Intensidad de los impulsos y sensibilidad ajustablesRequisitos del sistema:iOS ≥9.0, Android™ ≥4.4, Blue tooth® ≥4.0Lista de los aparatos compatibles:
34
2. SímbolosEn estas instrucciones de uso se utilizan los siguientes símbolos:
ADVERTENCIA Indicación de advertencia sobre peligro de lesiones u otros pe-ligros para la salud
ATENCIÓN Indicación de seguridad sobre posibles daños en el aparato o los accesorios
NotaIndicación de información importante
Eliminación según la Directiva europea sobre residuos de apa-ratos eléctricos y electrónicos (RAEE)
21
PAPEliminar el embalaje respetando el medioambiente
Fabricante
Este producto cumple los requisitos de las directrices europeas y nacionales vigentes.
3. Indicaciones
ADVERTENCIA
•La unidad de control extraíble de la máscara antirronquidos solo está prote-gida contra salpicaduras de agua.
•Mantenga la unidad de control extraíble de la máscara antirronquidos ale-jada del agua.
•Proteja la máscara antirronquidos de impactos, humedad, suciedad, grandes oscilaciones térmicas y exposición directa a la luz solar.
•Mantenga a los niños alejados de la máscara antirronquidos y del material de embalaje. Existe peligro de asfixia.
•Mantenga la unidad de control extraíble de la máscara antirronquidos aleja-da de fuentes de calor y no la utilice cerca (~1 m) de aparatos de onda corta o microonda.
35
•Utilice y conserve la máscara antirronquidos a una temperatura ambiente de entre 0 °C y 60 °C. Temperaturas superiores o inferiores pueden dañarla.
•No utilice limpiadores químicos ni abrasivos para la limpieza de la unidad de control extraíble de la máscara antirronquidos. Limpie de vez en cuando la unidad de control extraíble con una almohadilla con alcohol isopropílico del 70 %. La máscara antirronquidos se puede lavar a máquina a 30 °C (en un programa para ropa muy delicada).
•En caso de que el líquido de una batería entre en contacto con la piel o los ojos, lave la zona afectada con agua y busque asistencia médica.
•Proteja las baterías de un calor excesivo.• ¡Peligro de explosión! No arroje las baterías al fuego.•No despiece, abra ni triture las baterías.•Cargue la batería completamente antes de la primera puesta en funcionamiento. •Cargue completamente la batería como mínimo una vez cada 3 meses.•Las baterías deben estar correctamente cargadas antes de su uso. Para una
carga correcta, deben cumplirse en todo momento las indicaciones del fa-bricante o las de estas instrucciones de uso.
4. Descripción del aparato
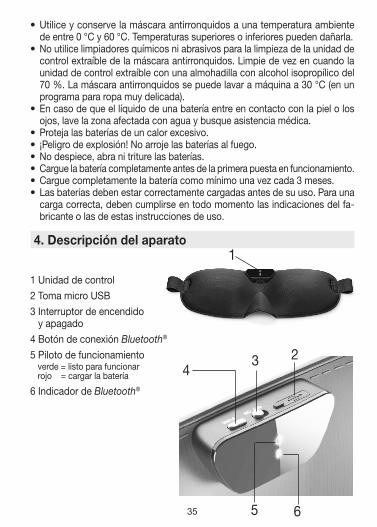
1 Unidad de control2 Toma micro USB 3 Interruptor de encendido
y apagado4 Botón de conexión Blue tooth®
5 Piloto de funcionamientoverde = listo para funcionarrojo = cargar la batería
6 Indicador de Blue tooth®
3 2
65
4
1
36
5. Puesta en funcionamiento
5.1 Conexión de la máscara antirronquidos con la aplicación “beurer SleepQuiet”
También es posible utilizar las funciones básicas de la máscara antirronquidos sin la aplicación “beurer SleepQuiet”. Las funciones adicionales como registro, estadísticas, calendario y ajustes solo están disponibles en combinación con la aplicación “beurer SleepQuiet”.Para conectar la máscara antirronquidos con la aplicación “beurer SleepQuiet”, proceda del siguiente modo:1. Asegúrese de que su smartphone esté conectado a Internet.2. Active Blue tooth® en su smartphone.3. Descárguese la aplicación gratuita “beurer SleepQuiet” en la Apple App
Store (iOS) o en Google Play (AndroidTM).
Dependiendo del tipo de contrato que tenga su smart-phone, conectarse a Internet o enviar datos puede im-plicar costes adicionales.
4. Inicie la aplicación “beurer SleepQuiet” y siga las instrucciones.
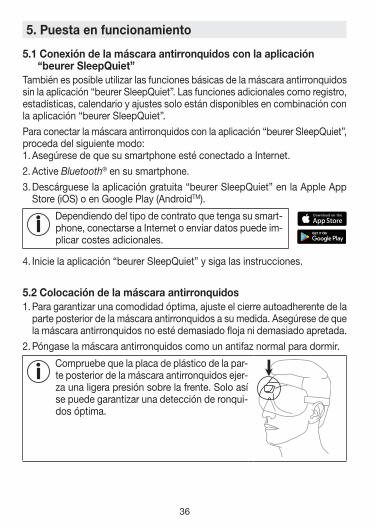
5.2 Colocación de la máscara antirronquidos1. Para garantizar una comodidad óptima, ajuste el cierre autoadherente de la
parte posterior de la máscara antirronquidos a su medida. Asegúrese de que la máscara antirronquidos no esté demasiado floja ni demasiado apretada.
2. Póngase la máscara antirronquidos como un antifaz normal para dormir.
Compruebe que la placa de plástico de la par-te posterior de la máscara antirronquidos ejer-za una ligera presión sobre la frente. Solo así se puede garantizar una detección de ronqui-dos óptima.

37
5.3 Aplicación1. Para encender la máscara antirronquidos, desplace el interruptor de encen-
dido y apagado a la posición “ON”. El piloto de funcionamiento se iluminará en verde durante 15 segundos. La máscara antirronquidos está lista para funcionar. Además, directamente después de encender el aparato empezará a parpadear en azul el indicador de Blue tooth® durante 15 segundos como máximo. Si la luz parpadea en azul, significa que la máscara antirronquidos está intentando establecer una conexión con su smartphone. Cuando se es-tén transmitiendo datos, el indicador de Blue tooth® emitirá una luz azul fija.
Si la máscara antirronquidos no se enciende o el piloto de funciona-miento se ilumina en rojo, debe cargar la batería de la máscara an-tirronquidos. Cargue la batería como se describe en el capítulo “6. Carga de la batería”.
2. Colóquese la máscara antirronquidos y póngase a dormir. Las luces se apagan automáticamente transcurridos 15 segundos para no molestar a otras personas mientras duermen.
3. Cuando se despierte, quítese la máscara antirronquidos y apáguela. Para apagar la máscara antirronquidos, desplace el interruptor de encendido y apagado a la posición “OFF”.
6. Carga de la batería
Para comprobar la capacidad actual de la batería, pulse el botón de conexión Blue tooth®. Si el piloto de funcionamiento se ilumina en verde, la batería dispone de la capacidad suficiente para ser utilizada una noche más (más del 41 %). En cambio, si el piloto de funcionamiento se ilumina en rojo, significa que debe cargar la ba-tería antes de usar el dispositivo. Si la máscara antirronquidos está conectada a la aplicación “beurer SleepQuiet”, puede consultar la capacidad actual de la batería (%) en la aplicación. Si sus ronquidos son intensos, le recomendamos cargar la batería a diario.
Para hacerlo, proceda del siguiente modo:1. Abra la tapa de la toma micro USB de la máscara antirronquidos.2. Conecte el cable de carga suministrado a la máscara antirronquidos y a un
ordenador encendido. Si lo prefiere, puede conectar el cable de cable a la máscara antirronquidos y a un adaptador de red USB (no suministrado con el aparato). Enchufe el adaptador de red USB a una toma de corriente apta.
38
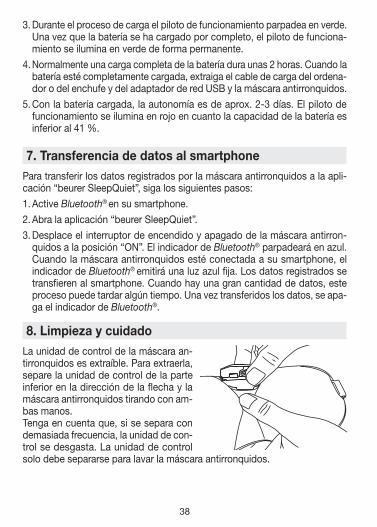
3. Durante el proceso de carga el piloto de funcionamiento parpadea en verde. Una vez que la batería se ha cargado por completo, el piloto de funciona-miento se ilumina en verde de forma permanente.
4. Normalmente una carga completa de la batería dura unas 2 horas. Cuando la batería esté completamente cargada, extraiga el cable de carga del ordena-dor o del enchufe y del adaptador de red USB y la máscara antirronquidos.
5. Con la batería cargada, la autonomía es de aprox. 2-3 días. El piloto de funcionamiento se ilumina en rojo en cuanto la capacidad de la batería es inferior al 41 %.
7. Transferencia de datos al smartphonePara transferir los datos registrados por la máscara antirronquidos a la apli-cación “beurer SleepQuiet”, siga los siguientes pasos:1. Active Blue tooth® en su smartphone.2. Abra la aplicación “beurer SleepQuiet”. 3. Desplace el interruptor de encendido y apagado de la máscara antirron-
quidos a la posición “ON”. El indicador de Blue tooth® parpadeará en azul. Cuando la máscara antirronquidos esté conectada a su smartphone, el indicador de Blue tooth® emitirá una luz azul fija. Los datos registrados se transfieren al smartphone. Cuando hay una gran cantidad de datos, este proceso puede tardar algún tiempo. Una vez transferidos los datos, se apa-ga el indicador de Blue tooth®.
8. Limpieza y cuidadoLa unidad de control de la máscara an-tirronquidos es extraíble. Para extraerla, separe la unidad de control de la parte inferior en la dirección de la flecha y la máscara antirronquidos tirando con am-bas manos.Tenga en cuenta que, si se separa con demasiada frecuencia, la unidad de con-trol se desgasta. La unidad de control solo debe separarse para lavar la máscara antirronquidos.
39
ATENCIÓN
•Separe siempre la unidad de control de la máscara antirronquidos antes de limpiarla. De lo contrario, podrían producirse daños.
ATENCIÓN
•La unidad de control de la máscara antirronquidos no debe entrar nunca en contacto con agua o con otros líquidos, ya que podría dañarse.
Para limpiar la unidad de control, utilice un disco de algodón empapado en alcohol isopropílico del 70 %. No emplee ningún producto de limpieza quí-mico ni abrasivo.
ATENCIÓN
•Tenga en cuenta que la máscara antirronquidos no se debe limpiar en seco, retorcer, secar en secadora, calandrar o planchar. De lo contrario, podría resultar dañada.
La máscara antirronquidos puede lavarse a máquina. Para ello, cierre el cierre autoadherente de la parte posterior de la máscara antirronquidos y métala en una funda o bolsa de lavado. Ponga la lavadora en un programa de lavado muy suave a 30 °C (programa para ropa muy delicada).Lave la máscara antirronquidos junto con otras prendas, por razones ecoló-gicas. Utilice un detergente suave y dosifíquelo siguiendo las indicaciones del fabricante.
ATENCIÓN
•Tenga en cuenta que lavar la máscara antirronquidos la desgasta.Por eso, a lo largo de su vida útil, se debería lavar a máquina un máximo de 10 veces. Déjela secar bien extendida en el tendedero.
ATENCIÓN
•No vuelva a conectar la máscara antirronquidos a la unidad de control hasta que la máscara esté completamente seca. De lo contrario, podría resultar dañada.
40
9. Eliminación A fin de preservar el medioambiente, cuando el aparato llegue al final de su vida útil no lo deseche con la basura doméstica. Se puede desechar en los puntos de recogida adecuados dispo-nibles en su zona. Deseche el aparato según la Directiva europea sobre residuos de aparatos eléctricos y electrónicos (RAEE).Para más información, póngase en contacto con la autoridad muni-cipal competente en materia de eliminación de residuos.
10. Datos técnicos
Medidas (largo × ancho × alto)
Unidad de control: 4,3 × 1,9 × 1,2 cmMáscara: 23,5 × 9,0 × 3,4 cm
Peso 48 g
Toma Toma micro USB
Alimentación de tensión Entrada: 100-240 V~; 50/60 Hz; 0,3 ASalida: 5 V 1000 mA
BateríaCapacidad: 80 mAhTensión nominal: 3,7 VDenominación de tipo: Iones de litio
Autonomía de la batería aprox. 2-3 días (dependiendo de lo que se use)
Memoria 1 noche con ronquidos intensos
Material
Unidad de control: acrilonitrilo-butadieno-estire-no (ABS), policarbonato (PC), polimetilmetacrilato (PMMA)Máscara: tejido
Transmisión de datos Blue tooth® low energy technologyCondiciones de servicio admisibles
De 0 °C a 60 °C, de 30 a 75 % HRDe 860 a 1060 hPa de presión ambiente
Condiciones admisibles de transporte/almacenamiento
De –20 °C a 60 °C, <75 % HRDe 860 a 1060 hPa de presión ambiente
Banda de frecuencias 2402-2480 MHzPotencia de emisión 3,7 dBm
41
Salv
o er
rore
s y
mod
ifica
cion
es
Garantizamos que este producto cumple la Directiva europea RED 2014/53/UE.Póngase en contacto con el servicio técnico pertinente para obtener más in-formación al respecto, como por ejemplo la declaración de conformidad CE.
11. Garantía/AsistenciaEn caso de reclamaciones en el marco de la garantía diríjase a su distribui-dor local o a la delegación local (ver lista “Service international”).Cuando nos envíe el aparato, adjunte una copia del recibo de compra y una breve descripción del problema.
Se aplican las siguientes condiciones de garantía:1. El periodo de garantía para productos de BEURER es de 3 años o, si es
superior, se aplica el periodo de garantía vigente en el país correspon-diente a partir de la fecha de compra. En caso de una reclamación de la garantía, la fecha de compra deberá demostrarse con el recibo de compra o una factura.
2. Las reparaciones (todo el aparato o solo algunas piezas) no hacen que se prolongue el periodo de garantía.
3. La garantía no tiene validez para daños debidos a a. Uso indebido, p. ej. si no se siguen las instrucciones de uso. b. Reparaciones o cambios realizados por el cliente o por una persona
no autorizada. c. Transporte del fabricante al cliente o durante el transporte al centro
de servicio. d. La garantía no tiene validez para accesorios sometidos al desgaste
habitual (brazalete, pilas, etc.).4. La responsabilidad por daños derivados directos o indirectos provoca-
dos por el aparato también queda excluida incluso si se reconoce una reclamación de la garantía en caso de daño del aparato.
42
Sommario1. Introduzione ............................432. Spiegazione dei simboli .........443. Note .........................................444. Descrizione
dell'apparecchio ....................455. Messa in funzione ...................465.1 Collegamento della maschera
antirussamento con l'app "beurer SleepQuiet" .................. 46
5.2 Applicazione della maschera antirussamento .......................... 46
5.3 Impiego ...................................... 47 6. Caricamento della batteria ..47 7. Trasmissione dei dati allo
smartphone ...........................48 8. Pulizia e cura .........................48 9. Smaltimento .........................5010. Dati tecnici ............................5011. Garanzia/Assistenza ............51
ITALIANO
Gentile cliente,siamo lieti che Lei abbia scelto un prodotto del nostro assortimento. Il nostro marchio è garanzia di prodotti di elevata qualità, controllati nei dettagli, relativi ai settori calore, peso, pressione, temperatura corporea, pulsazioni, terapia dolce, massaggio, aria e bellezza.Cordiali salutiTeam Beurer
Fornitura Controllare l'integrità esterna della confezione e del contenuto. Prima dell'uso assicurarsi che l'apparecchio e gli accessori non presentino nessun danno palese e che il materiale di imballaggio sia stato rimosso. In caso di dubbio non utilizzare l'apparecchio e consultare il proprio rivenditore o contattare il Servizio clienti indicato.
1 maschera antirussamento1 cavo di carica micro USB
Leggere attentamente le presenti istruzioni per l'uso, con-servarle per impieghi futuri, renderle accessibili ad altri utenti e attenersi alle indicazioni.
43
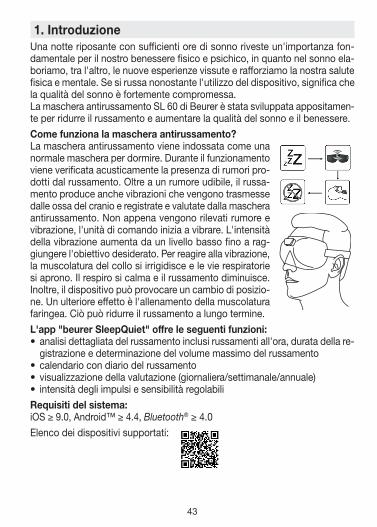
1. IntroduzioneUna notte riposante con sufficienti ore di sonno riveste un'importanza fon-damentale per il nostro benessere fisico e psichico, in quanto nel sonno ela-boriamo, tra l'altro, le nuove esperienze vissute e rafforziamo la nostra salute fisica e mentale. Se si russa nonostante l'utilizzo del dispositivo, significa che la qualità del sonno è fortemente compromessa.La maschera antirussamento SL 60 di Beurer è stata sviluppata appositamen-te per ridurre il russamento e aumentare la qualità del sonno e il benessere.Come funziona la maschera antirussamento?La maschera antirussamento viene indossata come una normale maschera per dormire. Durante il funzionamento viene verificata acusticamente la presenza di rumori pro-dotti dal russamento. Oltre a un rumore udibile, il russa-mento produce anche vibrazioni che vengono trasmesse dalle ossa del cranio e registrate e valutate dalla maschera antirussamento. Non appena vengono rilevati rumore e vibrazione, l'unità di comando inizia a vibrare. L'intensità della vibrazione aumenta da un livello basso fino a rag-giungere l'obiettivo desiderato. Per reagire alla vibrazione, la muscolatura del collo si irrigidisce e le vie respiratorie si aprono. Il respiro si calma e il russamento diminuisce. Inoltre, il dispositivo può provocare un cambio di posizio-ne. Un ulteriore effetto è l'allenamento della muscolatura faringea. Ciò può ridurre il russamento a lungo termine.L'app "beurer SleepQuiet" offre le seguenti funzioni:•analisi dettagliata del russamento inclusi russamenti all'ora, durata della re-
gistrazione e determinazione del volume massimo del russamento•calendario con diario del russamento•visualizzazione della valutazione (giornaliera/settimanale/annuale)• intensità degli impulsi e sensibilità regolabiliRequisiti del sistema:iOS ≥ 9.0, Android™ ≥ 4.4, Blue tooth® ≥ 4.0Elenco dei dispositivi supportati:
44
2. Spiegazione dei simboliNelle presenti istruzioni per l'uso vengono utilizzati i seguenti simboli:
AVVERTENZA Segnalazione di rischio di lesioni o pericoli per la salute
ATTENZIONE Segnalazione di rischi di possibili danni all'apparecchio
NotaIndicazione di importanti informazioni
Smaltimento secondo le norme previste dalla Direttiva CE sui rifiuti di apparecchiature elettriche ed elettroniche (RAEE)
21
PAPSmaltire la confezione nel rispetto dell'ambiente.
Produttore
Il presente prodotto soddisfa i requisiti delle direttive europee e nazionali vigenti.
3. Note
AVVERTENZA
•L'unità di comando rimovibile della maschera antirussamento è solo protetta contro gli spruzzi d'acqua.
•Tenere l'unità di comando rimovibile della maschera antirussamento lontano dall'acqua!
•Proteggere la maschera antirussamento da urti, umidità, sporcizia, forti sbalzi di temperatura e irraggiamento solare diretto.
•Tenere lontani i bambini dalla maschera antirussamento e dal materiale d'im-ballaggio. Pericolo di soffocamento!
•Tenere l'unità di comando rimovibile della maschera antirussamento lonta-no da fonti di calore e non utilizzarla nelle vicinanze (~1 m) di apparecchi a onde corte o a microonde.
•Utilizzare e stoccare la maschera antirussamento a una temperatura am-biente compresa fra 0 °C e 60 °C. Temperature superiori o inferiori possono danneggiare la maschera antirussamento.
45
•Per la pulizia dell'unità di comando rimovibile della maschera antirussamento non utilizzare detergenti chimici né prodotti abrasivi. Pulire di tanto in tanto la maschera antirussamento con un tampone imbevuto di alcool isopropilico al 70%. La maschera antirussamente in sé può essere lavata in lavatrice a 30 °C (ciclo per capi molto delicati).
•Se il liquido della batteria ricaricabile viene a contatto con la pelle o con gli occhi, sciacquare le parti interessate con acqua e consultare il medico.
•Proteggere le batterie ricaricabili dal caldo eccessivo.•Rischio di esplosione! Non gettare le batterie ricaricabili nel fuoco.•Non scomporre, aprire o frantumare le batterie ricaricabili.•Prima del primo utilizzo, caricare completamente la batteria ricaricabile. •Caricare completamente la batteria ricaricabile almeno ogni 3 mesi.•Le batterie ricaricabili devono essere caricate correttamente prima dell'uso.
Rispettare le avvertenze del produttore e le indicazioni fornite nelle presenti istruzioni per l'uso per caricare correttamente le batterie.
4. Descrizione dell'apparecchio
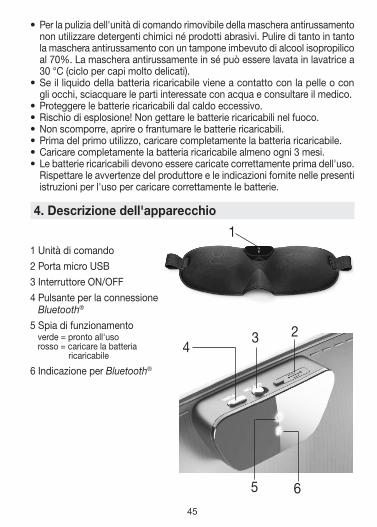
1 Unità di comando2 Porta micro USB 3 Interruttore ON/OFF4 Pulsante per la connessione
Blue tooth®
5 Spia di funzionamentoverde = pronto all'usorosso = caricare la batteria ricaricabile
6 Indicazione per Blue tooth®
3 2
65
4
1
46
5. Messa in funzione
5.1 Collegamento della maschera antirussamento con l'app "beurer SleepQuiet"
Le funzioni di base della maschera antirussamento possono essere utilizzate anche senza l'app "beurer SleepQuiet". Le funzione aggiuntive, come rileva-zione, statistica, calendario e impostazioni, sono disponibili solo in collega-mento con l'app "beurer SleepQuiet".Per collegare la maschera antirussamento con l'app "beurer SleepQuiet", procedere come segue:1. Accertarsi che lo smartphone sia connesso a Internet.2. Attivare il Blue tooth® sul proprio smartphone.3. Scaricare l'app gratuita "beurer SleepQuiet" dall'Apple App Store (iOS) op-
pure da Google Play (AndroidTM).
A seconda delle impostazioni dello smartphone, po-trebbero esserci costi aggiuntivi per la connessione Internet o la trasmissione dati.
4. Avviare l'app "beurer SleepQuiet" e seguire le istruzioni.
5.2 Applicazione della maschera antirussamento1. Per garantire il massimo comfort, regolare la chiusura a strappo sul retro
della maschera antirussamento fino a raggiungere la dimensione desidera-ta. Prestare attenzione che la maschera antirussamento non sia né troppo stretta né troppo lenta.
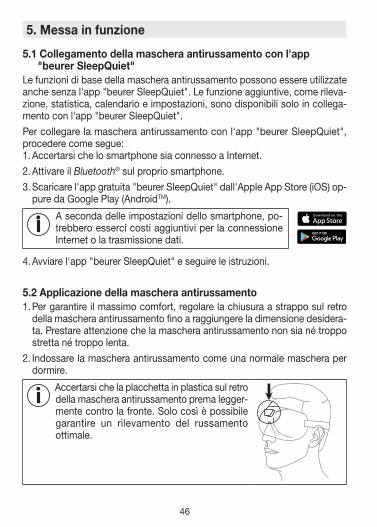
2. Indossare la maschera antirussamento come una normale maschera per dormire.
Accertarsi che la placchetta in plastica sul retro della maschera antirussamento prema legger-mente contro la fronte. Solo così è possibile garantire un rilevamento del russamento ottimale.
47
5.3 Impiego1. Per accendere la maschera antirussamento, spingere l'interruttore ON/OFF
nella posizione "ON". A questo punto la spia di funzionamento si accende in verde per 15 secondi. La maschera antirussamento è pronta per l'uso. Inoltre, subito dopo l'accensione, l'indicazione per il Blue tooth® inizia a lam-peggiare in blu per massimo 15 secondi. Il lampeggiamento blu significa che la maschera antirussamento sta cercando di connettersi allo smartphone. Durante la trasmissione dei dati, l'indicazione per il Blue tooth® rimane per-manentemente accesa in blu.
Se non si riesce ad accendere la maschera antirussamento o la spia di funzionamento si accende in rosso, è necessario caricare la bat-teria ricaricabile della maschera antirussamento. Caricare la batteria ricaricabile come descritto al capitolo "6. Caricamento della batteria".
2. Indossare la maschera antirussamento e andare a dormire. Per non distur-bare le altre persone che dormono, le spie si spengono automaticamente dopo 15 secondi.
3. Togliere la maschera antirussamento appena svegli e spegnerla. Per spe-gnere la maschera antirussamento, spingere l'interruttore ON/OFF nella posizione "OFF".
6. Caricamento della batteria
Per verificare l'attuale capacità della batteria, premere il pulsante per la connessione Blue tooth®. Se la spia di funzionamento si ac-cende in verde, la batteria ricaricabile è sufficientemente carica per garantire il funzionamento per un'altra notte (capacità superiore al 41%). Se la spia di funzionamento si accende in rosso, è necessario ricaricare la batteria ricaricabile prima di utilizzare la maschera an-tirussamento. Se la maschera antirussamento è collegata all'app "beurer SleepQuiet", la capacità attuale (%) può essere verificata nella app. Se si è forti russatori, si consiglia di ricaricare la batteria ricaricabile ogni giorno.
Per caricare la batteria ricaricabile, procedere nel modo seguente:1. Sulla maschera antirussamento aprire la copertura della porta micro USB.2. Collegare il cavo di carica in dotazione alla maschera antirussamento e a
un computer acceso. In alternativa collegare il cavo di carica alla maschera

48
antirussamento e a un adattatore di rete USB (non compreso nella forni-tura). Inserire l'adattatore di rete USB in una presa di corrente adeguata.
3. Durante l'operazione di carica la spia di funzionamento lampeggia in ver-de. Al termine del caricamento della batteria, la spia di funzionamento di-venta verde.
4. Generalmente una carica completa della batteria ricaricabile richiede circa 2 ore. Quando la batteria ricaricabile è completamente carica, staccare il cavo di carica dal computer e/o dalla presa, dall'adattatore di rete USB e dalla maschera antirussamento.
5. Quando è completamente carica, la batteria ricaricabile dura circa 2-3 giorni. La spia di funzionamento diventa rossa non appena la capacità della batteria ricaricabile scende al di sotto del 41%.
7. Trasmissione dei dati allo smartphonePer trasmettere i dati registrati dalla maschera antirussamento alla app "beurer SleepQuiet", procedere come segue:1. Attivare il Blue tooth® sul proprio smartphone.2. Aprire la app "beurer SleepQuiet". 3. Spostare l'interruttore ON/OFF della maschera antirussamento su "ON".
L'indicazione per il Blue tooth® lampeggia in blu. Non appena la maschera antirussamento è collegata allo smartphone, l'indicazione per il Blue tooth®
diventa blu fissa. I dati registrati vengono ora trasmessi allo smartphone. A seconda della quantità di dati, l'operazione può richiedere del tempo. Al termine della trasmissione dei dati, l'indicazione per il Blue tooth® si spegne.
8. Pulizia e curaL'unità di comando della maschera an-tirussamento è rimovibile. A tale scopo tirare l'unità di comando in direzione del-la freccia sul lato inferiore e allargare la maschera antirussamento con entram-be le mani.L'unità di comando può essere danneg-giata se viene smontata troppo frequen-temente. L'unità di comando dovrebbe
49
essere rimossa dalla maschera antirussamento solo quando quest'ultima deve essere lavata.
ATTENZIONE
•Prima della pulizia rimuovere sempre l'unità di comando dalla maschera antirussamento. In caso contrario sussiste il pericolo di danneggiamento.
ATTENZIONE
•L'unità di comando della maschera antirussamento non deve mai entrare in contatto con acqua o altri liquidi. Potrebbe subire danni.
Per pulire l'unità di comando utilizzare un dischetto di cotone imbevuto di al-cool isopropilico al 70%. Non utilizzare detergenti chimici o prodotti abrasivi.
ATTENZIONE
•La maschera antirussamento non può essere lavata a secco, strizzata, asciu-gata in asciugatrice, manganata o stirata in quanto potrebbe danneggiarsi.
La maschera antirussamento è lavabile in lavatrice. A tale scopo chiudere la chiusura a strappo sul retro della maschera antirussamento e inserirla in una federa o un in sacchetto per la biancheria. Impostare un programma di lavaggio particolarmente delicato a 30 °C (ciclo per capi molto delicati).Per motivi ecologici lavare la maschera antirussamento solo insieme ad altri tessuti. Utilizzare un detergente per capi delicati e dosarlo secondo le indi-cazioni del produttore.
ATTENZIONE
•La maschera antirussamento può essere danneggiata dal lavaggio.Durante tutto il suo ciclo di vita, la maschera antirussamento dovrebbe quindi essere lavata al massimo 10 volte in lavatrice. Lasciare asciugare la maschera antirussamento ben distesa su uno stendibiancheria.
ATTENZIONE
•Ricollegare la maschera antirussamento all'unità di comando solo quando la maschera antirussamento è completamente asciutta, altrimenti l'unità di comando potrebbe danneggiarsi.
50
9. Smaltimento Per motivi ecologici, l'apparecchio non deve essere smaltito tra i normali rifiuti quando viene buttato via. Lo smaltimento va effettuato negli appositi centri di raccolta. Smaltire l'apparecchio secondo la direttiva europea sui rifiuti di apparecchia-ture elettriche ed elettroniche (RAEE).Per eventuali chiarimenti rivolgersi alle autorità comunali competenti per lo smaltimento.
10. Dati tecnici
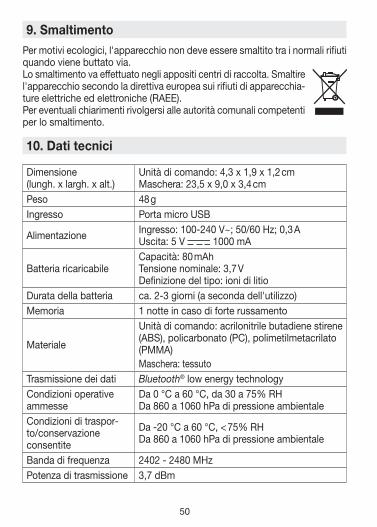
Dimensione (lungh. x largh. x alt.)
Unità di comando: 4,3 x 1,9 x 1,2 cmMaschera: 23,5 x 9,0 x 3,4 cm
Peso 48 g Ingresso Porta micro USB
Alimentazione Ingresso: 100-240 V~; 50/60 Hz; 0,3 AUscita: 5 V 1000 mA
Batteria ricaricabileCapacità: 80 mAhTensione nominale: 3,7 VDefinizione del tipo: ioni di litio
Durata della batteria ca. 2-3 giorni (a seconda dell'utilizzo)Memoria 1 notte in caso di forte russamento
Materiale
Unità di comando: acrilonitrile butadiene stirene (ABS), policarbonato (PC), polimetilmetacrilato (PMMA)Maschera: tessuto
Trasmissione dei dati Blue tooth® low energy technologyCondizioni operative ammesse
Da 0 °C a 60 °C, da 30 a 75% RHDa 860 a 1060 hPa di pressione ambientale
Condizioni di traspor-to/conservazione consentite
Da -20 °C a 60 °C, < 75% RHDa 860 a 1060 hPa di pressione ambientale
Banda di frequenza 2402 - 2480 MHzPotenza di trasmissione 3,7 dBm
51
Salv
o er
rori
e m
odifi
che
Con la presente garantiamo che il prodotto è conforme alla direttiva europea RED 2014/53/UE.Per ulteriori informazioni, ad esempio per richiedere la dichiarazione di con-formità CE, rivolgersi al servizio di assistenza indicato.
11. Garanzia/AssistenzaPer rivendicazioni nell'ambito della garanzia, rivolgersi al rivenditore locale o alla sede locale (vedere l'elenco "Service international").Allegare al reso dell'apparecchio una copia della prova d'acquisto e una breve descrizione del difetto.
Si applicano le seguenti condizioni di garanzia:1. La garanzia dei prodotti BEURER dura 3 anni oppure, se più lunga, fa
fede la durata di garanzia valida dalla data di acquisto di ciascun paese. In caso di rivendicazioni, la data di acquisto deve essere dimostrata tramite una prova d'acquisto o una fattura.
2. La durata della garanzia non viene prolungata da riparazioni (dell'intero apparecchio o di parti di esso).
3. La garanzia non ha validità per i danni derivanti da a. Uso improprio, ad es. mancata osservanza delle istruzioni per l'uso. b. Riparazioni o modifiche effettuate dal cliente o da persone non
autorizzate. c. Trasporto dal produttore al cliente o durante il trasporto al centro di
assistenza. d. La garanzia non è valida per gli accessori soggetti a comune usura
(manicotto, batterie, ecc.).4. La responsabilità per danni diretti o indiretti causati dall'apparecchio è
esclusa se viene riconosciuta una rivendicazione della garanzia per il danno dell'apparecchio.
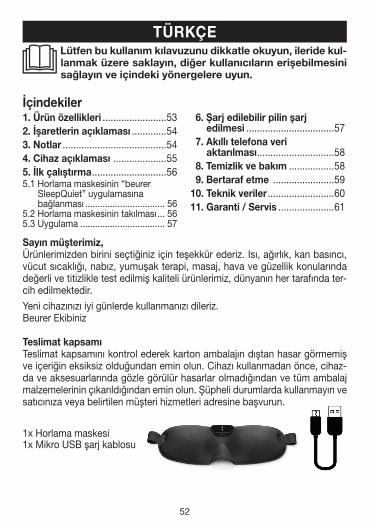
52
İçindekiler1. Ürün özellikleri ........................532. İşaretlerin açıklaması .............543. Notlar .......................................544. Cihaz açıklaması ....................555. İlk çalıştırma ............................565.1 Horlama maskesinin “beurer
SleepQuiet” uygulamasına bağlanması ................................ 56
5.2 Horlama maskesinin takılması ... 565.3 Uygulama .................................. 57
6. Şarj edilebilir pilin şarj edilmesi .................................57
7. Akıllı telefona veri aktarılması .............................58
8. Temizlik ve bakım .................58 9. Bertaraf etme .......................5910. Teknik veriler .........................6011. Garanti / Servis .....................61
TÜRKÇE
Sayın müşterimiz,Ürünlerimizden birini seçtiğiniz için teşekkür ederiz. Isı, ağırlık, kan basıncı, vücut sıcaklığı, nabız, yumuşak terapi, masaj, hava ve güzellik konularında değerli ve titizlikle test edilmiş kaliteli ürünlerimiz, dünyanın her tarafında ter-cih edilmektedir.Yeni cihazınızı iyi günlerde kullanmanızı dileriz.Beurer Ekibiniz
Teslimat kapsamı Teslimat kapsamını kontrol ederek karton ambalajın dıştan hasar görmemiş ve içeriğin eksiksiz olduğundan emin olun. Cihazı kullanmadan önce, cihaz-da ve aksesuarlarında gözle görülür hasarlar olmadığından ve tüm ambalaj malzemelerinin çıkarıldığından emin olun. Şüpheli durumlarda kullanmayın ve satıcınıza veya belirtilen müşteri hizmetleri adresine başvurun.
1x Horlama maskesi1x Mikro USB şarj kablosu
Lütfen bu kullanım kılavuzunu dikkatle okuyun, ileride kul-lanmak üzere saklayın, diğer kullanıcıların erişebilmesini sağlayın ve içindeki yönergelere uyun.
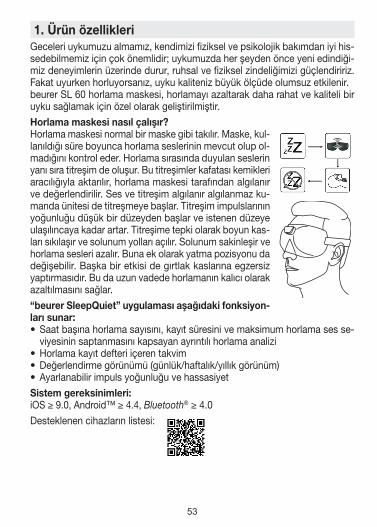
53
1. Ürün özellikleriGeceleri uykumuzu almamız, kendimizi fiziksel ve psikolojik bakımdan iyi his-sedebilmemiz için çok önemlidir; uykumuzda her şeyden önce yeni edindiği-miz deneyimlerin üzerinde durur, ruhsal ve fiziksel zindeliğimizi güçlendiririz. Fakat uyurken horluyorsanız, uyku kaliteniz büyük ölçüde olumsuz etkilenir.beurer SL 60 horlama maskesi, horlamayı azaltarak daha rahat ve kaliteli bir uyku sağlamak için özel olarak geliştirilmiştir.Horlama maskesi nasıl çalışır?Horlama maskesi normal bir maske gibi takılır. Maske, kul-lanıldığı süre boyunca horlama seslerinin mevcut olup ol-madığını kontrol eder. Horlama sırasında duyulan seslerin yanı sıra titreşim de oluşur. Bu titreşimler kafatası kemikleri aracılığıyla aktarılır, horlama maskesi tarafından algılanır ve değerlendirilir. Ses ve titreşim algılanır algılanmaz ku-manda ünitesi de titreşmeye başlar. Titreşim impulslarının yoğunluğu düşük bir düzeyden başlar ve istenen düzeye ulaşılıncaya kadar artar. Titreşime tepki olarak boyun kas-ları sıkılaşır ve solunum yolları açılır. Solunum sakinleşir ve horlama sesleri azalır. Buna ek olarak yatma pozisyonu da değişebilir. Başka bir etkisi de gırtlak kaslarına egzersiz yaptırmasıdır. Bu da uzun vadede horlamanın kalıcı olarak azaltılmasını sağlar.“beurer SleepQuiet” uygulaması aşağıdaki fonksiyon-ları sunar:•Saat başına horlama sayısını, kayıt süresini ve maksimum horlama ses se-
viyesinin saptanmasını kapsayan ayrıntılı horlama analizi•Horlama kayıt defteri içeren takvim•Değerlendirme görünümü (günlük/haftalık/yıllık görünüm)•Ayarlanabilir impuls yoğunluğu ve hassasiyetSistem gereksinimleri:iOS ≥ 9.0, Android™ ≥ 4.4, Blue tooth® ≥ 4.0Desteklenen cihazların listesi:
54
2. İşaretlerin açıklamasıKullanım kılavuzunda aşağıdaki simgeler kullanılmıştır:
UYARI Yaralanma tehlikelerine veya sağlığınızla ilgili tehlikelere yöne-lik uyarı
DİKKAT Cihazda/aksesuarlarda oluşabilecek hasarlara yönelik güven-lik uyarısı
NotÖnemli bilgilere yönelik notElektrikli ve elektronik hurda cihazlarla ilgili AB direktifine (WE-EE - Waste Electrical and Electronic Equipment) uygun şekilde bertaraf edilmelidir
21
PAPAmbalaj çevreye zarar vermeyecek şekilde bertaraf edilmelidir
Üretici
Bu ürün geçerli Avrupa Birliği yönergelerinin ve ulusal yönerge-lerin gereklerini yerine getirmektedir.
3. Notlar
UYARI
•Horlama maskesinin çıkarılabilir kumanda ünitesi sadece su sıçramalarına kar-şı korumalıdır.
•Horlama maskesinin çıkarılabilir kumanda ünitesini sudan uzak tutun!•Horlama maskesini darbelerden, nemden, kirden, aşırı sıcaklık değişiklikle-
rinden ve doğrudan güneş ışığından koruyun.•Çocukları horlama maskesinden ve ambalaj malzemesinden uzak tutun. Bo-
ğulma tehlikesi vardır! •Horlama maskesinin çıkarılabilir kumanda ünitesini ısı kaynaklarından uzak
tutun ve kısa dalga veya mikro dalga ile çalışan cihazların yakınında (~1 m) kullanmayın.
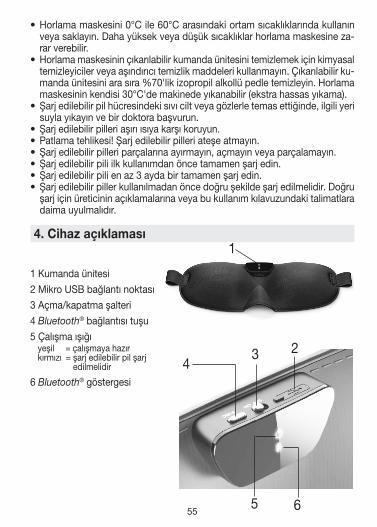
55
•Horlama maskesini 0°C ile 60°C arasındaki ortam sıcaklıklarında kullanın veya saklayın. Daha yüksek veya düşük sıcaklıklar horlama maskesine za-rar verebilir.
•Horlama maskesinin çıkarılabilir kumanda ünitesini temizlemek için kimyasal temizleyiciler veya aşındırıcı temizlik maddeleri kullanmayın. Çıkarılabilir ku-manda ünitesini ara sıra %70'lik izopropil alkollü pedle temizleyin. Horlama maskesinin kendisi 30°C'de makinede yıkanabilir (ekstra hassas yıkama).
•Şarj edilebilir pil hücresindeki sıvı cilt veya gözlerle temas ettiğinde, ilgili yeri suyla yıkayın ve bir doktora başvurun.
•Şarj edilebilir pilleri aşırı ısıya karşı koruyun.•Patlama tehlikesi! Şarj edilebilir pilleri ateşe atmayın.•Şarj edilebilir pilleri parçalarına ayırmayın, açmayın veya parçalamayın.•Şarj edilebilir pili ilk kullanımdan önce tamamen şarj edin. •Şarj edilebilir pili en az 3 ayda bir tamamen şarj edin.•Şarj edilebilir piller kullanılmadan önce doğru şekilde şarj edilmelidir. Doğru
şarj için üreticinin açıklamalarına veya bu kullanım kılavuzundaki talimatlara daima uyulmalıdır.
4. Cihaz açıklaması
1 Kumanda ünitesi2 Mikro USB bağlantı noktası 3 Açma/kapatma şalteri4 Blue tooth® bağlantısı tuşu5 Çalışma ışığı
yeşil = çalışmaya hazırkırmızı = şarj edilebilir pil şarj edilmelidir
6 Blue tooth® göstergesi
3 2
65
4
1

56
5. İlk çalıştırma
5.1 Horlama maskesinin “beurer SleepQuiet” uygulamasına bağlanması
Horlama maskesinin temel fonksiyonlarını “beurer SleepQuiet” uygulama-sı olmadan da kullanabilirsiniz. Kayıt, istatistik, takvim ve ayarlar gibi ek fonksiyonları yalnızca “beurer SleepQuiet” uygulamasıyla bağlantılı olarak kullanabilirsiniz.Horlama maskenizi “beurer SleepQuiet” uygulamasına bağlamak için aşağı-dakileri yapın:1. Akıllı telefonunuzun Internet'e bağlı olduğundan emin olun.2. Akıllı telefonunuzda Blue tooth®özelliğini etkinleştirin.3. Apple App Store (iOS) veya Google Play dan (AndroidTM) ücretsiz “beurer
SleepQuiet” uygulamasını indirin.
Akıllı telefonun ayarlarına bağlı olarak, Internet bağlan-tısı veya veri aktarımı için ek ücret söz konusu olabilir.
4. “beurer SleepQuiet” uygulamasını başlatın ve talimatları uygulayın.
5.2 Horlama maskesinin takılması1. Maskeyi size en uygun ve konforlu şekilde kullanabilmek için horlama mas-
kesinin arka tarafındaki kenetlenen bandı istediğiniz boya ayarlayın. Hor-lama maskesini çok sıkı veya çok gevşek şekilde takmamaya dikkat edin.
2. Horlama maskesini normal bir uyku maskesini taktığınız gibi takın.
Horlama maskesinin arka tarafındaki plastik plakanın hafif bir basınçla alnınıza temas etti-ğinden emin olun. Horlamanın en iyi şekilde algılanması ancak bu şekilde garanti edilebilir.
57
5.3 Uygulama1. Horlama maskesini açmak için açma/kapatma şalterini “ON” konumuna
getirin. Şimdi çalışma ışığı 15 saniye süreyle yeşil yanar. Horlama maskesi çalışmaya hazırdır. Ayrıca maske açıldıktan hemen sonra Blue tooth® göster-gesi maks. 15 saniye süreyle mavi yanıp söner. Mavi yanıp sönme, horlama maskesinin akıllı telefonunuz ile bağlantı kurmaya çalıştığı anlamına gelir. Veriler aktarılırken Blue tooth® göstergesi sürekli olarak mavi yanar.
Horlama maskesini açamıyorsanız veya çalışma ışığı kırmızı yanıyor-sa, horlama maskesinin şarj edilebilir pilini şarj etmeniz gerekir. Şarj edilebilir pili “6. Şarj edilebilir pilin şarj edilmesi” bölümünde açıklanan şekilde şarj edin.
2. Horlama maskesini takın ve yatın. Uyku sırasında başkalarının rahatsız ol-masını önlemek için ışıklar 15 saniye sonra otomatik olarak söner.
3. Kalkar kalkmaz horlama maskesini çıkarın ve kapatın. Horlama maskesini kapatmak için açma/kapatma şalterini “OFF” konumuna getirin.
6. Şarj edilebilir pilin şarj edilmesi
Şarj edilebilir pilin mevcut kapasitesini kontrol etmek için Blue tooth® bağlantısı tuşuna basın. Çalışma ışığı yeşil yanıyorsa şarj edilebilir pilde bir gece daha kullanım için yeterli kapasite mevcuttur (%41 üzerinde). Çalışma ışığı kırmızı yanıyorsa, maskeyi kullanmadan önce şarj edilebilir pili şarj etmeniz gerekir. Horlama maskesi “beurer SleepQuiet” uygulamasına bağlı durumdayken mevcut şarj edilebilir pil kapasitesini (%) uygulamada görebilirsiniz. Horlamanız şiddet-liyse maskenin şarj edilebilir pilini her gün şarj etmenizi tavsiye ederiz.
Şarj edilebilir pili şarj etmek için aşağıdakileri yapın:1. Horlama maskesindeki mikro USB bağlantı noktasının kapağını açın.2. Teslimat kapsamında yer alan şarj kablosunu horlama maskesine ve açık
durumdaki bir bilgisayara bağlayın. Alternatif olarak şarj kablosunu horla-ma maskesine ve bir USB elektrik adaptörüne de bağlayabilirsiniz (teslimat kapsamına dahil değildir). USB elektrik adaptörünü uygun bir prize takın.
3. Şarj işlemi sırasında çalışma ışığı yeşil yanıp söner. Şarj edilebilir pil tama-men şarj edildiğinde çalışma ışığı sürekli olarak yeşil yanar.
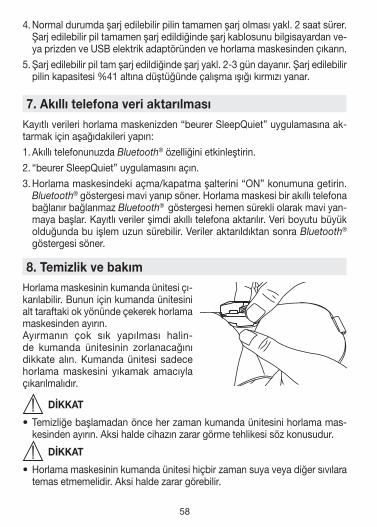
58
4. Normal durumda şarj edilebilir pilin tamamen şarj olması yakl. 2 saat sürer. Şarj edilebilir pil tamamen şarj edildiğinde şarj kablosunu bilgisayardan ve-ya prizden ve USB elektrik adaptöründen ve horlama maskesinden çıkarın.
5. Şarj edilebilir pil tam şarj edildiğinde şarj yakl. 2-3 gün dayanır. Şarj edilebilir pilin kapasitesi %41 altına düştüğünde çalışma ışığı kırmızı yanar.
7. Akıllı telefona veri aktarılmasıKayıtlı verileri horlama maskenizden “beurer SleepQuiet” uygulamasına ak-tarmak için aşağıdakileri yapın:1. Akıllı telefonunuzda Blue tooth® özelliğini etkinleştirin.2. “beurer SleepQuiet” uygulamasını açın. 3. Horlama maskesindeki açma/kapatma şalterini “ON” konumuna getirin.
Blue tooth® göstergesi mavi yanıp söner. Horlama maskesi bir akıllı telefona bağlanır bağlanmaz Blue tooth® göstergesi hemen sürekli olarak mavi yan-maya başlar. Kayıtlı veriler şimdi akıllı telefona aktarılır. Veri boyutu büyük olduğunda bu işlem uzun sürebilir. Veriler aktarıldıktan sonra Blue tooth® göstergesi söner.
8. Temizlik ve bakımHorlama maskesinin kumanda ünitesi çı-karılabilir. Bunun için kumanda ünitesini alt taraftaki ok yönünde çekerek horlama maskesinden ayırın.Ayırmanın çok sık yapılması halin-de kumanda ünitesinin zorlanacağını dikkate alın. Kumanda ünitesi sadece horlama maskesini yıkamak amacıyla çıkarılmalıdır.
DİKKAT
•Temizliğe başlamadan önce her zaman kumanda ünitesini horlama mas-kesinden ayırın. Aksi halde cihazın zarar görme tehlikesi söz konusudur.
DİKKAT
•Horlama maskesinin kumanda ünitesi hiçbir zaman suya veya diğer sıvılara temas etmemelidir. Aksi halde zarar görebilir.
59
Kumanda ünitesinin temizliği için %70 izopropil alkolle ıslatılmış bir pamuk ped kullanın. Kimyasal veya aşındırıcı temizlik maddeleri kullanmayın.
DİKKAT
•Horlama maskesinin kimyasal yöntemlerle temizlenmemesi, sıkılmaması, makinede kurutulmaması, pres ütüyle veya normal ütüyle ütülenmemesi gerektiğini dikkate alın. Aksi halde horlama maskesi zarar görebilir.
Horlama maskesi makinede yıkanabilir. Bunun için horlama maskesinin arka tarafındaki kenetlenen bandı kapatın ve maskeyi bir yastık kılıfının veya yıkama torbasının içine yerleştirin. Çok hassas bir yıkama işlemi için çamaşır makine-sini 30°C'ye ayarlayın (ekstra hassas yıkama).Ekolojik nedenlerle, horlama maskesini mutlaka başka tekstil ürünleriyle birlik-te yıkayın. Hassas ürün deterjanı ile ve deterjanın üreticisi tarafından belirtilen doza dikkat ederek yıkayın.
DİKKAT
•Yıkama nedeniyle horlama maskesinin yıpranacağını dikkate alın.Bu nedenle horlama maskesi, kullanım ömrü boyunca en çok 10 defa çamaşır makinesinde yıkanmalıdır. Horlama maskesini bir çamaşırlık üzerine düz bir şekilde sererek kurutun.
DİKKAT
•Horlama maskesini kumanda ünitesine tekrar takmak için horlama maskesi-nin tamamen kurumasını bekleyin. Aksi halde kumanda ünitesi zarar görebilir.
9. Bertaraf etme Çevreyi korumak için, kullanım ömrü dolan cihaz evsel atıklarla beraber ber-taraf edilmemelidir. Cihaz, ülkenizdeki uygun atık toplama merkezleri aracılığıyla bertaraf edilebilir. Cihaz, elektrikli ve elektronik atık cihazlarla ilgili AB direk-tifine (WEEE - Waste Electrical and Electronic Equipment) uygun şekilde bertaraf edilmelidir.Bertaraf etme ile ilgili sorularınızı, ilgili yerel makamlara iletebilirsiniz.
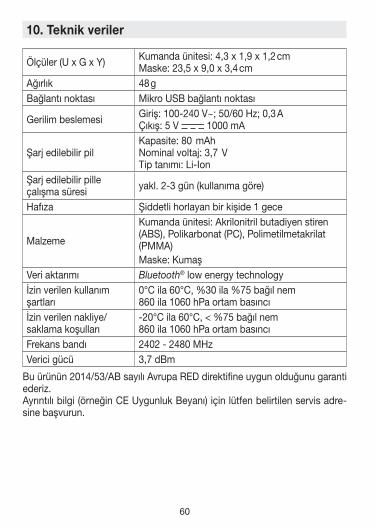
60
10. Teknik veriler
Ölçüler (U x G x Y) Kumanda ünitesi: 4,3 x 1,9 x 1,2 cmMaske: 23,5 x 9,0 x 3,4 cm
Ağırlık 48 g Bağlantı noktası Mikro USB bağlantı noktası
Gerilim beslemesi Giriş: 100-240 V~; 50/60 Hz; 0,3 AÇıkış: 5 V 1000 mA
Şarj edilebilir pilKapasite: 80 mAhNominal voltaj: 3,7 VTip tanımı: Li-Ion
Şarj edilebilir pille çalışma süresi yakl. 2-3 gün (kullanıma göre)
Hafıza Şiddetli horlayan bir kişide 1 gece
Malzeme
Kumanda ünitesi: Akrilonitril butadiyen stiren (ABS), Polikarbonat (PC), Polimetilmetakrilat (PMMA)Maske: Kumaş
Veri aktarımı Blue tooth® low energy technologyİzin verilen kullanım şartları
0°C ila 60°C, %30 ila %75 bağıl nem860 ila 1060 hPa ortam basıncı
İzin verilen nakliye/saklama koşulları
-20°C ila 60°C, < %75 bağıl nem860 ila 1060 hPa ortam basıncı
Frekans bandı 2402 - 2480 MHzVerici gücü 3,7 dBm
Bu ürünün 2014/53/AB sayılı Avrupa RED direktifine uygun olduğunu garanti ederiz.Ayrıntılı bilgi (örneğin CE Uygunluk Beyanı) için lütfen belirtilen servis adre-sine başvurun.
61
Hat
a ve
değ
işik
lik h
akkı
sak
lıdır
11. Garanti / ServisGaranti ile ilgili talepleriniz için bölgenizdeki yetkili satıcınıza veya bölgeniz-deki şubeye başvurun (“Uluslararası servis” listesine bakın).Cihazı geri gönderirken faturanızın bir kopyasını ve arızanın kısa açıklamasını ekleyin.
Aşağıdaki garanti koşulları geçerlidir:1. BEURER ürünlerinin garanti süresi 3 yıldır veya – daha uzun ise – ilgili ül-
kede geçerli olan satın alma tarihinden itibaren garanti süresi kabul edilir. Garanti talebinde satın alma tarihi bir satış fişi veya fatura ile belgelenmelidir.
2. Onarım (cihazın tamamı veya parçaları) garanti süresinin uzamasını sağlamaz.
3. Garanti aşağıdakiler sonucu oluşan hasarlar için geçerli değildir: a. Usulüne uygun olmayan kullanım, örn. kullanım talimatlarına
uyulmaması. b. Müşteri veya yetkisiz kişiler tarafından yapılan onarımlar. c. Üreticiden müşteriye nakliye veya servis merkezine nakliye sırasında
oluşan hasarlar. d. Normal yıpranmaya uğrayan aksesuarlar (manşet, piller vb.) için
garanti geçerli değildir.4. Cihaz hasar gördüğünde bir garanti talebi kabul edilmesi durumunda da
cihazın neden olduğu doğrudan veya dolaylı netice kabilinden doğan hasarlar için sorumluluk üstlenilmez.
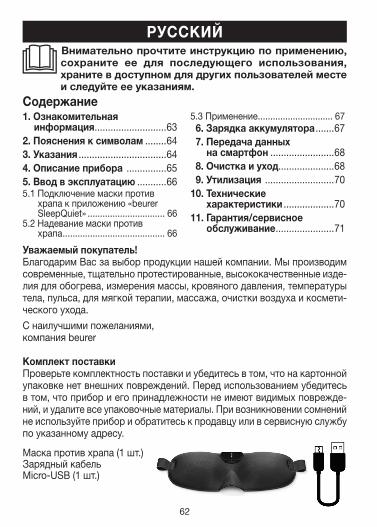
62
Содержание1. Ознакомительная
информация ...........................632. Пояснения к символам ........643. Указания .................................644. Описание прибора ...............655. Ввод в эксплуатацию ...........665.1 Подключение маски против
храпа к приложению «beurer SleepQuiet» ............................... 66
5.2 Надевание маски против храпа ......................................... 66
5.3 Применение .............................. 67 6. Зарядка аккумулятора .......67 7. Передача данных
на смартфон ........................68 8. Очистка и уход.....................68 9. Утилизация ..........................7010. Технические
характеристики ...................7011. Гарантия/сервисное
обслуживание ......................71
РУССКИЙ
Уважаемый покупатель!Благодарим Вас за выбор продукции нашей компании. Мы производим современные, тщательно протестированные, высококачественные изде-лия для обогрева, измерения массы, кровяного давления, температуры тела, пульса, для мягкой терапии, массажа, очистки воздуха и космети-ческого ухода.С наилучшими пожеланиями,компания beurer
Комплект поставки Проверьте комплектность поставки и убедитесь в том, что на картонной упаковке нет внешних повреждений. Перед использованием убедитесь в том, что прибор и его принадлежности не имеют видимых поврежде-ний, и удалите все упаковочные материалы. При возникновении сомнений не используйте прибор и обратитесь к продавцу или в сервисную службу по указанному адресу.
Маска против храпа (1 шт.)Зарядный кабель Micro-USB (1 шт.)
Внимательно прочтите инструкцию по применению, сохраните ее для последующего использования, храните в доступном для других пользователей месте и следуйте ее указаниям.
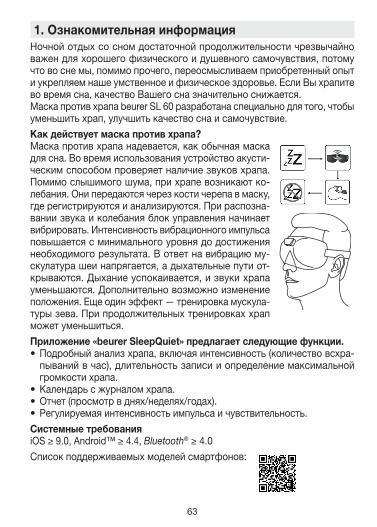
63
1. Ознакомительная информацияНочной отдых со сном достаточной продолжительности чрезвычайно важен для хорошего физического и душевного самочувствия, потому что во сне мы, помимо прочего, переосмысливаем приобретенный опыт и укрепляем наше умственное и физическое здоровье. Если Вы храпите во время сна, качество Вашего сна значительно снижается.Маска против храпа beurer SL 60 разработана специально для того, чтобы уменьшить храп, улучшить качество сна и самочувствие.Как действует маска против храпа?Маска против храпа надевается, как обычная маска для сна. Во время использования устройство акусти-ческим способом проверяет наличие звуков храпа. Помимо слышимого шума, при храпе возникают ко-лебания. Они передаются через кости черепа в маску, где регистрируются и анализируются. При распозна-вании звука и колебания блок управления начинает вибрировать. Интенсивность вибрационного импульса повышается с минимального уровня до достижения необходимого результата. В ответ на вибрацию му-скулатура шеи напрягается, а дыхательные пути от-крываются. Дыхание успокаивается, и звуки храпа уменьшаются. Дополнительно возможно изменение положения. Еще один эффект — тренировка мускула-туры зева. При продолжительных тренировках храп может уменьшиться.Приложение «beurer SleepQuiet» предлагает следующие функции.•Подробный анализ храпа, включая интенсивность (количество всхра-
пываний в час), длительность записи и определение максимальной громкости храпа.
•Календарь с журналом храпа.•Отчет (просмотр в днях/неделях/годах).•Регулируемая интенсивность импульса и чувствительность.Системные требованияiOS ≥ 9.0, Android™ ≥ 4.4, Blue tooth® ≥ 4.0Список поддерживаемых моделей смартфонов:
64
2. Пояснения к символамВ настоящей инструкции по применению используются следующие символы.
ПРЕДОСТЕРЕЖЕНИЕ Предупреждает об опасности травмирования или ущерба для здоровья.
ВНИМАНИЕ Обращает внимание на возможность повреждения прибора/принадлежностей.
УказаниеВажная информация.Утилизация прибора в соответствии с директивой ЕС по отходам электрического и электронного оборудова-ния — WEEE (Waste Electrical and Electronic Equipment).
21
PAP
Утилизировать упаковку в соответствии с предписаниями по охране окружающей среды.
Изготовитель.
Это изделие соответствует требованиям действующих ев-ропейских и национальных директив.
3. Указания
ПРЕДОСТЕРЕЖЕНИЕ
•Съемный блок управления маски против храпа защищен только от брызг.•Храните съемный блок управления маски против храпа вдали от воды!•Защищайте маску против храпа от ударов, влажности, загрязнения,
сильных колебаний температуры и прямых солнечных лучей.•Не давайте маску и упаковочный материал детям. Они могут задохнуться! •Храните съемный блок управления вдали от источников тепла и не ис-
пользуйте его вблизи (~ 1 м) от коротко- или микроволновых приборов.•Используйте и храните маску против храпа при температуре
от 0 до 60 °C. Более высокие или более низкие температуры могут привести к повреждению устройства.
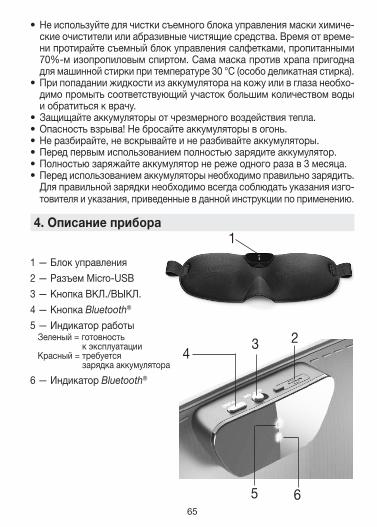
65
•Не используйте для чистки съемного блока управления маски химиче-ские очистители или абразивные чистящие средства. Время от време-ни протирайте съемный блок управления салфетками, пропитанными 70%-м изопропиловым спиртом. Сама маска против храпа пригодна для машинной стирки при температуре 30 °C (особо деликатная стирка).
•При попадании жидкости из аккумулятора на кожу или в глаза необхо-димо промыть соответствующий участок большим количеством воды и обратиться к врачу.
•Защищайте аккумуляторы от чрезмерного воздействия тепла.•Опасность взрыва! Не бросайте аккумуляторы в огонь.•Не разбирайте, не вскрывайте и не разбивайте аккумуляторы.•Перед первым использованием полностью зарядите аккумулятор. •Полностью заряжайте аккумулятор не реже одного раза в 3 месяца.•Перед использованием аккумуляторы необходимо правильно зарядить.
Для правильной зарядки необходимо всегда соблюдать указания изго-товителя и указания, приведенные в данной инструкции по применению.
4. Описание прибора
1 — Блок управления2 — Разъем Micro-USB 3 — Кнопка ВКЛ./ВЫКЛ.4 — Кнопка Blue tooth®
5 — Индикатор работыЗеленый = готовность к эксплуатацииКрасный = требуется зарядка аккумулятора
6 — Индикатор Blue tooth®
3 2
65
4
1
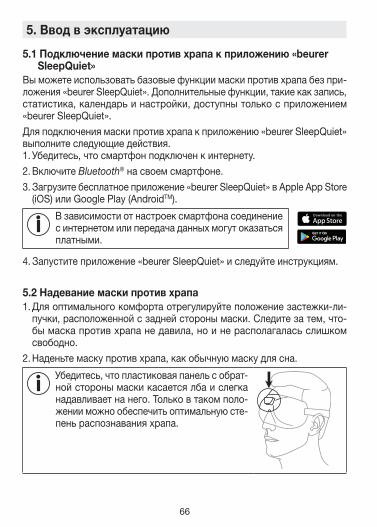
66
5. Ввод в эксплуатацию
5.1 Подключение маски против храпа к приложению «beurer SleepQuiet»
Вы можете использовать базовые функции маски против храпа без при-ложения «beurer SleepQuiet». Дополнительные функции, такие как запись, статистика, календарь и настройки, доступны только с приложением «beurer SleepQuiet».Для подключения маски против храпа к приложению «beurer SleepQuiet» выполните следующие действия.1. Убедитесь, что смартфон подключен к интернету.2. Включите Blue tooth® на своем смартфоне.3. Загрузите бесплатное приложение «beurer SleepQuiet» в Apple App Store
(iOS) или Google Play (AndroidTM).
В зависимости от настроек смартфона соединение с интернетом или передача данных могут оказаться платными.
4. Запустите приложение «beurer SleepQuiet» и следуйте инструкциям.
5.2 Надевание маски против храпа1. Для оптимального комфорта отрегулируйте положение застежки-ли-
пучки, расположенной с задней стороны маски. Следите за тем, что-бы маска против храпа не давила, но и не располагалась слишком свободно.
2. Наденьте маску против храпа, как обычную маску для сна.
Убедитесь, что пластиковая панель с обрат-ной стороны маски касается лба и слегка надавливает на него. Только в таком поло-жении можно обеспечить оптимальную сте-пень распознавания храпа.
67
5.3 Применение1. Для включения маски против храпа переместите выключатель ВКЛ./
ВЫКЛ. в положение ON. Индикатор работы загорается зеленым цветом на 15 секунд. Маска против храпа готова к работе. Сразу после вклю-чения индикатор Blue tooth® мигает синим в течение макс. 15 секунд. Мигание синим означает, что устанавливается соединение маски про-тив храпа с Вашим смартфоном. Во время передачи данных индикатор Blue tooth® светится синим цветом.
Если маска против храпа не включается или индикатор работы светится красным цветом, следует зарядить аккумулятор. Заря-дите аккумулятор, как описано в разделе «6. Зарядка аккумулятора».
2. Наденьте маску против храпа и ложитесь спать. Чтобы свет индика-торов не мешал другим во время сна, они автоматически погаснут через 15 секунд.
3. После пробуждения снимите маску и выключите ее. Для выключения маски против храпа переместите выключатель ВКЛ./ВЫКЛ. в поло-жение OFF.
6. Зарядка аккумулятора
Чтобы проверить уровень заряда аккумулятора, нажмите на кнопку Blue tooth®. Если индикатор работы светится зеленым цветом, уровень заряда аккумулятора достаточен для исполь-зования маски следующей ночью (более 41 %). Если индикатор работы светится красным цветом, перед применением следует сначала зарядить аккумулятор. Если маска против храпа под-ключена к приложению beurer SleepQuiet, Вы можете узнать уровень заряда аккумулятора (%) в приложении. Если Вы силь-но храпите, рекомендуем Вам заряжать аккумулятор ежедневно.
Для зарядки аккумулятора выполните следующие действия.1. Откройте крышку разъема Micro-USB на маске против храпа.2. Подсоедините маску против храпа к включенному компьютеру с по-
мощью зарядного кабеля, входящего в комплект поставки. В качестве альтернативы подсоедините маску против храпа с помощью зарядно-
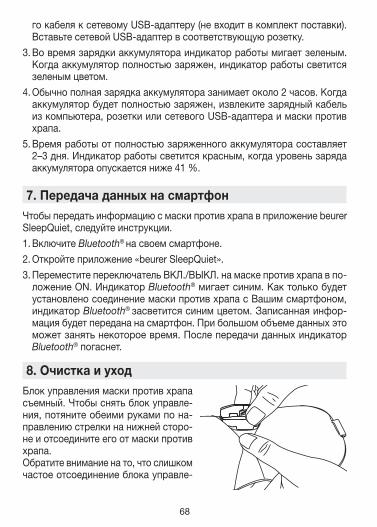
68
го кабеля к сетевому USB-адаптеру (не входит в комплект поставки). Вставьте сетевой USB-адаптер в соответствующую розетку.
3. Во время зарядки аккумулятора индикатор работы мигает зеленым. Когда аккумулятор полностью заряжен, индикатор работы светится зеленым цветом.
4. Обычно полная зарядка аккумулятора занимает около 2 часов. Когда аккумулятор будет полностью заряжен, извлеките зарядный кабель из компьютера, розетки или сетевого USB-адаптера и маски против храпа.
5. Время работы от полностью заряженного аккумулятора составляет 2–3 дня. Индикатор работы светится красным, когда уровень заряда аккумулятора опускается ниже 41 %.
7. Передача данных на смартфонЧтобы передать информацию с маски против храпа в приложение beurer SleepQuiet, следуйте инструкции.1. Включите Blue tooth® на своем смартфоне.2. Откройте приложение «beurer SleepQuiet». 3. Переместите переключатель ВКЛ./ВЫКЛ. на маске против храпа в по-
ложение ON. Индикатор Blue tooth® мигает синим. Как только будет установлено соединение маски против храпа с Вашим смартфоном, индикатор Blue tooth® засветится синим цветом. Записанная инфор-мация будет передана на смартфон. При большом объеме данных это может занять некоторое время. После передачи данных индикатор Blue tooth® погаснет.
8. Очистка и уходБлок управления маски против храпа съемный. Чтобы снять блок управле-ния, потяните обеими руками по на-правлению стрелки на нижней сторо-не и отсоедините его от маски против храпа.Обратите внимание на то, что слишком частое отсоединение блока управле-
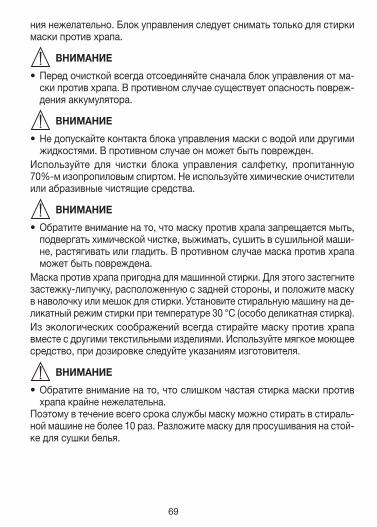
69
ния нежелательно. Блок управления следует снимать только для стирки маски против храпа.
ВНИМАНИЕ
•Перед очисткой всегда отсоединяйте сначала блок управления от ма-ски против храпа. В противном случае существует опасность повреж-дения аккумулятора.
ВНИМАНИЕ
•Не допускайте контакта блока управления маски с водой или другими жидкостями. В противном случае он может быть поврежден.
Используйте для чистки блока управления салфетку, пропитанную 70%-м изопропиловым спиртом. Не используйте химические очистители или абразивные чистящие средства.
ВНИМАНИЕ
•Обратите внимание на то, что маску против храпа запрещается мыть, подвергать химической чистке, выжимать, сушить в сушильной маши-не, растягивать или гладить. В противном случае маска против храпа может быть повреждена.
Маска против храпа пригодна для машинной стирки. Для этого застегните застежку-липучку, расположенную с задней стороны, и положите маску в наволочку или мешок для стирки. Установите стиральную машину на де-ликатный режим стирки при температуре 30 °C (особо деликатная стирка).Из экологических соображений всегда стирайте маску против храпа вместе с другими текстильными изделиями. Используйте мягкое моющее средство, при дозировке следуйте указаниям изготовителя.
ВНИМАНИЕ
•Обратите внимание на то, что слишком частая стирка маски против храпа крайне нежелательна.
Поэтому в течение всего срока службы маску можно стирать в стираль-ной машине не более 10 раз. Разложите маску для просушивания на стой-ке для сушки белья.
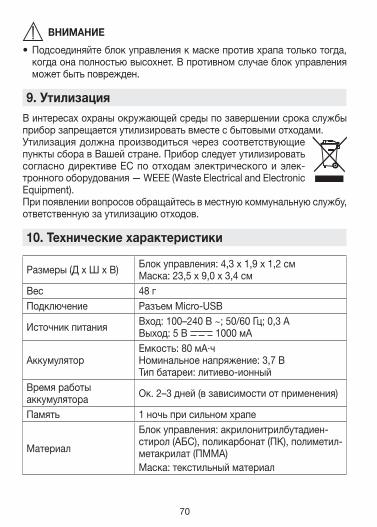
70
ВНИМАНИЕ
•Подсоединяйте блок управления к маске против храпа только тогда, когда она полностью высохнет. В противном случае блок управления может быть поврежден.
9. Утилизация В интересах охраны окружающей среды по завершении срока службы прибор запрещается утилизировать вместе с бытовыми отходами. Утилизация должна производиться через соответствующие пункты сбора в Вашей стране. Прибор следует утилизировать согласно директиве ЕС по отходам электрического и элек-тронного оборудования — WEEE (Waste Electrical and Electronic Equipment).При появлении вопросов обращайтесь в местную коммунальную службу, ответственную за утилизацию отходов.
10. Технические характеристики
Размеры (Д x Ш x В) Блок управления: 4,3 x 1,9 x 1,2 смМаска: 23,5 x 9,0 x 3,4 см
Вес 48 г Подключение Разъем Micro-USB
Источник питания Вход: 100–240 В ~; 50/60 Гц; 0,3 AВыход: 5 В 1000 мA
АккумуляторЕмкость: 80 мА·чНоминальное напряжение: 3,7 ВТип батареи: литиево-ионный
Время работы аккумулятора Ок. 2–3 дней (в зависимости от применения)
Память 1 ночь при сильном храпе
Материал
Блок управления: акрилонитрилбутадиен-стирол (АБС), поликарбонат (ПК), полиметил-метакрилат (ПММА)Маска: текстильный материал
71
Воз
мож
ны о
шиб
ки и
изм
енен
ия
Передача данных Blue tooth® low energy technology
Допустимые условия эксплуатации
От 0 до 60 °C, относительная влажность от 30 до 75 %Атмосферное давление от 860 до 1060 гПа
Допустимые условия транспортировки/хранения
От –20 до +60 °C, относительная влажность < 75 %Атмосферное давление от 860 до 1060 гПа
Диапазон частоты 2402–2480 МГцМощность передатчика 3,7 дБм
Настоящим гарантируем, что данное изделие соответствует европейской директиве RED 2014/53/EC.Обратитесь в сервисный центр по указанному адресу для получения под-робных сведений, например о соответствии директивам ЕС.
11. Гарантия/сервисное обслуживаниеБолее подробная информация по гарантии/сервису находится в гаран-тийном/сервисном талоне, который входит в комплект поставки.
72
Spis treści1. Informacje ogólne ..................732. Objaśnienie symboli ...............743. Wskazówki ..............................744. Opis urządzenia .....................755. Uruchomienie ..........................765.1 Połączenie maski przeciw
chrapaniu z aplikacją „beurer SleepQuiet” ............................... 76
5.2 Zakładanie maski przeciw chrapaniu ................................... 76
5.3 Zastosowanie ............................ 77 6. Ładowanie baterii .................77 7. Transfer danych na
smartfon ................................78 8. Czyszczenie i konserwacja..78 9. Utylizacja ..............................8010. Dane techniczne ...................8011. Gwarancja/serwis .................81
POLSKI
Szanowni Państwo!Cieszymy się, że zdecydowali się Państwo na zakup naszego produktu. Fir-ma Beurer oferuje dokładnie przetestowane produkty wysokiej jakości, prze-znaczone do pomiaru temperatury powietrza, wagi, ciśnienia, temperatury ciała, tętna, urządzenia do łagodnej terapii, masażu, inhalacji oraz zabiegów upiększających.Z poważaniemZespół Beurer
Zawartość opakowania Zestaw należy sprawdzić pod kątem zewnętrznych uszkodzeń kartonowe-go opakowania oraz kompletności zawartości. Przed użyciem istotne jest upewnienie się, że na urządzeniu i akcesoriach nie widać żadnych uszkodzeń, a wszystkie części opakowania zostały usunięte. W razie wątpliwości należy zaprzestać używania urządzenia i zwrócić się do dystrybutora lub napisać na podany adres działu obsługi klienta.
1 × maska przeciw chrapaniu1 × kabel do ładowania micro-USB
Należy dokładnie przeczytać niniejszą instrukcję obsługi, zachować ją i przechowywać w miejscu dostępnym dla innych użytkowników oraz przestrzegać podanych w niej wskazówek.
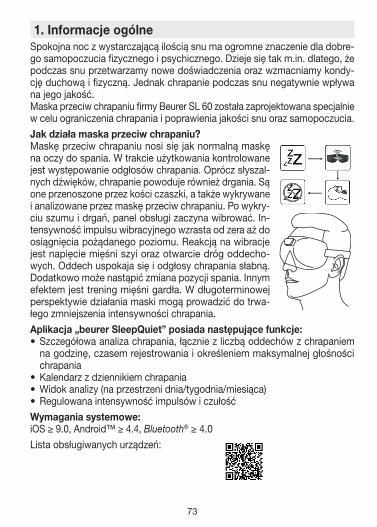
73
1. Informacje ogólneSpokojna noc z wystarczającą ilością snu ma ogromne znaczenie dla dobre-go samopoczucia fizycznego i psychicznego. Dzieje się tak m.in. dlatego, że podczas snu przetwarzamy nowe doświadczenia oraz wzmacniamy kondy-cję duchową i fizyczną. Jednak chrapanie podczas snu negatywnie wpływa na jego jakość.Maska przeciw chrapaniu firmy Beurer SL 60 została zaprojektowana specjalnie w celu ograniczenia chrapania i poprawienia jakości snu oraz samopoczucia.Jak działa maska przeciw chrapaniu?Maskę przeciw chrapaniu nosi się jak normalną maskę na oczy do spania. W trakcie użytkowania kontrolowane jest występowanie odgłosów chrapania. Oprócz słyszal-nych dźwięków, chrapanie powoduje również drgania. Są one przenoszone przez kości czaszki, a także wykrywane i analizowane przez maskę przeciw chrapaniu. Po wykry-ciu szumu i drgań, panel obsługi zaczyna wibrować. In-tensywność impulsu wibracyjnego wzrasta od zera aż do osiągnięcia pożądanego poziomu. Reakcją na wibracje jest napięcie mięśni szyi oraz otwarcie dróg oddecho-wych. Oddech uspokaja się i odgłosy chrapania słabną. Dodatkowo może nastąpić zmiana pozycji spania. Innym efektem jest trening mięśni gardła. W długoterminowej perspektywie działania maski mogą prowadzić do trwa-łego zmniejszenia intensywności chrapania.Aplikacja „beurer SleepQuiet” posiada następujące funkcje:•Szczegółowa analiza chrapania, łącznie z liczbą oddechów z chrapaniem
na godzinę, czasem rejestrowania i określeniem maksymalnej głośności chrapania
•Kalendarz z dziennikiem chrapania•Widok analizy (na przestrzeni dnia/tygodnia/miesiąca)•Regulowana intensywność impulsów i czułośćWymagania systemowe:iOS ≥ 9.0, Android™ ≥ 4.4, Blue tooth® ≥ 4.0Lista obsługiwanych urządzeń:
74
2. Objaśnienie symboliW instrukcji obsługi zastosowano następujące symbole:
OSTRZEŻENIE Ostrzeżenie przed niebezpieczeństwem utraty zdrowia lub od-niesienia obrażeń ciała
UWAGA Ostrzeżenie przed niebezpieczeństwem uszkodzenia urządze-nia lub akcesoriów
WskazówkaWażne informacjeUtylizacja zgodnie z dyrektywą WE o zużytych urządzeniach elektrycznych i elektronicznych – WEEE (Waste Electrical and Electronic Equipment).
21
PAPOpakowanie zutylizować w sposób przyjazny dla środowiska
Producent
Niniejszy produkt spełnia wymagania obowiązujących dyrektyw europejskich i krajowych.
3. Wskazówki
OSTRZEŻENIE
•Zdejmowany panel obsługi maski przeciw chrapaniu jest chroniony przed bry-zgającą wodą, ale nie wodoszczelny.
•Należy trzymać go z dala od wody!•Maskę przeciw chrapaniu należy chronić przed wstrząsami, wilgocią, bru-
dem, silnymi wahaniami temperatury i bezpośrednim światłem słonecznym.•Należy trzymać dzieci z dala od maski i opakowań po niej. Istnieje ryzyko
uduszenia! •Zdejmowany panel obsługi maski należy trzymać z dala od źródeł ciepła
i nie korzystać z niego w pobliżu (~1 m) instalacji wytwarzających fale krót-kie lub mikrofale.
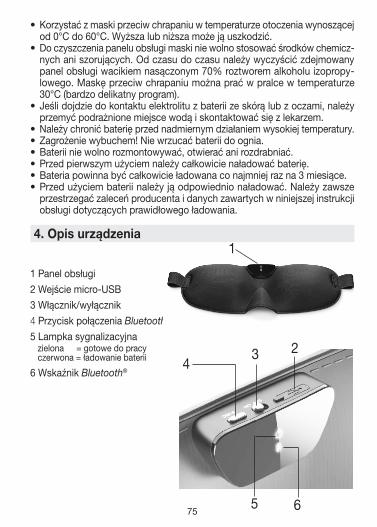
75
•Korzystać z maski przeciw chrapaniu w temperaturze otoczenia wynoszącej od 0°C do 60°C. Wyższa lub niższa może ją uszkodzić.
•Do czyszczenia panelu obsługi maski nie wolno stosować środków chemicz-nych ani szorujących. Od czasu do czasu należy wyczyścić zdejmowany panel obsługi wacikiem nasączonym 70% roztworem alkoholu izopropy-lowego. Maskę przeciw chrapaniu można prać w pralce w temperaturze 30°C (bardzo delikatny program).
•Jeśli dojdzie do kontaktu elektrolitu z baterii ze skórą lub z oczami, należy przemyć podrażnione miejsce wodą i skontaktować się z lekarzem.
•Należy chronić baterię przed nadmiernym działaniem wysokiej temperatury.•Zagrożenie wybuchem! Nie wrzucać baterii do ognia.•Baterii nie wolno rozmontowywać, otwierać ani rozdrabniać.•Przed pierwszym użyciem należy całkowicie naładować baterię. •Bateria powinna być całkowicie ładowana co najmniej raz na 3 miesiące.•Przed użyciem baterii należy ją odpowiednio naładować. Należy zawsze
przestrzegać zaleceń producenta i danych zawartych w niniejszej instrukcji obsługi dotyczących prawidłowego ładowania.
4. Opis urządzenia
1 Panel obsługi2 Wejście micro-USB 3 Włącznik/wyłącznik4 Przycisk połączenia Blue tooth®
5 Lampka sygnalizacyjnazielona = gotowe do pracyczerwona = ładowanie baterii
6 Wskaźnik Blue tooth®
3 2
65
4
1
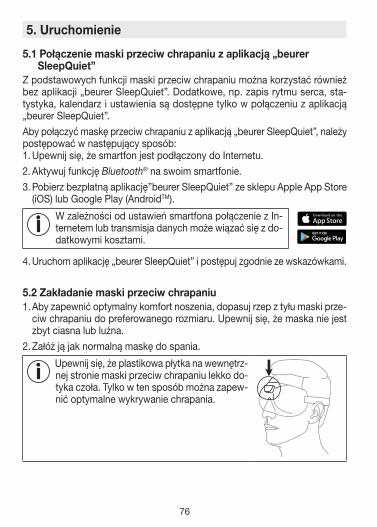
76
5. Uruchomienie
5.1 Połączenie maski przeciw chrapaniu z aplikacją „beurer SleepQuiet”
Z podstawowych funkcji maski przeciw chrapaniu można korzystać również bez aplikacji „beurer SleepQuiet”. Dodatkowe, np. zapis rytmu serca, sta-tystyka, kalendarz i ustawienia są dostępne tylko w połączeniu z aplikacją „beurer SleepQuiet”.Aby połączyć maskę przeciw chrapaniu z aplikacją „beurer SleepQuiet”, należy postępować w następujący sposób:1. Upewnij się, że smartfon jest podłączony do Internetu.2. Aktywuj funkcję Blue tooth® na swoim smartfonie.3. Pobierz bezpłatną aplikację”beurer SleepQuiet” ze sklepu Apple App Store
(iOS) lub Google Play (AndroidTM).
W zależności od ustawień smartfona połączenie z In-ternetem lub transmisja danych może wiązać się z do-datkowymi kosztami.
4. Uruchom aplikację „beurer SleepQuiet” i postępuj zgodnie ze wskazówkami.
5.2 Zakładanie maski przeciw chrapaniu1. Aby zapewnić optymalny komfort noszenia, dopasuj rzep z tyłu maski prze-
ciw chrapaniu do preferowanego rozmiaru. Upewnij się, że maska nie jest zbyt ciasna lub luźna.
2. Załóż ją jak normalną maskę do spania.
Upewnij się, że plastikowa płytka na wewnętrz-nej stronie maski przeciw chrapaniu lekko do-tyka czoła. Tylko w ten sposób można zapew-nić optymalne wykrywanie chrapania.
77
5.3 Zastosowanie1. Aby włączyć maskę przeciw chrapaniu, należy przesunąć włącznik/wyłącznik
na pozycję „ON”. Lampka sygnalizacyjna będzie świecić na zielono przez 15 sekund. Maska przeciw chrapaniu jest gotowa do użycia. Wskaźnik Bluetooth® zacznie migać na niebiesko przez maks. 15 sekund natychmiast po włączeniu. Niebieskie miganie oznacza, że maska przeciw chrapaniu próbuje połączyć się z telefonem. Podczas przesyłania danych wskaźnik Blue tooth® zaświeci się na niebiesko.
Jeśli maska przeciw chrapaniu nie może się włączyć lub świeci się czerwona lampka sygnalizacyjna, należy naładować baterię. Naładuj ponownie baterię zgodnie z opisem w rozdziale „6. Ładowanie baterii”.
2. Załóż maskę przeciw chrapaniu i idź spać. Aby zapobiec przeszkadza-niu innej osobie we śnie, po 15 sekundach lampka automatycznie gaśnie.
3. Gdy tylko wstaniesz, zdejmij maskę przeciw chrapaniu i wyłącz ją. Aby wyłączyć maskę przeciw chrapaniu, przesuń włącznik/wyłącznik w poło-żenie „OFF”.
6. Ładowanie baterii
Aby sprawdzić aktualną wydajność baterii, naciśnij przycisk połą-czenia Blue tooth®. Jeśli lampka sygnalizacyjna świeci na zielono, bateria jest wystarczająco naładowana, aby korzystać z maski ko-lejną noc (ponad 41%). Jeśli lampka sygnalizacyjna świeci się na czerwono, przed użyciem należy najpierw naładować baterię. Jeśli do aplikacji „beurer SleepQuiet” podłączona jest maska przeciw chrapaniu, można odczytać aktualny stan naładowania baterii (%) w aplikacji. W przypadku silnego chrapania zalecamy codzienne ładowanie baterii.
Aby naładować baterię, postępuj w następujący sposób:1. Otwórz osłonę wejścia micro-USB na masce przeciw chrapaniu.2. Połącz dostarczony w komplecie kabel do ładowania z maską i włączo-
nym komputerem. Alternatywnie połącz kabel do ładowania z maską i za-silaczem USB (nie wchodzi w zakres dostawy). Podłącz zasilacz USB do odpowiedniego gniazdka.
3. W trakcie ładowania lampka sygnalizacyjna miga na zielono. Gdy bateria jest całkowicie naładowana, lampka sygnalizacyjna świeci się na zielono.
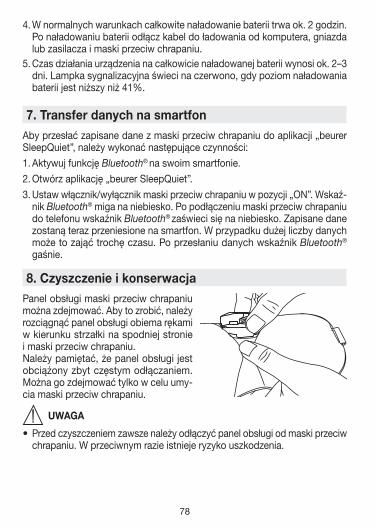
78
4. W normalnych warunkach całkowite naładowanie baterii trwa ok. 2 godzin. Po naładowaniu baterii odłącz kabel do ładowania od komputera, gniazda lub zasilacza i maski przeciw chrapaniu.
5. Czas działania urządzenia na całkowicie naładowanej baterii wynosi ok. 2–3 dni. Lampka sygnalizacyjna świeci na czerwono, gdy poziom naładowania baterii jest niższy niż 41%.
7. Transfer danych na smartfonAby przesłać zapisane dane z maski przeciw chrapaniu do aplikacji „beurer SleepQuiet”, należy wykonać następujące czynności:1. Aktywuj funkcję Blue tooth® na swoim smartfonie.2. Otwórz aplikację „beurer SleepQuiet”. 3. Ustaw włącznik/wyłącznik maski przeciw chrapaniu w pozycji „ON”. Wskaź-
nik Blue tooth® miga na niebiesko. Po podłączeniu maski przeciw chrapaniu do telefonu wskaźnik Blue tooth® zaświeci się na niebiesko. Zapisane dane zostaną teraz przeniesione na smartfon. W przypadku dużej liczby danych może to zająć trochę czasu. Po przesłaniu danych wskaźnik Blue tooth®
gaśnie.
8. Czyszczenie i konserwacjaPanel obsługi maski przeciw chrapaniu można zdejmować. Aby to zrobić, należy rozciągnąć panel obsługi obiema rękami w kierunku strzałki na spodniej stronie i maski przeciw chrapaniu.Należy pamiętać, że panel obsługi jest obciążony zbyt częstym odłączaniem. Można go zdejmować tylko w celu umy-cia maski przeciw chrapaniu.
UWAGA
•Przed czyszczeniem zawsze należy odłączyć panel obsługi od maski przeciw chrapaniu. W przeciwnym razie istnieje ryzyko uszkodzenia.
79
UWAGA
•Panel obsługi maski przeciw chrapaniu nie powinien mieć jakiegokolwiek kontaktu z wodą ani innymi cieczami. W przeciwnym razie może nastąpić jego uszkodzenie.
Do czyszczenia panelu obsługi należy użyć wacika nasączonego 70% al-koholem izopropylowym. Nie należy stosować środków chemicznych ani szorujących.
UWAGA
•Maski przeciw chrapaniu nie wolno czyścić chemicznie, wyżymać, suszyć w suszarce automatycznej, maglować ani prasować. W przeciwnym razie może dojść do uszkodzenia maski przeciw chrapaniu.
Maskę przeciw chrapaniu można prać w pralce. W tym celu należy zapiąć rzep z tyłu maski przeciw chrapaniu i włożyć ją do poszewki lub woreczka do prania. Należy nastawić pralkę na program łagodnego prania w temperaturze 30°C (bardzo delikatny program).Maskę przeciw chrapaniu należy prać ze względów ekologicznych razem z in-nymi tekstyliami. Do prania należy użyć delikatnego środka piorącego w ilości przewidzianej przez producenta.
UWAGA
•Pamiętaj, że zbyt częste pranie ma negatywny wpływ na maskę przeciw chrapaniu.
Dlatego w całym okresie jej użytkowania może być prana w pralce maksy-malnie 10 razy. Po praniu należy rozłożyć ją płasko na suszarce i pozostawić do wyschnięcia.
UWAGA
•Ponownie podłącz maskę przeciw chrapaniu do panelu obsługi dopiero po całkowitym wyschnięciu maski. W przeciwnym razie może dojść do uszko-dzenia panelu obsługi.
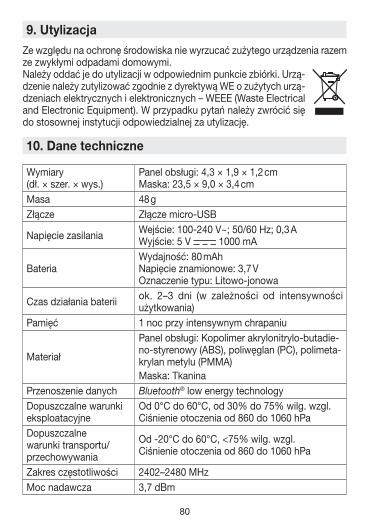
80
9. Utylizacja Ze względu na ochronę środowiska nie wyrzucać zużytego urządzenia razem ze zwykłymi odpadami domowymi. Należy oddać je do utylizacji w odpowiednim punkcie zbiórki. Urzą-dzenie należy zutylizować zgodnie z dyrektywą WE o zużytych urzą-dzeniach elektrycznych i elektronicznych – WEEE (Waste Electrical and Electronic Equipment). W przypadku pytań należy zwrócić się do stosownej instytucji odpowiedzialnej za utylizację.
10. Dane techniczne
Wymiary (dł. × szer. × wys.)
Panel obsługi: 4,3 × 1,9 × 1,2 cmMaska: 23,5 × 9,0 × 3,4 cm
Masa 48 g Złącze Złącze micro-USB
Napięcie zasilania Wejście: 100-240 V~; 50/60 Hz; 0,3 AWyjście: 5 V 1000 mA
BateriaWydajność: 80 mAhNapięcie znamionowe: 3,7 VOznaczenie typu: Litowo-jonowa
Czas działania baterii ok. 2–3 dni (w zależności od intensywności użytkowania)
Pamięć 1 noc przy intensywnym chrapaniu
Materiał
Panel obsługi: Kopolimer akrylonitrylo-butadie-no-styrenowy (ABS), poliwęglan (PC), polimeta-krylan metylu (PMMA)Maska: Tkanina
Przenoszenie danych Blue tooth® low energy technologyDopuszczalne warunki eksploatacyjne
Od 0°C do 60°C, od 30% do 75% wilg. wzgl.Ciśnienie otoczenia od 860 do 1060 hPa
Dopuszczalne warunki transportu/przechowywania
Od -20°C do 60°C, <75% wilg. wzgl.Ciśnienie otoczenia od 860 do 1060 hPa
Zakres częstotliwości 2402–2480 MHzMoc nadawcza 3,7 dBm
81
Zast
rzeg
a si
ę pr
awo
do p
omył
ek i
zmia
n
Niniejszym gwarantujemy, że opisywany produkt jest zgodny z dyrektywą europejską RED 2014/53/UE.Aby uzyskać szczegółowe dane, np. otrzymać deklarację zgodności CE, należy skontaktować się z punktem serwisowym, pisząc na podany adres.
11. Gwarancja/serwisGwarancja/serwis
W przypadku roszczeń z tytułu gwarancji należy zwrócić się do miejscowe-go dystrybutora lub partnera (patrz lista „Service international”).Przy odsyłce urządzenia należy załączyć kopię dowodu zakupu i krótki opis usterki.
Obowiązują następujące warunki gwarancji:1. Okres gwarancji na produkty firmy BEURER wynosi 3 lata lub, jeśli jest
dłuższy, obowiązuje w danym kraju od daty zakupu. W przypadku rosz-czeń z tytułu gwarancji konieczne jest potwierdzenie daty zakupu przez okazanie dowodu zakupu lub faktury.
2. Naprawy (całego urządzenia lub jego części) nie przedłużają okresu gwarancyjnego.
3. Gwarancja nie obowiązuje w przypadku uszkodzeń powstałych w nastę-pujących okolicznościach:
a. Z powodu niewłaściwego użytkowania, np. nieprzestrzegania instruk-cji obsługi.
b. W wyniku napraw lub modyfikacji wykonanych przez klienta lub osoby nieupoważnione.
c. Podczas transportu od producenta do klienta lub podczas trans-portu do Servicecenter.
d. Ponadto nie obejmuje akcesoriów dostarczonych z urządzeniem, które ulegają regularnemu zużyciu.
4. Odpowiedzialność za szkody bezpośrednio lub pośrednio spowodo-wane przez urządzenie jest wykluczona także wtedy, gdy w przypad-ku jego uszkodzenia uznane zostanie roszczenie z tytułu gwarancji.

82

83
84
BeurerGmbH•SöflingerStraße218•89077Ulm,Germanywww.beurer.com•www.beurer-gesundheitsratgeber.comwww.beurer-healthguide.com 67
7.69
_SL6
0_20
18-0
7-02
_01_
IM1_
BEU
The Bluetooth® word mark and logos are registered trademarks owned by Bluetooth SIG,Inc. and any use of such marks by Beurer GmbH is under license. Other trademarks and trade names are those of their respective owners.Apple and the Apple logo are trademarks of Apple Inc., registered in the U.S. and other countries. App Store is a service mark of Apple Inc., registered in the U.S. and other countries.Google Play and the Google Play logo are trademarks of Google LLC.Android is a trademark of Google LLC.


![Home [] · Web viewFotos können gerne angefordert werden! Foto: Horst Lennart, Lichtinstallation 2016 St. Josef ob der Laimgrube, Windmühlgasse 3, 1060 Wien 18:30 bis 21:45 Klassiktreffpunkt](https://img.pdfslide.org/doc/110x75/6056b8ee50474d335d1bda65/home-web-view-fotos-knnen-gerne-angefordert-werden-foto-horst-lennart-lichtinstallation.jpg)