Embed Size (px)
Citation preview
Web Server Access for
TVVR40000 / TVVR40010 / TVVR40020 TVVR50010 / TVVR50020
User manual
Version 1.0
Notes on the operating instructions
2
Deutsch Nederlands
Diese Bedienungsanleitung enthält wichtige Hinweise zur Inbetriebnahme und Handhabung.
Achten Sie hierauf, auch wenn Sie dieses Produkt an Dritte weitergeben.
Heben Sie deshalb diese Bedienungsanleitung zum Nachlesen auf!
Eine Auflistung der Inhalte finden Sie im Inhaltsverzeich-
nis mit Angabe der entsprechenden Seitenzahlen.
Deze gebruiksaanwijzing hoort bij dit product.
Er staan belagrijke aanwijzingen in betreffende de inge-bruikname en gebruik, ook als u dit product doorgeeft aan
derden.
Bewaar deze hendleiding zorgvuldig, zodat u deze later
nog eens kunt nalezen!
U vindt een opsomming van de inhoud in de inhoudsop-
gave met aanduiding van de paginanummers.
English Dansk
These user manual contains important information for in-
stallation and operation.
This should be also noted when this product is passed on
to a third party.
Therefore look after these operating instructions for future
reference!
A list of contents with the corresponding page number
can be found in the index.
Denne manual hører sammen med dette produkt.
Den indeholder vigtig information som skal bruges under opsætning og efterfølgende ved service.
Dette skal huskes også når produkter gives videre til an-den part. Læs derfor denne manual grundigt igennem
også for fremtiden.
Indholdet kan ses med sideanvisninger kan findes i
indekset.
Français
Ce mode d’emploi appartient à de produit.
Il contient des recommandations en ce qui concerne sa
mise en service et sa manutention.
Veuillez en tenir compte et ceci également lorsque vous
remettez le produit à des tiers. Conservez ce mode d’emploi afin de pouvoir vous documenter en temps utile!
Vous trouverez le récapitulatif des indications du contenu á la table des matières avec mention de la page corre-
spondante.
Pay attention to the information in the separate quick guide and operating instruc-
tions. These can be found on the Internet under www.abus-sc.com.

Web interface
3
Web interface
Opening the web interface
It is essential that the network settings are correct when
using remote control of the device and surveillance via
Internet Explorer.
Note
Please read the notes in the network section in
the operating manual.
When a connection is first established, Active-X
control elements must be loaded for the web inter-
face to be displayed correctly.
1. Enter the IP address of the recorder in Internet
Explorer.
• The login screen opens:
2. Enter the user, password and port and click on Login
with the mouse.
The following are preset on the recorder:
User: admin
Password: 12345
Port: 8000
Note
If the password function is deactivated in the re-
corder menu, there will still be a prompt for the
password when the network is accessed.
�
�
�
�
�
Web interface
4
Preview
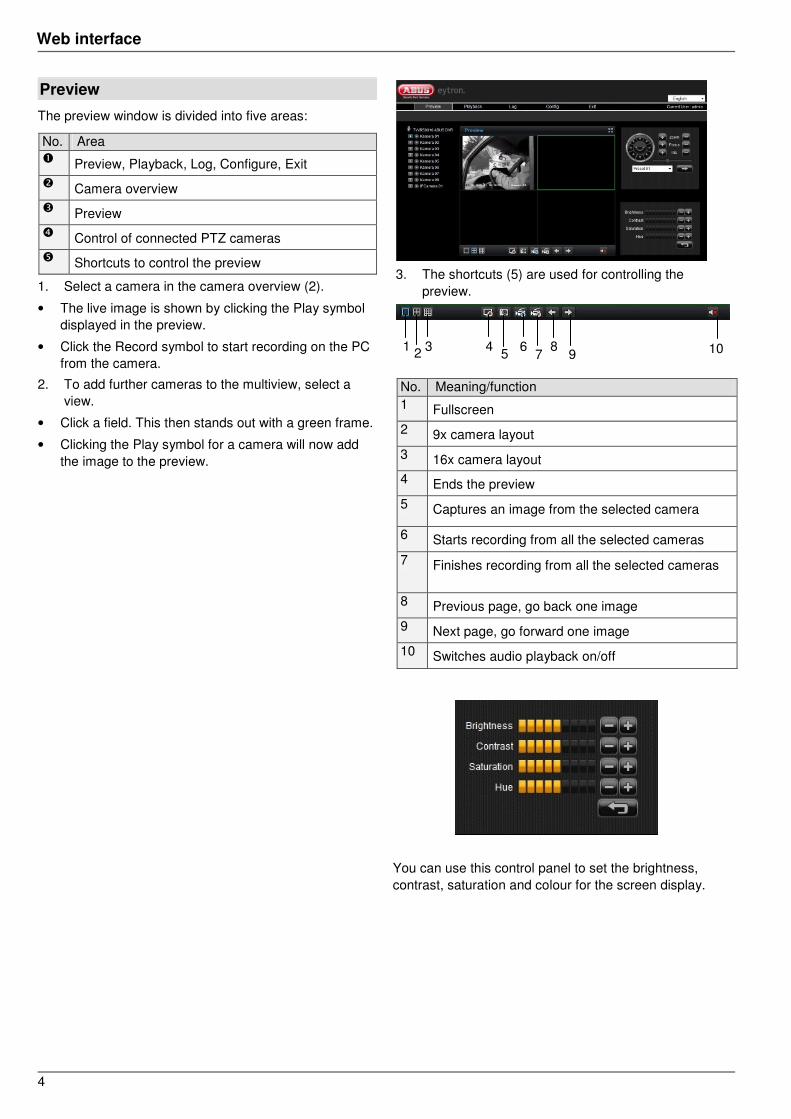
The preview window is divided into five areas:
No. Area
� Preview, Playback, Log, Configure, Exit
� Camera overview
� Preview
� Control of connected PTZ cameras
� Shortcuts to control the preview
1. Select a camera in the camera overview (2).
• The live image is shown by clicking the Play symbol
displayed in the preview.
• Click the Record symbol to start recording on the PC
from the camera.
2. To add further cameras to the multiview, select a
view.
• Click a field. This then stands out with a green frame.
• Clicking the Play symbol for a camera will now add
the image to the preview.
3. The shortcuts (5) are used for controlling the
preview.
No. Meaning/function
1 Fullscreen
2 9x camera layout
3 16x camera layout
4 Ends the preview
5 Captures an image from the selected camera
6 Starts recording from all the selected cameras
7 Finishes recording from all the selected cameras
8 Previous page, go back one image
9 Next page, go forward one image
10 Switches audio playback on/off
You can use this control panel to set the brightness,
contrast, saturation and colour for the screen display.
3 2
4 5
6 7
8 9 10 1

Playback
5
Playback
1. Click on Playback in the menu (1).
2. Select a camera in the camera overview (2).
3. Select the date in the calendar. The day is high-
lighted yellow.
4. Enable time entry to the left of the magnifying glass
to search for recordings.
5. Click on Search by the magnifying glass.
Recordings fulfilling the search criteria are displayed and
can be replayed.
• Use the control panel to play the recordings.
No. Meaning/function
1 Starts playback/Pause
2 Stops playback
3 Reduces the playback speed
4 Increases the playback speed
5 Image by image: Advances by a single image
No. Meaning/function
1 Captures image
2 Saves video clip on local PC. Click again to finish
video clip generation
3 Switches audio on/off
1 2 3 4 5
1 2 3
Log
6
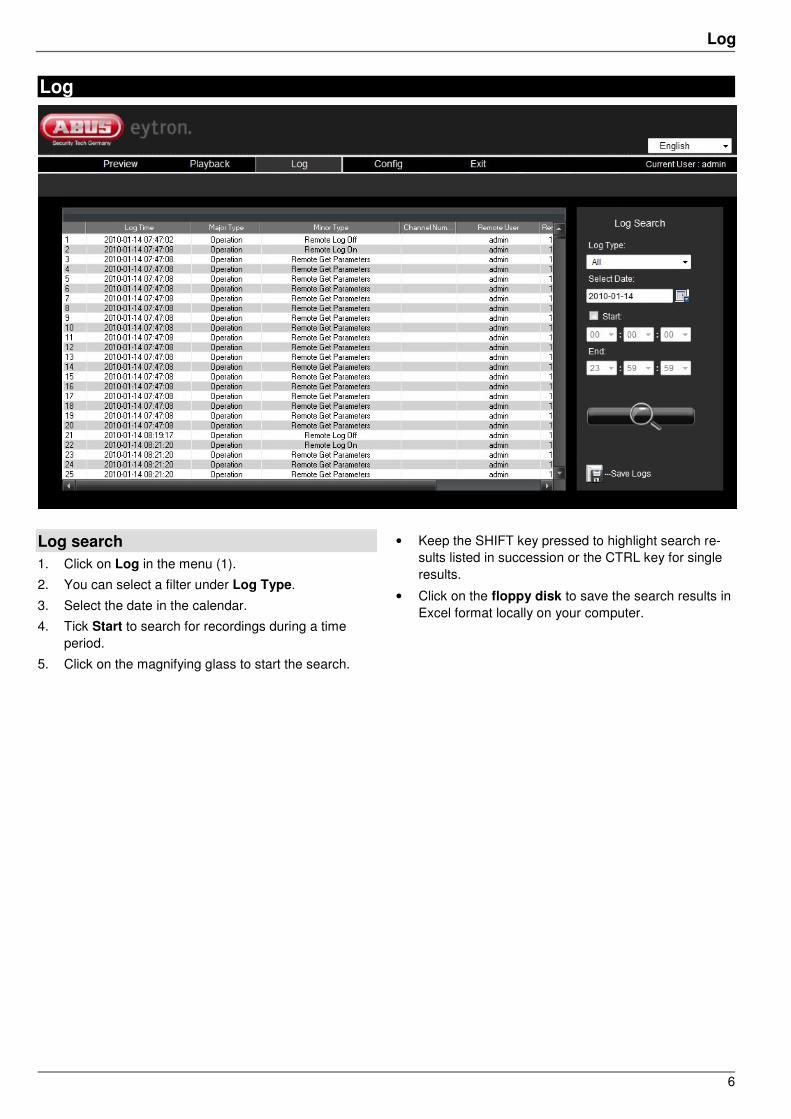
Log
Log search
1. Click on Log in the menu (1).
2. You can select a filter under Log Type.
3. Select the date in the calendar.
4. Tick Start to search for recordings during a time
period.
5. Click on the magnifying glass to start the search.
• Keep the SHIFT key pressed to highlight search re-
sults listed in succession or the CTRL key for single
results.
• Click on the floppy disk to save the search results in
Excel format locally on your computer.
Configure
7
Configure
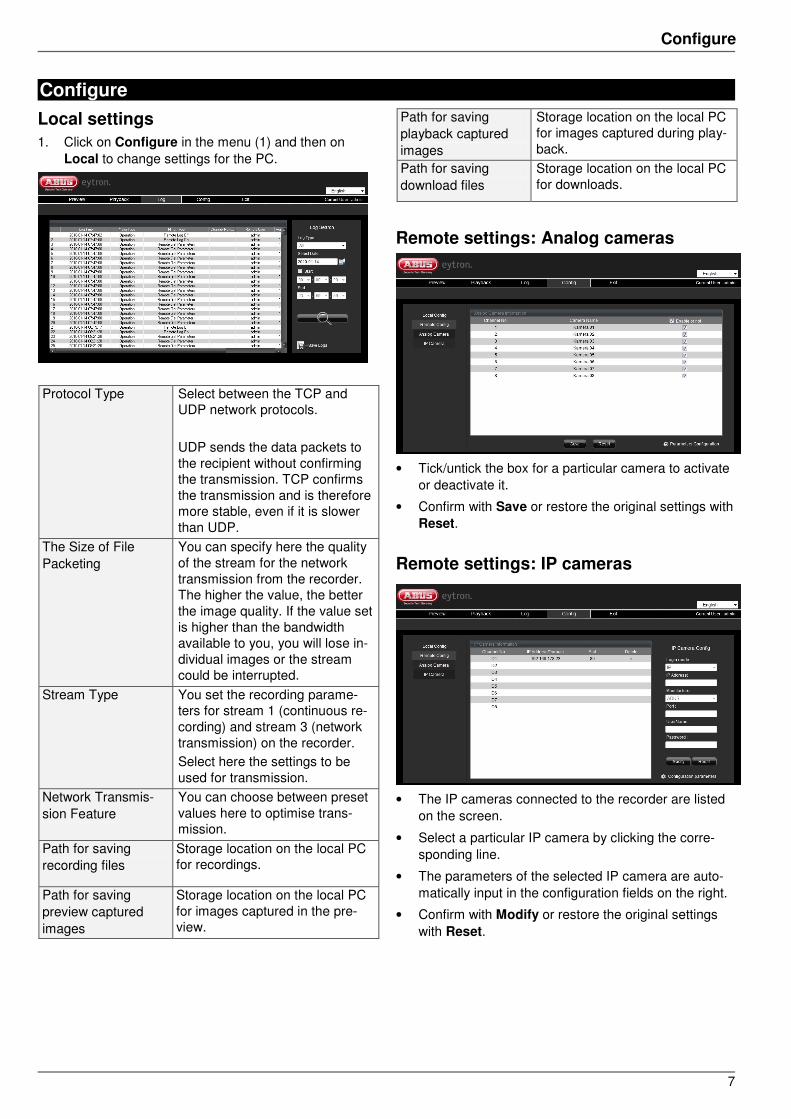
Local settings
1. Click on Configure in the menu (1) and then on
Local to change settings for the PC.
Protocol Type Select between the TCP and UDP network protocols.
UDP sends the data packets to
the recipient without confirming the transmission. TCP confirms
the transmission and is therefore more stable, even if it is slower
than UDP.
The Size of File
Packeting
You can specify here the quality
of the stream for the network
transmission from the recorder. The higher the value, the better
the image quality. If the value set
is higher than the bandwidth available to you, you will lose in-
dividual images or the stream could be interrupted.
Stream Type You set the recording parame-ters for stream 1 (continuous re-
cording) and stream 3 (network
transmission) on the recorder.
Select here the settings to be
used for transmission.
Network Transmis-
sion Feature
You can choose between preset
values here to optimise trans-mission.
Path for saving
recording files
Storage location on the local PC for recordings.
Path for saving
preview captured
images
Storage location on the local PC
for images captured in the pre-view.
Path for saving
playback captured
images
Storage location on the local PC for images captured during play-
back.
Path for saving
download files
Storage location on the local PC
for downloads.
Remote settings: Analog cameras
• Tick/untick the box for a particular camera to activate
or deactivate it.
• Confirm with Save or restore the original settings with
Reset.
Remote settings: IP cameras
• The IP cameras connected to the recorder are listed
on the screen.
• Select a particular IP camera by clicking the corre-
sponding line.
• The parameters of the selected IP camera are auto-
matically input in the configuration fields on the right.
• Confirm with Modify or restore the original settings
with Reset.

Configure
8
Remote recorder settings
1. Click Settings: Remote settings are on the bottom
right.
The following window opens:
You can now change the settings directly from the re-
corder. To apply the changes, click on the Save button.
Device Parameters Device information, version info
Channel Parameters Display settings, video parame-ters, schedule record, motion de-
tection, video lost, video tamper-
ing, video mask, text overlay
Network Parameters Network settings, PPPOE set-
tings, DDNS settings, NTP set-tings, NFS settings,
e-mail settings
Serial Port Settings RS-232 settings, RS-485 set-
tings
Alarm Parameters Alarm input parameters, alarm output parameters
Exception Parame-
ters
Manages exceptions
Account Manage-
ment
User administration
HDD Settings Formats HDDs, assigns groups
Update Remotely Firmware update over network
Exit
9
Exit
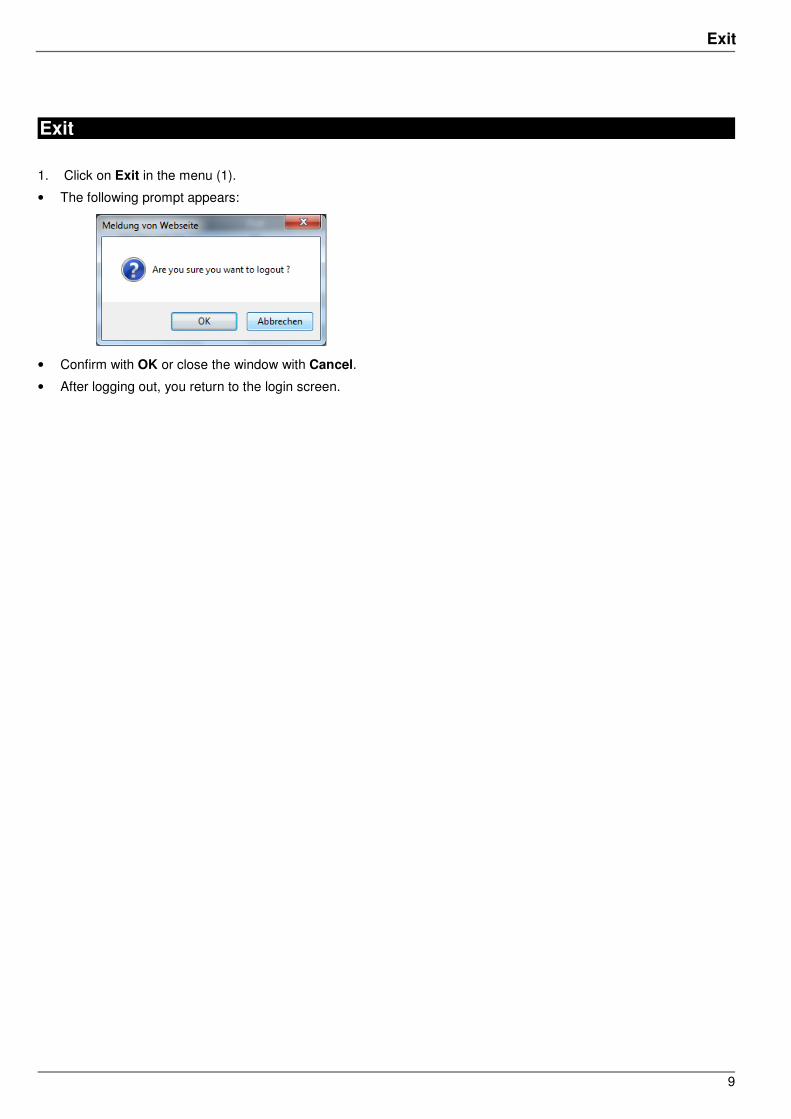
1. Click on Exit in the menu (1).
• The following prompt appears:
• Confirm with OK or close the window with Cancel.
• After logging out, you return to the login screen.
Exit
10
ABUS Digital Recorder Web server
TVVR40000 / TVVR40010 / TVVR40020
TVVR50010 / TVVR50020
Manufacturer:
ABUS Security-Center GmbH & Co. KG
Linker Kreuthweg 5
86444 Affing (Germany)