Embed Size (px)
Citation preview
Photometer Chlordioxid • Chlorine Dioxide
Tabletten • Tablets • Powderpacks: 0 - 3,8 mg/l ClO2
DE BedienungsanleitungGB Instruction Manual
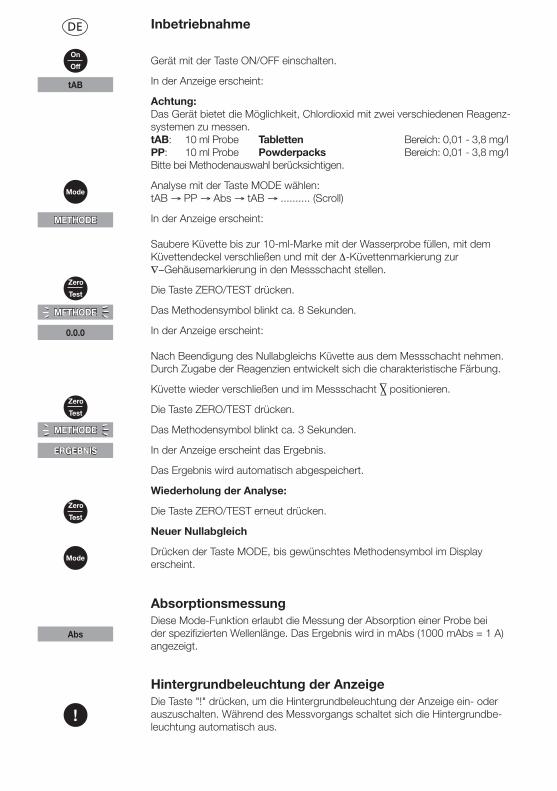
Gerät mit der Taste ON/OFF einschalten.
In der Anzeige erscheint:
Achtung: Das Gerät bietet die Möglichkeit, Chlordioxid mit zwei verschiedenen Reagenz-systemen zu messen. tAB: 10 ml Probe Tabletten Bereich: 0,01 - 3,8 mg/l PP: 10 ml Probe Powderpacks Bereich: 0,01 - 3,8 mg/l Bitte bei Methodenauswahl berücksichtigen.
Analyse mit der Taste MODE wählen: tAB → PP → Abs → tAB → .......... (Scroll)
In der Anzeige erscheint: Saubere Küvette bis zur 10-ml-Marke mit der Wasserprobe füllen, mit dem Küvettendeckel verschließen und mit der ∆-Küvettenmarkierung zur ∇−Gehäusemarkierung in den Messschacht stellen.
Die Taste ZERO/TEST drücken.
Das Methodensymbol blinkt ca. 8 Sekunden.
In der Anzeige erscheint: Nach Beendigung des Nullabgleichs Küvette aus dem Messschacht nehmen. Durch Zugabe der Reagenzien entwickelt sich die charakteristische Färbung.
Küvette wieder verschließen und im Messschacht positionieren.
Die Taste ZERO/TEST drücken.
Das Methodensymbol blinkt ca. 3 Sekunden.
In der Anzeige erscheint das Ergebnis.
Das Ergebnis wird automatisch abgespeichert.
Wiederholung der Analyse:
Die Taste ZERO/TEST erneut drücken.
Neuer Nullabgleich
Drücken der Taste MODE, bis gewünschtes Methodensymbol im Display erscheint.
Inbetriebnahme
METHODE
METHODE
METHODE
0.0.0
ERGEBNIS
tAB
On
Off
Mode
Zero
Test
Zero
Test
Hintergrundbeleuchtung der AnzeigeDie Taste "!" drücken, um die Hintergrundbeleuchtung der Anzeige ein- oder auszuschalten. Während des Messvorgangs schaltet sich die Hintergrundbe-leuchtung automatisch aus.
!
Mode
Zero
Test
DE
Abs
AbsorptionsmessungDiese Mode-Funktion erlaubt die Messung der Absorption einer Probe bei der spezifizierten Wellenlänge. Das Ergebnis wird in mAbs (1000 mAbs = 1 A) angezeigt.
Hinweise zu den Methoden
Anwendungsmöglichkeiten, Analysenvorschrift und Matrixeffekte der Methoden beachten. Reagenzien sind für die chemische Analyse bestimmt und dürfen nicht in die Hände von Kindern gelangen.
Sicherheitsdatenblätter: www.aqualytic.de
Reagenzlösungen ordnungsgemäß entsorgen.
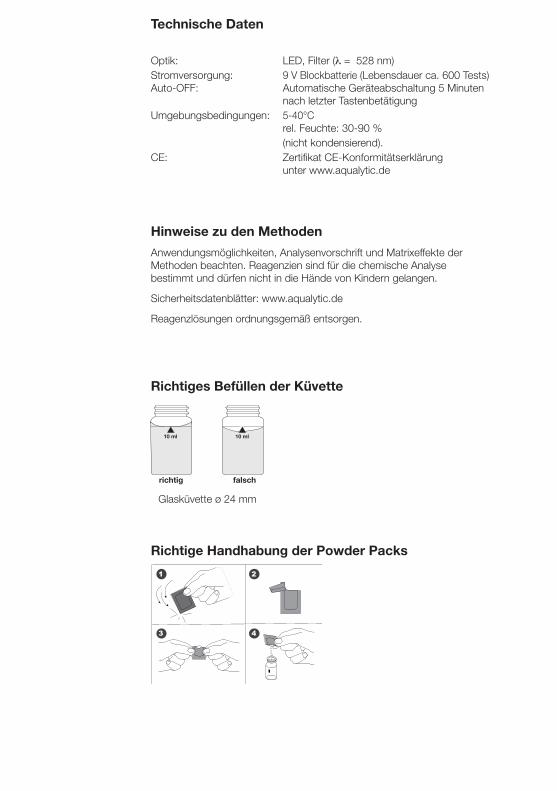
Richtiges Befüllen der Küvette
Richtige Handhabung der Powder Packs
1 2
3
AB
4
Optik: LED, Filter (l = 528 nm)Stromversorgung: 9 V Blockbatterie (Lebensdauer ca. 600 Tests) Auto-OFF: Automatische Geräteabschaltung 5 Minuten nach letzter TastenbetätigungUmgebungsbedingungen: 5-40°C rel. Feuchte: 30-90 % (nicht kondensierend).CE: Zertifikat CE-Konformitätserklärung unter www.aqualytic.de
Technische Daten
Glasküvette ø 24 mm
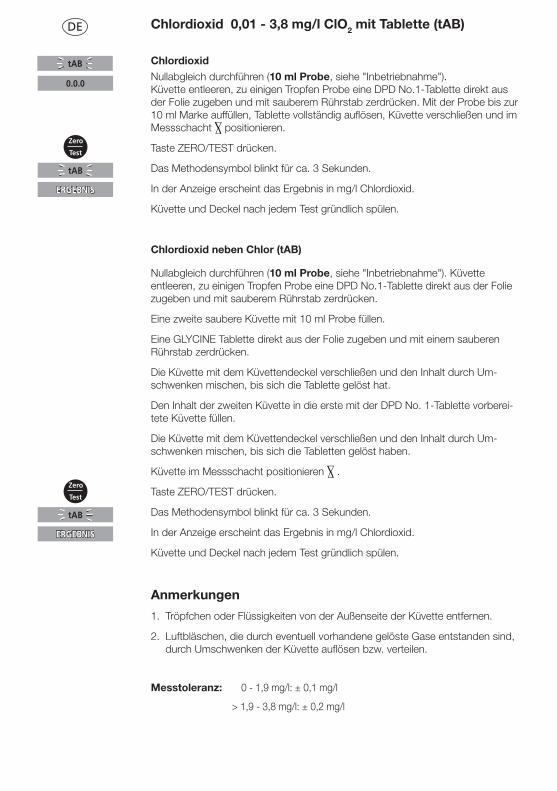
DE Chlordioxid 0,01 - 3,8 mg/l ClO2 mit Tablette (tAB)
Chlordioxid
Nullabgleich durchführen (10 ml Probe, siehe "Inbetriebnahme"). Küvette entleeren, zu einigen Tropfen Probe eine DPD No.1-Tablette direkt aus der Folie zugeben und mit sauberem Rührstab zerdrücken. Mit der Probe bis zur 10 ml Marke auffüllen, Tablette vollständig auflösen, Küvette verschließen und im Messschacht positionieren.
Taste ZERO/TEST drücken.
Das Methodensymbol blinkt für ca. 3 Sekunden.
In der Anzeige erscheint das Ergebnis in mg/l Chlordioxid.
Küvette und Deckel nach jedem Test gründlich spülen.
Chlordioxid neben Chlor (tAB)
Nullabgleich durchführen (10 ml Probe, siehe "Inbetriebnahme"). Küvette entleeren, zu einigen Tropfen Probe eine DPD No.1-Tablette direkt aus der Folie zugeben und mit sauberem Rührstab zerdrücken.
Eine zweite saubere Küvette mit 10 ml Probe füllen.
Eine GLYCINE Tablette direkt aus der Folie zugeben und mit einem sauberen Rührstab zerdrücken.
Die Küvette mit dem Küvettendeckel verschließen und den Inhalt durch Um-schwenken mischen, bis sich die Tablette gelöst hat.
Den Inhalt der zweiten Küvette in die erste mit der DPD No. 1-Tablette vorberei-tete Küvette füllen.
Die Küvette mit dem Küvettendeckel verschließen und den Inhalt durch Um-schwenken mischen, bis sich die Tabletten gelöst haben.
Küvette im Messschacht positionieren .
Taste ZERO/TEST drücken.
Das Methodensymbol blinkt für ca. 3 Sekunden.
In der Anzeige erscheint das Ergebnis in mg/l Chlordioxid.
Küvette und Deckel nach jedem Test gründlich spülen.
Anmerkungen
1. Tröpfchen oder Flüssigkeiten von der Außenseite der Küvette entfernen.
2. Luftbläschen, die durch eventuell vorhandene gelöste Gase entstanden sind, durch Umschwenken der Küvette auflösen bzw. verteilen.
Messtoleranz: 0 - 1,9 mg/l: ± 0,1 mg/l
> 1,9 - 3,8 mg/l: ± 0,2 mg/l
0.0.0
ERGEBNIS
Zero
Test
tAB
tAB
ERGEBNIS
Zero
Test
tAB
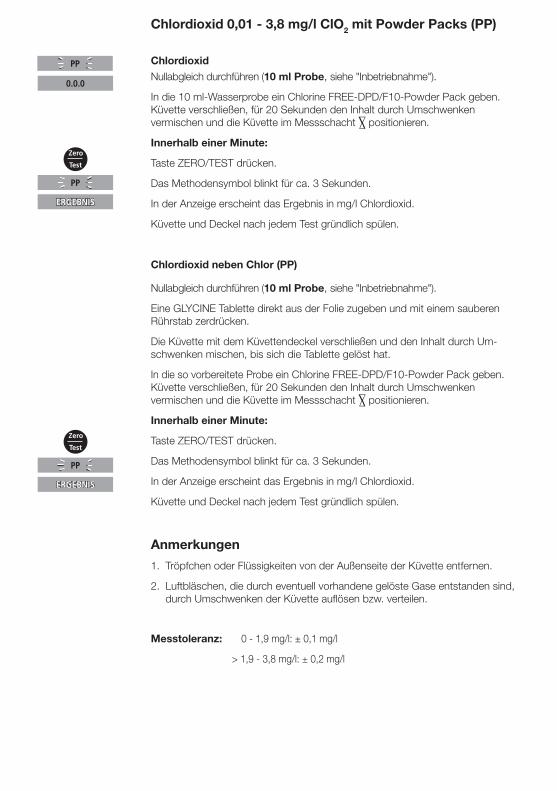
Chlordioxid 0,01 - 3,8 mg/l ClO2 mit Powder Packs (PP)
Chlordioxid
Nullabgleich durchführen (10 ml Probe, siehe "Inbetriebnahme").
In die 10 ml-Wasserprobe ein Chlorine FREE-DPD/F10-Powder Pack geben. Küvette verschließen, für 20 Sekunden den Inhalt durch Umschwenken vermischen und die Küvette im Messschacht positionieren.
Innerhalb einer Minute:
Taste ZERO/TEST drücken.
Das Methodensymbol blinkt für ca. 3 Sekunden.
In der Anzeige erscheint das Ergebnis in mg/l Chlordioxid.
Küvette und Deckel nach jedem Test gründlich spülen.
Chlordioxid neben Chlor (PP)
Nullabgleich durchführen (10 ml Probe, siehe "Inbetriebnahme").
Eine GLYCINE Tablette direkt aus der Folie zugeben und mit einem sauberen Rührstab zerdrücken.
Die Küvette mit dem Küvettendeckel verschließen und den Inhalt durch Um-schwenken mischen, bis sich die Tablette gelöst hat.
In die so vorbereitete Probe ein Chlorine FREE-DPD/F10-Powder Pack geben. Küvette verschließen, für 20 Sekunden den Inhalt durch Umschwenken vermischen und die Küvette im Messschacht positionieren.
Innerhalb einer Minute:
Taste ZERO/TEST drücken.
Das Methodensymbol blinkt für ca. 3 Sekunden.
In der Anzeige erscheint das Ergebnis in mg/l Chlordioxid.
Küvette und Deckel nach jedem Test gründlich spülen.
Anmerkungen
1. Tröpfchen oder Flüssigkeiten von der Außenseite der Küvette entfernen.
2. Luftbläschen, die durch eventuell vorhandene gelöste Gase entstanden sind, durch Umschwenken der Küvette auflösen bzw. verteilen.
Messtoleranz: 0 - 1,9 mg/l: ± 0,1 mg/l
> 1,9 - 3,8 mg/l: ± 0,2 mg/l
0.0.0
ERGEBNIS
Zero
Test
PP
PP
ERGEBNIS
Zero
Test
PP
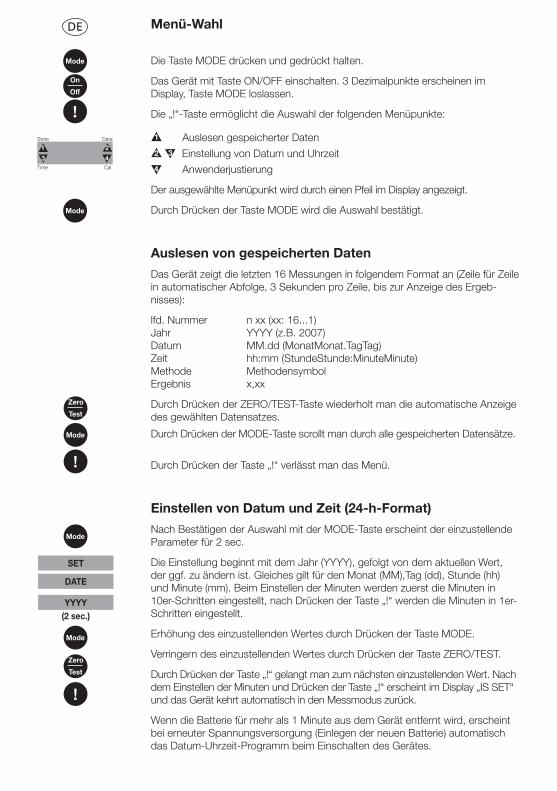
Die Taste MODE drücken und gedrückt halten.
Das Gerät mit Taste ON/OFF einschalten. 3 Dezimalpunkte erscheinen im Display, Taste MODE loslassen.
Die „!“-Taste ermöglicht die Auswahl der folgenden Menüpunkte:
▲ 1 Auslesen gespeicherter Daten
▲ 2 ▼ 3 Einstellung von Datum und Uhrzeit
▼ 4 Anwenderjustierung
Der ausgewählte Menüpunkt wird durch einen Pfeil im Display angezeigt.
Durch Drücken der Taste MODE wird die Auswahl bestätigt.
Auslesen von gespeicherten Daten
Das Gerät zeigt die letzten 16 Messungen in folgendem Format an (Zeile für Zeile in automatischer Abfolge, 3 Sekunden pro Zeile, bis zur Anzeige des Ergeb-nisses):
lfd. Nummer n xx (xx: 16...1) Jahr YYYY (z.B. 2007) Datum MM.dd (MonatMonat.TagTag) Zeit hh:mm (StundeStunde:MinuteMinute) Methode Methodensymbol Ergebnis x,xx
Durch Drücken der ZERO/TEST-Taste wiederholt man die automatische Anzeige des gewählten Datensatzes.
Durch Drücken der MODE-Taste scrollt man durch alle gespeicherten Datensätze.
Durch Drücken der Taste „!“ verlässt man das Menü.
Einstellen von Datum und Zeit (24-h-Format)
Nach Bestätigen der Auswahl mit der MODE-Taste erscheint der einzustellende Parameter für 2 sec.
Die Einstellung beginnt mit dem Jahr (YYYY), gefolgt von dem aktuellen Wert, der ggf. zu ändern ist. Gleiches gilt für den Monat (MM),Tag (dd), Stunde (hh) und Minute (mm). Beim Einstellen der Minuten werden zuerst die Minuten in 10er-Schritten eingestellt, nach Drücken der Taste „!“ werden die Minuten in 1er-Schritten eingestellt.
Erhöhung des einzustellenden Wertes durch Drücken der Taste MODE.
Verringern des einzustellenden Wertes durch Drücken der Taste ZERO/TEST.
Durch Drücken der Taste „!“ gelangt man zum nächsten einzustellenden Wert. Nach dem Einstellen der Minuten und Drücken der Taste „!“ erscheint im Display „IS SET“ und das Gerät kehrt automatisch in den Messmodus zurück.
Wenn die Batterie für mehr als 1 Minute aus dem Gerät entfernt wird, erscheint bei erneuter Spannungsversorgung (Einlegen der neuen Batterie) automatisch das Datum-Uhrzeit-Programm beim Einschalten des Gerätes.
On
Off
Mode
!
Mode
!
Zero
Test
Mode
!
Time Cal
Store Date▼
2
▼3 ▼4
▼
1
Mode
SET
DATE
YYYY
(2 sec.)
Zero
Test
Mode
Menü-WahlDE
Anwenderjustierung
CAL/tAB
CAL/PP
CAL
ERGEBNIS + x
0.0.0
ERGEBNIS
CAL
: :
METHODE
METHODE
CAL
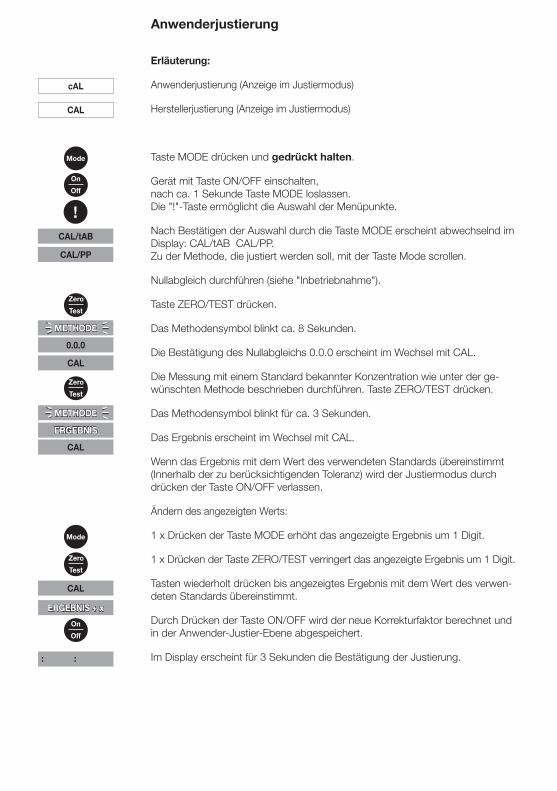
Erläuterung:
Anwenderjustierung (Anzeige im Justiermodus)
Herstellerjustierung (Anzeige im Justiermodus)
Taste MODE drücken und gedrückt halten.
Gerät mit Taste ON/OFF einschalten, nach ca. 1 Sekunde Taste MODE loslassen. Die "!"-Taste ermöglicht die Auswahl der Menüpunkte.
Nach Bestätigen der Auswahl durch die Taste MODE erscheint abwechselnd im Display: CAL/tAB CAL/PP. Zu der Methode, die justiert werden soll, mit der Taste Mode scrollen.
Nullabgleich durchführen (siehe "Inbetriebnahme").
Taste ZERO/TEST drücken.
Das Methodensymbol blinkt ca. 8 Sekunden.
Die Bestätigung des Nullabgleichs 0.0.0 erscheint im Wechsel mit CAL.
Die Messung mit einem Standard bekannter Konzentration wie unter der ge-wünschten Methode beschrieben durchführen. Taste ZERO/TEST drücken.
Das Methodensymbol blinkt für ca. 3 Sekunden.
Das Ergebnis erscheint im Wechsel mit CAL.
Wenn das Ergebnis mit dem Wert des verwendeten Standards übereinstimmt (Innerhalb der zu berücksichtigenden Toleranz) wird der Justiermodus durch drücken der Taste ON/OFF verlassen.
Ändern des angezeigten Werts:
1 x Drücken der Taste MODE erhöht das angezeigte Ergebnis um 1 Digit.
1 x Drücken der Taste ZERO/TEST verringert das angezeigte Ergebnis um 1 Digit.
Tasten wiederholt drücken bis angezeigtes Ergebnis mit dem Wert des verwen-deten Standards übereinstimmt.
Durch Drücken der Taste ON/OFF wird der neue Korrekturfaktor berechnet und in der Anwender-Justier-Ebene abgespeichert.
Im Display erscheint für 3 Sekunden die Bestätigung der Justierung.
Zero
Test
Zero
Test
Zero
Test
Mode
On
Off
CAL
cAL
Mode
On
Off
!
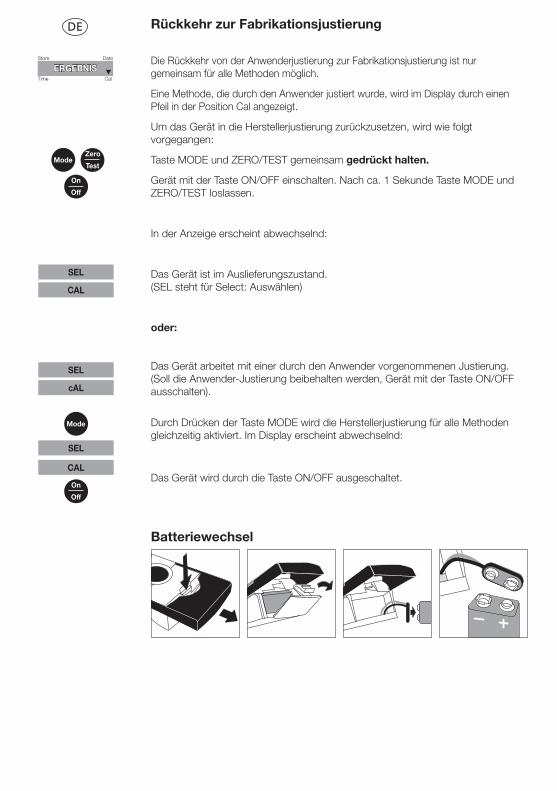
Rückkehr zur Fabrikationsjustierung
cAL
SEL
SEL
CAL
CAL
SEL
Die Rückkehr von der Anwenderjustierung zur Fabrikationsjustierung ist nur gemeinsam für alle Methoden möglich.
Eine Methode, die durch den Anwender justiert wurde, wird im Display durch einen Pfeil in der Position Cal angezeigt.
Um das Gerät in die Herstellerjustierung zurückzusetzen, wird wie folgt vorgegangen:
Taste MODE und ZERO/TEST gemeinsam gedrückt halten.
Gerät mit der Taste ON/OFF einschalten. Nach ca. 1 Sekunde Taste MODE und ZERO/TEST loslassen.
In der Anzeige erscheint abwechselnd:
Das Gerät ist im Auslieferungszustand. (SEL steht für Select: Auswählen)
oder:
Das Gerät arbeitet mit einer durch den Anwender vorgenommenen Justierung. (Soll die Anwender-Justierung beibehalten werden, Gerät mit der Taste ON/OFF ausschalten).
Durch Drücken der Taste MODE wird die Herstellerjustierung für alle Methoden gleichzeitig aktiviert. Im Display erscheint abwechselnd:
Das Gerät wird durch die Taste ON/OFF ausgeschaltet.
Zero
TestMode
On
Off
Mode
On
Off
Time Cal
Store Date
▼
LO BAT
DE
ERGEBNIS
Batteriewechsel
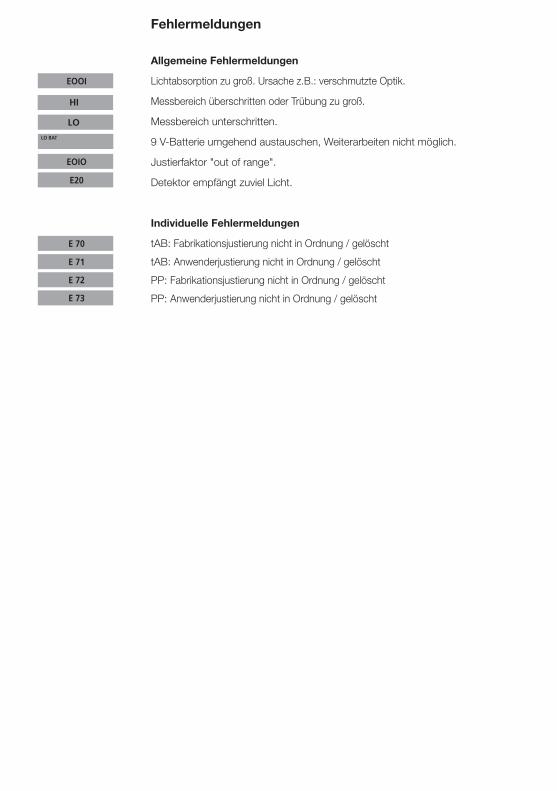
Fehlermeldungen
Allgemeine Fehlermeldungen
Lichtabsorption zu groß. Ursache z.B.: verschmutzte Optik.
Messbereich überschritten oder Trübung zu groß.
Messbereich unterschritten.
9 V-Batterie umgehend austauschen, Weiterarbeiten nicht möglich.
Justierfaktor "out of range".
Detektor empfängt zuviel Licht.
Individuelle Fehlermeldungen
tAB: Fabrikationsjustierung nicht in Ordnung / gelöscht
tAB: Anwenderjustierung nicht in Ordnung / gelöscht
PP: Fabrikationsjustierung nicht in Ordnung / gelöscht
PP: Anwenderjustierung nicht in Ordnung / gelöscht
HI
EOOI
LO
LO BAT
EOIO
E 70
E 71
E20
E 72
E 73
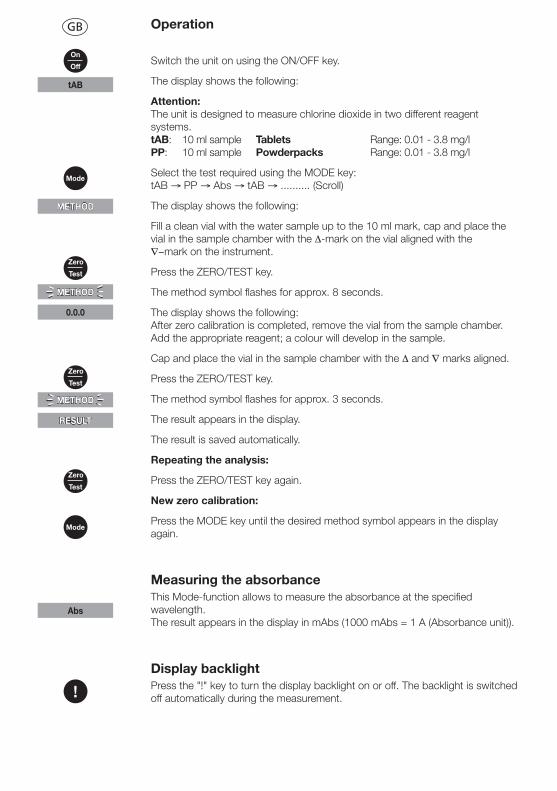
Switch the unit on using the ON/OFF key.
The display shows the following:
Attention: The unit is designed to measure chlorine dioxide in two different reagent systems. tAB: 10 ml sample Tablets Range: 0.01 - 3.8 mg/l PP: 10 ml sample Powderpacks Range: 0.01 - 3.8 mg/l
Select the test required using the MODE key: tAB → PP → Abs → tAB → .......... (Scroll)
The display shows the following:
Fill a clean vial with the water sample up to the 10 ml mark, cap and place the vial in the sample chamber with the ∆-mark on the vial aligned with the ∇−mark on the instrument.
Press the ZERO/TEST key.
The method symbol flashes for approx. 8 seconds.
The display shows the following: After zero calibration is completed, remove the vial from the sample chamber. Add the appropriate reagent; a colour will develop in the sample.
Cap and place the vial in the sample chamber with the ∆ and ∇ marks aligned.
Press the ZERO/TEST key.
The method symbol flashes for approx. 3 seconds.
The result appears in the display.
The result is saved automatically.
Repeating the analysis:
Press the ZERO/TEST key again.
New zero calibration:
Press the MODE key until the desired method symbol appears in the display again.
Operation
METHOD
METHOD
METHOD
0.0.0
RESULT
tAB
On
Off
Mode
Zero
Test
Zero
Test
Display backlightPress the "!" key to turn the display backlight on or off. The backlight is switched off automatically during the measurement.!
Mode
Zero
Test
GB
Abs
Measuring the absorbanceThis Mode-function allows to measure the absorbance at the specified wavelength. The result appears in the display in mAbs (1000 mAbs = 1 A (Absorbance unit)).
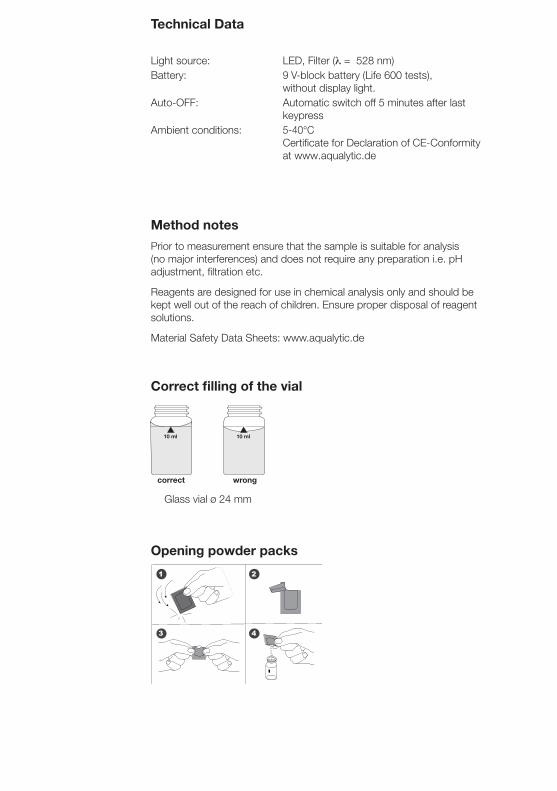
Correct filling of the vial
Opening powder packs
1 2
3
AB
4
Light source: LED, Filter (l = 528 nm)Battery: 9 V-block battery (Life 600 tests), without display light.Auto-OFF: Automatic switch off 5 minutes after last keypressAmbient conditions: 5-40°C Certificate for Declaration of CE-Conformity at www.aqualytic.de
Technical Data
Glass vial ø 24 mm
Method notes
Prior to measurement ensure that the sample is suitable for analysis (no major interferences) and does not require any preparation i.e. pH adjustment, filtration etc.
Reagents are designed for use in chemical analysis only and should be kept well out of the reach of children. Ensure proper disposal of reagent solutions.
Material Safety Data Sheets: www.aqualytic.de
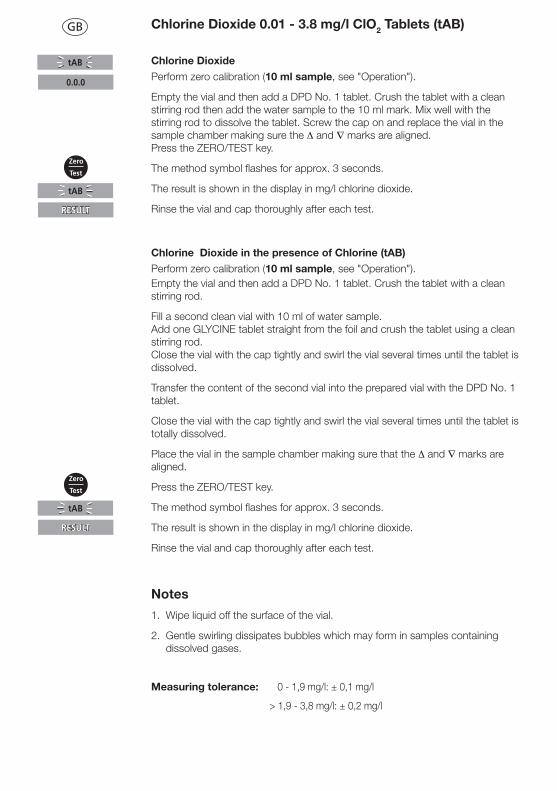
GB Chlorine Dioxide 0.01 - 3.8 mg/l ClO2 Tablets (tAB)
Chlorine Dioxide
Perform zero calibration (10 ml sample, see "Operation").
Empty the vial and then add a DPD No. 1 tablet. Crush the tablet with a clean stirring rod then add the water sample to the 10 ml mark. Mix well with the stirring rod to dissolve the tablet. Screw the cap on and replace the vial in the sample chamber making sure the ∆ and ∇ marks are aligned. Press the ZERO/TEST key.
The method symbol flashes for approx. 3 seconds.
The result is shown in the display in mg/l chlorine dioxide.
Rinse the vial and cap thoroughly after each test.
Chlorine Dioxide in the presence of Chlorine (tAB) Perform zero calibration (10 ml sample, see "Operation").Empty the vial and then add a DPD No. 1 tablet. Crush the tablet with a clean stirring rod.
Fill a second clean vial with 10 ml of water sample. Add one GLYCINE tablet straight from the foil and crush the tablet using a clean stirring rod. Close the vial with the cap tightly and swirl the vial several times until the tablet is dissolved.
Transfer the content of the second vial into the prepared vial with the DPD No. 1 tablet.
Close the vial with the cap tightly and swirl the vial several times until the tablet is totally dissolved.
Place the vial in the sample chamber making sure that the ∆ and ∇ marks are aligned.
Press the ZERO/TEST key.
The method symbol flashes for approx. 3 seconds.
The result is shown in the display in mg/l chlorine dioxide.
Rinse the vial and cap thoroughly after each test.
Notes
1. Wipe liquid off the surface of the vial.
2. Gentle swirling dissipates bubbles which may form in samples containing dissolved gases.
Measuring tolerance: 0 - 1,9 mg/l: ± 0,1 mg/l
> 1,9 - 3,8 mg/l: ± 0,2 mg/l
0.0.0
RESULT
Zero
Test
tAB
tAB
RESULT
Zero
Test
tAB
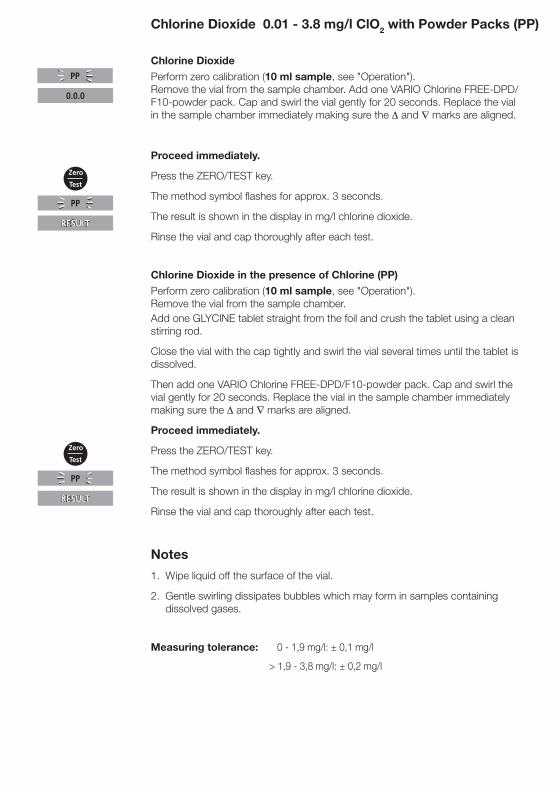
Chlorine Dioxide 0.01 - 3.8 mg/l ClO2 with Powder Packs (PP)
Chlorine Dioxide
Perform zero calibration (10 ml sample, see "Operation"). Remove the vial from the sample chamber. Add one VARIO Chlorine FREE-DPD/F10-powder pack. Cap and swirl the vial gently for 20 seconds. Replace the vial in the sample chamber immediately making sure the ∆ and ∇ marks are aligned.
Proceed immediately.
Press the ZERO/TEST key.
The method symbol flashes for approx. 3 seconds.
The result is shown in the display in mg/l chlorine dioxide.
Rinse the vial and cap thoroughly after each test.
Chlorine Dioxide in the presence of Chlorine (PP) Perform zero calibration (10 ml sample, see "Operation"). Remove the vial from the sample chamber. Add one GLYCINE tablet straight from the foil and crush the tablet using a clean stirring rod.
Close the vial with the cap tightly and swirl the vial several times until the tablet is dissolved.
Then add one VARIO Chlorine FREE-DPD/F10-powder pack. Cap and swirl the vial gently for 20 seconds. Replace the vial in the sample chamber immediately making sure the ∆ and ∇ marks are aligned.
Proceed immediately.
Press the ZERO/TEST key.
The method symbol flashes for approx. 3 seconds.
The result is shown in the display in mg/l chlorine dioxide.
Rinse the vial and cap thoroughly after each test.
Notes
1. Wipe liquid off the surface of the vial.
2. Gentle swirling dissipates bubbles which may form in samples containing dissolved gases.
Measuring tolerance: 0 - 1,9 mg/l: ± 0,1 mg/l
> 1,9 - 3,8 mg/l: ± 0,2 mg/l
0.0.0
RESULT
Zero
Test
PP
PP
RESULT
Zero
Test
PP
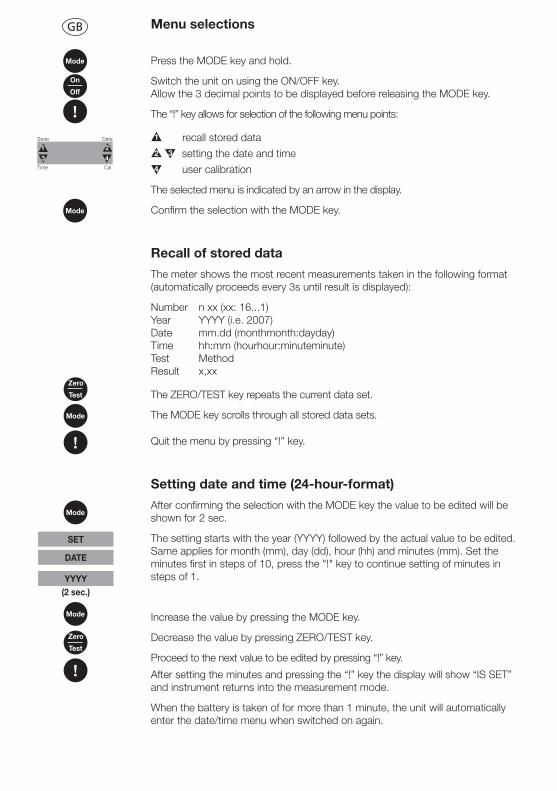
Press the MODE key and hold.
Switch the unit on using the ON/OFF key. Allow the 3 decimal points to be displayed before releasing the MODE key.
The “!” key allows for selection of the following menu points:
▲ 1 recall stored data
▲ 2 ▼ 3 setting the date and time
▼ 4 user calibration
The selected menu is indicated by an arrow in the display.
Confirm the selection with the MODE key.
Recall of stored data
The meter shows the most recent measurements taken in the following format (automatically proceeds every 3s until result is displayed):
Number n xx (xx: 16...1) Year YYYY (i.e. 2007) Date mm.dd (monthmonth:dayday) Time hh:mm (hourhour:minuteminute) Test Method Result x,xx
The ZERO/TEST key repeats the current data set.
The MODE key scrolls through all stored data sets.
Quit the menu by pressing “!” key.
Setting date and time (24-hour-format)
After confirming the selection with the MODE key the value to be edited will be shown for 2 sec.
The setting starts with the year (YYYY) followed by the actual value to be edited. Same applies for month (mm), day (dd), hour (hh) and minutes (mm). Set the minutes first in steps of 10, press the "!" key to continue setting of minutes in steps of 1.
Increase the value by pressing the MODE key.
Decrease the value by pressing ZERO/TEST key.
Proceed to the next value to be edited by pressing “!” key. After setting the minutes and pressing the “!” key the display will show “IS SET” and instrument returns into the measurement mode.
When the battery is taken of for more than 1 minute, the unit will automatically enter the date/time menu when switched on again.
On
Off
Mode
!
Mode
!
Zero
Test
Mode
!
Time Cal
Store Date▼
2
▼3 ▼4
▼
1
Mode
SET
DATE
YYYY
(2 sec.)
Zero
Test
Mode
Menu selectionsGB
User calibration
CAL/tAB
CAL/PP
CAL
RESULT + x
0.0.0
RESULT
CAL
: :
METHOD
METHOD
CAL
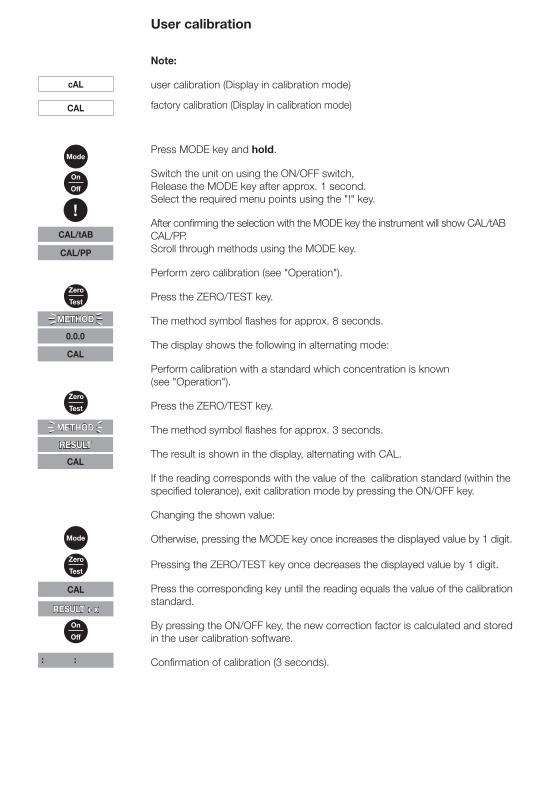
Note:
user calibration (Display in calibration mode)
factory calibration (Display in calibration mode)
Press MODE key and hold.
Switch the unit on using the ON/OFF switch, Release the MODE key after approx. 1 second. Select the required menu points using the "!" key.
After confirming the selection with the MODE key the instrument will show CAL/tAB CAL/PP. Scroll through methods using the MODE key.
Perform zero calibration (see "Operation").
Press the ZERO/TEST key.
The method symbol flashes for approx. 8 seconds.
The display shows the following in alternating mode:
Perform calibration with a standard which concentration is known (see "Operation").
Press the ZERO/TEST key.
The method symbol flashes for approx. 3 seconds.
The result is shown in the display, alternating with CAL.
If the reading corresponds with the value of the calibration standard (within the specified tolerance), exit calibration mode by pressing the ON/OFF key.
Changing the shown value:
Otherwise, pressing the MODE key once increases the displayed value by 1 digit. Pressing the ZERO/TEST key once decreases the displayed value by 1 digit.
Press the corresponding key until the reading equals the value of the calibration standard.
By pressing the ON/OFF key, the new correction factor is calculated and stored in the user calibration software.
Confirmation of calibration (3 seconds).
Zero
Test
Zero
Test
Zero
Test
Mode
On
Off
CAL
cAL
Mode
On
Off
!

Resetting the factory calibration
cAL
SEL
SEL
CAL
CAL
SEL
Resetting the user calibration to the oriinal factory setting resets all parameters.
A user calibrated method will be indicated by an arrow in the display.
To reset the calibration to the factory setting:
Press both the MODE and ZERO/TEST key and hold.
Switch the unit on using the ON/OFF key. Release the MODE and ZERO/TEST keys after approx. 1 second.
The following messages will appear in turn on the display:
The factory setting is active. (SEL stands for Select)
or:
Calibration has been set by the user. (If the user calibration is to be retained, switch the unit off using the ON/OFF key.)
Calibration is reset to the factory setting by pressing the MODE key. The following messages will appear in turn on the display:
Switch the unit off using the ON/OFF key.
Zero
TestMode
On
Off
Mode
On
Off
Time Cal
Store Date
▼
LO BAT
GB
RESULT
Changing the battery
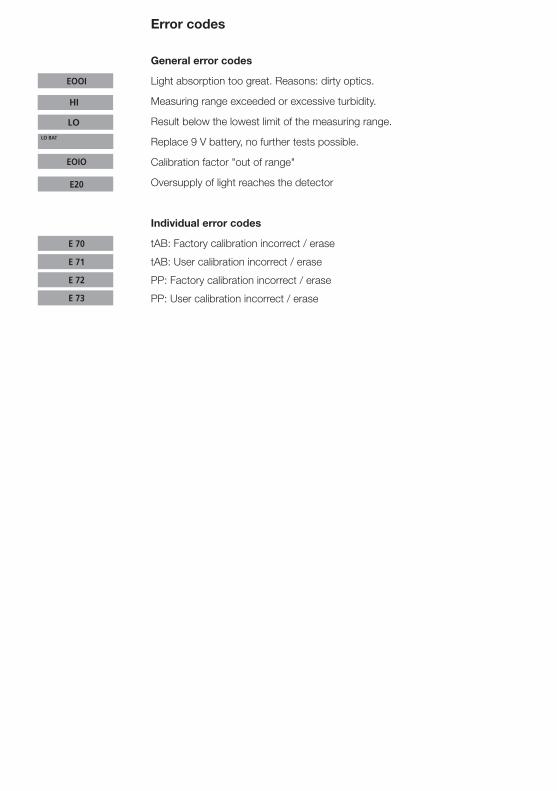
Error codes
General error codes
Light absorption too great. Reasons: dirty optics.
Measuring range exceeded or excessive turbidity.
Result below the lowest limit of the measuring range.
Replace 9 V battery, no further tests possible.
Calibration factor "out of range"
Oversupply of light reaches the detector
Individual error codes
tAB: Factory calibration incorrect / erase
tAB: User calibration incorrect / erase
PP: Factory calibration incorrect / erase
PP: User calibration incorrect / erase
HI
EOOI
LO
LO BAT
EOIO
E 70
E 71
E 72
E 73
E20


Aqualytic GmbH, Division Aqualytic® Schleefstraße 8-12 D-44287 Dortmund Tel.: (+49) (0)2 31 / 9 45 10-755 Fax: (+49) (0)2 31 / 9 45 10-750 [email protected] www.aqualytic.de Germany
Technical changes without notice Printed in Germany 11/09