Embed Size (px)
Citation preview
NOUVAG®
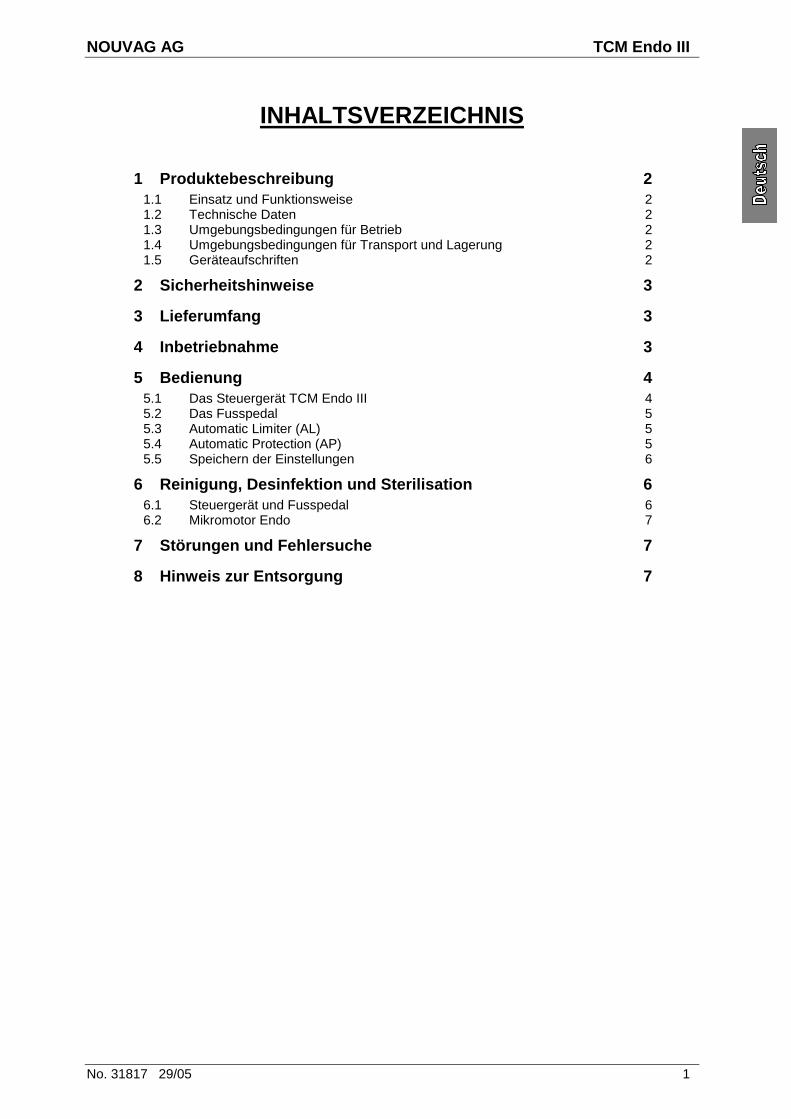
Made in Switzerland Nr. 31817
www.nouvag.com
Bedienungsanleitung D Operation manual GB
Mode d'emploi F
Instrucciones de uso E
TCM Endo III


NOUVAG AG
Herzlichen Glückwunsch zum Kauf eines Produktes der Firma NOUVAG AG. Wir freuen uns, dass Sie sich für ein NOUVAG Erzeugnis entschieden haben und danken Ihnen für Ihr entgegen-gebrachtes Vertrauen. Diese Bedienungsanleitung wird Sie mit dem Gerät und seinen Eigenschaften vertraut machen, damit eine möglichst lange und problemlose Funktion gewährleistet werden kann. Im Anhang finden Sie die Konformitätserklärung und unsere autorisierten Servicestellen.
• Bitte lesen Sie diese Anleitung vor Inbetriebnahme aufmerksam durch!
Congratulations on your purchase of a NOUVAG AG product. Thank you for the confidence shown in our products. Please consult the instruction manual for the use and maintenance of the device in order to ensure that it will function properly and efficiently for many years. You will find the conformity statement and list of authorized service representatives attached.
• Before operating, please read instructions carefully!
Félicitations vous venez d’acheter un produit NOUVAG AG. Merci de la confiance que vous montrez en nos produits. Merci de consulter le mode d’emploi pour l’utilisation et l’entretien de cet appareil de manière à vous assurer qu’il fonctionnera correctement et efficacement pendant de nombreuses années. Vous trouverez ci-joint les déclarations de conformité et la liste des agents agréés pour l’entretien.
• Lire soigneusement les instructions avant utilisation!
Muchas gracias por la compra de un producto NOUVAG AG. Felicidades por la elección y la confianza depositada en nuestros productos. Para garantizar una función duradera y eficiente del aparato, por favor consultar el manual de instrucciones. El Certificado de Conformidad y la lista de Centros de Servicio se encuentran en el apéndice.
• Por favor leer las instrucciones detenidamente antes de poner en marcha el aparato!

NOUVAG AG TCM Endo III
No. 31817 29/05 1
INHALTSVERZEICHNIS
1 Produktebeschreibung 2 1.1 Einsatz und Funktionsweise 2 1.2 Technische Daten 2 1.3 Umgebungsbedingungen für Betrieb 2 1.4 Umgebungsbedingungen für Transport und Lagerung 2 1.5 Geräteaufschriften 2
2 Sicherheitshinweise 3
3 Lieferumfang 3
4 Inbetriebnahme 3
5 Bedienung 4 5.1 Das Steuergerät TCM Endo III 4 5.2 Das Fusspedal 5 5.3 Automatic Limiter (AL) 5 5.4 Automatic Protection (AP) 5 5.5 Speichern der Einstellungen 6
6 Reinigung, Desinfektion und Sterilisation 6 6.1 Steuergerät und Fusspedal 6 6.2 Mikromotor Endo 7
7 Störungen und Fehlersuche 7
8 Hinweis zur Entsorgung 7
TCM Endo III NOUVAG AG
2 No. 31817 29/05
1 Produktebeschreibung
1.1 Einsatz und Funktionsweise
Der TCM Endo ist ein mikroprozessorgesteuertes Endodontie-Gerät, das die Drehzahl und das Drehmoment des Motors regelt. Die Drehzahl wird bei jeder Belastung konstant gehalten bis das maximal eingestellte Drehmoment erreicht wird. Der Drehmomentschutz (AP) gibt die Sicherheit, dass die Rimmer nicht brechen. Bei Erreichen des vorgewählten Drehmoments schaltet die Drehrichtung des Motors sofort in den Rückwärtslauf. Nach einer Umdrehung wird wieder in den normalen Vorwärtslauf geschaltet. Damit wird eine schnelle und effektive Wurzelkanalaufbereitung garantiert.
1.2 Technische Daten
Spannung: ...........................................115V∼/ 50-60Hz oder 230V∼/ 50-60Hz (Siehe Geräteaufkleber!) Sicherung Stromversorgung:............................................. 2 x T2A (bei 115V∼) und 2 x T1A (bei 230V∼) Leistung: ..........................................................................................................................................40 VA Typ: ......................................................................................................................................................... B Drehzahl: .................................................................................................................. 1´200 - 16´000 Upm Masse (H x B x T): ......................................................................................................90 x 100 x 170 mm Nettogewicht: ......................................................................................................................................2 kg
1.3 Umgebungsbedingungen für Betrieb
Feuchtigkeit: ............................. max. 80 % Temperatur: .............................10 bis 30°C Druck: .............................800 bis 1060 hPa
1.4 Umgebungsbedingungen für Transport und Lagerung
Rel. Luftfeuchtigkeit:.........................max. 90% Temperatur:..................................... 0 bis 60°C Luftdruck:............................... 700 bis 1060hPa
1.5 Geräteaufschriften
: Achtung: Begleitpapiere beachten
: Anwendungsteil des Typs B
1275 : EU-Konformitätszeichen
: Zertifiziert von Canadian Standards Associaton (CSA) für Kanada und USA
: Alte Elektro- und Elektronikgeräte müssen getrennt entsorgt werden und dürfen nicht dem Hausmüll zugeführt werden.
NOUVAG AG TCM Endo III
No. 31817 29/05 3
2 Sicherheitshinweise
Ihre Sicherheit, die Ihres Teams und selbstverständlich die Sicherheit Ihrer Patienten ist uns ein grosses Anliegen. Daher ist es unerlässlich, die folgenden Hinweise zu beachten:
• Der TCM Endo III darf nur von fachkundigem und gesc hultem Personal bedient werden!
• Vergewissern Sie sich, dass die Betriebsspannung un d die Netzspannung übereinstimmen!
• Die Verwendung von Fremdprodukten liegt in der Vera ntwortung des Betreibers!
• Reparaturen dürfen nur durch autorisierte NOUVAG Se rvice-Techniker vorgenommen werden!
• Unsachgemässer Gebrauch und Reparatur des Gerätes, sowie die Nichteinhaltung unserer Anweisungen, entbindet uns von jeder Garantieleistung oder anderen Ansprüchen!
3 Lieferumfang
1520........................... Steuergerät TCM Endo III .......................................................................... 1 Stück 1823........................... Mikromotor Endo ....................................................................................... 1 Stück 1488........................... On / Off - Fussschalter .............................................................................. 1 Stück
4 Inbetriebnahme
1) On/Off-Fusspedal bei Buchse “FOOT“ anschliessen (→ Falls Motorsteuerung durch Fusspedal erwünscht)
2) Motor bei Buchse “MOTOR“ anschliessen.
3) Hand- oder Winkelstück mit Werkzeugspitze auf Motor stecken.
4) Netzverbindung herstellen.
5) Steuergerät mit grünem “ON / OFF“-Hauptschalter auf der Rückseite einschalten.
6) Untersetzung und gewünschte Drehzahl einstellen.
7) “MOTOR“-Taste drücken oder Trittplatte runterdrücken (falls Fusspedal angeschlossen) um Motor in Betrieb zu setzen.
TCM Endo III NOUVAG AG
4 No. 31817 29/05
5 Bedienung
5.1 Das Steuergerät TCM Endo III
Gerät einschalten:
Mit dem grünen Hauptschalter “ON/OFF“ (Rückseite!) wird das Steuergerät ein- respektiv ausgeschaltet.
Display:
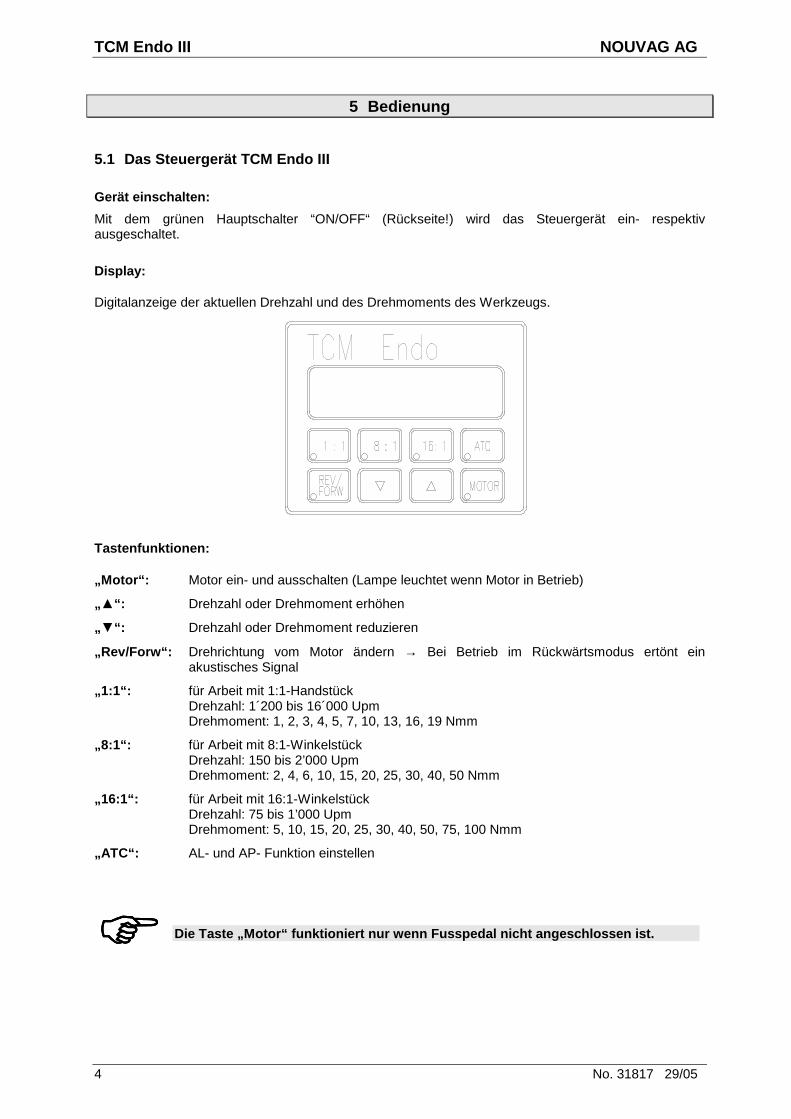
Digitalanzeige der aktuellen Drehzahl und des Drehmoments des Werkzeugs.
Tastenfunktionen:
„Motor“: Motor ein- und ausschalten (Lampe leuchtet wenn Motor in Betrieb)
„▲“: Drehzahl oder Drehmoment erhöhen
„▼“: Drehzahl oder Drehmoment reduzieren
„Rev/Forw“: Drehrichtung vom Motor ändern → Bei Betrieb im Rückwärtsmodus ertönt ein akustisches Signal
„1:1“: für Arbeit mit 1:1-Handstück Drehzahl: 1´200 bis 16´000 Upm Drehmoment: 1, 2, 3, 4, 5, 7, 10, 13, 16, 19 Nmm
„8:1“: für Arbeit mit 8:1-Winkelstück Drehzahl: 150 bis 2’000 Upm Drehmoment: 2, 4, 6, 10, 15, 20, 25, 30, 40, 50 Nmm
„16:1“: für Arbeit mit 16:1-Winkelstück Drehzahl: 75 bis 1’000 Upm Drehmoment: 5, 10, 15, 20, 25, 30, 40, 50, 75, 100 Nmm
„ATC“: AL- und AP- Funktion einstellen
���� Die Taste „Motor“ funktioniert nur wenn Fusspedal n icht angeschlossen ist.
NOUVAG AG TCM Endo III
No. 31817 29/05 5
5.2 Das Fusspedal
Der TCM Endo III kann mit oder ohne Fusspedal betrieben werden. Mit der Trittplatte des Fusspedals wird der Motor gestartet und gestoppt:
Trittplatte nicht gedrückt: ................Motor ausgeschaltet Trittplatte runtergedrückt:................Motor eingeschaltet
Die Drehgeschwindigkeit des Werkzeugs entspricht derjenigen, die beim Steuergerät eingestellt wird.
5.3 Automatic Limiter (AL)
Mit dem Automatic Limiter (AL) wird das Drehmoment am Werkzeug begrenzt. Wenn der eingestellte Drehmomentwert erreicht ist, fällt die Drehzahl bis auf Null Umdrehungen ab, die Kraft am Werkzeug bleibt jedoch bestehen. Die Werte sind immer in Nmm angegeben (Bsp. [AL 20] → Werkzeug wird mit max. 20 Nmm belastet).
Einstellen des AL:
1) Taste “ATC SET” drücken. Im Display erscheint die Drehmomentauswahl (z.B. [AL 20]).
2) Mit den Tasten “▲” und “▼” können Sie den gewünschten Drehmomentwert einstellen.
3) Taste “ATC SET” drücken damit Drehzahlanzeige wieder im Display erscheint.
5.4 Automatic Protection (AP)
Der Automatic Protection (AP) ist eine spezielle Funktion für Rimmer, um diese vor dem Brechen zu schützen. Bei Erreichen des vorgewählten Drehmoments schaltet die Drehrichtung des Motors sofort in den Rückwärtslauf. Nach einer Umdrehung des Werkzeugs wird wieder automatisch in den Vorwärtslauf geschaltet. Die Werte sind immer in Nmm angegeben (Bsp. [AP 20] → Werkzeug wird mit max. 20 Nmm belastet).
���� AL ist in folgenden Bereichen einstellbar:
1:1 →→→→ 1 bis 19 Nmm
8:1 →→→→ 2 bis 50 Nmm
16:1 →→→→ 5 bis 100 Nmm
���� Falls im Display [AP.....] erscheint: Taste “ ▼” drücken bis [AL.....] im Display erscheint.
Wenn AL-Modus aktiv ist, leuchtet grüne Lampe bei T aste “ATC” nicht.
���� AP ist in folgenden Bereichen einstellbar:
1:1 →→→→ 1 bis 19 Nmm
8:1 →→→→ 2 bis 50 Nmm
16:1 →→→→ 5 bis 100 Nmm
TCM Endo III NOUVAG AG
6 No. 31817 29/05
Einstellen der AP:
1) Taste “ATC” drücken. Im Display erscheint die Drehmomentauswahl (z.B. [AP 20]).
2) Mit den Tasten “▲” und “▼” können Sie den gewünschten Drehmomentwert einstellen.
3) Taste “ATC SET” drücken damit Drehzahlanzeige wieder im Display erscheint.
5.5 Speichern der Einstellungen
Beim Einschalten des Gerätes erscheinen automatisch die Einstellungen des letzten Gebrauchs.
6 Reinigung, Desinfektion und Sterilisation
Für die Pflege des Materials sind insbesondere folgende wichtige Punkte zu beachten:
• Reinigung, Desinfektion und Sterilisation nach jede r Behandlung durchführen!
• Keine lösungsmittelhaltigen Reinigungsmittel verwen den!
• Material immer in Sterilgut - Einzelverpackung auto klavieren!
• Sterilisationsverpackungen dürfen nur bis zu 80% ge füllt sein!
• Material bei maximal 134°C autoklavieren!
• Falls sterilisiertes Material nicht sofort zum Eins atz kommt, sollte es auf der Verpackung mit Sterilindikator und Sterildatum besc hriftet werden!
6.1 Steuergerät und Fusspedal
Steuergerät und Fusspedal kommen mit dem Patienten nicht in Berührung: Nur äusserliche Wischdesinfektion mit mikrobiologisch geprüften Flächendesinfektionsmitteln oder 80%-igem Äthyl-Alkohol verwenden.
���� Falls im Display [AL.....] erscheint: Taste “ ▼” drücken bis [AP.....] im Display erscheint.
Wenn AP-Modus aktiv ist, leuchtet grüne Lampe bei T aste “ATC”.
AP-Modus funktioniert nur, wenn Motor vorwärts dreh t (LED bei “Rev/Forw“ leuchtet nicht).
Steuergerät nur mit Lappen abwischen. Keine Sprühde sinfektion, da Gerät nicht abgedichtet!
NOUVAG AG TCM Endo III
No. 31817 29/05 7
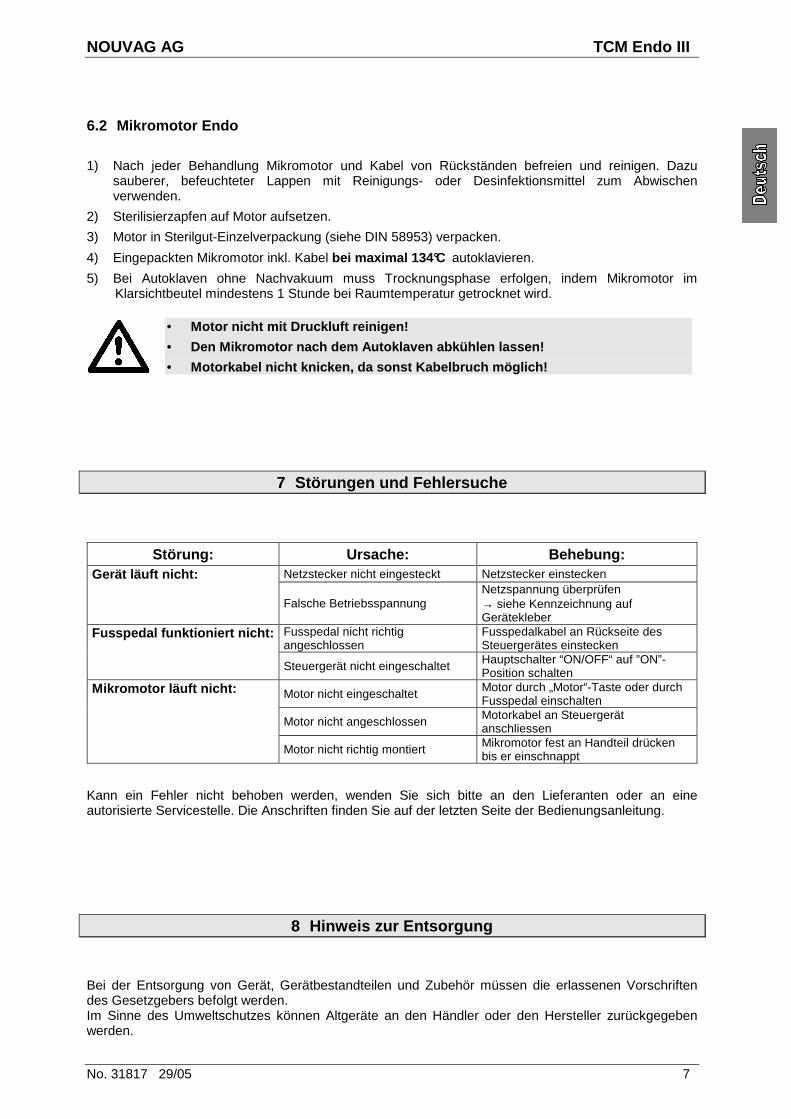
6.2 Mikromotor Endo
1) Nach jeder Behandlung Mikromotor und Kabel von Rückständen befreien und reinigen. Dazu sauberer, befeuchteter Lappen mit Reinigungs- oder Desinfektionsmittel zum Abwischen verwenden.
2) Sterilisierzapfen auf Motor aufsetzen.
3) Motor in Sterilgut-Einzelverpackung (siehe DIN 58953) verpacken.
4) Eingepackten Mikromotor inkl. Kabel bei maximal 134°C autoklavieren.
5) Bei Autoklaven ohne Nachvakuum muss Trocknungsphase erfolgen, indem Mikromotor im Klarsichtbeutel mindestens 1 Stunde bei Raumtemperatur getrocknet wird.
• Motor nicht mit Druckluft reinigen!
• Den Mikromotor nach dem Autoklaven abkühlen lassen!
• Motorkabel nicht knicken, da sonst Kabelbruch mögli ch!
7 Störungen und Fehlersuche
Störung: Ursache: Behebung: Gerät läuft nicht: Netzstecker nicht eingesteckt Netzstecker einstecken
Falsche Betriebsspannung Netzspannung überprüfen → siehe Kennzeichnung auf Gerätekleber
Fusspedal funktioniert nicht: Fusspedal nicht richtig angeschlossen
Fusspedalkabel an Rückseite des Steuergerätes einstecken
Steuergerät nicht eingeschaltet Hauptschalter “ON/OFF“ auf ”ON”-Position schalten
Mikromotor läuft nicht: Motor nicht eingeschaltet Motor durch „Motor“-Taste oder durch Fusspedal einschalten
Motor nicht angeschlossen Motorkabel an Steuergerät anschliessen
Motor nicht richtig montiert Mikromotor fest an Handteil drücken bis er einschnappt
Kann ein Fehler nicht behoben werden, wenden Sie sich bitte an den Lieferanten oder an eine autorisierte Servicestelle. Die Anschriften finden Sie auf der letzten Seite der Bedienungsanleitung.
8 Hinweis zur Entsorgung
Bei der Entsorgung von Gerät, Gerätbestandteilen und Zubehör müssen die erlassenen Vorschriften des Gesetzgebers befolgt werden. Im Sinne des Umweltschutzes können Altgeräte an den Händler oder den Hersteller zurückgegeben werden.

NOUVAG AG TCM Endo III
No. 31817 29/05 1
TABLE OF CONTENTS
1 Description 2 1.1 Operation and functions 2 1.2 Technical Data 2 1.3 Operating Environment 2 1.4 Transport and Storage Environment 2 1.5 Description on device 2
2 Safety measures 3
3 Shipping contents 3
4 Set-up 3
5 Operation 4 5.1 The TCM Endo III unit 4 5.2 The footswitch 5 5.3 Automatic Limiter (AL) 5 5.4 Automatic Protection (AP) 5 5.5 Memory 6
6 Disinfection, Cleaning and sterilization 6 6.1 Control unit and footswitch 6 6.2 Mikromotor Endo 7
7 Troubleshooting 7
8 Disposal 7
TCM Endo III NOUVAG AG
2 No. 31817 29/05
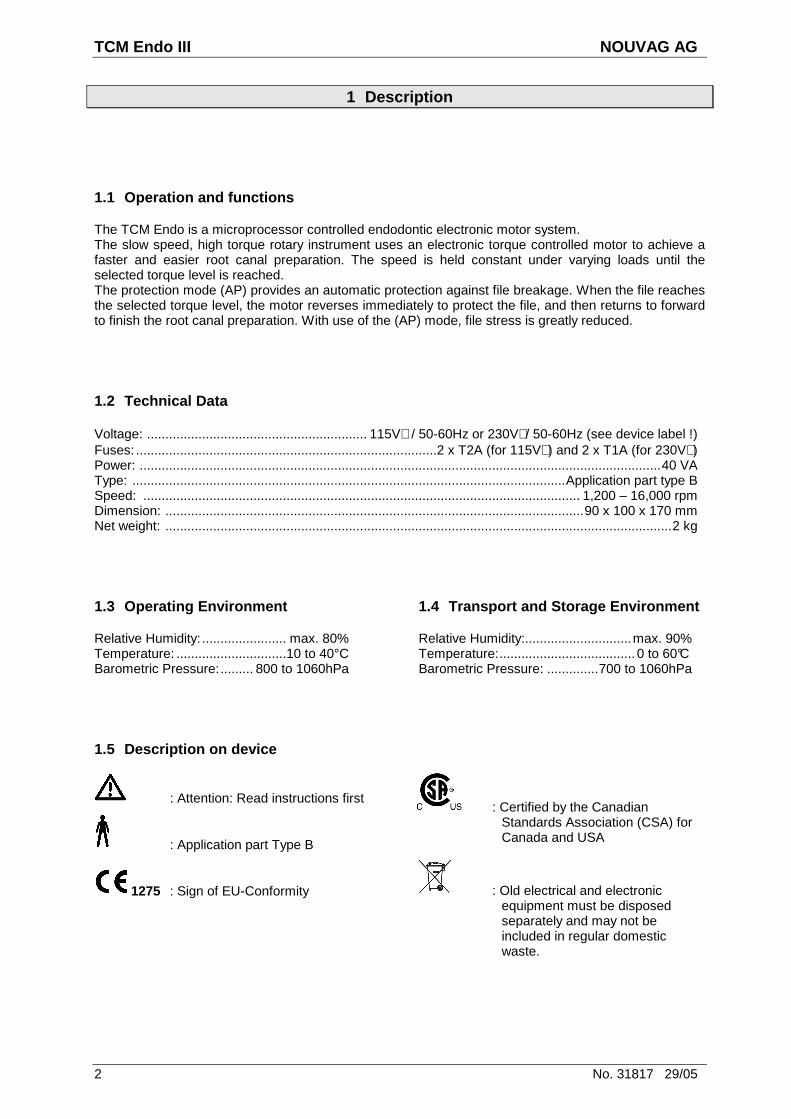
1 Description
1.1 Operation and functions
The TCM Endo is a microprocessor controlled endodontic electronic motor system. The slow speed, high torque rotary instrument uses an electronic torque controlled motor to achieve a faster and easier root canal preparation. The speed is held constant under varying loads until the selected torque level is reached. The protection mode (AP) provides an automatic protection against file breakage. When the file reaches the selected torque level, the motor reverses immediately to protect the file, and then returns to forward to finish the root canal preparation. With use of the (AP) mode, file stress is greatly reduced.
1.2 Technical Data
Voltage: ............................................................ 115V∼ / 50-60Hz or 230V∼/ 50-60Hz (see device label !) Fuses: ..................................................................................2 x T2A (for 115V∼) and 2 x T1A (for 230V∼) Power: ..............................................................................................................................................40 VA Type: ......................................................................................................................Application part type B Speed: ....................................................................................................................... 1,200 – 16,000 rpm Dimension: ..................................................................................................................90 x 100 x 170 mm Net weight: ..........................................................................................................................................2 kg
1.3 Operating Environment
Relative Humidity: ....................... max. 80% Temperature: ..............................10 to 40°C Barometric Pressure:......... 800 to 1060hPa
1.4 Transport and Storage Environment
Relative Humidity:.............................max. 90% Temperature:..................................... 0 to 60°C Barometric Pressure: ..............700 to 1060hPa
1.5 Description on device
: Attention: Read instructions first
: Application part Type B
1275 : Sign of EU-Conformity
: Certified by the Canadian Standards Association (CSA) for Canada and USA
: Old electrical and electronic equipment must be disposed separately and may not be included in regular domestic waste.
NOUVAG AG TCM Endo III
No. 31817 29/05 3
2 Safety measures
Your safety, the safety of your team, and, it goes without saying, the safety of your patients is for Nouvag AG the first priority. It is therefore vital that the following measures be strictly observed:
• The TCM Endo III should be operated by qualified pe rsonnel only!
• Check the correct operation voltage on the rating p late!
• Responsibility for the use of accessories, parts or assemblies from other manufacturers rest solely with the user!
• Repairs are to be carried out by authorized Nouvag AG service technicians only!
• Nouvag AG cannot be held liable for any malfunction of the TCM Endo III, or performance failure and/or its designed or desired utility, nor can Nouvag AG be held liable for any injuries to persons or anima ls, in any case when the device is miss-used or not operated, applied or mai ntained in strict accordance with the user/owner instructions set out in the ope rating manual. In the event of any doubt or question, the user is to contact No uvag AG or its lawful representative for clarification or assistance!
3 Shipping contents
1520........................... Control unit TCM Endo III ...........................................................................1 piece 1823........................... Micromotor Endo ........................................................................................1 piece 1488........................... On / Off -Footswitch....................................................................................1 piece
4 Set-up
1) Connect On/Off-footswicht to “FOOT“ (→ when operating unit with footswitch)
2) Connect the micromotor to “MOTOR“
3) Attach handpiece or contra angle
4) Attach AC cord into the plug in the back of the unit and the electrical outlet
5) Turn on green power “ON / OFF“ switch (rear of unit)
6) Adjust desired reduction and speed.
7) Press “MOTOR“-key or step on the foot switch (if foot switch is connected) to start the micromotor.
TCM Endo III NOUVAG AG
4 No. 31817 29/05
8)
5 Operation
5.1 The TCM Endo III unit
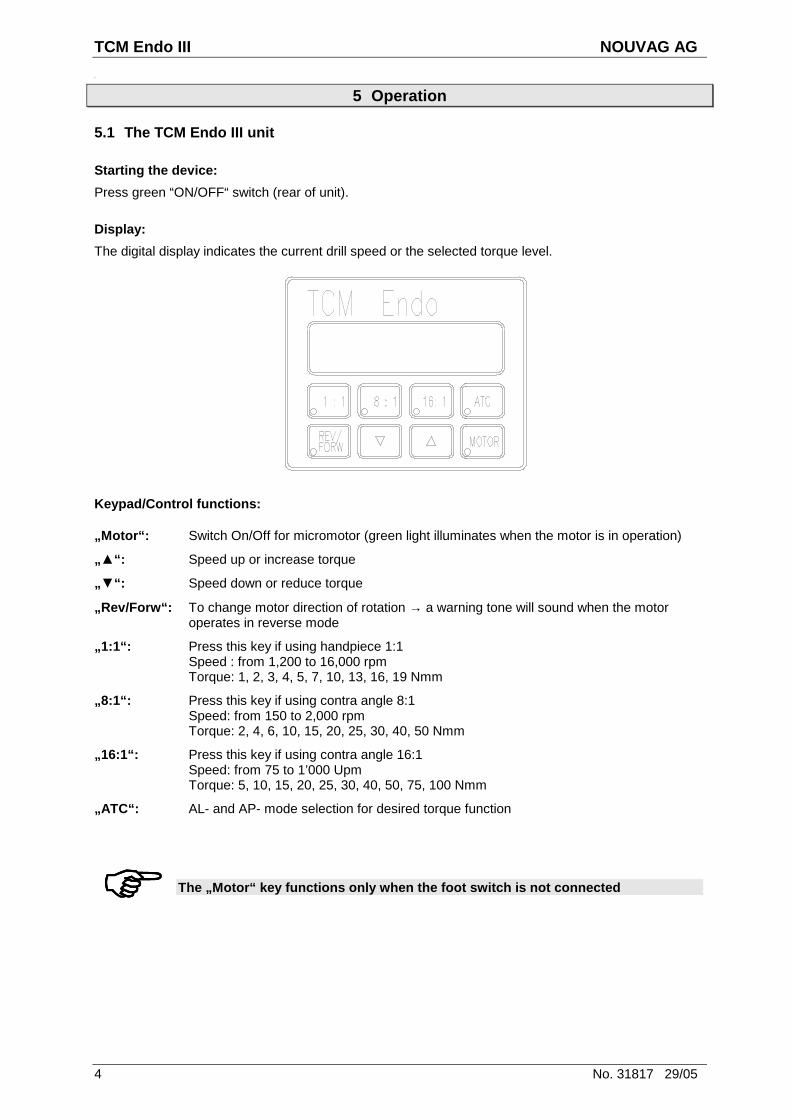
Starting the device:
Press green “ON/OFF“ switch (rear of unit).
Display:
The digital display indicates the current drill speed or the selected torque level.
Keypad/Control functions:
„Motor“: Switch On/Off for micromotor (green light illuminates when the motor is in operation)
„▲“: Speed up or increase torque
„▼“: Speed down or reduce torque
„Rev/Forw“: To change motor direction of rotation → a warning tone will sound when the motor operates in reverse mode
„1:1“: Press this key if using handpiece 1:1 Speed : from 1,200 to 16,000 rpm Torque: 1, 2, 3, 4, 5, 7, 10, 13, 16, 19 Nmm
„8:1“: Press this key if using contra angle 8:1 Speed: from 150 to 2,000 rpm Torque: 2, 4, 6, 10, 15, 20, 25, 30, 40, 50 Nmm
„16:1“: Press this key if using contra angle 16:1 Speed: from 75 to 1’000 Upm Torque: 5, 10, 15, 20, 25, 30, 40, 50, 75, 100 Nmm
„ATC“: AL- and AP- mode selection for desired torque function
���� The „Motor“ key functions only when the foot switch is not connected
NOUVAG AG TCM Endo III
No. 31817 29/05 5
5.2 The footswitch
The TCM Endo III can be operated with or without footswitch. Press footswitch to start the motor.
Footswitch not pressed:..................Motor off Footswitch fully pressed: ................Motor on
The tool speed corresponds to the speed adjusted on the control unit.
5.3 Automatic Limiter (AL)
The Automatic Limiter (AL) limits the torque level applied to the instrument. If the selected torque level is reached, the speed will drop to zero rpm. A torque level equal to the selected setting will still be exerted against the file. All torque values are shown in Nmm (for example a setting of AL 20→ indicates that the instrument can be loaded to maximum of 20 Nmm before rotations stops).
Adjusting the AL mode:
1) Press the key “ATC SET”. In the display appears the torque mode set (for example [AL 20]).
2) Pressing the keys “▲” and“▼” will increase and decrease the torque level respectively.
3) By pressing the “ATC SET” briefly once more the digital display switches back automatically.
5.4 Automatic Protection (AP)
The automatic protection (AP) mode is a special function against file breakage. When the selected torque level is reached, the motor reverses immediately to free the file and then returns automatically to forward operation. All torque values are shown in Nmm (for example a setting of AL 20→ indicates that the instrument can be loaded to maximum of 20 Nmm before rotations stops).
���� The Automatic Limiter (AL) can be adjusted in the f ollowing ranges:
1:1 →→→→ from 1 to 19 Nmm
8:1 →→→→ from 2 to 50 Nmm
16:1 →→→→ from 5 to 100 Nmm
���� If the display says [AP.....] : press the key “ ▼” to get back to [AL.....].
The green light will illuminate when the AP - mode is activated, the green light does not illuminate on the AL- mode.
���� The automatic protection AP can be adjusted in the following ranges:
1:1 →→→→ from 1 to 19 Nmm
8:1 →→→→ from 2 to 50 Nmm
16:1 →→→→ from 5 to 100 Nmm
TCM Endo III NOUVAG AG
6 No. 31817 29/05
Adjusting the AP:
1) Press the “ATC” key. In the display appears the torque mode set (for example [AL 20]).
2) Pressing the keys “▲” and“▼” will increase and decrease the torque level respectively.
3) By pressing the “ATC SET” briefly once more the digital display switches back automatically.
5.5 Memory
Once programmed, the preselected speed, torque and value setting will remain stored in memory, even when the motor is turned off.
6 Disinfection, Cleaning and sterilization
Please pay attention to the following important points for the maintenance of the device:
• Clean, disinfect and sterilize the device and compo nents after each use!
• Do not use dissolving agents for cleaning
• Autoclave material in transparent packaging!
• Do not fill the sterilization bag more than 80%.
• Autoclave material at 134°C maximum.
• Sterilized material should be stored and tagged wit h sterilization date!
6.1 Control unit and footswitch
The control unit and the pedal do not come into contact with patients. Only clean the surface of the unit, do not use harsh cleaners or solvents for cleaning. Use 80% ethyl alcohol or microbiologically effective disinfectants.
���� If the display says [AL.....] : press the key “ ▼” to get back to [AP.....].
The green light “ATC” will illuminate when the AP-M odus is activated.
The AP-Modus works only when the motor runs forward (the g reen light LED “Rev/Forw“ does not illuminate).
The control unit should be wiped with a clean, damp cloth only. No spray cleaners or disinfecting agents should be employed, as the c ontrol unit face is not watertight!
NOUVAG AG TCM Endo III
No. 31817 29/05 7
6.2 Mikromotor Endo
1) The micromotor, cable and plug should be cleaned after each use to prevent the build up of deposits and debris that can destroy it, if not removed. Wipe it with a clean cloth dampened with disinfectant solution.
2) Put the sterilizable stopple on the motor.
3) After packing motor and cable, autoclave it at maximum 134°C .
4) After autoclaving, allow motor to dry for one hour at room temperature.
Store motor bagged and tagged with sterilization date!
• Do not bend the motor cable!
• Clean, disinfect and sterilize the Micromotor after each use
• Do not clean Micromotor with compressed air
7 Troubleshooting
Problem: Cause: Solution: Device does not operate at all:
Plug is not inserted properly Insert plug and check fitting
Wrong operating voltage
Check mains voltage output → please see operating voltage on the rating plate
Footswitch fails to function: Pedal not connected Plug pedal cable into rear of control unit
Control unit not turned on Turn main switch ON/OFF Micromotor does not run: Motor not turned on Turn motor with „Motor“-key on or with
footswitch Motor not connected Connect motor cable to control unit Motor incorrectly attached Press handpiece firm on motor until
handpiece snaps in
In the event a problem cannot be solved, contact dealer or authorized service technicians, as listed on the last page of your Operating Instruction Manual.
8 Disposal
Disposal of device, components and accessories must strictly conform to local laws and regulations as set out by the relevant authorities. With regard to the preservation of the environment old equipment may be returned to the distributor or manufacturer.

NOUVAG AG TCM Endo III
No. 31817 29/05 1
TABLE DES MATIERES
1 Description 2 1.1 Utilisation et fonctionnement 2 1.2 Données techniques 2 1.3 Environnement d’utilisation 2 1.4 Environnement de Transport et stockage 2 1.5 Description de l’appareil 2
2 Mesures de sécurité 3
3 Contenu de l’expédition 3
4 Mise en service 3
5 Fonctionnement 4 5.1 L’unité TCM Endo III 4 5.2 La pédale 5 5.3 Limite automatique (AL) 5 5.4 Protection automatique (AP) 5 5.5 Mémoire 6
6 Désinfection, nettoyage et stérilisation 6 6.1 L’unité de contrôle et la pédale 6 6.2 Le micro moteur Endo 7
7 Dépannage 7
8 Mise au rebut 7
TCM Endo III NOUVAG AG
2 No. 31817 29/05
1 Description
1.1 Utilisation et fonctionnement
Le TCM Endo est un moteur électronique pour l’endodontie dont la vitesse et le couple sont réglés par un microprocesseur. Garantissant ainsi une préparation rapide et efficace du canal radiculaire. La vitesse est maintenue constante sous des charges variables jusqu’à ce que le niveau du couple choisi soit atteint. Le mode de protection (AP) fourni une protection automatique pour prévenir la casse de la lime. Lorsque la lime atteint le niveau du couple choisi, le moteur part en arrière immédiatement pour protéger la lime puis repart en avant pour terminer la préparation du canal radiculaire. En utilisant le mode (AP), la sollicitation de la lime est très réduite.
1.2 Données techniques
Voltage : ................................................... 115V∼ / 50-60Hz ou 230V∼/ 50-60Hz (voir étiquette appareil) Fusibles : ......................................................................... 2 x T2A (pour 115V∼) et 2 x T1A (pour 230V∼) Tension : ......................................................................................................................................... 40 VA Type : ............................................................................................................... Pièce d’application type B Vitesse : ................................................................................................................. 1,200 – 16,000 tr/min Dimension : ................................................................................................................ 90 x 100 x 170 mm Poids net : .......................................................................................................................................... 2 kg
1.3 Environnement d’utilisation
Humidité relative : ....................... maxi 80% Température : ............................. 10 à 40°C Pression barométrique : .... 800 à 1060hPa
1.4 Environnement de Transport et stockage
Humidité relative :............................ maxi 90% Température :.................................... 0 à 60°C Pression barométrique : .......... 700 à 1060hPa
1.5 Description de l’appareil
: Attention : Lire les instructions
: Pièce d’application type B
1275 : Conforme aux normes de l’UE
: Certifié par la Canadian Standards Association (CSA) pour le Canada et les USA
: De vieux appareils électriques et d'électronique doivent être éliminés séparé et ne peuvent pas être amenés aux ordures ménagères.
NOUVAG AG TCM Endo III
No. 31817 29/05 3
2 Mesures de sécurité
Votre sécurité, la sécurité de votre équipe et, il va sans dire, la sécurité de vos patients est pour Nouvag AG la première des priorités. Il est donc vital que les mesures suivantes soient strictement respectées :
• Le TCM Endo III doit être utilisé uniquement par du personnel qualifié !
• Vérifier le voltage d’utilisation sur la plaque sig nalétique !
• Toute responsabilité pour l’utilisation d’accessoir es, pièces ou montages d’autres fabricants est entièrement celle de l’util isateur !
• Les réparations doivent être effectuées uniquement par des techniciens agréés par Nouvag AG !
• Nouvag AG ne peut être tenu pour responsable d’aucu n disfonctionnement, défaillance et/ou de l’utilisation prévue ou souhai tée du TCM Endo III, Nouvag AG ne peut pas être tenu pour responsable, non plus , pour toute blessure aux personnes ou animaux, ni lorsque l’appareil est mal utilisé ou non utilisé, appliqué ou entretenu suivant les instructions util isateur/propriétaire du manuel d’utilisation. En cas de doute ou question, l’utilisateur peut contacter Nouvag AG ou ses représentants légaux pour clarific ation ou assistance !
3 Contenu de l’expédition
1520........................... Unité de contrôle TCM Endo III ..................................................................1 pièce 1823........................... Micro moteur Endo .....................................................................................1 pièce 1488........................... Pédale On / Off ..........................................................................................1 pièce
4 Mise en service
1) Brancher la pédale On/Off sur «FOOT» (→ pour utilisation de l’unité avec la pédale).
2) Brancher le micro moteur sur «MOTOR».
3) Brancher la pièce à main ou le contre angle.
4) Brancher le fil de CA dans la prise derrière l’unité et dans la prise de courant.
5) Mettre sous tension le bouton vert «ON / OFF» (à l’arrière de l’unité).
6) Régler la réduction et la vitesse désirée.
7) Appuyer sur la touche «MOTOR» ou appuyer sur la pédale (si la pédale est branchée) pour démarrer le micro moteur.
TCM Endo III NOUVAG AG
4 No. 31817 29/05
8)
5 Fonctionnement
5.1 L’unité TCM Endo III
Mise en marche de l’appareil :
Appuyer sur le bouton vert «ON/OFF» (à l’arrière de l’unité).
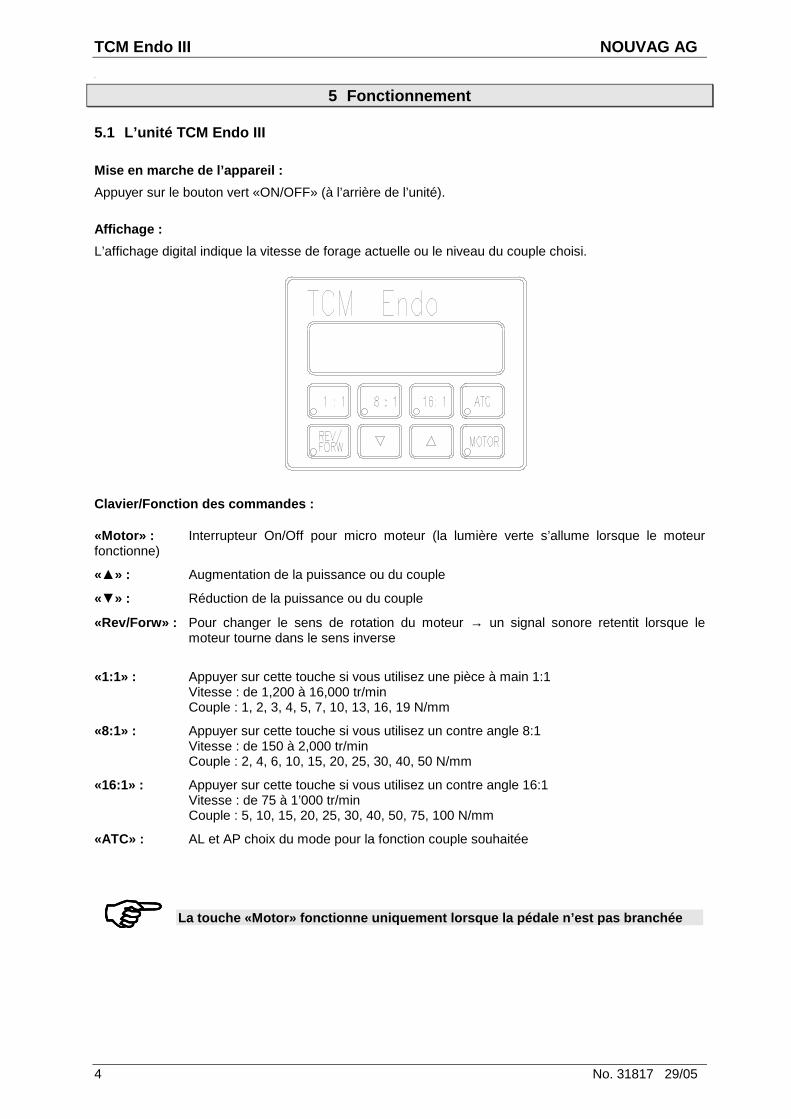
Affichage :
L’affichage digital indique la vitesse de forage actuelle ou le niveau du couple choisi.
Clavier/Fonction des commandes :
«Motor» : Interrupteur On/Off pour micro moteur (la lumière verte s’allume lorsque le moteur fonctionne)
«▲» : Augmentation de la puissance ou du couple
«▼» : Réduction de la puissance ou du couple
«Rev/Forw» : Pour changer le sens de rotation du moteur → un signal sonore retentit lorsque le moteur tourne dans le sens inverse
«1:1» : Appuyer sur cette touche si vous utilisez une pièce à main 1:1 Vitesse : de 1,200 à 16,000 tr/min Couple : 1, 2, 3, 4, 5, 7, 10, 13, 16, 19 N/mm
«8:1» : Appuyer sur cette touche si vous utilisez un contre angle 8:1 Vitesse : de 150 à 2,000 tr/min Couple : 2, 4, 6, 10, 15, 20, 25, 30, 40, 50 N/mm
«16:1» : Appuyer sur cette touche si vous utilisez un contre angle 16:1 Vitesse : de 75 à 1’000 tr/min Couple : 5, 10, 15, 20, 25, 30, 40, 50, 75, 100 N/mm
«ATC» : AL et AP choix du mode pour la fonction couple souhaitée
���� La touche «Motor» fonctionne uniquement lorsque la pédale n’est pas branchée
NOUVAG AG TCM Endo III
No. 31817 29/05 5
5.2 La pédale
Le TCM Endo III peut être utilisé avec ou sans pédale. Appuyer sur la pédale pour démarrer le moteur.
Pédale non enfoncée : ................... Moteur arrêté Pédale complètement enfoncée : .. Moteur en marche
La vitesse de l’instrument correspond à la vitesse réglée sur l’unité de contrôle.
5.3 Limite automatique (AL)
La limite automatique (AL) limite le niveau du couple appliqué à l’instrument. Si le niveau du couple choisi est atteint, la vitesse descendra à zéro tr/min. Un niveau du couple égale à celui sélectionné sera encore exercé sur la lime. Toutes les valeurs du couple sont indiquées en N/mm (par exemple un réglage de AL 20→ indique que l’instrument peut atteindre 20 N/mm au maximum avant que la rotation ne s’arrête).
Réglage du mode AL :
1) Appuyer sur la touche «ATC SET». La série de mode couple s’affiche (par exemple [AL 20]).
2) Appuyer sur les touches «▲» et «▼» augmentera ou baissera le niveau du couple respectivement.
3) En appuyant brièvement une fois de plus sur «ATC SET» l’affichage digital revient automatiquement.
5.4 Protection automatique (AP)
Le mode de protection automatique (AP) est une fonction spéciale pour prévenir la casse de la lime. Lorsque le niveau du couple est atteint, le moteur part en arrière pour libérer la lime et ensuite retourne automatiquement en marche avant. Toutes les valeurs du couple sont indiquées en N/mm (par exemple un réglage de AL 20→ indique que l’instrument peut atteindre 20 N/mm maximum avant que la rotation ne s’arrête).
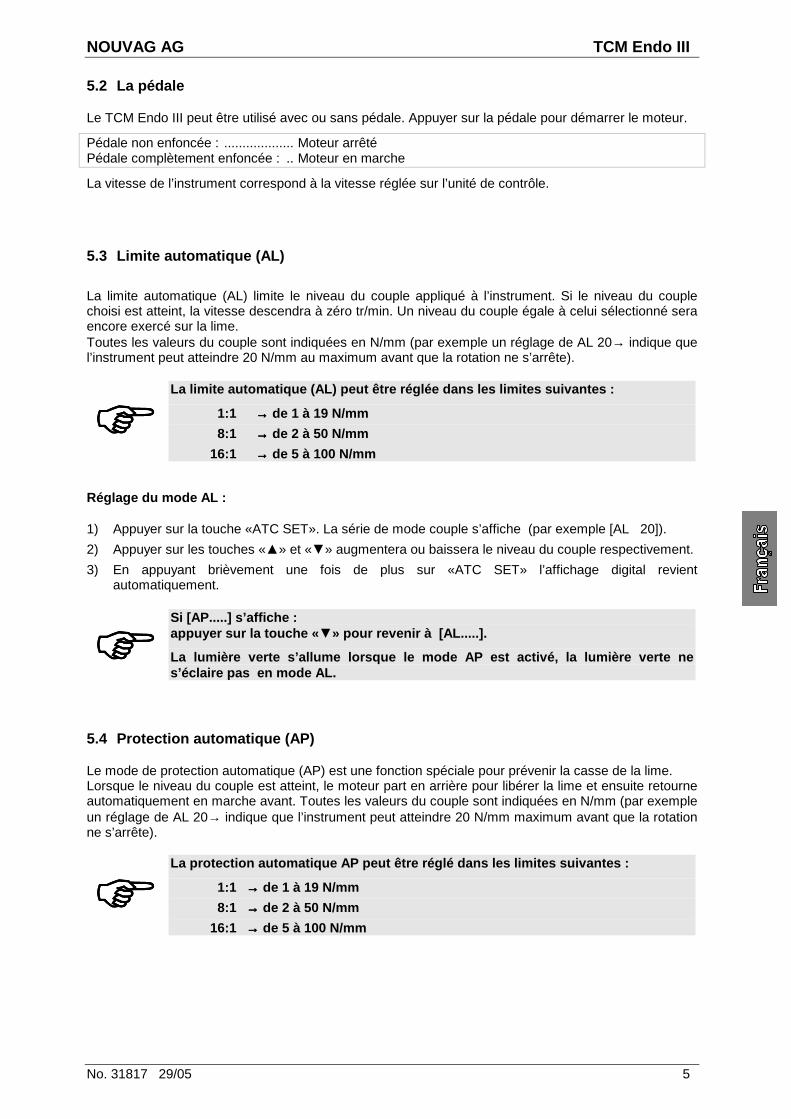
���� La limite automatique (AL) peut être réglée dans le s limites suivantes :
1:1 →→→→ de 1 à 19 N/mm
8:1 →→→→ de 2 à 50 N/mm
16:1 →→→→ de 5 à 100 N/mm
���� Si [AP.....] s’affiche : appuyer sur la touche « ▼» pour revenir à [AL.....].
La lumière verte s’allume lorsque le mode AP est ac tivé, la lumière verte ne s’éclaire pas en mode AL.
���� La protection automatique AP peut être réglé dans l es limites suivantes :
1:1 →→→→ de 1 à 19 N/mm
8:1 →→→→ de 2 à 50 N/mm
16:1 →→→→ de 5 à 100 N/mm

TCM Endo III NOUVAG AG
6 No. 31817 29/05
Réglage de AP :
1) Appuyer sur la touche «ATC». Le mode choisi s’affiche (par exemple [AL 20]).
2) Appuyer sur les touches «▲» et «▼» augmentera ou baissera respectivement le niveau du couple.
3) En appuyant brièvement un fois de plus sur «ATC SET» l’affichage digital revient automatiquement.
5.5 Mémoire
Lors du branchement de l’appareil, apparaissent automatiquement les réglages faits lors de la dernière intervention.
6 Désinfection, nettoyage et stérilisation
Merci de faire attention aux points suivants, très importants pour l’entretien de l’appareil :
• Nettoyer, désinfecter et stériliser l’appareil et l es composants après chaque utilisation !
• Ne pas utiliser d’agents dissolvants pour le nettoy age !
• Stériliser l’équipement dans un emballage transpare nt !
• Ne pas remplir le sac de stérilisation à plus de 80 % !
• Stériliser le matériel à l’autoclave à 134°C maximu m !
• Le matériel stérilisé doit être stocké et étiqueté avec la date de stérilisation !
6.1 L’unité de contrôle et la pédale
L’unité de contrôle et la pédale ne sont pas en contact avec les patients. Nettoyer simplement la surface de l’unité, ne pas utiliser de nettoyants abrasif ou de solvant. Utiliser 80% d’alcool éthylique ou des désinfectants antimicrobiens.
���� Si [AL.....] s’affiche : appuyer sur “ ▼” pour revenir à [AP.....].
La lumière verte “ATC” s’allumera lorsque le mode A P est activé.
Le mode AP fonctionne uniquement lorsque le moteur tourne vers l’avant (la lumière verte LED “Rev/Forw“ ne s’allume pas).
L’unité de contrôle doit être essuyée uniquement av ec un chiffon propre et humide. Ne pas vaporiser d’agent nettoyant ou désinfectant car le devant de l’unité de contrôle n’est pas étanche !
NOUVAG AG TCM Endo III
No. 31817 29/05 7
6.2 Le micro moteur Endo
1) Le micro moteur, câble et prise doivent être nettoyés après chaque utilisation pour éviter l’accumulation de dépôts et débris pouvant l’endommager. Essuyer avec un chiffon propre humidifié de solution désinfectante.
2) Mettre le bouchon de stérilisation sur le moteur.
3) Après avoir emballé le moteur et le câble, stériliser à 134°C maximum .
4) Après stérilisation, laisser sécher le moteur pendant une heure à température ambiante.
Stocker le moteur emballé et étiqueté avec la date de stérilisation !
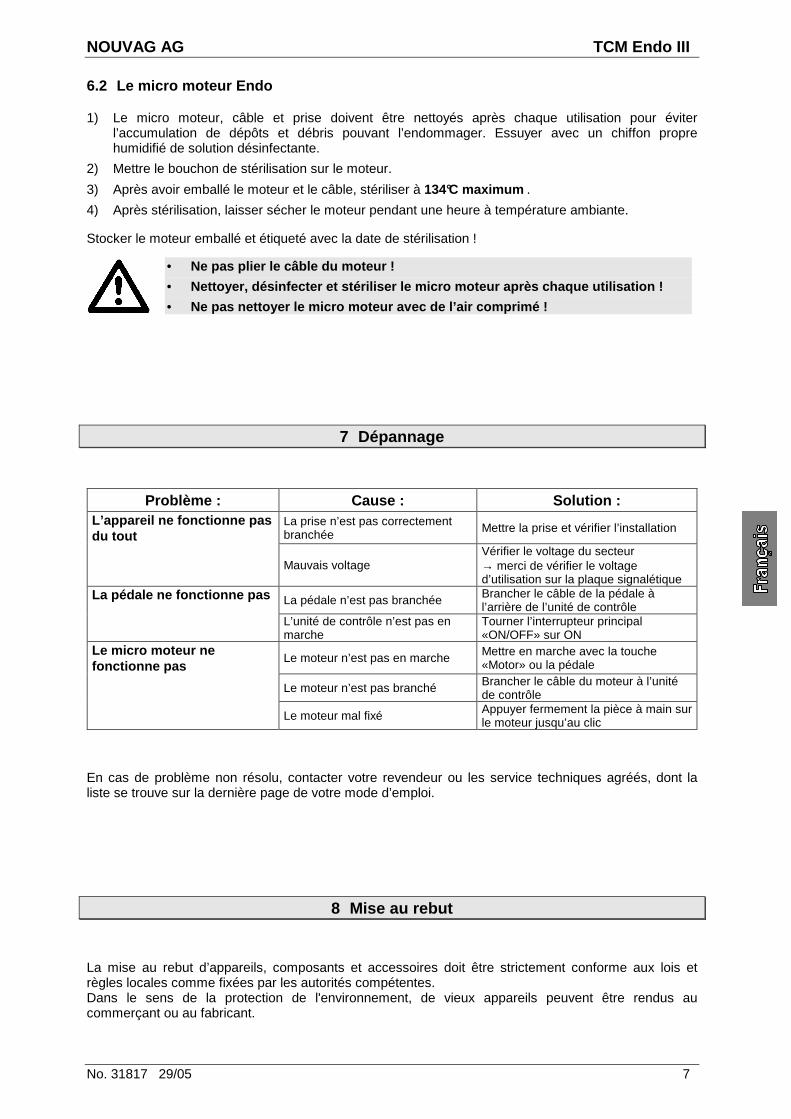
• Ne pas plier le câble du moteur !
• Nettoyer, désinfecter et stériliser le micro moteur après chaque utilisation !
• Ne pas nettoyer le micro moteur avec de l’air compr imé !
7 Dépannage
Problème : Cause : Solution : L’appareil ne fonctionne pas du tout
La prise n’est pas correctement branchée Mettre la prise et vérifier l’installation
Mauvais voltage
Vérifier le voltage du secteur → merci de vérifier le voltage d’utilisation sur la plaque signalétique
La pédale ne fonctionne pas La pédale n’est pas branchée Brancher le câble de la pédale à l’arrière de l’unité de contrôle
L’unité de contrôle n’est pas en marche
Tourner l’interrupteur principal «ON/OFF» sur ON
Le micro moteur ne fonctionne pas
Le moteur n’est pas en marche Mettre en marche avec la touche «Motor» ou la pédale
Le moteur n’est pas branché Brancher le câble du moteur à l’unité de contrôle
Le moteur mal fixé Appuyer fermement la pièce à main sur le moteur jusqu’au clic
En cas de problème non résolu, contacter votre revendeur ou les service techniques agréés, dont la liste se trouve sur la dernière page de votre mode d’emploi.
8 Mise au rebut
La mise au rebut d’appareils, composants et accessoires doit être strictement conforme aux lois et règles locales comme fixées par les autorités compétentes. Dans le sens de la protection de l'environnement, de vieux appareils peuvent être rendus au commerçant ou au fabricant.

NOUVAG AG TCM Endo III
No. 31817 29/05 1
Contenido
1 Descripción 2 1.1 Funciones 2 1.2 Datos técnicos 2 1.3 Condiciones de operación 2 1.4 Almacenaje y transporte 2 1.5 Descripción del aparato 2
2 Medidas de seguridad 3
3 Contenido del envío 3
4 Puesta en marcha 3
5 Operación 4 5.1 La unidad de control TCM Endo III 4 5.2 El interruptor de pedal 5 5.3 Limitador automático (AL) 5 5.4 Protección automática (AP) 5 5.5 Memoria 6
6 Desinfección, Limpieza y Esterilización 6 6.1 Unidad de Control y Pedal 6 6.2 Micromotor Endo 7
7 Problemas y anomalías 7
8 Eliminación 7
TCM Endo III NOUVAG AG
2 No. 31817 29/05
1 Descripción
1.1 Funciones
El TCM Endo es un motor sistema electrónico para Endodoncia, controlado por un microprocesador. El motor electrónico proporciona baja velocidad y alto torque en el instrumento de rotación y de esa manera se obtiene un fácil y rápido tratamiento de conducto. La velocidad se mantiene constante bajo todas las circunstancias, hasta alcanzar el nivel de torque programado. El modo de protección de torque (AP) evita que el ensanchador se rompa. Al alcanzar el torque programado, la dirección de torque se invierte para proteger el ensanchador y después de un giro, el motor cambia de nuevo hacia adelante para finalizar el tratamiento de conducto. El modo AP garantiza un rápido y efectivo procedimento.
1.2 Datos técnicos
Voltaje: ....................................................115V∼ / 50-60 Hz ó 230V∼/ 50-60Hz (ver etiqueta del aparato) Fusibles de alimentación: ...................................................2 x T2A (para115V∼) y 2 x T1A (para 230V∼) Potencia: ..........................................................................................................................................40 VA Tipo: ....................................................................................................................... aplicación de partes B Velocidad: .................................................................................................................. 1,200 – 16,000 rpm Dimensión: ..................................................................................................................90 x 100 x 170 mm Peso neto: ......................................................................................................................................... 2 Kg.
1.3 Condiciones de operación
Humedad relativa:........................Max. 80% Temperatura: ..............................10 to 30°C Presión:....................... 800 hasta 1060 hPa
1.4 Almacenaje y transporte
Humedad relativa: ............................Max. 90% Temperatura:............................... 0 hasta 60°C Presión .............................700 hasta 1060 hPa
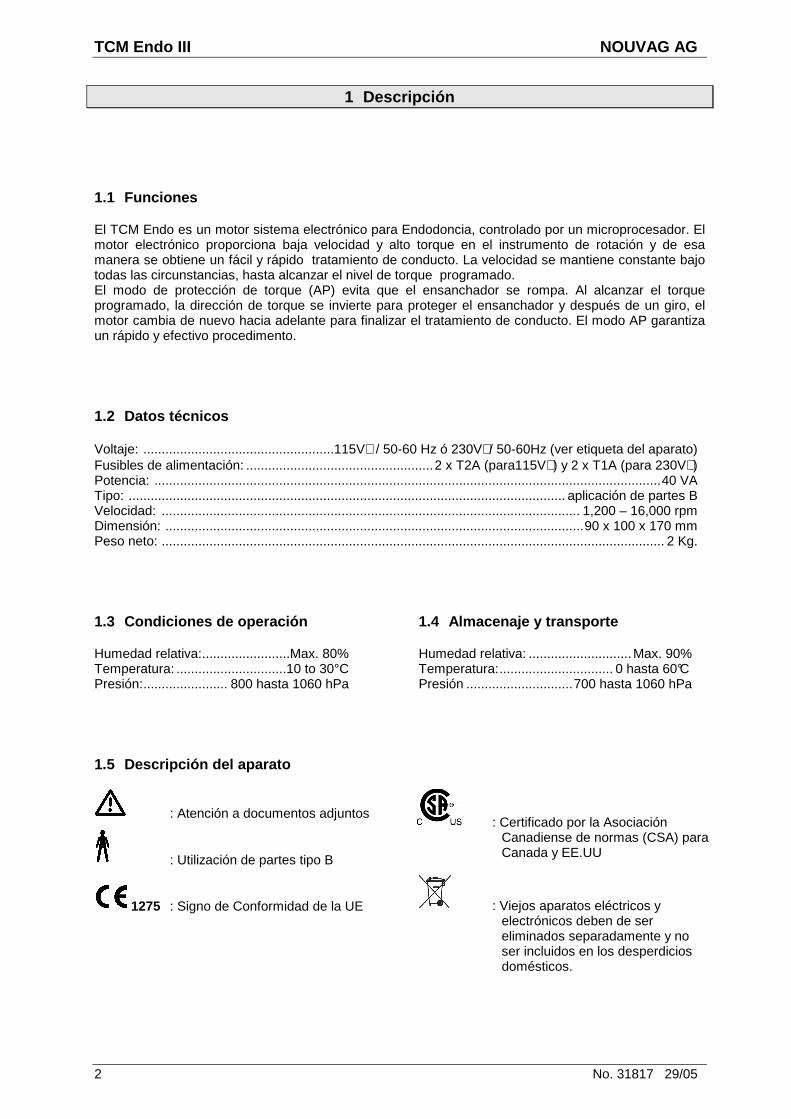
1.5 Descripción del aparato
: Atención a documentos adjuntos
: Utilización de partes tipo B
1275 : Signo de Conformidad de la UE
: Certificado por la Asociación Canadiense de normas (CSA) para Canada y EE.UU
: Viejos aparatos eléctricos y electrónicos deben de ser eliminados separadamente y no ser incluidos en los desperdicios domésticos.
NOUVAG AG TCM Endo III
No. 31817 29/05 3
2 Medidas de seguridad
Su seguridad, la seguridad de su grupo y por supuesto la seguridad de sus pacientes, es para Nouvag AG la mayor prioridad. Por lo tanto es indispensable acatar las siguients medidas:
• El TCM Endo III debe ser operado solo por personal calificado y especializado.
• Controlar que el voltaje sea el adecuado.
• El uso de otros productos, por ejemplo piezas de ma no o contrángulos que no sean de la marca Nouva AG, es resposabilidad del op erador.
• La reparaciones se deben llevar a cabo solo por los Centros de Servicios autorizados.
• El uso habitual o corriente así como el deterioro p roducido por una utilización no apropiada o un cuidado incorrecto del aparato y sus componentes, no está cubierto por la garantía. En lo referente al cuidad o del aparato, es importante seguir las instrucciones proporcionadas en este man ual de operación o sino contactar a Nouvag AG para más información.
3 Contenido del envío
1520........................... Unidad de control TCM Endo III .......................................................................... 1 1823........................... Micromotor Endo ................................................................................................. 1 1488........................... Interruptor de pedal On / Off .............................................................................. 1
4 Puesta en marcha
1) Conectar el Interruptor de pedal On/Off a “ FOOT“. (→ Cuando se opera la unidad con el Interruptor de pedal).
2) Conectar el micromotor a “MOTOR“.
3) Conectar la pieza de mano o contra ángulo.
4) Conectar la conexión principal en el enchufe detrás de la unidad y luego a la toma de corriente.
5) Encender el interruptor verde “ON / OFF“(detrás de la unidad).
6) Seleccionar la reducción y velocidad requeridas.
7) Presionar la tecla “MOTOR“- o pisar el interruptor de pedal (si el pedal está conectado) para poner en marcha el micromotor.
TCM Endo III NOUVAG AG
4 No. 31817 29/05
5 Operación
5.1 La unidad de control TCM Endo III
Modo de empleo:
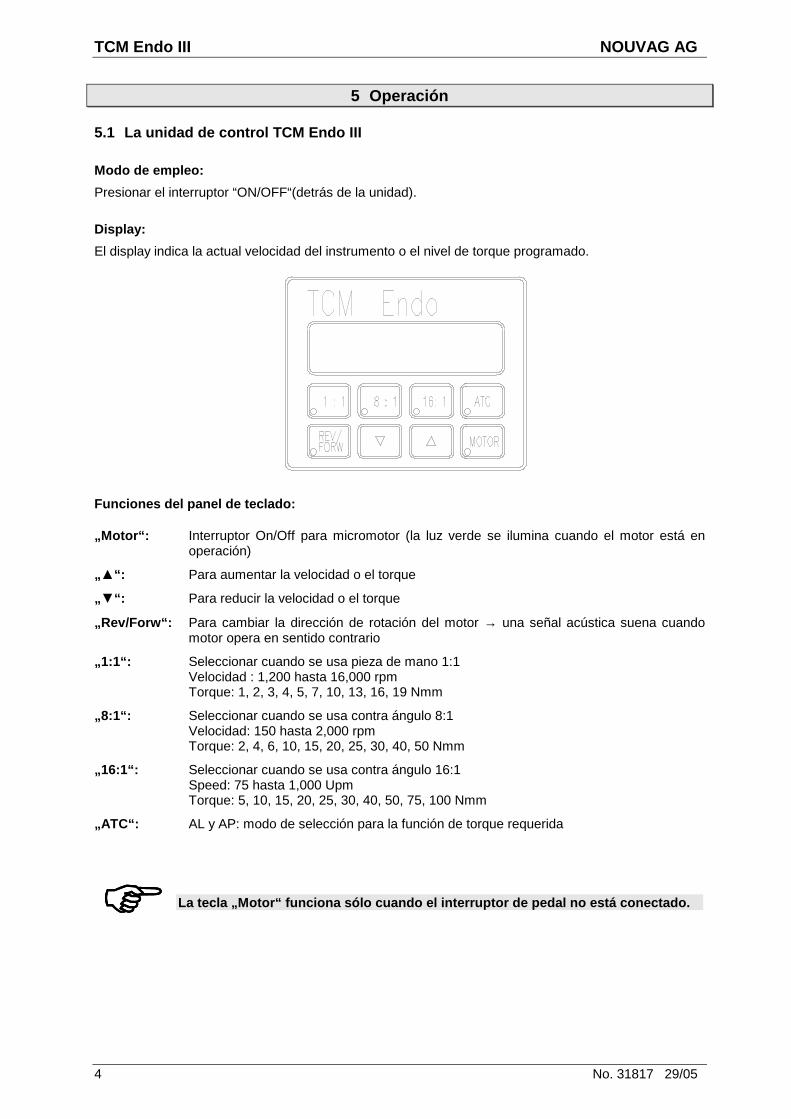
Presionar el interruptor “ON/OFF“(detrás de la unidad).
Display:
El display indica la actual velocidad del instrumento o el nivel de torque programado.
Funciones del panel de teclado:
„Motor“: Interruptor On/Off para micromotor (la luz verde se ilumina cuando el motor está en operación)
„▲“: Para aumentar la velocidad o el torque
„▼“: Para reducir la velocidad o el torque
„Rev/Forw“: Para cambiar la dirección de rotación del motor → una señal acústica suena cuando motor opera en sentido contrario
„1:1“: Seleccionar cuando se usa pieza de mano 1:1 Velocidad : 1,200 hasta 16,000 rpm Torque: 1, 2, 3, 4, 5, 7, 10, 13, 16, 19 Nmm
„8:1“: Seleccionar cuando se usa contra ángulo 8:1 Velocidad: 150 hasta 2,000 rpm Torque: 2, 4, 6, 10, 15, 20, 25, 30, 40, 50 Nmm
„16:1“: Seleccionar cuando se usa contra ángulo 16:1 Speed: 75 hasta 1,000 Upm Torque: 5, 10, 15, 20, 25, 30, 40, 50, 75, 100 Nmm
„ATC“: AL y AP: modo de selección para la función de torque requerida
���� La tecla „Motor“ funciona sólo cuando el interrupto r de pedal no está conectado.
NOUVAG AG TCM Endo III
No. 31817 29/05 5
5.2 El interruptor de pedal
El TCM Endo III puede ser operado con o sin interruptor de pedal. Presionar el interruptor de pedal para poner en marcha el motor.
Interruptor de pedal sin presionar:..Motor apagado Interruptor de pedal presionado:.....Motor encendido
La velocidad del instrumento corresponde a la velocidad ajustada en la unidad de control.
5.3 Limitador automático (AL)
El limitador automático (AL) limita el nivel de torque en el instrumento. Si se alcanza el nivel de torque programado, la velocidad disminuye hasta cero rpm pero la potencia en el instrumento se mantiene. Todos los valores de torque son indicados en Nmm (por ejemplo: AL 20→ significa que el instrumento puede trabajar hasta 20 Nmm antes que se detenga).
Ajuste del modo AL:
1) Presionar la tecla “ATC SET”. En el display aparece el modo de seleción de torque (por ejemplo [AL 20]).
2) Presionar las teclas “▲” y “▼” para aumentar y reducir el nivel de torque respectivamente.
3) Al presionar brevemente la tecla “ATC SET” una vez más, el display cambia automaticamente de nuevo.
5.4 Protección automática (AP)
El modo de protección automática (AP), es una función especial para evitar que los ensanchadores se rompan. Sí el torque programado es alcanzado, el motor cambia inmediatamente de dirección. Después de un giro, regresa inmediatamente hacia adelante. Todos los valores de torque son indicados en Nmm (por ejemplo: AL 20→ significa que el instrumento puede trabajar hasta 20 Nmm antes que se detenga).
���� El limitador automático (AL) puede ajustarse en los siguientes alcances:
1:1 →→→→ de 1 a 19 Nmm
8:1 →→→→ de 2 a 50 Nmm
16:1 →→→→ de 5 a 100 Nmm
���� Si el display indica [AP.....] : presionar la tecla “ ▼” para regresar a [AL.....].
La luz verde se ilumina cuando se activa el AP- mod o, la luz verde no se ilumina en el AL- modo.
���� La protección automática AP puede ajustarse en los siguientes alcances:
1:1 →→→→ de 1 a 19 Nmm
8:1 →→→→ de 2 a 50 Nmm
16:1 →→→→ de 5 a 100 Nmm
TCM Endo III NOUVAG AG
6 No. 31817 29/05
Ajuste del modo AP :
1) Presionar la tecla “ATC”. En el display aparece el modo de selección de torque (por ejemplo [AL 20]).
2) Presionar las teclas “▲” y “▼” para aumentar y disminuir el nivel de torque respectivamente.
3) Al presionar brevemente la tecla “ATC SET” una vez más, el display cambia automaticamente de nuevo.
5.5 Memoria
Una vez programada la velocidad y el torque, permanecen en la memoria aún cuando el motor se apaga.
6 Desinfección, Limpieza y Esterilización
Por favor prestar atención a los siguientes puntos importantes para el mantenimiento del equipo:
• No usar materiales ni detergentes abrasivos para la limpieza.
• Poner el material en el autoclave siempre en empaqu e transparente.
• Poner el material en el autoclave a un máximo de 13 4°C.
• El material ya esterilizado debe ser guardado indic ando la fecha de la esterilización.
6.1 Unidad de Control y Pedal
La unidad de control y el pedal, no entran en contacto directo con los pacientes. No usar limpiadores o solventes abrasivos para la limpieza. Usar alcohol de etilo 80% ó desinfectantes comprobados microbiologicamente.
���� Sí el display indica [AL.....] : presionar la tecla “ ▼” para regresar a [AP.....].
La luz verde “ATC” se ilumina cuando el AP-Modus se activa.
El AP-Modus funciona solo cuando el motor opera hac ia adelante (la luz verde LED “Rev/Forw“ no se ilumina).
Sólo limpiar la superfcie de la Unidad con un paño húmedo. No utilizar rociadores o desinfectantes abrasivos, ya que la consola no es impermeable.
NOUVAG AG TCM Endo III
No. 31817 29/05 7
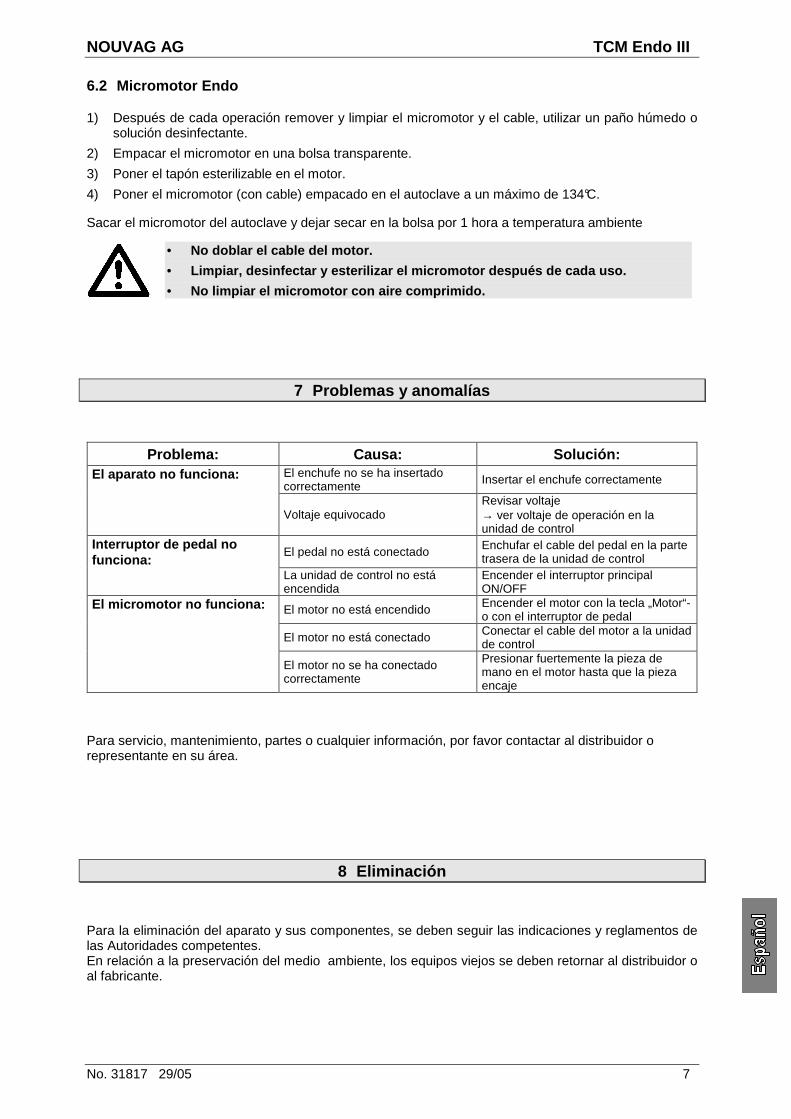
6.2 Micromotor Endo
1) Después de cada operación remover y limpiar el micromotor y el cable, utilizar un paño húmedo o solución desinfectante.
2) Empacar el micromotor en una bolsa transparente.
3) Poner el tapón esterilizable en el motor.
4) Poner el micromotor (con cable) empacado en el autoclave a un máximo de 134°C.
Sacar el micromotor del autoclave y dejar secar en la bolsa por 1 hora a temperatura ambiente
• No doblar el cable del motor.
• Limpiar, desinfectar y esterilizar el micromotor de spués de cada uso.
• No limpiar el micromotor con aire comprimido.
7 Problemas y anomalías
Problema: Causa: Solución: El aparato no funciona: El enchufe no se ha insertado
correctamente Insertar el enchufe correctamente
Voltaje equivocado
Revisar voltaje → ver voltaje de operación en la unidad de control
Interruptor de pedal no funciona:
El pedal no está conectado Enchufar el cable del pedal en la parte trasera de la unidad de control
La unidad de control no está encendida
Encender el interruptor principal ON/OFF
El micromotor no funciona: El motor no está encendido Encender el motor con la tecla „Motor“-o con el interruptor de pedal
El motor no está conectado Conectar el cable del motor a la unidad de control
El motor no se ha conectado correctamente
Presionar fuertemente la pieza de mano en el motor hasta que la pieza encaje
Para servicio, mantenimiento, partes o cualquier información, por favor contactar al distribuidor o representante en su área.
8 Eliminación
Para la eliminación del aparato y sus componentes, se deben seguir las indicaciones y reglamentos de las Autoridades competentes. En relación a la preservación del medio ambiente, los equipos viejos se deben retornar al distribuidor o al fabricante.


NOUVAG AG
Anhang
Appendix
Appendice
Apéndice
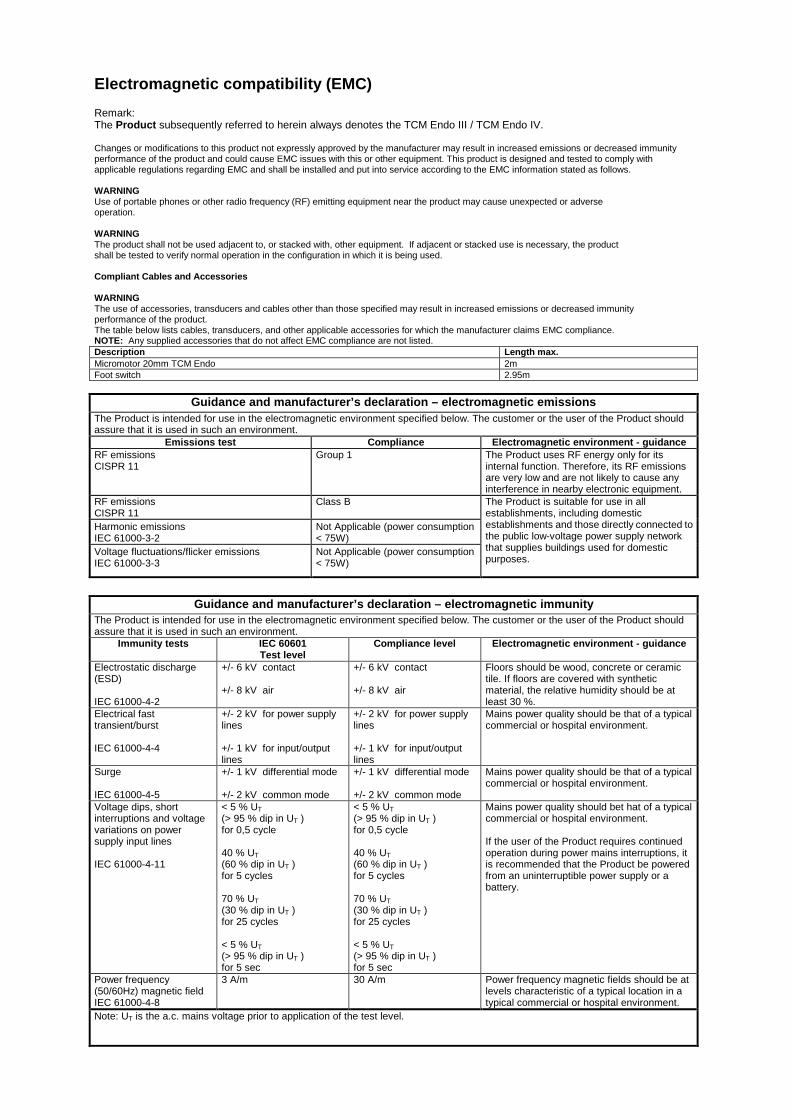
Electromagnetic compatibility (EMC) Remark: The Product subsequently referred to herein always denotes the TCM Endo III / TCM Endo IV. Changes or modifications to this product not expressly approved by the manufacturer may result in increased emissions or decreased immunity performance of the product and could cause EMC issues with this or other equipment. This product is designed and tested to comply with applicable regulations regarding EMC and shall be installed and put into service according to the EMC information stated as follows. WARNING Use of portable phones or other radio frequency (RF) emitting equipment near the product may cause unexpected or adverse operation. WARNING The product shall not be used adjacent to, or stacked with, other equipment. If adjacent or stacked use is necessary, the product shall be tested to verify normal operation in the configuration in which it is being used. Compliant Cables and Accessories WARNING The use of accessories, transducers and cables other than those specified may result in increased emissions or decreased immunity performance of the product. The table below lists cables, transducers, and other applicable accessories for which the manufacturer claims EMC compliance. NOTE: Any supplied accessories that do not affect EMC compliance are not listed. Description Length max. Micromotor 20mm TCM Endo 2m Foot switch 2.95m
Guidance and manufacturer’s declaration – electroma gnetic emissions The Product is intended for use in the electromagnetic environment specified below. The customer or the user of the Product should assure that it is used in such an environment.
Emissions test Compliance Electromagnetic environme nt - guidance RF emissions CISPR 11
Group 1 The Product uses RF energy only for its internal function. Therefore, its RF emissions are very low and are not likely to cause any interference in nearby electronic equipment.
RF emissions CISPR 11
Class B
Harmonic emissions IEC 61000-3-2
Not Applicable (power consumption < 75W)
Voltage fluctuations/flicker emissions IEC 61000-3-3
Not Applicable (power consumption < 75W)
The Product is suitable for use in all establishments, including domestic establishments and those directly connected to the public low-voltage power supply network that supplies buildings used for domestic purposes.
Guidance and manufacturer’s declaration – electroma gnetic immunity
The Product is intended for use in the electromagnetic environment specified below. The customer or the user of the Product should assure that it is used in such an environment.
Immunity tests IEC 60601 Test level
Compliance level Electromagnetic environment - guid ance
Electrostatic discharge (ESD) IEC 61000-4-2
+/- 6 kV contact +/- 8 kV air
+/- 6 kV contact +/- 8 kV air
Floors should be wood, concrete or ceramic tile. If floors are covered with synthetic material, the relative humidity should be at least 30 %.
Electrical fast transient/burst IEC 61000-4-4
+/- 2 kV for power supply lines +/- 1 kV for input/output lines
+/- 2 kV for power supply lines +/- 1 kV for input/output lines
Mains power quality should be that of a typical commercial or hospital environment.
Surge IEC 61000-4-5
+/- 1 kV differential mode +/- 2 kV common mode
+/- 1 kV differential mode +/- 2 kV common mode
Mains power quality should be that of a typical commercial or hospital environment.
Voltage dips, short interruptions and voltage variations on power supply input lines IEC 61000-4-11
< 5 % UT (> 95 % dip in UT ) for 0,5 cycle 40 % UT (60 % dip in UT ) for 5 cycles 70 % UT (30 % dip in UT ) for 25 cycles < 5 % UT (> 95 % dip in UT ) for 5 sec
< 5 % UT (> 95 % dip in UT ) for 0,5 cycle 40 % UT (60 % dip in UT ) for 5 cycles 70 % UT (30 % dip in UT ) for 25 cycles < 5 % UT (> 95 % dip in UT ) for 5 sec
Mains power quality should bet hat of a typical commercial or hospital environment. If the user of the Product requires continued operation during power mains interruptions, it is recommended that the Product be powered from an uninterruptible power supply or a battery.
Power frequency (50/60Hz) magnetic field IEC 61000-4-8
3 A/m 30 A/m Power frequency magnetic fields should be at levels characteristic of a typical location in a typical commercial or hospital environment.
Note: UT is the a.c. mains voltage prior to application of the test level.
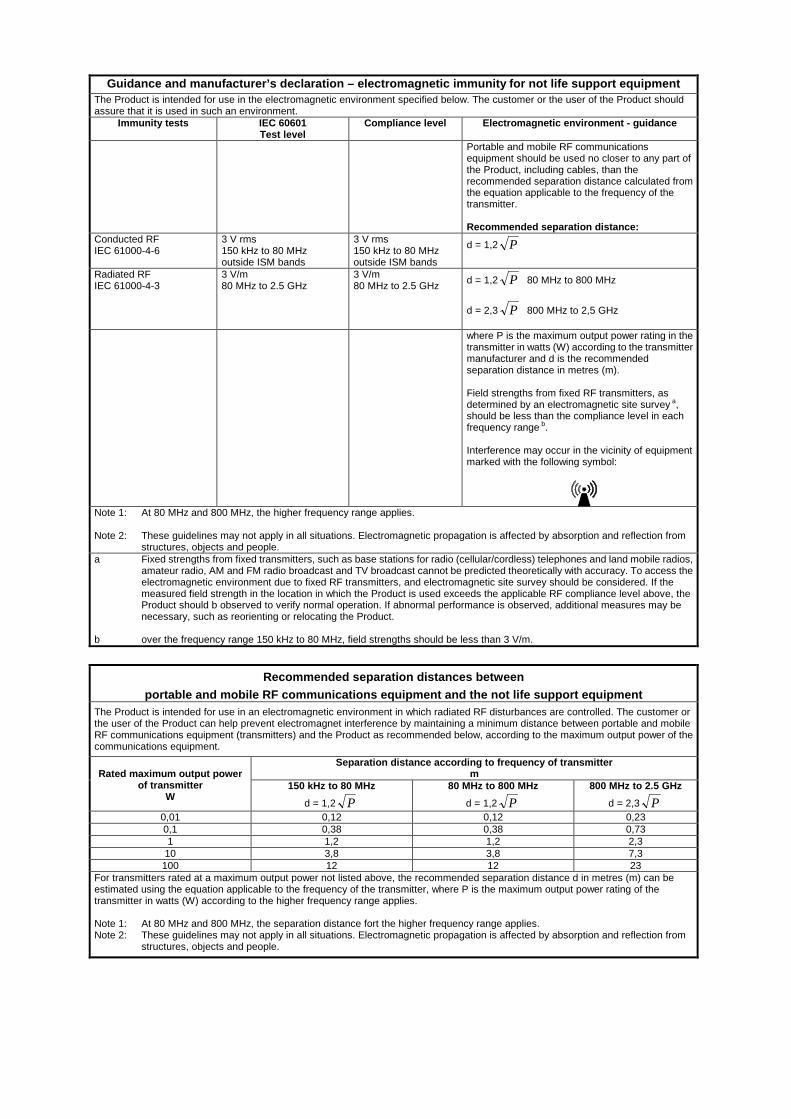
Guidance and manufacturer’s declaration – electroma gnetic immunity for not life support equipment The Product is intended for use in the electromagnetic environment specified below. The customer or the user of the Product should assure that it is used in such an environment.
Immunity tests IEC 60601 Test level
Compliance level Electromagnetic environment - guid ance
Portable and mobile RF communications equipment should be used no closer to any part of the Product, including cables, than the recommended separation distance calculated from the equation applicable to the frequency of the transmitter. Recommended separation distance:
Conducted RF IEC 61000-4-6
3 V rms 150 kHz to 80 MHz outside ISM bands
3 V rms 150 kHz to 80 MHz outside ISM bands
d = 1,2 P
Radiated RF IEC 61000-4-3
3 V/m 80 MHz to 2.5 GHz
3 V/m 80 MHz to 2.5 GHz d = 1,2 P 80 MHz to 800 MHz
d = 2,3 P 800 MHz to 2,5 GHz
where P is the maximum output power rating in the transmitter in watts (W) according to the transmitter manufacturer and d is the recommended separation distance in metres (m). Field strengths from fixed RF transmitters, as determined by an electromagnetic site survey a,
should be less than the compliance level in each frequency range b. Interference may occur in the vicinity of equipment marked with the following symbol:
Note 1: At 80 MHz and 800 MHz, the higher frequency range applies. Note 2: These guidelines may not apply in all situations. Electromagnetic propagation is affected by absorption and reflection from structures, objects and people. a Fixed strengths from fixed transmitters, such as base stations for radio (cellular/cordless) telephones and land mobile radios, amateur radio, AM and FM radio broadcast and TV broadcast cannot be predicted theoretically with accuracy. To access the electromagnetic environment due to fixed RF transmitters, and electromagnetic site survey should be considered. If the measured field strength in the location in which the Product is used exceeds the applicable RF compliance level above, the Product should b observed to verify normal operation. If abnormal performance is observed, additional measures may be necessary, such as reorienting or relocating the Product. b over the frequency range 150 kHz to 80 MHz, field strengths should be less than 3 V/m.
Recommended separation distances between
portable and mobile RF communications equipment and the not life support equipment The Product is intended for use in an electromagnetic environment in which radiated RF disturbances are controlled. The customer or the user of the Product can help prevent electromagnet interference by maintaining a minimum distance between portable and mobile RF communications equipment (transmitters) and the Product as recommended below, according to the maximum output power of the communications equipment.
Separation distance according to frequency of trans mitter m
Rated maximum output power
of transmitter W
150 kHz to 80 MHz
d = 1,2 P
80 MHz to 800 MHz
d = 1,2 P
800 MHz to 2.5 GHz
d = 2,3 P 0,01 0,12 0,12 0,23 0,1 0,38 0,38 0,73 1 1,2 1,2 2,3
10 3,8 3,8 7,3 100 12 12 23
For transmitters rated at a maximum output power not listed above, the recommended separation distance d in metres (m) can be estimated using the equation applicable to the frequency of the transmitter, where P is the maximum output power rating of the transmitter in watts (W) according to the higher frequency range applies. Note 1: At 80 MHz and 800 MHz, the separation distance fort the higher frequency range applies. Note 2: These guidelines may not apply in all situations. Electromagnetic propagation is affected by absorption and reflection from structures, objects and people.
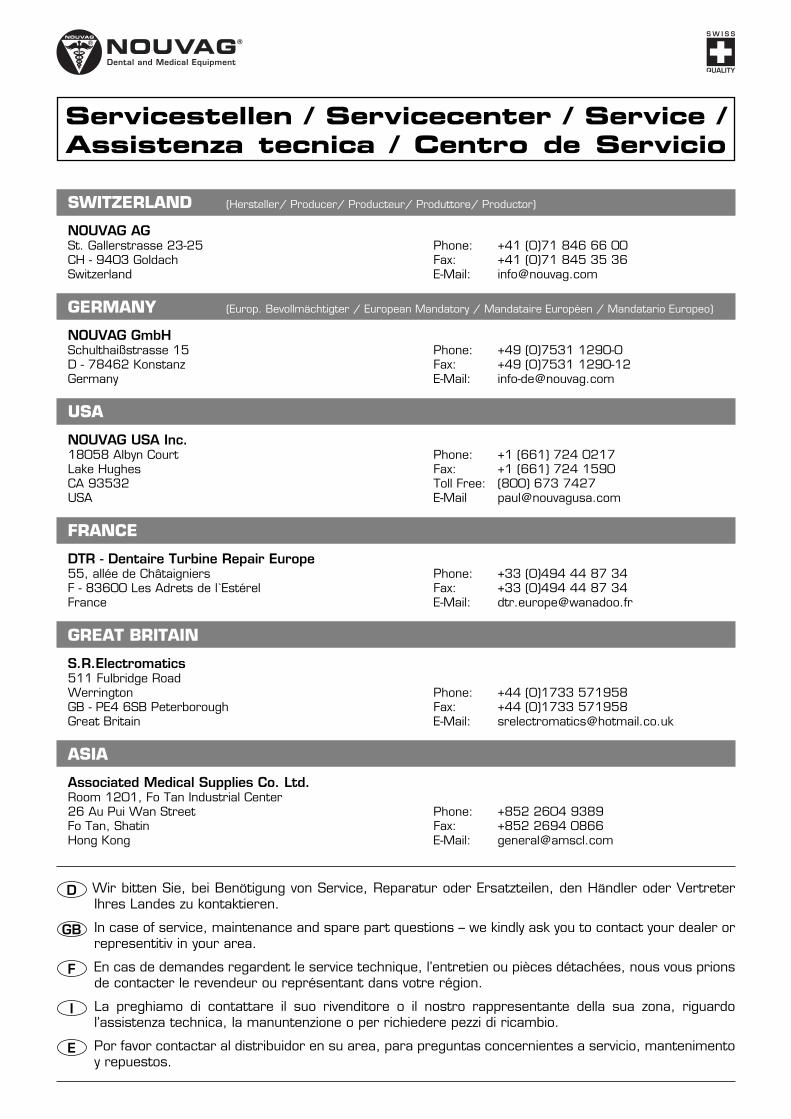
Servicestellen / Servicecenter / Service / Assistenza tecnica / Centro de Servicio
SWITZERLAND (Hersteller/ Producer/ Producteur/ Produttore/ Productor)
NOUVAG AGSt. Gallerstrasse 23-25 Phone: +41 (0)71 846 66 00CH - 9403 Goldach Fax: +41 (0)71 845 35 36Switzerland E-Mail: [email protected]
GERMANY (Europ. Bevollmächtigter / European Mandatory / Mandataire Européen / Mandatario Europeo)
NOUVAG GmbHSchulthaißstrasse 15 Phone: +49 (0)7531 1290-0D - 78462 Konstanz Fax: +49 (0)7531 1290-12Germany E-Mail: [email protected]
USA
NOUVAG USA Inc.18058 Albyn Court Phone: +1 (661) 724 0217Lake Hughes Fax: +1 (661) 724 1590CA 93532 Toll Free: (800) 673 7427USA E-Mail [email protected]
FRANCE
DTR - Dentaire Turbine Repair Europe55, allée de Châtaigniers Phone: +33 (0)494 44 87 34F - 83600 Les Adrets de l`Estérel Fax: +33 (0)494 44 87 34France E-Mail: [email protected]
GREAT BRITAIN
S.R.Electromatics511 Fulbridge Road Werrington Phone: +44 (0)1733 571958GB - PE4 6SB Peterborough Fax: +44 (0)1733 571958Great Britain E-Mail: [email protected]
ASIA
Associated Medical Supplies Co. Ltd.Room 1201, Fo Tan Industrial Center26 Au Pui Wan Street Phone: +852 2604 9389Fo Tan, Shatin Fax: +852 2694 0866Hong Kong E-Mail: [email protected]
D Wir bitten Sie, bei Benötigung von Service, Reparatur oder Ersatzteilen, den Händler oder Vertreter Ihres Landes zu kontaktieren.
GB In case of service, maintenance and spare part questions – we kindly ask you to contact your dealer or representitiv in your area.
F En cas de demandes regardent le service technique, l’entretien ou pièces détachées, nous vous prions de contacter le revendeur ou représentant dans votre région.
I La preghiamo di contattare il suo rivenditore o il nostro rappresentante della sua zona, riguardo l’assistenza technica, la manuntenzione o per richiedere pezzi di ricambio.
E Por favor contactar al distribuidor en su area, para preguntas concernientes a servicio, mantenimento y repuestos.