Embed Size (px)
Citation preview
Blackboard Academic Suite Setup Guide for Windows®
Release 6.1
Blackboard Learning System Blackboard Portal System
Blackboard Learning System � Basic
Date Published: February 9, 2004 Date of Last Revision: Copyright © 2004 by Blackboard Inc. All rights reserved.
Blackboard Academic Suite (Release 6.1) Setup Guide for Windows
© 2004 Blackboard Inc. Proprietary and Confidential Page 2
Blackboard, the Blackboard logo, Blackboard Academic Suite, Blackboard Learning System, Blackboard Learning System ML, Blackboard Portal System, Blackboard Transaction System, Blackboard Building Blocks, and Bringing Education Online are either registered trademarks or trademarks of Blackboard Inc. in the United States and/or other countries. Intel and Pentium are registered trademarks of Intel Corporation. Microsoft and Windows are registered trademarks of Microsoft Corporation in the United States and/or other countries. Sun, Solaris, UltraSPARC, and Java are either registered trademarks or trademarks of Sun Microsystems, Inc. in the United States and/or other countries. Oracle is a registered trademark of Oracle Corporation in the United States and/or other countries. Red Hat is a registered trademark of Red Hat, Inc. in the United States and/or other countries. Linux is a registered trademark of Linus Torvalds in the United States and/or other countries. Apache is a trademark of The Apache Software Foundation in the United States and/or other countries. Macromedia, Authorware and Shockwave are either registered trademarks or trademarks of Macromedia, Inc. in the United States and/or other countries. Real Player and Real Audio Movie are trademarks of RealNetworks in the United States and/or other countries. Adobe and Acrobat Reader are either registered trademarks or trademarks of Adobe Systems Incorporated in the United States and/or other countries. Macintosh and QuickTime are registered trademarks of Apple Computer, Inc. in the United States and/or other countries. WordPerfect is a registered trademark of Corel Corporation in the United States and/or other countries. Crystal Reports is a trademark of Crystal Decisions in the United States and/or other countries. WebEQ is a trademark of Design Science, Inc. in the United States and/or other countries. Other product and company names mentioned herein may be the trademarks of their respective owners. Patents pending. © 2004 Blackboard Inc. All rights reserved. Made and printed in the USA. No part of the contents of this manual may be reproduced or transmitted in any form or by any means without the written permission of the publisher, Blackboard Inc. Worldwide Headquarters Blackboard Inc. 1899 L Street, NW, 5th Floor Washington, DC 20036-3861 USA 800-424-9299 toll free US & Canada +1-202-463-4860 telephone +1-202-463-4863 facsimile www.blackboard.com
International Headquarters Blackboard International B.V. Keizersgracht 106 1015 CS Amsterdam The Netherlands +31 20 5206884 (NL) telephone +31 20 5206885 (NL) facsimile global.blackboard.com
Blackboard Academic Suite (Release 6.1) Setup Guide for Windows
© 2004 Blackboard Inc. Proprietary and Confidential Page 3
Table of Contents
Table of Contents ................................................................................... 3 About the Blackboard Academic Suite Setup Guide ..................................... 4 Introduction to the Blackboard Academic Suite ........................................... 6
Chapter 1�Before Installing the Blackboard Learning System.............................. 8 Technical Requirements........................................................................... 9 Preferred Technical Skills ........................................................................11 Planning and Preparation ........................................................................14 Basic Hardware Configurations ................................................................16 SQL Server Failover ...............................................................................18
Chapter 2�Installation on One or Two Servers .................................................20 Installation Process................................................................................21 Installation Checklist ..............................................................................23 Installation Worksheet for Windows .........................................................27 Step by Step Instructions .......................................................................32 Installation Troubleshooting ....................................................................42 Uninstall Blackboard Learning System ......................................................44
Chapter 3�Blackboard Learning System Application Architecture........................46 File System...........................................................................................47 Databases.............................................................................................50 Services ...............................................................................................52 Performance Tuning and Maintenance ......................................................54 Blackboard Academic Suite Maintenance...................................................57 Operating System and Database Maintenance ...........................................58 Backup and Recovery .............................................................................60 Command Line Tools ..............................................................................61
Chapter 4�Virtual Installations.......................................................................68 About Virtual Installations.......................................................................70 Virtual Installation Command Line Tools ...................................................72 Create a Virtual Installation.....................................................................75 Remove a Virtual Installation ..................................................................77 Move Virtual Installation Databases..........................................................79 Root Installation Management Panel.........................................................84 Manage Virtual Installations Page ............................................................86 Modify Virtual Information ......................................................................87 Edit Root Administrator Profile Page .........................................................90
Chapter 5�Setting Up SSL.............................................................................92 About SSL and SSL Choice ......................................................................93 Configure SSL for IIS .............................................................................95 SSL Choice............................................................................................98
Chapter 6�Web Email .................................................................................100 About Web Email .................................................................................101 Web Email Installation..........................................................................102
Appendix�Updates Since Publication ............................................................106
Blackboard Academic Suite (Release 6.1) Setup Guide for Windows
© 2004 Blackboard Inc. Proprietary and Confidential Page 4
About the Blackboard Academic Suite Setup Guide
Overview
The goal of the Blackboard Academic Suite Setup Guide is to provide institutions with all the information needed to make the Blackboard Academic Suite continuously available to users. Institutions have the choice of hosting their own installation or having their Blackboard installation hosted by Blackboard ASP Solutions. Institutions that choose to have their installation hosted by Blackboard ASP Solutions will find the information in this Guide to be informative, but not necessary to making the Blackboard Academic Suite continuously available to users. This guide will cover: Prerequisites for establishing a continuously available installation
of Blackboard Academic Suite Installation of Blackboard Learning System, other licensed
products, and supplemental components
Maintenance and fine tuning of Blackboard Learning System
Blackboard Learning System architecture and file structure
Installation and configuration of Virtual Installations
Utilities for administering the system Note: This manual focuses almost entirely on the Blackboard Learning System. The Blackboard Portal System only requires additional licensing, not a separate installation process. The Blackboard Portal System may be installed at the same time as the Blackboard Learning System or the license can be obtained later. If a Blackboard Portal System license is obtained after installing the Blackboard Learning System, a simple command line tool will activate the Blackboard Portal System.

Blackboard Academic Suite (Release 6.1) Setup Guide for Windows
© 2004 Blackboard Inc. Proprietary and Confidential Page 5
Manual Conventions To make this manual easier to use a number of conventions appear throughout. These conventions are detailed in the table below.
Symbol Description
Bold type A button or field name. Courier font Code samples, file names, and commands. Steps Tasks users should perform. Italics Italicized text is used for titles as well as
to identify some variables. Note: Examples in this manual use C:\blackboard as the Blackboard Learning System home directory.
Blackboard Academic Suite (Release 6.1) Setup Guide for Windows
© 2004 Blackboard Inc. Proprietary and Confidential Page 6
Introduction to the Blackboard Academic Suite
Overview
The Blackboard Academic Suite is a robust platform for education that is licensed with several different options. The available products include:
Blackboard Learning System: Includes the course management
system and advanced integration and data management tools. Blackboard Learning System � Basic Edition: Includes a course
management system. Blackboard Portal System: Includes a customizable portal.
Who uses the Blackboard Academic Suite?
Many different types of institutions use the Blackboard Academic Suite, including:
Elementary and secondary schools Universities and colleges Vocational schools Corporations
Each institution customizes the content and appearance of the Blackboard Academic Suite to meet its goals.
Blackboard Academic Suite (Release 6.1) Setup Guide for Windows
© 2004 Blackboard Inc. Proprietary and Confidential Page 7
Why do institutions choose Blackboard Academic Suite? Institutions that use the Blackboard Academic Suite have access to the course management, integration, and portal features that are part of the platform. The features of the Blackboard Academic Suite can also be expanded using Blackboard System Extensions. Blackboard System Extensions allow institutions to install custom tools and features that they build themselves or that are built by vendors other than Blackboard. In addition to the almost limitless number of tools and features available for the Blackboard Academic Suite, institutions can customize and brand the Blackboard Academic Suite according to the needs of specific groups of users. Also, multiple instances of Blackboard can be set up as Virtual Installations to address disparate units at the institution.
Blackboard Learning System � ML
The Blackboard Learning System is available in several different languages as Blackboard Learning System � ML. Please note that this is a separate product from the Blackboard Learning System. Language packs used to localize Blackboard Learning System � ML will not work with the Blackboard Learning System.
About Blackboard Inc.
Blackboard Inc. develops, licenses, and supports enterprise software applications for the global education market. Working in concert with over 2,600 client-institutions and dozens of technology partners, Blackboard is committed to enabling client innovation and enriching the educational experience through information technology and offers the industry �s leading e-Education platform. Blackboard �s suite of enterprise applications includes the Blackboard Learning System �, Blackboard Portal System �, and Blackboard Transaction System �.Through the use of Building Blocks SM technology, Blackboard�s suite of applications has been architected and designed to deliver a flexible, customizable, and seamlessly integrated operating environment for e-Education.

Blackboard Academic Suite (Release 6.1) Setup Guide for Windows
© 2004 Blackboard Inc. Proprietary and Confidential Page 8
Chapter 1�Before Installing the Blackboard Learning System
Overview
This chapter presents some topics that must be addressed before installing the Blackboard Learning System to ensure a successful installation and rollout. It includes information on technical and personnel considerations as well as some items to consider in the planning and preparation process.
In this chapter
Chapter 1�Before Installing the Blackboard Learning System includes the following topics.
Topic Description
Technical Requirements
This topic covers the technical requirements for installing the Blackboard Learning System.
Preferred Technical Skills
This topic offers suggestions on the skills needed to successfully install and maintain the Blackboard Learning System.
Planning and Preparation
This topic offers some issues to consider during the planning for the installation and rollout of the Blackboard Learning System.
Hardware Configurations
This topics covers the most common hardware configurations used with the Blackboard Learning System.
SQL Server Failover This topic describes how SQL Server Failover can be used with the Blackboard Learning System.
Blackboard Academic Suite (Release 6.1) Setup Guide for Windows
© 2004 Blackboard Inc. Proprietary and Confidential Page 9
Technical Requirements
Overview
The hardware and software requirements for the Blackboard Academic Suite are published as the Blackboard Academic Suite Minimum Hardware and Software Requirements. These charts are available on the Behind the Blackboard extranet. To access Behind the Blackboard, login at http://www.blackboard.com/products/services/support.htm. After logging in, navigate to the Reference Center to view Blackboard Learning System documentation. In addition to those requirements there are also a couple of software applications, available for free, that are required.
Javatm 2 Software Developer�s Kit, Standard Edition
Note: For more information on Java technologies used with the Blackboard Learning System, please see Knowledge Base article 181-856. This article also includes instructions for updating the Java 2 SDK. The Blackboard Learning System (Release 6.1) requires the Java 2 SDK. The Java 2 SDK must be installed on the Web/application server. The Blackboard Learning System has been updated to work with the latest version of Java 2 SDK. Release 6.1 should be installed and run using Javatm 2 SDK, Standard Edition, v. 1.4.2. Download and apply the latest version from http://java.sun.com/j2se/1.4.2/ Java 2 SDK must be installed on the application server and the path must be accessible by the Blackboard Learning System.
Sun updates the Java 2 SDK frequently. If the links above do not show the required version, then look in the archives section of the site for the correct version: http://java.sun.com/products/archive/.
WinZIP.
Blackboard Academic Suite (Release 6.1) Setup Guide for Windows
© 2004 Blackboard Inc. Proprietary and Confidential Page 10
WinZIP is a popular file compression program. The Blackboard Learning System required version can be found at: http://www.winzip.com
Supported file system
Blackboard Learning System will only work with the NTFS file system. It will not work correctly if the Windows 2000 file system is FAT32. To check the file system in use on a disk, follow these steps:
Step 1 From the Desktop of the Windows 2000 operating system open My Computer.
Step 2 Right-click on the disk where the Blackboard Learning System will be installed.
Step 3 Select Properties. Step 4 The File System field should show NTFS. If it shows
FAT32, consult the operating system documentation for instructions on converting the disk to a NTFS file system.
Blackboard Academic Suite (Release 6.1) Setup Guide for Windows
© 2004 Blackboard Inc. Proprietary and Confidential Page 11
Preferred Technical Skills
Overview
Installing and supporting a Blackboard installation hosted at the institution requires some specific technical skills. It is important that human resources that understand the installation and support of enterprise software are available to install and maintain the Blackboard Academic Suite. Before attempting to install, please ensure that the appropriate skill sets are available to support the installation and maintenance of the Blackboard Academic Suite.
Database Skills
The following database skills are recommended for installing and maintaining the Blackboard Learning System.
Experience with Microsoft SQL Server 2000 Accessing database and running SQL scripts Online and offline database backup and restore Monitor and reconfigure database parameters to meet growing
demand Tune the performance of the host machine and the database
server
Network Skills
The following networking skills are recommended for installing and maintaining the Blackboard Learning System.
Troubleshooting network bottlenecks Experience with threading Knowledge of authentication and experience with institutional
authentication methods (LDAP, Active Directory®, or similar method)
Experience supporting 24/7 network environments with failover contingencies
Experience configuring load-balanced solutions

Blackboard Academic Suite (Release 6.1) Setup Guide for Windows
© 2004 Blackboard Inc. Proprietary and Confidential Page 12
Operating System and Web/app server skills The following operating system and Web/app server skills are recommended for installing and maintaining the Blackboard Learning System.
Experience with IIS Experience with the Windows® operating system including file
management and permissions Experience in optimization and monitoring techniques MCSE certification or comparable knowledge and experience Comfortable with using a text editor to make changes to
configuration files Experience installing software Knowledge of starting and stopping applications on the server
to avoid damaging or corrupting the workstation or database Knowledge of creating scheduled jobs to automate system
processes such as backup and log file management Experience installing and troubleshooting operating systems Comfortable using the command line interface Understand how Web/app servers work and be able to start
and stop the various servers and system processes Knowledge of how to add hardware to the server Perform tape backups and tape archive programs and
understand how to use these backup tools to move files around the system and between machines
Experience running a mission-critical application Experience managing multiple points of integration

Blackboard Academic Suite (Release 6.1) Setup Guide for Windows
© 2004 Blackboard Inc. Proprietary and Confidential Page 13
Developer skills The following skills are recommended to create System Extensions or to use the Event-Driven API.
Familiar with compiling software Relational database experience Java developer experience comparable to a mid- or senior-
level programmer Experience programming Java Server pages Experience with JDBC 2.0 Experience with Java 2 Connection pooling Creating and testing JSPs Object-oriented programming
For assistance with integration, please contact Blackboard Technical Solutions. System Extension developers can find more information in the Blackboard Developer�s Center through the Behind the Blackboard extranet service (http://www.blackboard.com/dev/index.htm).
Blackboard Academic Suite (Release 6.1) Setup Guide for Windows
© 2004 Blackboard Inc. Proprietary and Confidential Page 14
Planning and Preparation
Overview
This topic covers some issues that may need to be addressed while planning and preparing for the Blackboard Learning System. Each school or institution that uses the Blackboard Learning System is unique and will require specific and detailed planning to implement the Blackboard Learning System. The information in this topic should not be used as a comprehensive guide but rather as a set of items that should be considered and adapted to each institution.
Develop a learning model
Before installing the Blackboard Learning System or making it available to users it is important to define how it will be used at the institution. Having a sound plan for how the Blackboard Learning System will be used helps ensure that configuration and security decisions are aligned with the goals of the institution. Some items to consider:
Define a naming convention for courses and users on the system.
Determine what information and areas of the system are
accessible to each set of users (Instructors, Students, Guests, and so forth).
Identify the other information systems will interact with the
Blackboard Learning System. Define which system owns the data.
Build a team to manage the system, support users, and
develop tools and content.
These are just a few examples of the decisions that go into developing a learning model. Each institution will have a unique approach appropriate for its users.
Blackboard Academic Suite (Release 6.1) Setup Guide for Windows
© 2004 Blackboard Inc. Proprietary and Confidential Page 15
Create a test environment Creating a test environment is a critical step in the process. A test environment allows system and database administrators to tune the software for maximum performance based on the needs of the institution. Developers use the test environment to build System Extensions prior to rollout as well as developing tools for integrating with other information systems at the institution. Finally, a test environment helps resolve potential issues with hardware or software before rolling out the Blackboard Learning System to users.
Establish a support infrastructure
Having qualified, trained staff to support users is important to operating smoothly with little interruptions to users. Define what level of support is required and when it should be available to users. Some institutions may require 24/7 support while others can operate with less. After training staff and defining support availability and expectations be sure to communicate this information to users.
Run a pilot program
After the software is installed, configured, and tested and the support staff is trained it is a good idea to launch a pilot program. A pilot program lets a few users on the system to work with the software in the context of the learning model. This is a good time to spot roadblocks or issues that may impact users when the software is rolled out. Also, the pilot program participants (especially the Instructors) can take a leadership role among their peers when the software is rolled out. These users can train other users on the software and help them successfully adopt the learning model.
Rollout
When the Blackboard Learning System is ready for users it is important to communicate key information to users. Make sure the user base has access to training sessions, support, and other resources to help them begin using the system.
Blackboard Academic Suite (Release 6.1) Setup Guide for Windows
© 2004 Blackboard Inc. Proprietary and Confidential Page 16
Basic Hardware Configurations
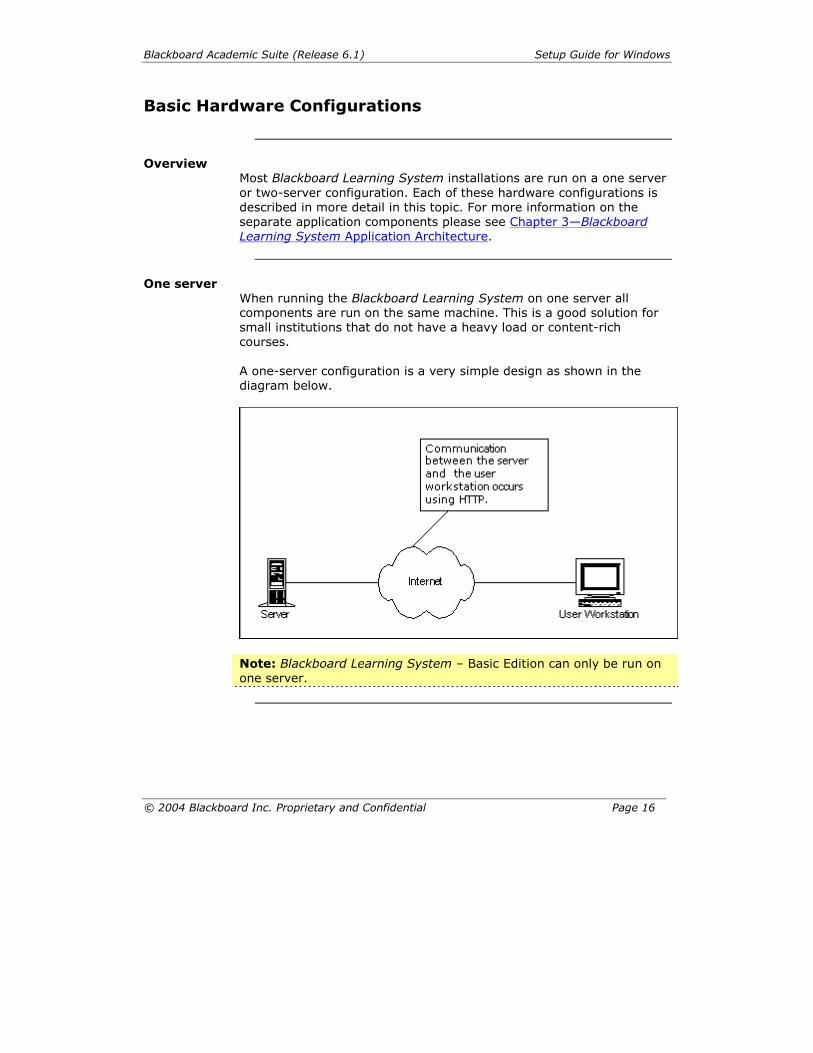
Overview
Most Blackboard Learning System installations are run on a one server or two-server configuration. Each of these hardware configurations is described in more detail in this topic. For more information on the separate application components please see Chapter 3�Blackboard Learning System Application Architecture.
One server
When running the Blackboard Learning System on one server all components are run on the same machine. This is a good solution for small institutions that do not have a heavy load or content-rich courses. A one-server configuration is a very simple design as shown in the diagram below.
Note: Blackboard Learning System � Basic Edition can only be run on one server.
Blackboard Academic Suite (Release 6.1) Setup Guide for Windows
© 2004 Blackboard Inc. Proprietary and Confidential Page 17
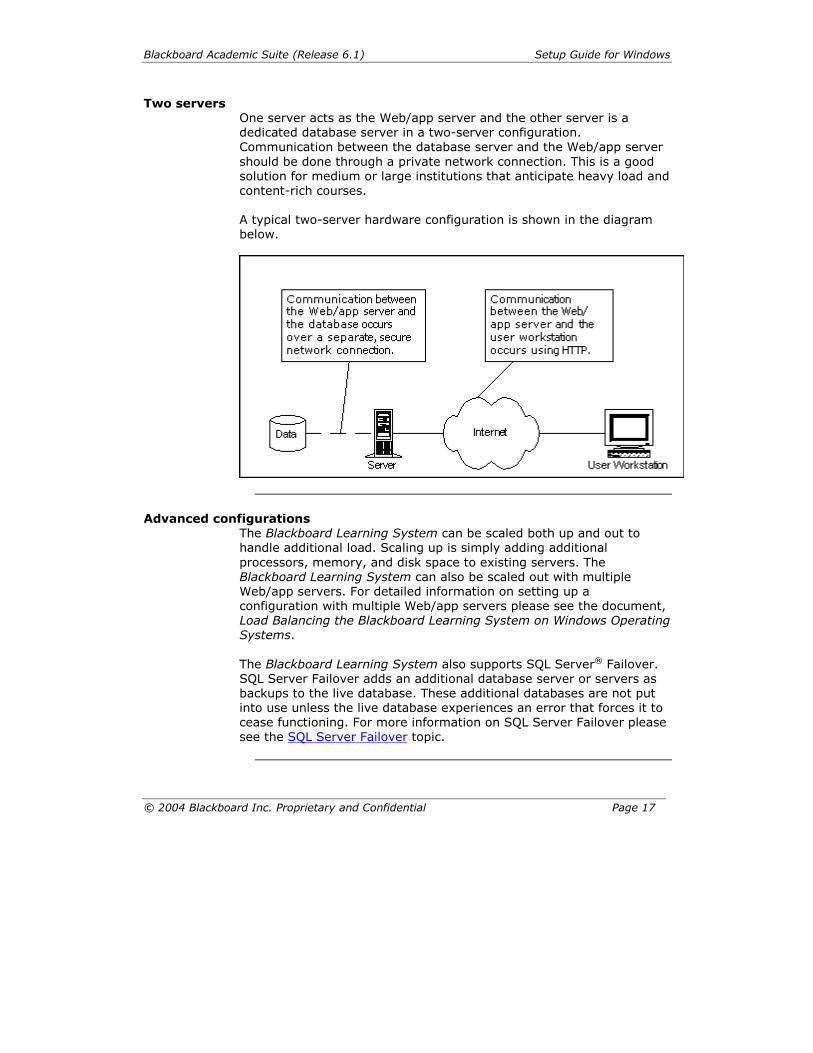
Two servers One server acts as the Web/app server and the other server is a dedicated database server in a two-server configuration. Communication between the database server and the Web/app server should be done through a private network connection. This is a good solution for medium or large institutions that anticipate heavy load and content-rich courses. A typical two-server hardware configuration is shown in the diagram below.
Advanced configurations
The Blackboard Learning System can be scaled both up and out to handle additional load. Scaling up is simply adding additional processors, memory, and disk space to existing servers. The Blackboard Learning System can also be scaled out with multiple Web/app servers. For detailed information on setting up a configuration with multiple Web/app servers please see the document, Load Balancing the Blackboard Learning System on Windows Operating Systems. The Blackboard Learning System also supports SQL Server® Failover. SQL Server Failover adds an additional database server or servers as backups to the live database. These additional databases are not put into use unless the live database experiences an error that forces it to cease functioning. For more information on SQL Server Failover please see the SQL Server Failover topic.
Blackboard Academic Suite (Release 6.1) Setup Guide for Windows
© 2004 Blackboard Inc. Proprietary and Confidential Page 18
SQL Server Failover
Overview
The Blackboard Learning System is designed to work with Microsoft SQL Server Failover clusters. SQL Server Failover provides added fault tolerance to the database by using another database in the cluster in the case of an error that causes the production database to fail.
What is a Microsoft SQL Server Failover cluster?
A SQL Server Failover cluster is based on the same design as a Windows cluster. A group of servers are joined together to provide continual service in the event of an outage or failure. When SQL Server 2000 is forced to shut down another server steps in to handle requests.
Process for setting up a Microsoft SQL Server failover cluster
The process for setting up a Microsoft SQL Server failover cluster is done at the operating system and database level before installing the Blackboard Learning System.
Step 1 Setup the Microsoft server cluster. Step 2 Install SQL Server 2000 and configure the failover
cluster. Step 3 Install the Blackboard Learning System.
Tips
The following is a list of tips for setting up a SQL Server failover.
Use four public IP addresses: node 1, node 2, Windows cluster server, and virtual SQL server.
The local disk of each node must be attached to a separate
SCSI controller. It should not use the same one that is attached to the RAID system.
The RAID SCSI controller IDs of the two nodes must be
different.
RAID SCSI BIOS must be setup to enable cluster (shared bus).
Blackboard Academic Suite (Release 6.1) Setup Guide for Windows
© 2004 Blackboard Inc. Proprietary and Confidential Page 19
The names of the network cards cannot contain spaces or special characters.
Do not use the default instance name for installing SQL server
on a virtual server.
MSDTC service must be running before starting SQL server setup.
For more information
For more information about installing and configuring a Microsoft SQL Server failover cluster please see Microsoft TechNet at http://www.microsoft.com/technet/. Note: While Blackboard supports SQL Server failover with the Blackboard Learning System, Microsoft is the best resource for information on installing and configuring a Microsoft SQL Server failover cluster.
Blackboard Academic Suite (Release 6.1) Setup Guide for Windows
© 2004 Blackboard Inc. Proprietary and Confidential Page 20
Chapter 2�Installation on One or Two Servers
Overview
The most common Blackboard Learning System Installations run on one server or two servers. With a two server installation, the database is maintained on a separate server to better handle the load. For information on installing the Blackboard Learning System on a multiple Web/app server, load-balanced configuration please see the document Load Balancing the Blackboard Learning System on Windows Operating Systems.
In this chapter
Chapter 2�Installation on One or Two Servers includes the following topics.
Topic Description
Installation Process This topic provides an overview of the installation.
Installation Checklist This topic is a checklist of items that must be completed before beginning the installation.
Installation Worksheet This topic is a worksheet that includes all the information required by the installer.
Step by Step Instructions
This topic goes through the installation step-by-step.
Installation Troubleshooting Tips
This topic covers some of the most common problems that may occur during the installation and provides solutions.
Uninstall the Blackboard Learning System
This topic covers how to uninstall the Blackboard Learning System.
Blackboard Academic Suite (Release 6.1) Setup Guide for Windows
© 2004 Blackboard Inc. Proprietary and Confidential Page 21
Installation Process
Overview
The most important part of the Blackboard Learning System installation process is the preparation. A properly configured and supported environment to host the Blackboard Learning System will help prevent future problems. The Blackboard Learning System installer must be run on the Web/app server. Unlike previous versions, such as Blackboard 5, there is not a separate installation process for the database component or for the advanced integration tools. If installing Blackboard Learning System on two servers, simply run the installer once on the Web/app server to install the application, database, and advanced integration tools.
Process
The Blackboard Learning System installation process occurs in the following order:
Step 1 Review the Installation Checklist. Do not proceed until all items in the list are checked.
Step 2 Complete the Installation Worksheet. This worksheet
includes space to record all the information that the Blackboard Learning System installer will require.
Step 3 Follow the Step-by-Step Instructions to run the
software installer.
Step 4 Verify Blackboard Learning System installed correctly by logging in.
Step 5 If Blackboard Learning System did not install correctly,
troubleshoot the problem. Uninstall Blackboard Learning System and repeat the installation process if necessary.
Optional steps:
Step 6 Install and configure any additional Virtual Installations.
Step 7 Migrate data from a previous version of Blackboard
Learning System.
Blackboard Academic Suite (Release 6.1) Setup Guide for Windows
© 2004 Blackboard Inc. Proprietary and Confidential Page 22
Step 8 Integrate Blackboard Learning System with other information systems at the institution.
Note: For more information on migrating data from an earlier version of the software please see the Blackboard Learning System Migration Manual. For more information on integrating with other information systems please see the Blackboard Learning System Advanced Data Management Manual and the Blackboard Learning System Authentication Manual.
Blackboard Academic Suite (Release 6.1) Setup Guide for Windows
© 2004 Blackboard Inc. Proprietary and Confidential Page 23
Installation Checklist
Overview
The installation checklist below and the installation worksheet that follows should be completed before installing Blackboard Learning System. Completing both the checklist and the worksheet prior to installation will help ensure a successful installation. Please note that if Blackboard Learning System will only be installed on one server, the machine must pass the checklist for both the Web/app server and the database server.
Blackboard basics
Review the following list to make sure that Blackboard has provided everything necessary to begin installation.
A valid Blackboard Learning System license file is accessible from the Web/app server.
The Blackboard Learning System installer is
available either on CD-ROM or from the Blackboard Download site.
The Administrator has contact information for
Blackboard Technical Support and a login for the Behind the Blackboard extranet at http://www.blackboard.com/products/services/support.
The Blackboard Learning System Operations
Workbook has been downloaded and begun. Download the Operations Workbook from the Reference Center section of Behind the Blackboard.
Web/app server checklist
Review the following list to make sure that the Web/app server is prepared for installation.
The machine is connected to the network and powered on.
The machine meets the minimum hardware
requirements.
Blackboard Academic Suite (Release 6.1) Setup Guide for Windows
© 2004 Blackboard Inc. Proprietary and Confidential Page 24
A supported operating system is installed on the machine.
The supported version of Java 2 SDK is
installed on the machine.
The machine is dedicated to the Blackboard Learning System and has no unnecessary software installed.
The supported version of IIS is installed.
The Administrator has a plan for managing log
files.
The Administrator has a plan for backing up the application file system.
The (Domain Name Server) DNS Server is set
to correctly resolve the server name. Note that the server name should not contain underscore characters. Microsoft Internet Explorer 6 blocks cookies from machines with an underscore in the name as a security measure.
The SQL Server 2000 Client libraries are
installed on the Web/app Server (if the database is running on a separate server).
Any firewalls are configured to allow access to
the Blackboard Learning System ports. These ports are defined when the installer is run. It is not possible to use a firewall to redirect to a different port. The Blackboard Learning System must be available to users on the ports specified during the installation and not served through an alternate port. For more information on the ports used by the Blackboard Learning System, see the next topic, Installation Worksheet.
The server clock is synchronized with the other
server or servers used in the Blackboard Learning System configuration. If the server clocks are not synchronized there may be differences between the displayed availability of time-sensitive content and the actual availability of time-sensitive content.
Blackboard Academic Suite (Release 6.1) Setup Guide for Windows
© 2004 Blackboard Inc. Proprietary and Confidential Page 25
The Windows 2000 file system is set to NTFS.
The Blackboard Learning System will not work with a FAT32 file system.
Database server checklist
Review the following to make sure that the database server is prepared for installation. Note: If using a SQL Server failover cluster make sure that the cluster is configured and SQL Server 2000 is running properly.
The machine is connected to the network and powered on.
The machine meets the minimum hardware
requirements.
A supported operating system is installed on the machine.
A supported version of SQL Server 2000 is
installed on the machine.
The person installing Blackboard Learning System knows the SQL Server Administrator password and what instance of SQL Server will support the Blackboard Learning System.
The machine is dedicated to Blackboard
Learning System and has no unnecessary software installed.
SQL Server 2000 is installed on the root
directory.
SQL Server 2000 is configured with Mixed Mode Security authentication.
SQL Server 2000 is installed using a local
account.
SQL Server 2000 is running. If SQL Server 2000 was installed just prior to Blackboard Learning System, restart the database machine
Blackboard Academic Suite (Release 6.1) Setup Guide for Windows
© 2004 Blackboard Inc. Proprietary and Confidential Page 26
after installing SQL Server 2000 and prior to installing Blackboard Learning System.
The database administrator has a plan for
backing up the database and managing database log files.
The Windows 2000 file system is set to NTFS.
The Blackboard Learning System will not work with a FAT32 file system.
Blackboard Academic Suite (Release 6.1) Setup Guide for Windows
© 2004 Blackboard Inc. Proprietary and Confidential Page 27
Installation Worksheet for Windows
Overview
The installation worksheet identifies all the information required by the Blackboard Learning System installer. Filling out the worksheet prior to installation will help the installation process run smoothly.
Using special characters
The following special characters should never be used in an attribute such as a User Name, password, database user, Course ID, and so forth. %&#<>=+ These characters are only safe to use when adding content into a text box, such as adding the description for a course. When creating attributes a good rule to follow is to only use alphanumeric characters, underscores, dots, and dashes (do not use spaces!).
Information required prior to running installer
The following information is needed by the installer to complete the installation. License File: ___________________________________________ The path to the License File. If a License File is not available, please contact Blackboard to request one. The License file determines which products and features are installed. Note: The installation will fail if the license file is accessed through a network path. Make sure the license file is on the Web/app server before beginning the installation. Setup Type: choose from one of the following options: New Install. Database on same server. Select this option if
installing Blackboard Learning System-Basic Edition or if installing another license on only one server. This Setup Type is appropriate only when the application and database will run on one server.
Blackboard Academic Suite (Release 6.1) Setup Guide for Windows
© 2004 Blackboard Inc. Proprietary and Confidential Page 28
New Install. Database on remote server. Select this option if
installing Blackboard Learning System or Blackboard Learning and Portal System on more than one server. This Setup Type is appropriate when the application and the database will be hosted on separate servers.
Add application server to existing system. Select this option
if scaling Blackboard Learning System by adding an additional application server.
Administrator Name: ____________________________ The name of the Administrator. Administrator Email: ____________________________ The email address of the Administrator. Company: ________________________ The institution that will be using Blackboard Learning System. State: ____________________ The state, province, or territory where the institution is located. ZIP Code: ________________ The ZIP Code where the institution is located. Institution Type: choose from one of the following options K-12 Higher Education Continuing Education Corporate Professional Association Hobby Application Directory:______________________________ The path to a directory on the application server where the Blackboard Learning System will reside. Note that the installer will create a directory called blackboard within this directory.
Blackboard Academic Suite (Release 6.1) Setup Guide for Windows
© 2004 Blackboard Inc. Proprietary and Confidential Page 29
JDK Directory:__________________________________ The path to the Java 2 SDK. The Java 2 SDK must be installed on the Web/application server. Web server Machine Name: _____________________ The name of the Web server. Hint: To find the machine name of a server, follow the steps below. 1. Right-click My Computer and select Properties from the context
menu. 2. Click the Network Identification tab. 3. The full computer name and the domain name both appear. The
full computer name is the Web/app server Machine Name with the domain name appended (webservermachinename.domain).
Web server Domain Name: ____________________________ The name of the domain where the Web server resides. Note: The Web server Machine Name and the Web/app server Domain Name form the URL for Blackboard (http://webservermachinename.domain). Because these names form the URL do not use any characters other than standard letters and numbers (underscores and spaces will cause problems) in the Web/app server name or the domain name. Web server Port Number: _____________ The port that the Web server will use for http connections with clients. Application Server Port Number: __________ The port that the application engine uses. Collaboration Server HTTP Port: ____________ The default port is 8011. Collaboration Server TCP/IP Port: __________ The default port is 8010. HTTP and TCP/IP port information is required for Collaboration Server to communicate with the applet running in the Web browser. TCP/IP performs better and is the preferred method to communicate,
Blackboard Academic Suite (Release 6.1) Setup Guide for Windows
© 2004 Blackboard Inc. Proprietary and Confidential Page 30
however, HTTP will be used if TCP/IP communication is not available; so both ports must be set. Database Machine Name: _______________________ The machine name where the SQL Server 2000 database that Blackboard Learning System will use is installed. The database machine name can be found the same way as the Web server machine name. Database Domain Name: ____________________________ The domain name where the database server resides. SQL Server Instance Name: ________________________ The name of the SQL Server instance that will run the Blackboard Learning System database. This may be left blank if Blackboard Learning System will run on the default instance of SQL Server. SQL System Database Administrator Password: __________________ The SQL System Database Administrator password associated with the �sa� login. By default, there is no password associated with this login although a password may be assigned for security reasons. Blackboard Database User Password: _______________________ A password for a SQL Server 2000 user that Blackboard Learning System creates at install. This account is also used by the application to access the database. Blackboard Database Report User Password:_____________________ This is the password for the Database Report User. This is a SQL Server user that the Blackboard Learning System uses. Database Data Directory: __________________ The directory that will store the Blackboard Learning System database data files (.mdf). This directory will not store application data or content. This directory must be on the database server.
Blackboard Academic Suite (Release 6.1) Setup Guide for Windows
© 2004 Blackboard Inc. Proprietary and Confidential Page 31
Database Logs Directory: ___________________ The directory that will store the Blackboard Learning System database log files (.ldf). This directory will not store application or Web logs. This directory must be on the database server. SMTP Server: ________________________ The full hostname (example: smtp.blackboard.com) of the SMTP server that Blackboard Learning System will use to send emails. Administrator Password: _________________
The Administrator account has full Administrator privileges. This account and the root_admin account are the only two accounts that can login until more users are created.
Root Administrator Password: _________________ The root_admin account has full administrative privileges including the management of Virtual Installations through the System Control Panel. When the root_admin account views the System Control Panel the Manage Virtual Installations link appears at the top of the panel. The root_admin can login to any Virtual Installation and access the Virtual Installation management features from this link. Note: The root_admin account is created even if your license does not include the use of additional Virtual Installations. The root_admin account can be modified from the Edit Root Administrator Profile page. Integration User Password: ___________________ The integration user is used only to facilitate Blackboard Learning System Snapshot operations. This account cannot be used to login through the GUI nor does it appear in any lists of users in the user interface. To change the password for this account, use the Integration Password feature available on the System Control Panel. For more information on how the integration account is used during Snapshot processes, please see the Blackboard Learning System Advanced Integration and Data Management Manual.
Blackboard Academic Suite (Release 6.1) Setup Guide for Windows
© 2004 Blackboard Inc. Proprietary and Confidential Page 32
Step by Step Instructions
Overview
The instructions below detail each step needed to successfully run the Blackboard Learning System installer for a one-server or two-server configuration. For information on scaling Blackboard Learning System out by adding Web/app servers, please see the Load Balancing with the Blackboard Learning System on Windows document available in the Reference Center of the Blackboard Support site (http://www.blackboard.com/products/services/support).
Install Blackboard Learning System
Step 1 Complete the pre-installation checklist and the pre-
installation worksheet prior to running the Blackboard Learning System installer.
Step 2 Download the Blackboard Learning System installer
executable file from the Blackboard download site onto the Web/app server. Or insert the Blackboard Learning System CD into a CD-ROM drive on the Web/app server and locate the Blackboard Learning System installer executable file. Obtain a license file.
Step 3 Double-click the Blackboard Learning System installer
executable file. The Blackboard Learning System installer will launch after a few moments.

Blackboard Academic Suite (Release 6.1) Setup Guide for Windows
© 2004 Blackboard Inc. Proprietary and Confidential Page 33
Step 4 Accept the terms of the license agreement and click Next.
Note: On the following pages there is a Back button for correcting mistakes on previous pages. Once the license file has been set on this page, do not return to this page and enter a new path to the license file. If a change to the path needs to be made after the path has been set (by clicking Next) the installer must be canceled and restarted.

Blackboard Academic Suite (Release 6.1) Setup Guide for Windows
© 2004 Blackboard Inc. Proprietary and Confidential Page 34
Step 5 Enter the full path to the Blackboard Learning System license file or click Browse to locate the file. When the path to the license file appears correctly in the License File field, click Next to accept the path and continue to the next installer page.
Step 6 After entering the license file path and clicking Next, the Setup Type page will appear.
Blackboard Academic Suite (Release 6.1) Setup Guide for Windows
© 2004 Blackboard Inc. Proprietary and Confidential Page 35
Select the Setup Type from the listed options. The available options are:
New Install. Database on same server. This Setup Type is appropriate only when the application and database will run on one server.
New Install. Database on remote server.
This Setup Type is appropriate when the application and the database will be hosted on separate servers.
Add application server to existing system. Select this option if scaling Blackboard Learning System by adding an additional application server.
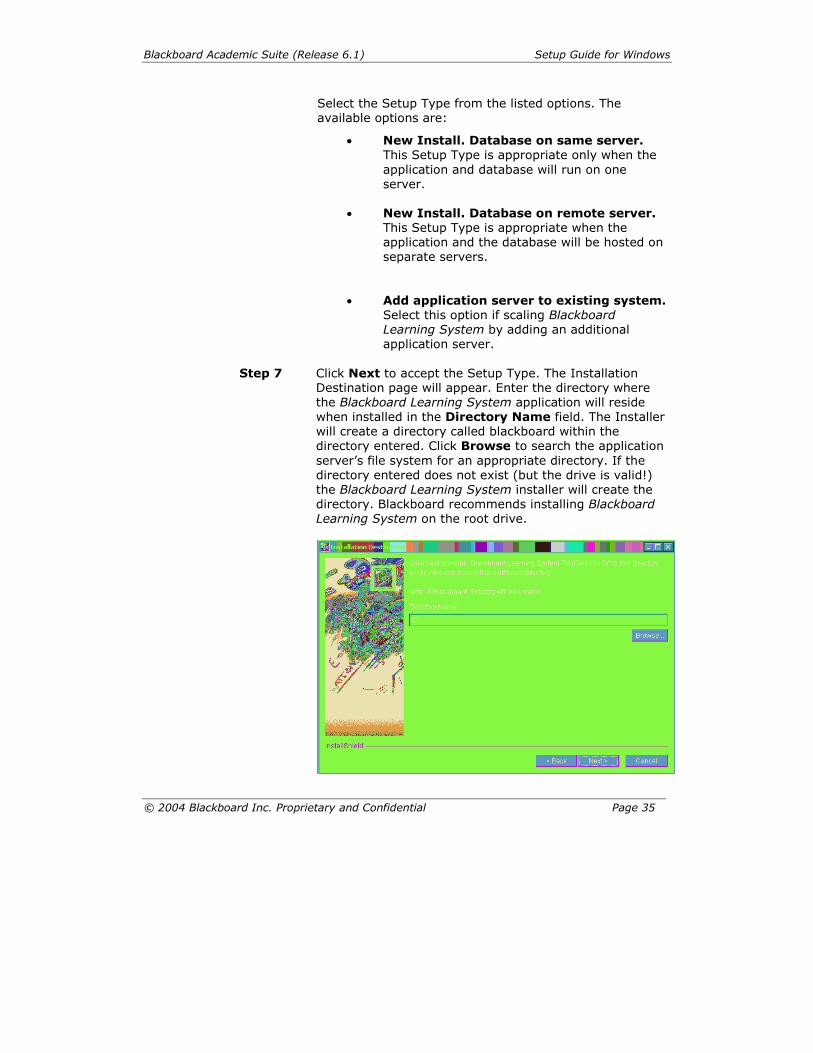
Step 7 Click Next to accept the Setup Type. The Installation
Destination page will appear. Enter the directory where the Blackboard Learning System application will reside when installed in the Directory Name field. The Installer will create a directory called blackboard within the directory entered. Click Browse to search the application server�s file system for an appropriate directory. If the directory entered does not exist (but the drive is valid!) the Blackboard Learning System installer will create the directory. Blackboard recommends installing Blackboard Learning System on the root drive.
Blackboard Academic Suite (Release 6.1) Setup Guide for Windows
© 2004 Blackboard Inc. Proprietary and Confidential Page 36
Step 8 Click Next. The Institution Information page will appear.
If a mistake was made entering the directory name, click Back to return to the previous page.
Fill out the fields with the appropriate information about the System Administrator and the institution. Values must be entered in all fields to continue with the installation.
Step 9 After completing the fields on the Institution Information page, click Next to advance to the Institution Type page. If a mistake was made entering the institution information, click Back to return to that page and make corrections. Select the institution type from the available options.
Blackboard Academic Suite (Release 6.1) Setup Guide for Windows
© 2004 Blackboard Inc. Proprietary and Confidential Page 37
Step 10 Click Next to advance to the Java 2 SDK Location page. If a mistake was made on the Installation Destination page, click Back to return to that page.
Enter the path to Java 2 SDK in the Directory Name field. Click Browse to locate the correct path.
Step 11 Click Next to advance to the Collaboration Server Setup page. Enter the TCP port number and the HTTP port number that the Collaboration Server will use. The default values are 8010 for the TCP port and 8011 for the HTTP port.
Blackboard Academic Suite (Release 6.1) Setup Guide for Windows
© 2004 Blackboard Inc. Proprietary and Confidential Page 38
Step 12 After entering the port numbers for the Collaboration server, click Next to advance to the Web Server Setup page. If a mistake was made entering the port numbers, click Back to return to the Collaboration Server Setup page.
Enter the appropriate information on the Web server. Please refer to the Installation Worksheet with any questions regarding the information required by these fields.
Step 13 Click Next to advance to the Database Server Location page. If a mistake was made on the Web Server Setup page, click Back to return to that page.
Blackboard Academic Suite (Release 6.1) Setup Guide for Windows
© 2004 Blackboard Inc. Proprietary and Confidential Page 39
Enter information on the database server in the appropriate fields. If the Blackboard Learning System will run on the same machine as the Blackboard Learning System database, the Database Machine Name and Database Domain Name fields will already be populated. If the default SQL Server Instance is to be used simply leave that field blank (this is true in most cases).
Step 14 Click Next to advance to the Database Passwords page. If a mistake was made on the Database Server Location page, click Back to return.
Enter the passwords for the SQL System Database Administrator, the Blackboard Database User, and the Blackboard Database Report User. The SQL System Database Administrator password is set when the database is installed. The SQL System Database Administrator default login is �sa� and no password. The Blackboard Database User and Blackboard Database Report User is created during the Blackboard Learning System installation. The password entered here will be associated with that user.
Blackboard Academic Suite (Release 6.1) Setup Guide for Windows
© 2004 Blackboard Inc. Proprietary and Confidential Page 40
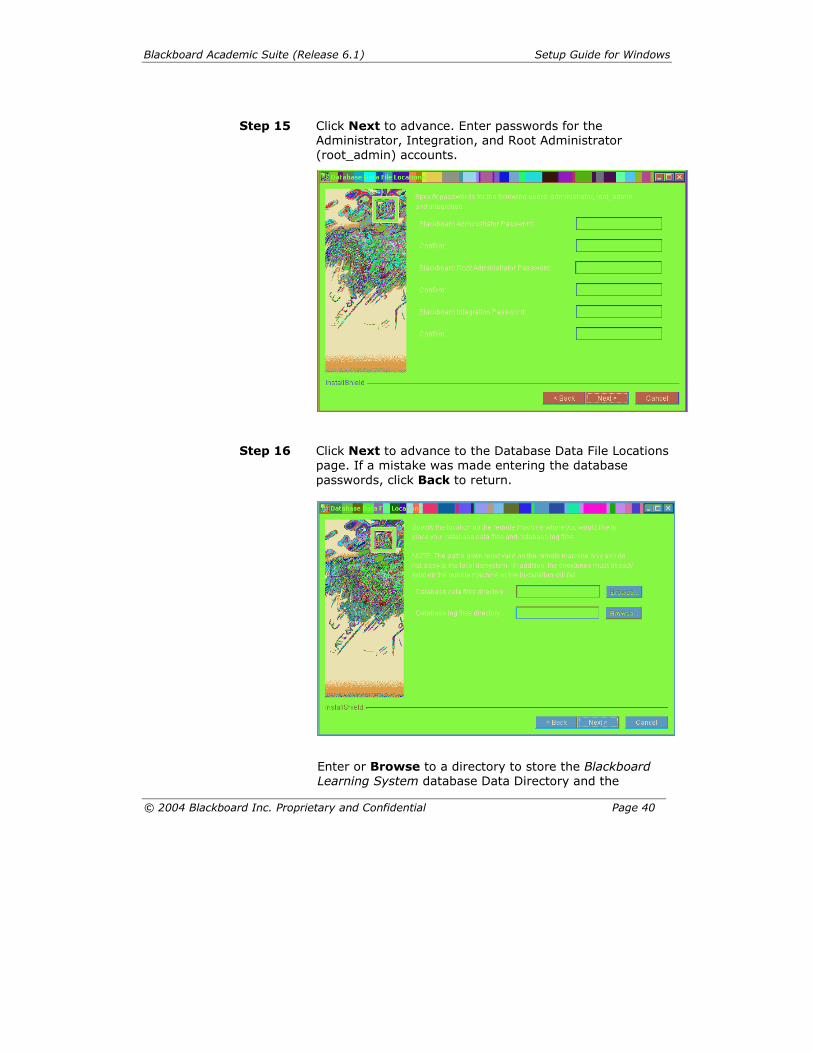
Step 15 Click Next to advance. Enter passwords for the Administrator, Integration, and Root Administrator (root_admin) accounts.
Step 16 Click Next to advance to the Database Data File Locations page. If a mistake was made entering the database passwords, click Back to return.
Enter or Browse to a directory to store the Blackboard Learning System database Data Directory and the
Blackboard Academic Suite (Release 6.1) Setup Guide for Windows
© 2004 Blackboard Inc. Proprietary and Confidential Page 41
Blackboard Learning System database Log Directory. The Data Directory stores the Blackboard Database data files (.mdf). The Blackboard Log Directory stores Database log files (.ldf). Please note that these Directories will not store application data or application logs. These directories must be stored on the database server.
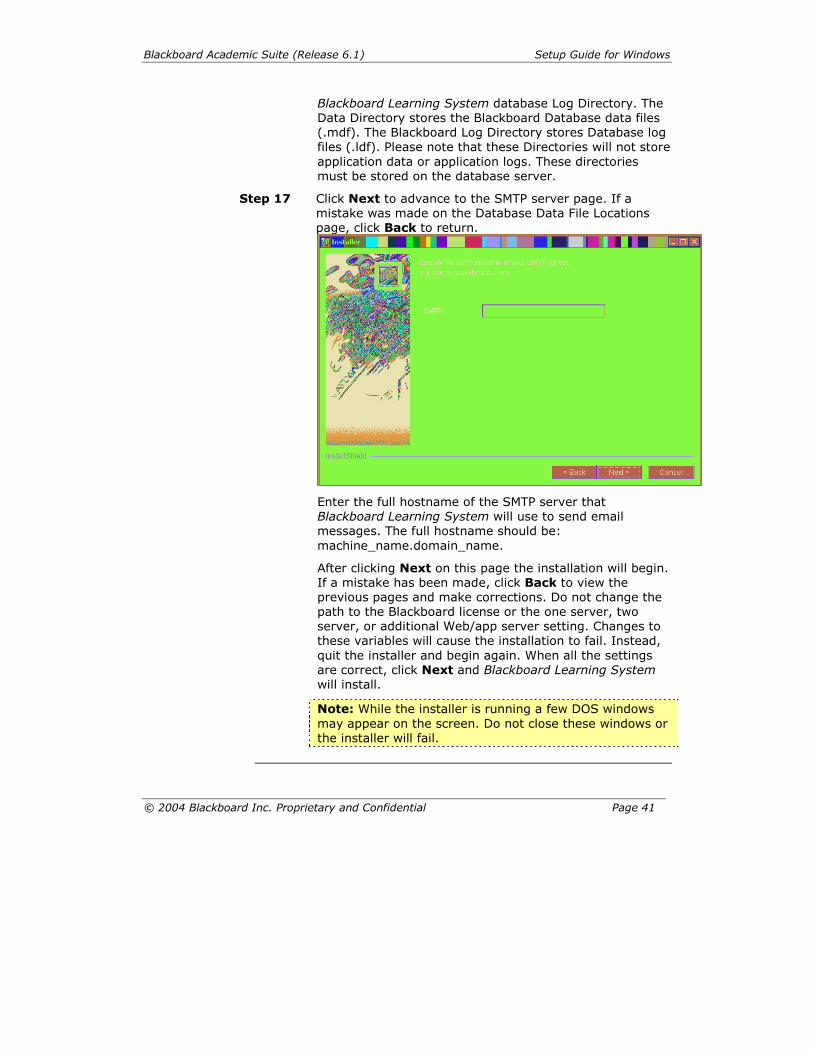
Step 17 Click Next to advance to the SMTP server page. If a mistake was made on the Database Data File Locations page, click Back to return.
Enter the full hostname of the SMTP server that Blackboard Learning System will use to send email messages. The full hostname should be: machine_name.domain_name.
After clicking Next on this page the installation will begin. If a mistake has been made, click Back to view the previous pages and make corrections. Do not change the path to the Blackboard license or the one server, two server, or additional Web/app server setting. Changes to these variables will cause the installation to fail. Instead, quit the installer and begin again. When all the settings are correct, click Next and Blackboard Learning System will install.
Note: While the installer is running a few DOS windows may appear on the screen. Do not close these windows or the installer will fail.
Blackboard Academic Suite (Release 6.1) Setup Guide for Windows
© 2004 Blackboard Inc. Proprietary and Confidential Page 42
Installation Troubleshooting
Overview
This topic offers some suggestions for where to go for help if the installation is not working properly.
Installation Checklist and Worksheet
Look through the Installation Checklist and Worksheet again and make sure that the system is fully prepared for the installation.
Log file
The Blackboard Learning System installer creates the following log file: Bb6_install_log.txt This file is found in the directory from which the installer was launched. If the installer fails, check the log file to help determine the problem. The log file includes a considerable amount of information about the installation process. Also, if the installer is run more than once the log file will contain a record of each attempt�make sure to focus on the latest attempt (each attempt is appended to the log file so the latest attempt is the last in the list). Because of the amount of information in the log file it can be frustrating to locate the problem. Try searching for the following strings: BUILD FAILED or Root Cause. Look closely at the log file both above and below the search string (BUILD FAILED or Root Cause) for the reason the installation failed. If the log file does not help diagnose the problem please keep a copy of the file in case you need to contact Blackboard Technical Support. Blackboard Technical Support may be able to use the log file to diagnose the problem.
Blackboard Support Site and Knowledge Base
The Blackboard Knowledge Base, accessible through the Behind the Blackboard extranet, includes several articles that may address your problem. If a login for Behind the Blackboard is unavailable please contact a Blackboard Account Manager.

Blackboard Academic Suite (Release 6.1) Setup Guide for Windows
© 2004 Blackboard Inc. Proprietary and Confidential Page 43
Contact Blackboard Technical Support
Please see the Behind the Blackboard extranet for information on contacting Blackboard Technical Support. The URL for Behind the Blackboard is:
http://www.blackboard.com/products/services/support.htm
Blackboard Academic Suite (Release 6.1) Setup Guide for Windows
© 2004 Blackboard Inc. Proprietary and Confidential Page 44
Uninstall Blackboard Learning System
Overview
Blackboard Learning System includes an easy-to-use uninstall program. Before uninstalling Blackboard Learning System, be sure to remove any Virtual Installations installed on the system. For information on how to remove Virtual Installations, please see Remove a Virtual Installation. The Blackboard Learning System Uninstaller is installed in a separate directory (_Blackboard6Uninstall) at the same level as the blackboard directory. Inside the directory is uninstaller.exe, an executable that will launch the uninstaller. Note: The uninstall log is written to the \tmp directory.
Uninstall Blackboard Learning System
Follow the steps below to uninstall Blackboard Learning System.
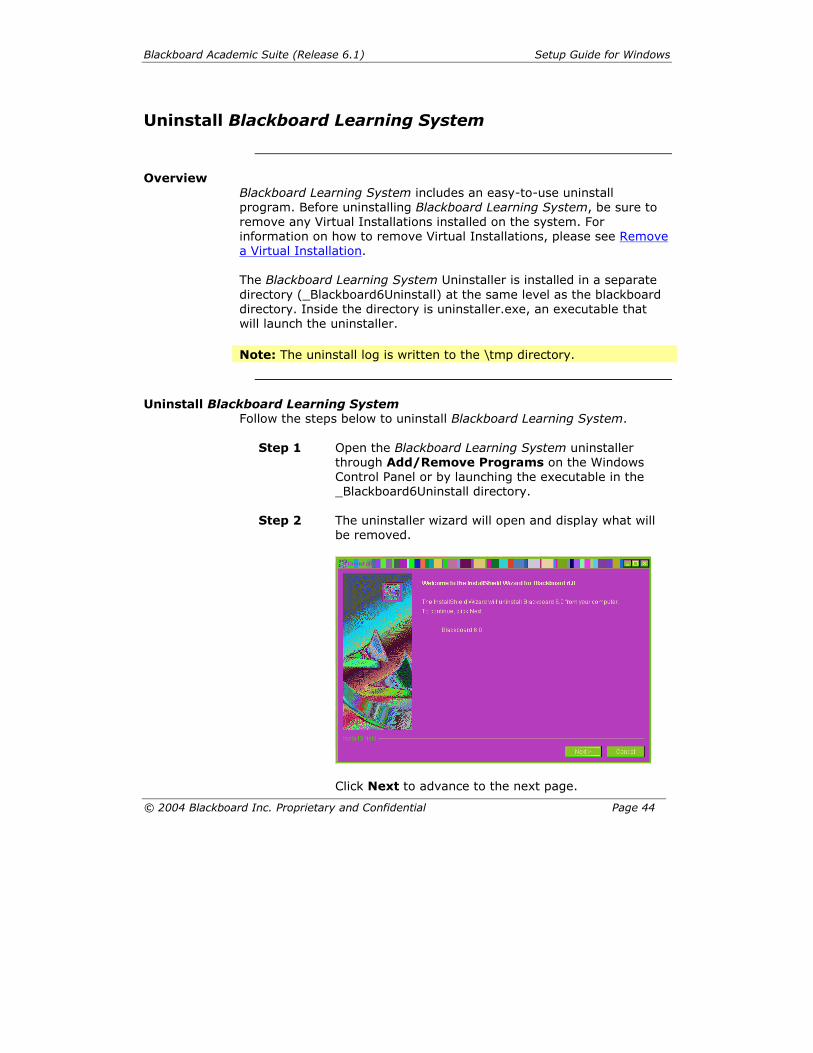
Step 1 Open the Blackboard Learning System uninstaller through Add/Remove Programs on the Windows Control Panel or by launching the executable in the _Blackboard6Uninstall directory.
Step 2 The uninstaller wizard will open and display what will
be removed.
Click Next to advance to the next page.
Blackboard Academic Suite (Release 6.1) Setup Guide for Windows
© 2004 Blackboard Inc. Proprietary and Confidential Page 45
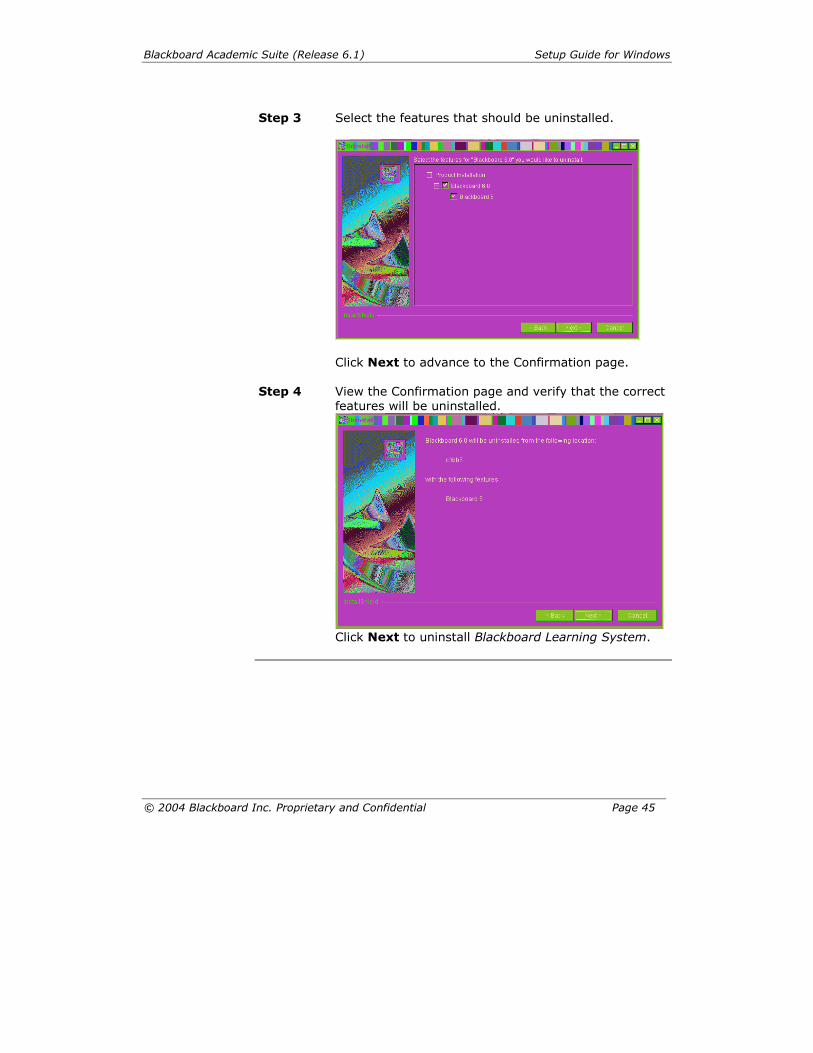
Step 3 Select the features that should be uninstalled.
Click Next to advance to the Confirmation page.
Step 4 View the Confirmation page and verify that the correct
features will be uninstalled.
Click Next to uninstall Blackboard Learning System.
Blackboard Academic Suite (Release 6.1) Setup Guide for Windows
© 2004 Blackboard Inc. Proprietary and Confidential Page 46
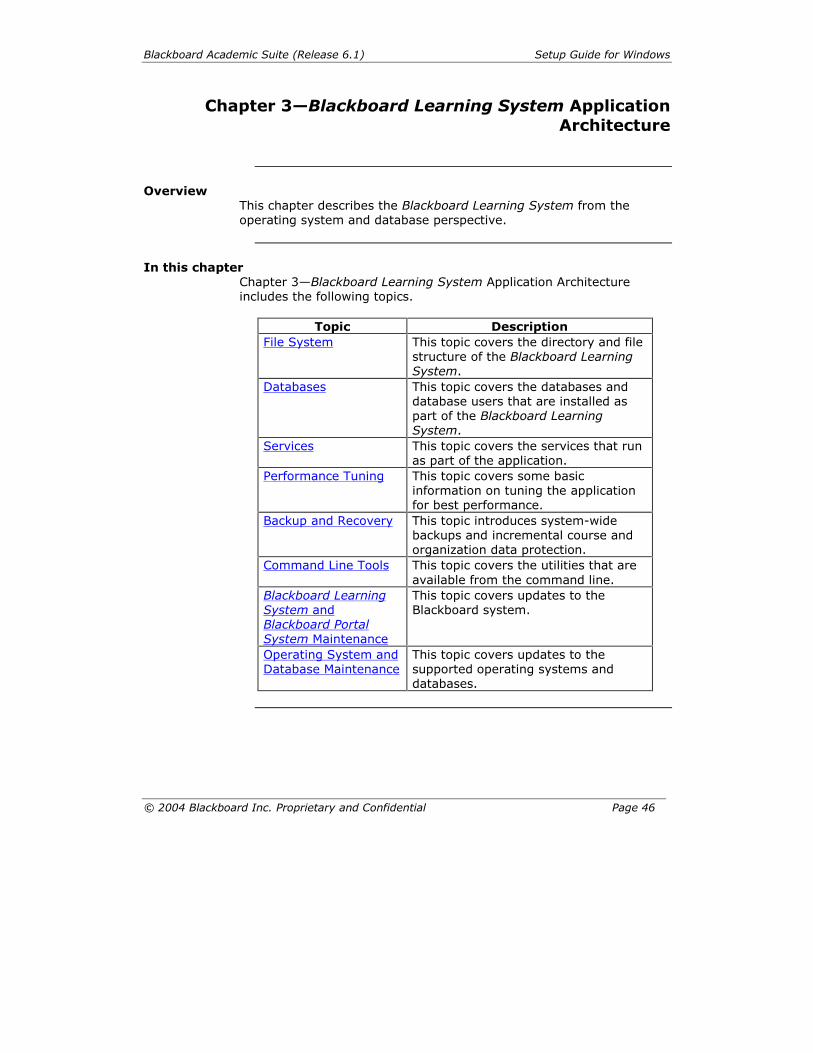
Chapter 3�Blackboard Learning System Application Architecture
Overview
This chapter describes the Blackboard Learning System from the operating system and database perspective.
In this chapter
Chapter 3�Blackboard Learning System Application Architecture includes the following topics.
Topic Description
File System This topic covers the directory and file structure of the Blackboard Learning System.
Databases This topic covers the databases and database users that are installed as part of the Blackboard Learning System.
Services This topic covers the services that run as part of the application.
Performance Tuning This topic covers some basic information on tuning the application for best performance.
Backup and Recovery This topic introduces system-wide backups and incremental course and organization data protection.
Command Line Tools This topic covers the utilities that are available from the command line.
Blackboard Learning System and Blackboard Portal System Maintenance
This topic covers updates to the Blackboard system.
Operating System and Database Maintenance
This topic covers updates to the supported operating systems and databases.
Blackboard Academic Suite (Release 6.1) Setup Guide for Windows
© 2004 Blackboard Inc. Proprietary and Confidential Page 47
File System
Overview
The Blackboard Learning System installs into a home directory that is always named �blackboard�. This directory not only holds all the application files but it is also the location where content items and log files are stored. Administrators should not have a reason to delete or modify any of the application files. Doing so may cause the system to fail. This topic reviews several of the more important areas of the file system.
Command line tools
Most of the command line utilities are stored in C:\blackboard\tools\admin\. The tools for batch archive/restore/export/import and batch copy are found in the C:\blackboard\apps\content-exchange\bin\. For more information on the command line tools please see Command Line Tools later in this chapter. For more information on the batch archive/restore/export/import and batch copy tools see the Blackboard Academic Suite Administrator Manual.
Content storage
Content for each Virtual Installation is stored in the C:\blackboard\content\vi\. Each Virtual Installation has a separate directory. Within each directory there are the following folders:
admin: This directory stores images associated with System Reporting.
branding: This directory stores the HTML that determines how
the Gateway page is displayed. Information for modifying the Gateway page can be found in the Blackboard Academic Suite Administrator Manual.
courses: This directory includes storage areas for each course
and organization. Content items uploaded to the course or organization are stored here.
images: This directory stores images used on the system.
modules: This directory stores .jsp pages for portal modules.
Blackboard Academic Suite (Release 6.1) Setup Guide for Windows
© 2004 Blackboard Inc. Proprietary and Confidential Page 48
plugins: This directory stores System Extensions.
recyclebin: This directory includes deleted course content.
Content must be removed from this directory or it will be stored indefinitely.
sessions: This directory stores session-specific data for users.
sponsors: This directory stores sponsorship information and
images.
Logs
All logs are stored in the C:\blackboard\logs directory. Logs can be managed and viewed from the Logs link on the System Control Panel in the user interface. For more information on managing and viewing logs, please see the Blackboard Academic Suite Administrator Manual. The verbosity of some logs can be adjusted to provide more or less information. Adjusting the verbosity of a log file will require running PushConfigUpdates to take effect. \blackboard\logs\PerlEx\*.log
The verbosity of this log is controlled by the bbconfig.perl.tracelevel property in the bb-config.properties file. The default value, 0, logs only fatal events. The other options are 1, which logs simple warnings, and 3, which logs warnings with stack traces. \blackboard\logs\bb-services-log.txt
The verbosity of this log is controlled by the blackboard.service.log.param.logdef.default.verbosity property in the service-config.properties file. The default value, fatal, logs only fatal events. The valid options from less verbosity to more verbosity are: �fatal�,�error�,�warning�,�information�,�debug�.
Blackboard Academic Suite (Release 6.1) Setup Guide for Windows
© 2004 Blackboard Inc. Proprietary and Confidential Page 49
Additional PerlEx specific logging information can be added to the error logs by changing a setting in the Windows registry. Set the following registry key to a value from 0 to 4 with 4 being the most verbose and 0 being the least verbose. HKEY_LOCAL_MACHINE\Software\Blackboard Inc.\PerlEx\trace
Blackboard Academic Suite (Release 6.1) Setup Guide for Windows
© 2004 Blackboard Inc. Proprietary and Confidential Page 50
Databases
Overview
The Blackboard Learning System initially installs three databases and three database users. This topic reviews the databases and database users of the Blackboard Learning System. Administrators should not add data directly to the database or modify data in the database directly. Doing so may create serious problems in the system.
Note: Even those institutions that are not licensed to use additional Virtual Installations are still, in effect, using one Virtual Installation. When Blackboard Learning System installs it creates the first Virtual Installation and then stores data in a Virtual Installation Database, known as bb_bb60. For more information on Virtual Installations please see Chapter 4�Virtual Installations. It is possible to move the databases for a Virtual Installation (including bb_bb60) to another server. For more information on moving the databases for a Virtual Installation please see Moving Virtual Installation Databases.
bb_admin
This database manages information about the databases that support each Virtual Installation.
bb_bb60
This is the main database for the first Virtual Installation. It manages all the data needed by the Virtual Installation. Each Virtual Installation will have its own main database. When creating a Virtual Installation it is important to give this database a name prefixed by �bb_�. Do not use any special characters (%&#<>=+) or a dash(-) in the name.

Blackboard Academic Suite (Release 6.1) Setup Guide for Windows
© 2004 Blackboard Inc. Proprietary and Confidential Page 51
bb_bb60_stats This is the statistics database for the first Virtual Installation. It is useful for Administrators who wish to generate reports on usage, performance, and so forth. Tracking data is sent to this database daily. For more information on generating reports and managing the information in this database please see the Advanced System Reporting topic in the Blackboard Academic Suite Administrator Manual.
Database users
The following database users are created when the Blackboard Learning System is installed.
bbadmin bb_bb60 bb_bb60_report bb_bb60_stats
Each additional Virtual Installation will have a database user and a stats and reports user. The bb_bb60_report user has limited access to view the bb_bb60 database and can only see a subset of tables and columns. Change the value in the bb-config.properties file and then run the PushConfigUpdates command to change the password of a database user. Remember that the password must also be changed within the database to match the new password or the Blackboard Learning System will not work properly.
Blackboard Academic Suite (Release 6.1) Setup Guide for Windows
© 2004 Blackboard Inc. Proprietary and Confidential Page 52
Services
Overview
Once Blackboard Learning System is installed, it adds the bb-collab and bb-tomcat services to the Windows 2000 operating system. In addition, for Blackboard Learning System to run properly the IIS service must be running and the SQL Server database must be started. When performing maintenance or upgrade tasks it may be necessary to stop some of these services. For most upgrade tasks, including adding a Virtual Installation or installing Blackboard Learning System software updates, the bb-collab, bb-tomcat, and IIS services should be stopped but the database should be running. While this is a good general rule, please refer to the specific instructions for each task to confirm.
Definition of Blackboard Services
bb-collab: The bb-collab service runs the Collaboration Tool within Blackboard Learning System. Stopping this service will make the Collaboration Tool unavailable to users. bb-tomcat: The bb-tomcat service runs the Java® servlet engine. Stopping this service makes any Java servlet pages unavailable to users, including the Login page. Blackboard Learning System uses IIS 5.0 to manage Web services with Windows 2000 and IIS 6.0 with Windows 2003.
Starting and stopping services
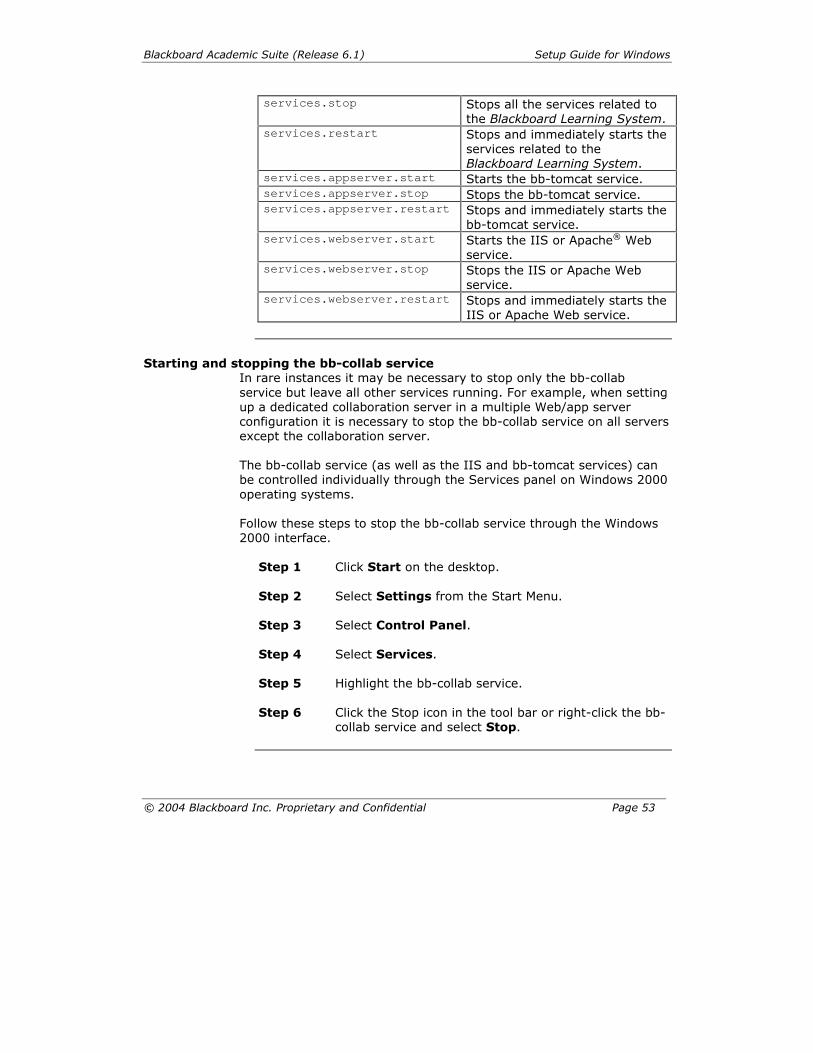
The ServicesController utility is used to start and stop services. This utility must be run from the command line. Command syntax: C:\Blackboard\tools\admin\ServiceController <argument> Where the arguments are defined in the table below.
Argument Description services.start Starts all the services related to
the Blackboard Learning System.
Blackboard Academic Suite (Release 6.1) Setup Guide for Windows
© 2004 Blackboard Inc. Proprietary and Confidential Page 53
services.stop Stops all the services related to the Blackboard Learning System.
services.restart Stops and immediately starts the services related to the Blackboard Learning System.
services.appserver.start Starts the bb-tomcat service. services.appserver.stop Stops the bb-tomcat service. services.appserver.restart Stops and immediately starts the
bb-tomcat service. services.webserver.start Starts the IIS or Apache® Web
service. services.webserver.stop Stops the IIS or Apache Web
service. services.webserver.restart Stops and immediately starts the
IIS or Apache Web service.
Starting and stopping the bb-collab service
In rare instances it may be necessary to stop only the bb-collab service but leave all other services running. For example, when setting up a dedicated collaboration server in a multiple Web/app server configuration it is necessary to stop the bb-collab service on all servers except the collaboration server. The bb-collab service (as well as the IIS and bb-tomcat services) can be controlled individually through the Services panel on Windows 2000 operating systems. Follow these steps to stop the bb-collab service through the Windows 2000 interface.
Step 1 Click Start on the desktop. Step 2 Select Settings from the Start Menu.
Step 3 Select Control Panel.
Step 4 Select Services.
Step 5 Highlight the bb-collab service.
Step 6 Click the Stop icon in the tool bar or right-click the bb-
collab service and select Stop.
Blackboard Academic Suite (Release 6.1) Setup Guide for Windows
© 2004 Blackboard Inc. Proprietary and Confidential Page 54
Performance Tuning and Maintenance
Overview
This topic reviews some of the issues that administrators should consider to help run the Blackboard Learning System at peak performance. Performance tuning is best done through trial and error in a test environment by administrators that are familiar with the institution and its hardware.
Delete content from the recyclebin
Course content that is removed from a course is stored in the recyclebin. While it is a good safety measure in case materials are accidentally removed from a course the recyclebin will take up more and more disk space unless files are removed. Removing files from the recyclebin is done at the operating system level, simply move the files offline or delete them through the operating system. Each Virtual Installation has its own recycle bin. The recycle bin is located at C:\blackboard\content\vi\bbuid\recyclebin, where bbuid is the name of the Virtual Installation.
Managing Logs
Log files can grow to be quite large and should be managed so that excessive disk space and resources are not wasted. For more information on managing logs please see the Blackboard Academic Suite Administrator Manual.
Windows Temp directory
Be sure to track the buildup of files in the Windows Temp directory. A bloated temp directory can impact performance.
Blackboard Academic Suite (Release 6.1) Setup Guide for Windows
© 2004 Blackboard Inc. Proprietary and Confidential Page 55
Setting the number of interpreters and reloads The number of interpreters and reloads can be adjusted to maximize performance. Note: Setting the number of interpreters and reloads should only be done by experienced system administrators that are carefully monitoring the impact of each change. These settings should be adjusted in a test environment before applying them to a production server. Interpreters and reloads are set in the Windows 2000 registry. The Blackboard Learning System (Release 6) branch is located at: HKEY_LOCAL_MACHINE\SOFTWARE\Blackboard, Inc\Blackboard 6 The Interpreters and Reload keys are set in the PerlEx directory. The IIS, bb-tomcat, and bb-collab services should be stopped before changing these values. Restart services after editing the number of interpreters and reloads. The number of interpreters determines the capability to serve simultaneous user requests. The default number of interpreters is six. The more interpreters available, the more simultaneous processing the application can handle. This does not mean that if the value is set too low users will not be able to use the application. If there are four simultaneous requests, the fourth user will wait for one of the three interpreters to finish processing and then the request will be filled. There are several things to consider when tuning the number of interpreters. First, each interpreter takes up approximately 20 MB of RAM � this is because the entire application is loaded into memory for fast performance. Second, since the Web is a connectionless protocol the need for simultaneous users is greatly reduced. If the average page takes 1 second to process, then 5 users can use the same interpreter simultaneously and response time will be within 5 seconds for each user. In a lab environment the optimal number of interpreters is two times the number of processors on the Web/app server. In practice, having a few extra interpreters will help performance, especially when a user with a slow connection or large file transfer is occupying a thread. Each interpreter will execute a defined number of times before reloading. Each time an interpreter reloads it disconnects from the database, cleans up memory leaks and unitialized variables, then restarts. There is a small performance loss every time an interpreter has to reload. The degree of memory leak differs for each installation.
Blackboard Academic Suite (Release 6.1) Setup Guide for Windows
© 2004 Blackboard Inc. Proprietary and Confidential Page 56
If monitoring is showing that the size of the IIS process is growing too large over time, lower the reload count. If the size of the process is consistent then increase the reload count.
Efficient use of Perl Interpreters with ActiveState PerlEx
The Blackboard Learning System uses the ActiveState PerlEx engine to execute Perl code. In some cases, a file upload to Blackboard Learning System can occupy a Perl interpreter for several minutes while the file is chunked into memory. Working together, Blackboard, Microsoft and ActiveState have designed a means by which with the latest ActiveState PerlEx engine, files are uploaded and cached before invoking the target script, releasing the Perl interpreters from devoting themselves entirely for the time it takes to upload the file.
The latest version of the ActiveState PerlEx engine is included with Blackboard Learning System (Release 6).
Blackboard Academic Suite (Release 6.1) Setup Guide for Windows
© 2004 Blackboard Inc. Proprietary and Confidential Page 57
Blackboard Academic Suite Maintenance
Overview
Blackboard is dedicated to proper maintenance of the Blackboard Learning System, Blackboard Learning System�Basic and the Blackboard Portal System. Blackboard will make available maintenance releases as needed.
Release 6 updaters
The Release 6 Updaters are used to move from one specific release to another, for example, from Release 6.0.11 to Release 6.1. Updaters must be run in sequence and may not be skipped. For example, to update from 6.0.3 to 6.0.5, two updaters must be run. The first will update from 6.0.3 to 6.0.4. The second will update from 6.0.4 to 6.0.5. The Release 6 Updaters and step by step instructions can be found at http://www.blackboard.com/products/services/support.htm. An administrator login and client ID is required. Information about the issues that are resolved in each update are found in the Release Notes. The Release Notes are located in the Reference Center at http://www.blackboard.com/products/services/support.htm. An administrator login and client ID is required to view the Release Notes. Note: To determine which release a Blackboard System is running, check the information at the bottom of the Login page or at the bottom of the System Control Panel.
Documentation updates
Blackboard maintains the product documentation after release with updates and additions. The cover of each document shows the published date and the last date the document was revised. Changes to the documentation are published in the appendix of each manual. Previously, all changes were logged in a separate document.
Blackboard Academic Suite (Release 6.1) Setup Guide for Windows
© 2004 Blackboard Inc. Proprietary and Confidential Page 58
Operating System and Database Maintenance
Overview
Blackboard supports operating system and database service packs and security patches for the operating systems and databases supported for use with the Blackboard Learning System, Blackboard Learning System�basic. Blackboard will test, certify, and, if necessary, provide fixes to ensure that Blackboard systems work with service packs and security patches. There is, necessarily, a short lag time between a service pack release and the completion of testing. Even during this interim testing period, however, Blackboard will provide support for just released operating system and database service packs and security patches. Note: This policy does not include support for subsequent releases. For example, if Blackboard supports version 1 of a database system any security patches or service packs for version 1 will be supported. Blackboard will not support a version 2 release of the same database system until that version has been properly tested and published as part of the Minimum Software Requirements (available in the Reference Center on http://www.blackboard.com/products/services/support.htm) for that release of the Blackboard system.
Applying a service pack or security patch after installing the Blackboard system
Follow these steps to install a service pack or a security patch to the operating system or database. Step 1 Back up the system. Step 2 Shut down the Blackboard system. Step 3 Check with Blackboard Product Support for any
prerequisite maintenance that may be required to ensure compatibility with an OS or DBMS service pack or security patch.
Step 4 Apply the operating system or database service pack or
Security patch to the test/development environment. Step 5 Restart the test/development server.
Blackboard Academic Suite (Release 6.1) Setup Guide for Windows
© 2004 Blackboard Inc. Proprietary and Confidential Page 59
Step 6 Ensure that system is still shutdown. If auto start mechanisms are configured to restart Blackboard after a server restart, remember to shut down the Blackboard system before continuing.
Step 7 Apply any necessary Blackboard prerequisite maintenance
to the test/development Blackboard systems. Step 8 Restart the Blackboard systems. Step 9 Check the results either by testing your critical path
features or by running your verification procedures.
Step 10 If results are satisfactory, back up the system again. (If not, please log a service request with Blackboard Product Support through http://www.blackboard.com/products/services/support.htm describing the failure.)
Blackboard Academic Suite (Release 6.1) Setup Guide for Windows
© 2004 Blackboard Inc. Proprietary and Confidential Page 60
Backup and Recovery
Overview
This topic offers some tips on system-wide backups and describes the tools in the Blackboard Learning System for incrementally backing up courses and organizations.
System backup and recovery
System administrators should backup the database and file system according to the needs of the institution. Blackboard Learning System supports full backup and restores at the operating system and database levels. As a general rule, daily backups should be kept for two weeks, as errors may not appear for several days. Recovery plans should include how to restore the entire system. For assistance restoring the system, please contact Blackboard Technical Support.
Incremental data protection
The Blackboard Learning System includes the following utilities for incrementally backing up individual courses and organizations. Export/Import: Export takes course content and puts it in a package that can be used in another course at a later date. One or more course areas can be included in the package. Archive/Restore: The Archive Course function creates a record of the Course including user interactions. It is most useful for recalling Student performance or interactions at a later time. The archive package is saved as a .ZIP file that can be restored to the system at another time. The command line tool that processes batch operations for Export/Import and Archive/Restore is a powerful tool for backing up course and organization data. For detailed information on using these utilities please see the Blackboard Academic Suite Administrator Manual.
Blackboard Academic Suite (Release 6.1) Setup Guide for Windows
© 2004 Blackboard Inc. Proprietary and Confidential Page 61
Command Line Tools
Overview
Blackboard Learning System includes a set of system administration tools that must be run from the command line. Trying to execute a utility by clicking the .bat file in the Windows GUI will return errors and possibly cause the system to stop functioning. This topic covers each tool and the syntax to invoke the tool. All of the commands described in this topic are found in the C:\blackboard\tools\admin\ directory.
ChangeDefaultVirtualInstallation
This tool establishes the Virtual Installation that users are taken to if a user enters an invalid hostname. Syntax: ChangeDefaultVirtualInstallation.bat <virtual_hostname>
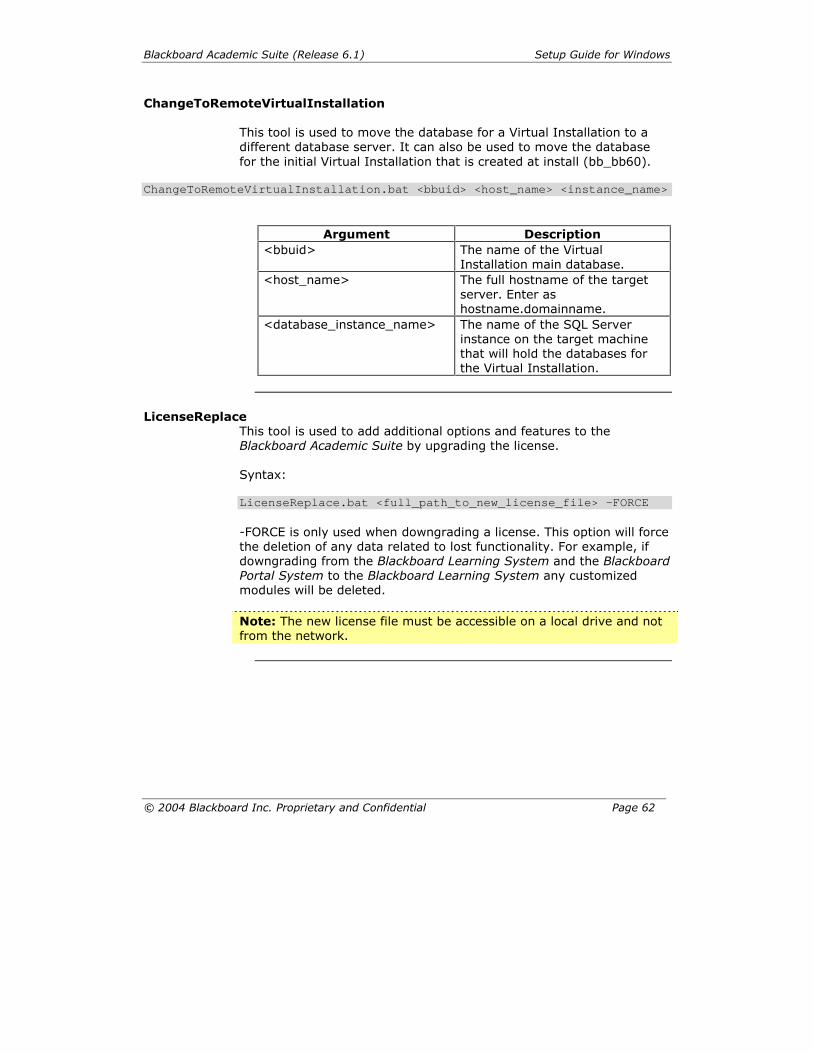
Blackboard Academic Suite (Release 6.1) Setup Guide for Windows
© 2004 Blackboard Inc. Proprietary and Confidential Page 62
ChangeToRemoteVirtualInstallation This tool is used to move the database for a Virtual Installation to a different database server. It can also be used to move the database for the initial Virtual Installation that is created at install (bb_bb60).
ChangeToRemoteVirtualInstallation.bat <bbuid> <host_name> <instance_name>
Argument Description
<bbuid> The name of the Virtual Installation main database.
<host_name> The full hostname of the target server. Enter as hostname.domainname.
<database_instance_name> The name of the SQL Server instance on the target machine that will hold the databases for the Virtual Installation.
LicenseReplace
This tool is used to add additional options and features to the Blackboard Academic Suite by upgrading the license. Syntax: LicenseReplace.bat <full_path_to_new_license_file> -FORCE -FORCE is only used when downgrading a license. This option will force the deletion of any data related to lost functionality. For example, if downgrading from the Blackboard Learning System and the Blackboard Portal System to the Blackboard Learning System any customized modules will be deleted. Note: The new license file must be accessible on a local drive and not from the network.
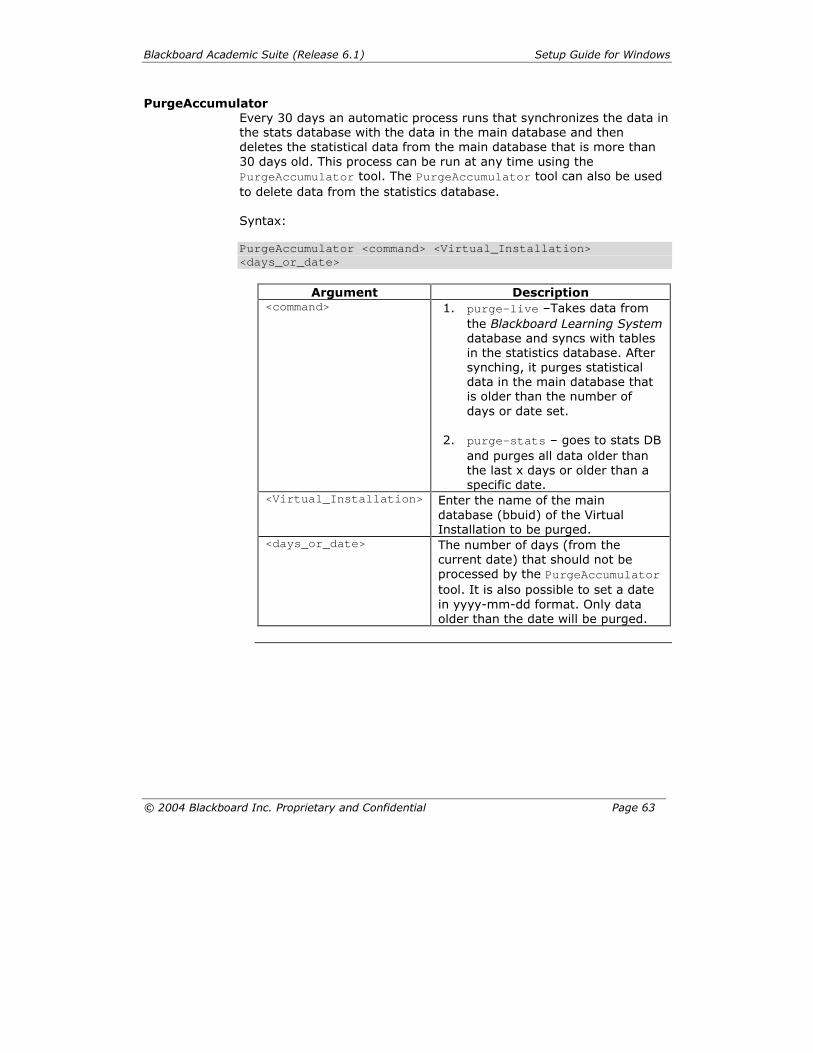
Blackboard Academic Suite (Release 6.1) Setup Guide for Windows
© 2004 Blackboard Inc. Proprietary and Confidential Page 63
PurgeAccumulator Every 30 days an automatic process runs that synchronizes the data in the stats database with the data in the main database and then deletes the statistical data from the main database that is more than 30 days old. This process can be run at any time using the PurgeAccumulator tool. The PurgeAccumulator tool can also be used to delete data from the statistics database. Syntax: PurgeAccumulator <command> <Virtual_Installation> <days_or_date>
Argument Description
<command> 1. purge-live �Takes data from the Blackboard Learning System database and syncs with tables in the statistics database. After synching, it purges statistical data in the main database that is older than the number of days or date set.
2. purge-stats � goes to stats DB
and purges all data older than the last x days or older than a specific date.
<Virtual_Installation> Enter the name of the main database (bbuid) of the Virtual Installation to be purged.
<days_or_date> The number of days (from the current date) that should not be processed by the PurgeAccumulator tool. It is also possible to set a date in yyyy-mm-dd format. Only data older than the date will be purged.
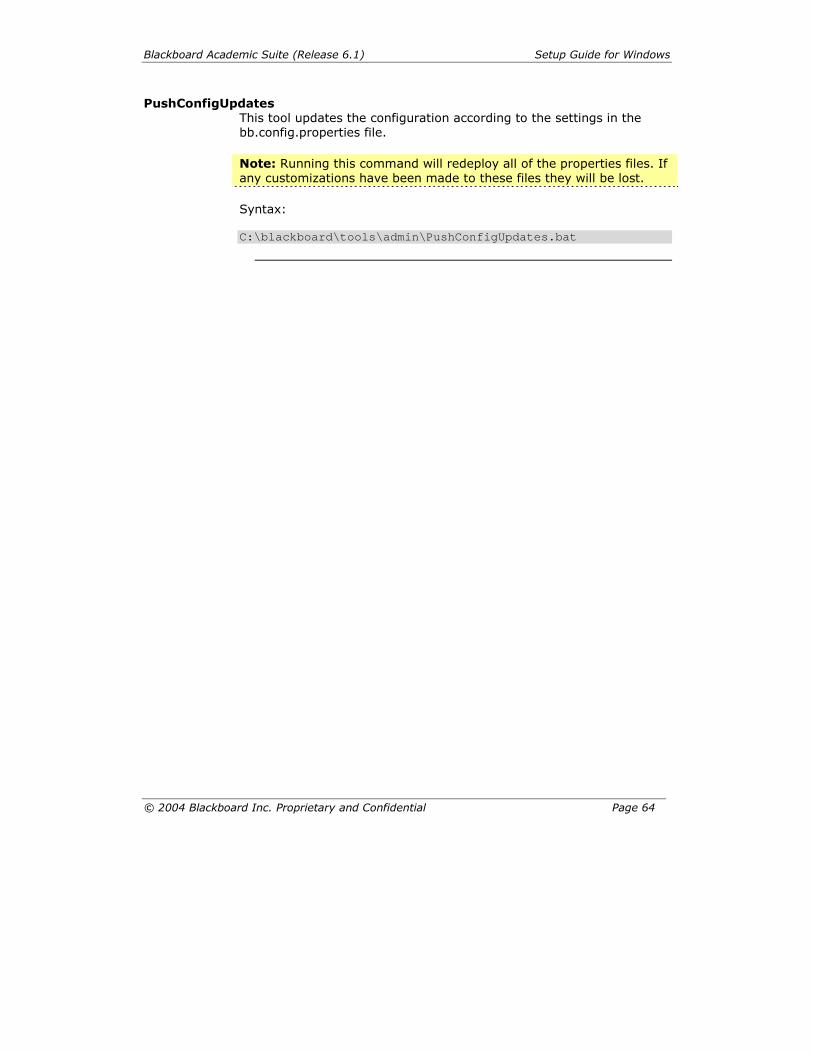
Blackboard Academic Suite (Release 6.1) Setup Guide for Windows
© 2004 Blackboard Inc. Proprietary and Confidential Page 64
PushConfigUpdates This tool updates the configuration according to the settings in the bb.config.properties file. Note: Running this command will redeploy all of the properties files. If any customizations have been made to these files they will be lost. Syntax: C:\blackboard\tools\admin\PushConfigUpdates.bat
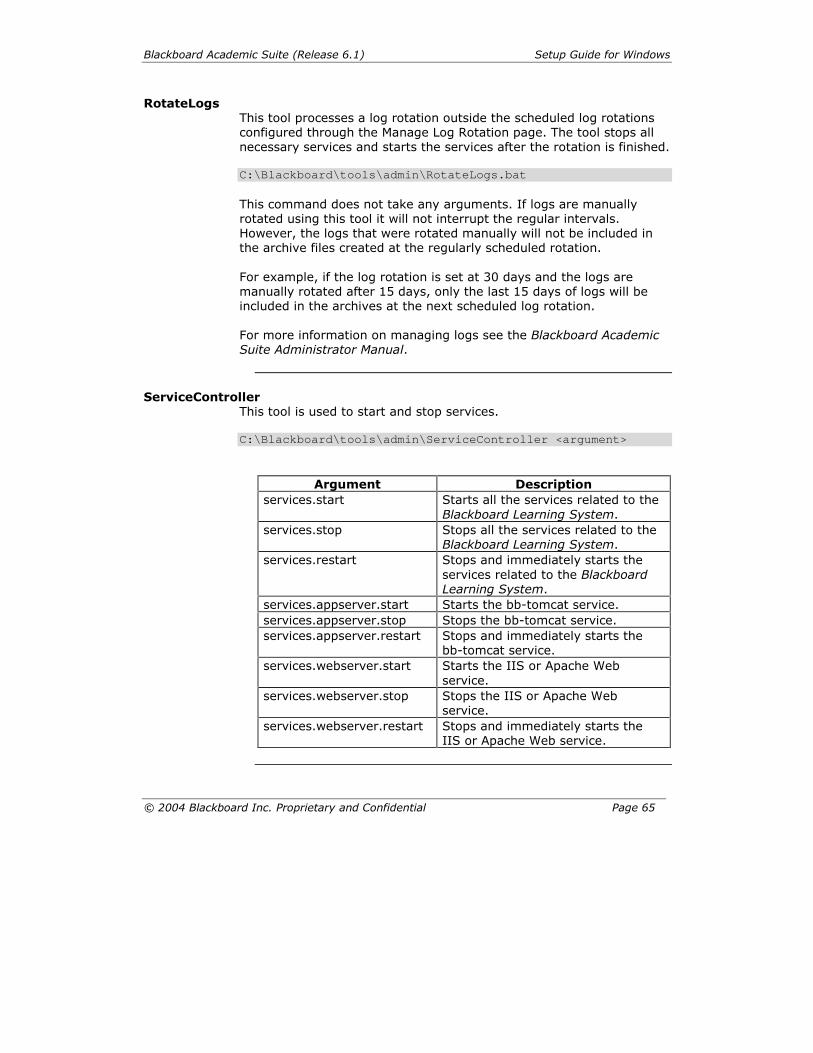
Blackboard Academic Suite (Release 6.1) Setup Guide for Windows
© 2004 Blackboard Inc. Proprietary and Confidential Page 65
RotateLogs This tool processes a log rotation outside the scheduled log rotations configured through the Manage Log Rotation page. The tool stops all necessary services and starts the services after the rotation is finished. C:\Blackboard\tools\admin\RotateLogs.bat This command does not take any arguments. If logs are manually rotated using this tool it will not interrupt the regular intervals. However, the logs that were rotated manually will not be included in the archive files created at the regularly scheduled rotation. For example, if the log rotation is set at 30 days and the logs are manually rotated after 15 days, only the last 15 days of logs will be included in the archives at the next scheduled log rotation. For more information on managing logs see the Blackboard Academic Suite Administrator Manual.
ServiceController
This tool is used to start and stop services. C:\Blackboard\tools\admin\ServiceController <argument>
Argument Description
services.start Starts all the services related to the Blackboard Learning System.
services.stop Stops all the services related to the Blackboard Learning System.
services.restart Stops and immediately starts the services related to the Blackboard Learning System.
services.appserver.start Starts the bb-tomcat service. services.appserver.stop Stops the bb-tomcat service. services.appserver.restart Stops and immediately starts the
bb-tomcat service. services.webserver.start Starts the IIS or Apache Web
service. services.webserver.stop Stops the IIS or Apache Web
service. services.webserver.restart Stops and immediately starts the
IIS or Apache Web service.
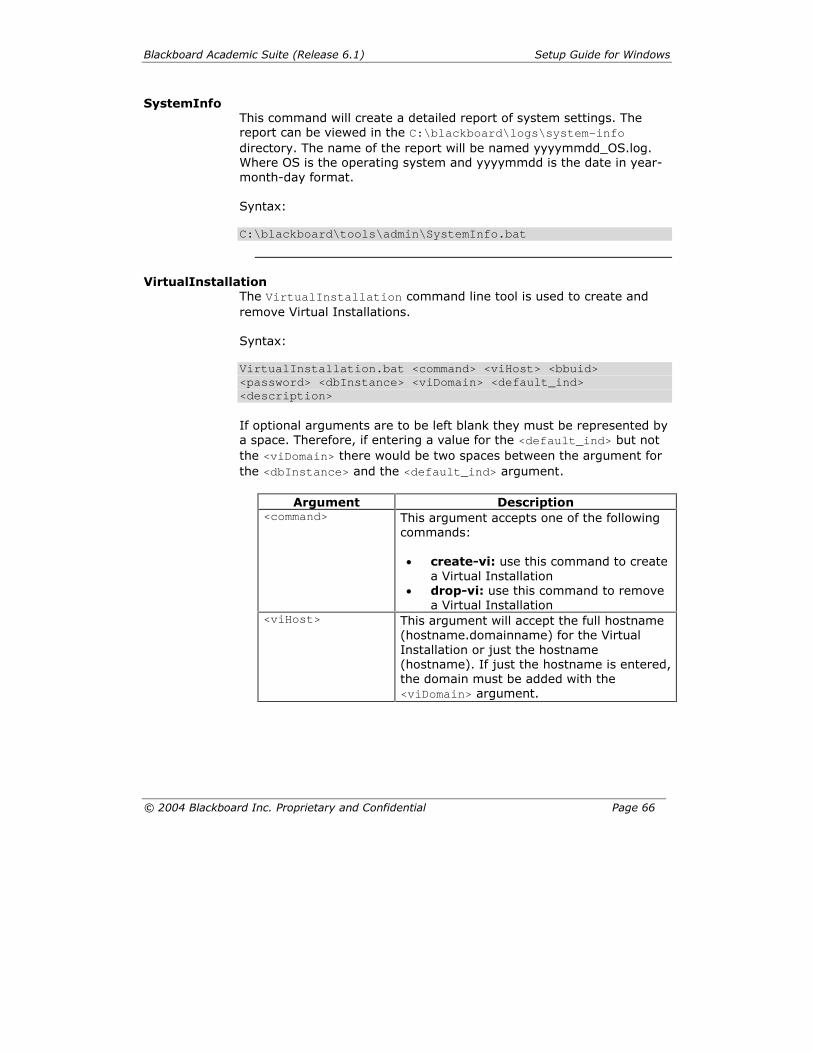
Blackboard Academic Suite (Release 6.1) Setup Guide for Windows
© 2004 Blackboard Inc. Proprietary and Confidential Page 66
SystemInfo This command will create a detailed report of system settings. The report can be viewed in the C:\blackboard\logs\system-info directory. The name of the report will be named yyyymmdd_OS.log. Where OS is the operating system and yyyymmdd is the date in year-month-day format. Syntax: C:\blackboard\tools\admin\SystemInfo.bat
VirtualInstallation
The VirtualInstallation command line tool is used to create and remove Virtual Installations. Syntax: VirtualInstallation.bat <command> <viHost> <bbuid> <password> <dbInstance> <viDomain> <default_ind> <description> If optional arguments are to be left blank they must be represented by a space. Therefore, if entering a value for the <default_ind> but not the <viDomain> there would be two spaces between the argument for the <dbInstance> and the <default_ind> argument.
Argument Description <command> This argument accepts one of the following
commands: create-vi: use this command to create
a Virtual Installation drop-vi: use this command to remove
a Virtual Installation <viHost> This argument will accept the full hostname
(hostname.domainname) for the Virtual Installation or just the hostname (hostname). If just the hostname is entered, the domain must be added with the <viDomain> argument.
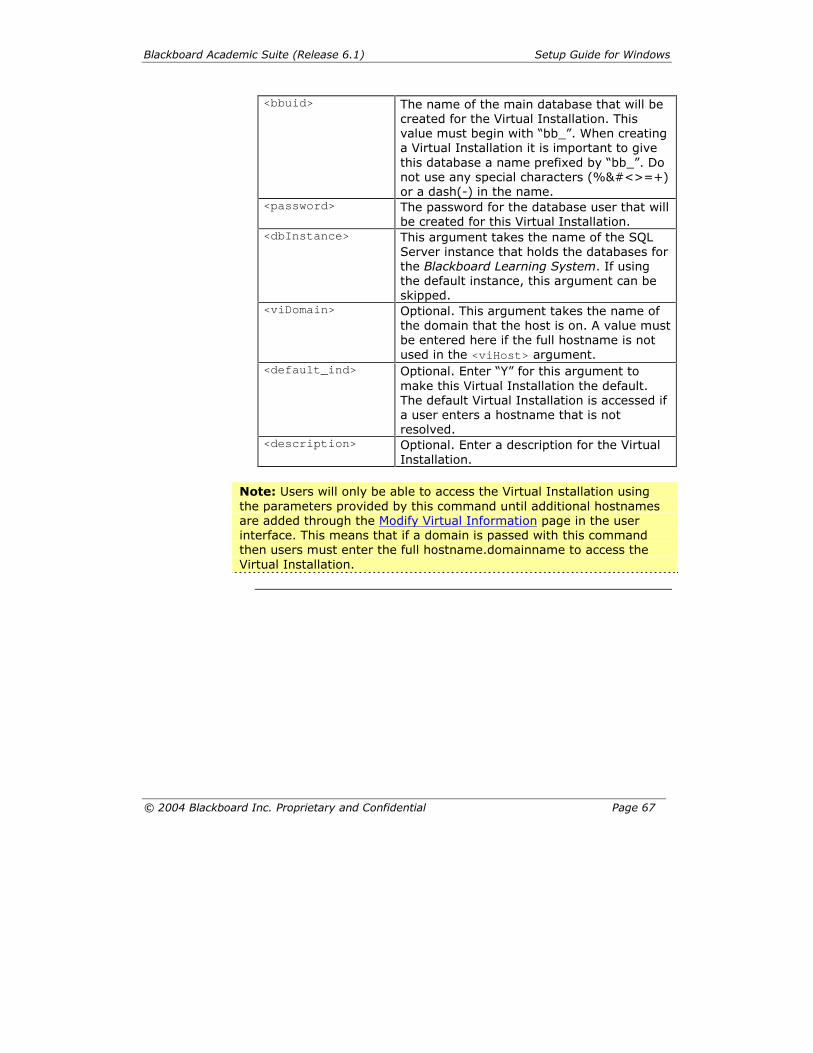
Blackboard Academic Suite (Release 6.1) Setup Guide for Windows
© 2004 Blackboard Inc. Proprietary and Confidential Page 67
<bbuid> The name of the main database that will be created for the Virtual Installation. This value must begin with �bb_�. When creating a Virtual Installation it is important to give this database a name prefixed by �bb_�. Do not use any special characters (%&#<>=+) or a dash(-) in the name.
<password> The password for the database user that will be created for this Virtual Installation.
<dbInstance> This argument takes the name of the SQL Server instance that holds the databases for the Blackboard Learning System. If using the default instance, this argument can be skipped.
<viDomain> Optional. This argument takes the name of the domain that the host is on. A value must be entered here if the full hostname is not used in the <viHost> argument.
<default_ind> Optional. Enter �Y� for this argument to make this Virtual Installation the default. The default Virtual Installation is accessed if a user enters a hostname that is not resolved.
<description> Optional. Enter a description for the Virtual Installation.
Note: Users will only be able to access the Virtual Installation using the parameters provided by this command until additional hostnames are added through the Modify Virtual Information page in the user interface. This means that if a domain is passed with this command then users must enter the full hostname.domainname to access the Virtual Installation.
Blackboard Academic Suite (Release 6.1) Setup Guide for Windows
© 2004 Blackboard Inc. Proprietary and Confidential Page 68
Chapter 4�Virtual Installations
Overview
This chapter reviews the installation, configuration, and management of Virtual Installations. Virtual Installations are used to define separate Blackboard Academic Suite environments running on the same hardware and software configuration.
In this chapter
Chapter 4�Virtual Installations includes the following topics.
Topic Description About Virtual Installations
This topic defines Virtual Installations and how they function.
Virtual Installation Command Line Tools
This topic covers the utilities for creating and updating Virtual Installations.
Create a Virtual Installation
This topic describes how to create a Virtual Installation.
Remove a Virtual Installation
This topic describes how to remove a Virtual Installation.
Move a Virtual Installation Database
This topic describes how to move a Virtual Installation database to a new server.
Root Installation Management Panel
This topic covers the Root Management Control Panel. This panel is available in the user interface to Administrators logged in as root_admin.
Manage Virtual Installations
This topic covers the Manage Virtual Installations page. This page in the user interface lists all the Virtual Installations on the system and provides links for accessing or modifying each Virtual Installation.
Modify Virtual Installation
This topic covers the Modify Virtual Information page. Administrators can set some configuration options for Virtual Installations from this page in the user interface.
Blackboard Academic Suite (Release 6.1) Setup Guide for Windows
© 2004 Blackboard Inc. Proprietary and Confidential Page 69
Edit Root Administrator Account
This topic covers the Edit Root Administrator Account Profile page. This page appears in the user interface as a means to update the root_admin account.
Blackboard Academic Suite (Release 6.1) Setup Guide for Windows
© 2004 Blackboard Inc. Proprietary and Confidential Page 70
About Virtual Installations
Overview
Virtual installations are distinct Blackboard environments that run on the same hardware. Each Virtual Installation is supported by its own database and its content files are stored separately, although under the same file system. It is important to note that all installations of the Blackboard Learning System use at least one Virtual Installation. The bb_bb60 database (and its stats database) and the bb_bb60 directory in the file system act as a Virtual Installation. If an institution does not license additional Virtual Installations it is important to note that, for the purposes of running commands (particularly with Snapshot integration), bb_bb60 is considered a Virtual Installation. Additional Virtual Installations require separate licensing from Blackboard. Please be sure to obtain a license file that allows for Virtual Installations before attempting to create a Virtual Installation. It is important to include Virtual Installations in hardware planning. While the first Blackboard Learning System Virtual Installation may support a moderate number of users, adding Virtual Installations will require additional hardware to provide optimal performance.
Virtual installation databases
Each Virtual Installation is configured with its own databases�a main database and a stats database. Please remember to include the databases for Virtual Installations in maintenance and backup plans. For more information about databases please see the Databases topic.
Virtual installation application files and file system
Each Virtual Installation runs using the same application files. The file system includes separate storage areas for each Virtual Installation under C:\blackboard\content\vi\bbuid (where bbuid is the name of the Virtual Installation).
Blackboard Academic Suite (Release 6.1) Setup Guide for Windows
© 2004 Blackboard Inc. Proprietary and Confidential Page 71
Managing Virtual Installations Virtual Installations are controlled through command line tools as well as a special area in the user interface accessible only to the root_admin user. This user account is created at install with a password defined by the person running the installer.
Hostnames
Virtual Installations can have multiple hostnames for users to access the system. A hostname is usually the machine_name.domain_name. With Virtual Installations, the hostnames that are used do not correspond to the machine name since more than on Virtual Installation is running on the same hardware. Rather, the hostnames are defined by the person creating the Virtual Installation and resolved against the IP address of the machine on the DNS server. Hostnames can be added, modified, and removed from the Modify Virtual Information page in the user interface. Remember to remove a hostname from the DNS server if it is removed from the system.

Blackboard Academic Suite (Release 6.1) Setup Guide for Windows
© 2004 Blackboard Inc. Proprietary and Confidential Page 72
Virtual Installation Command Line Tools
Overview
This topic details the command line tools that are specific to Virtual Installations.
VirtualInstallation
The VirtualInstallation command line tool is used to create and remove Virtual Installations. Syntax: VirtualInstallation.bat <command> <viHost> <bbuid> <password> <dbInstance> <viDomain> <default_ind> <description> If optional arguments are to be left blank they must be represented by a space. Therefore, if entering a value for the <default_ind> but not the <viDomain> there would be two spaces between the argument for the <dbInstance> and the <default_ind> argument.
Argument Description <command> This argument accepts one of the
following commands: create-vi: use this command to
create a Virtual Installation drop-vi: use this command to
remove a Virtual Installation <viHost> This argument will accept the full
hostname (hostname.domainname) for the Virtual Installation or just the hostname (hostname). If just the hostname is entered, the domain must be added with the <viDomain> argument.
<bbuid> The name of the main database that will be created for the Virtual Installation. This value must begin with �bb_�. When creating a Virtual Installation it is important to give this database a name prefixed by �bb_�. Do not use any special characters (%&#<>=+) or a dash(-) in the name.
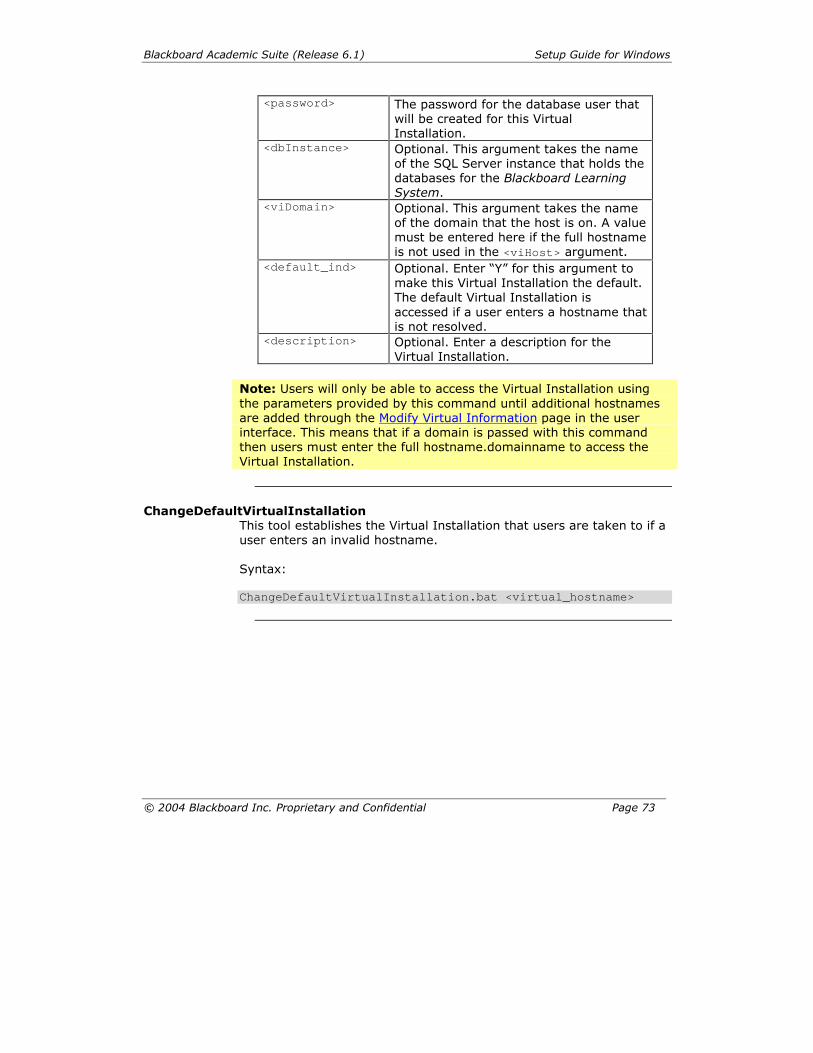
Blackboard Academic Suite (Release 6.1) Setup Guide for Windows
© 2004 Blackboard Inc. Proprietary and Confidential Page 73
<password> The password for the database user that will be created for this Virtual Installation.
<dbInstance> Optional. This argument takes the name of the SQL Server instance that holds the databases for the Blackboard Learning System.
<viDomain> Optional. This argument takes the name of the domain that the host is on. A value must be entered here if the full hostname is not used in the <viHost> argument.
<default_ind> Optional. Enter �Y� for this argument to make this Virtual Installation the default. The default Virtual Installation is accessed if a user enters a hostname that is not resolved.
<description> Optional. Enter a description for the Virtual Installation.
Note: Users will only be able to access the Virtual Installation using the parameters provided by this command until additional hostnames are added through the Modify Virtual Information page in the user interface. This means that if a domain is passed with this command then users must enter the full hostname.domainname to access the Virtual Installation.
ChangeDefaultVirtualInstallation
This tool establishes the Virtual Installation that users are taken to if a user enters an invalid hostname. Syntax: ChangeDefaultVirtualInstallation.bat <virtual_hostname>
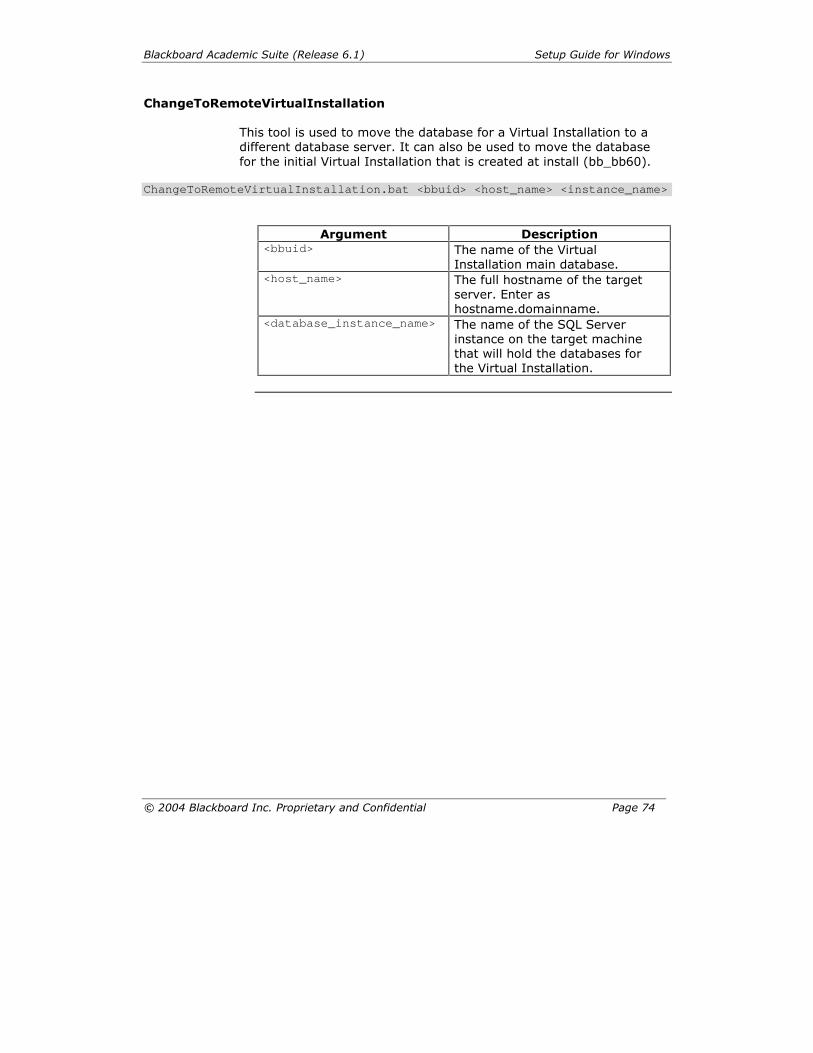
Blackboard Academic Suite (Release 6.1) Setup Guide for Windows
© 2004 Blackboard Inc. Proprietary and Confidential Page 74
ChangeToRemoteVirtualInstallation This tool is used to move the database for a Virtual Installation to a different database server. It can also be used to move the database for the initial Virtual Installation that is created at install (bb_bb60).
ChangeToRemoteVirtualInstallation.bat <bbuid> <host_name> <instance_name>
Argument Description
<bbuid> The name of the Virtual Installation main database.
<host_name> The full hostname of the target server. Enter as hostname.domainname.
<database_instance_name> The name of the SQL Server instance on the target machine that will hold the databases for the Virtual Installation.
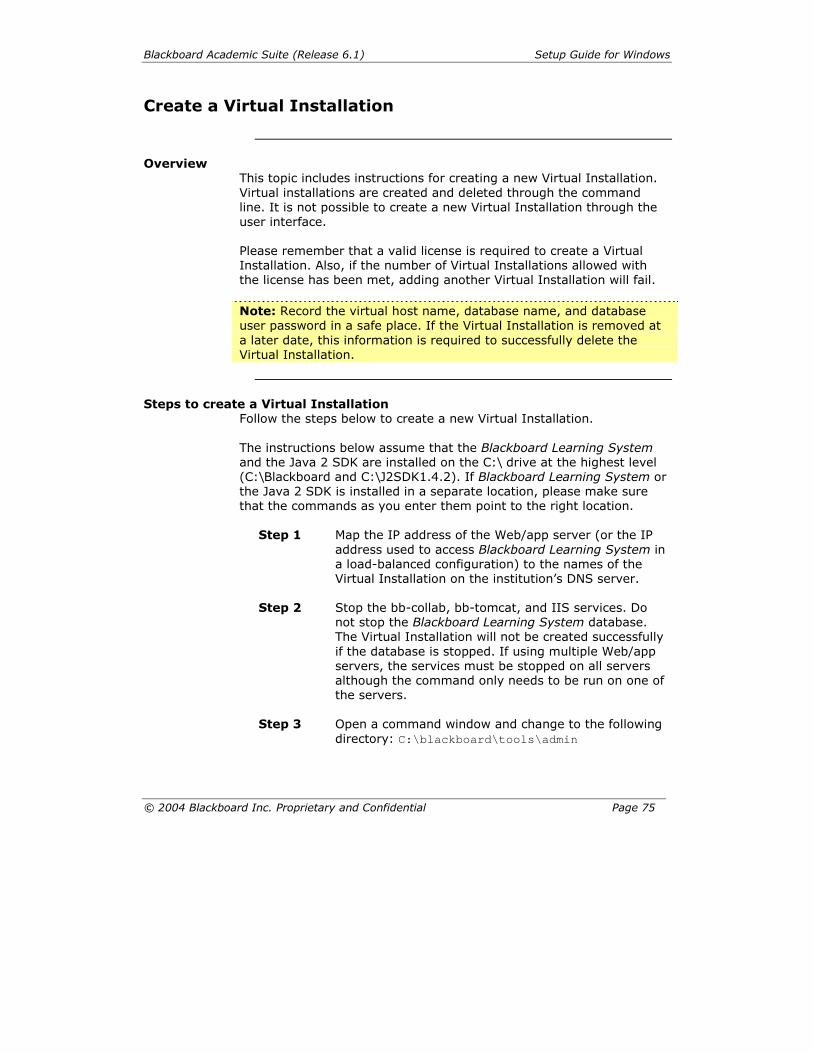
Blackboard Academic Suite (Release 6.1) Setup Guide for Windows
© 2004 Blackboard Inc. Proprietary and Confidential Page 75
Create a Virtual Installation
Overview
This topic includes instructions for creating a new Virtual Installation. Virtual installations are created and deleted through the command line. It is not possible to create a new Virtual Installation through the user interface. Please remember that a valid license is required to create a Virtual Installation. Also, if the number of Virtual Installations allowed with the license has been met, adding another Virtual Installation will fail. Note: Record the virtual host name, database name, and database user password in a safe place. If the Virtual Installation is removed at a later date, this information is required to successfully delete the Virtual Installation.
Steps to create a Virtual Installation
Follow the steps below to create a new Virtual Installation. The instructions below assume that the Blackboard Learning System and the Java 2 SDK are installed on the C:\ drive at the highest level (C:\Blackboard and C:\J2SDK1.4.2). If Blackboard Learning System or the Java 2 SDK is installed in a separate location, please make sure that the commands as you enter them point to the right location.
Step 1 Map the IP address of the Web/app server (or the IP
address used to access Blackboard Learning System in a load-balanced configuration) to the names of the Virtual Installation on the institution�s DNS server.
Step 2 Stop the bb-collab, bb-tomcat, and IIS services. Do
not stop the Blackboard Learning System database. The Virtual Installation will not be created successfully if the database is stopped. If using multiple Web/app servers, the services must be stopped on all servers although the command only needs to be run on one of the servers.
Step 3 Open a command window and change to the following
directory: C:\blackboard\tools\admin
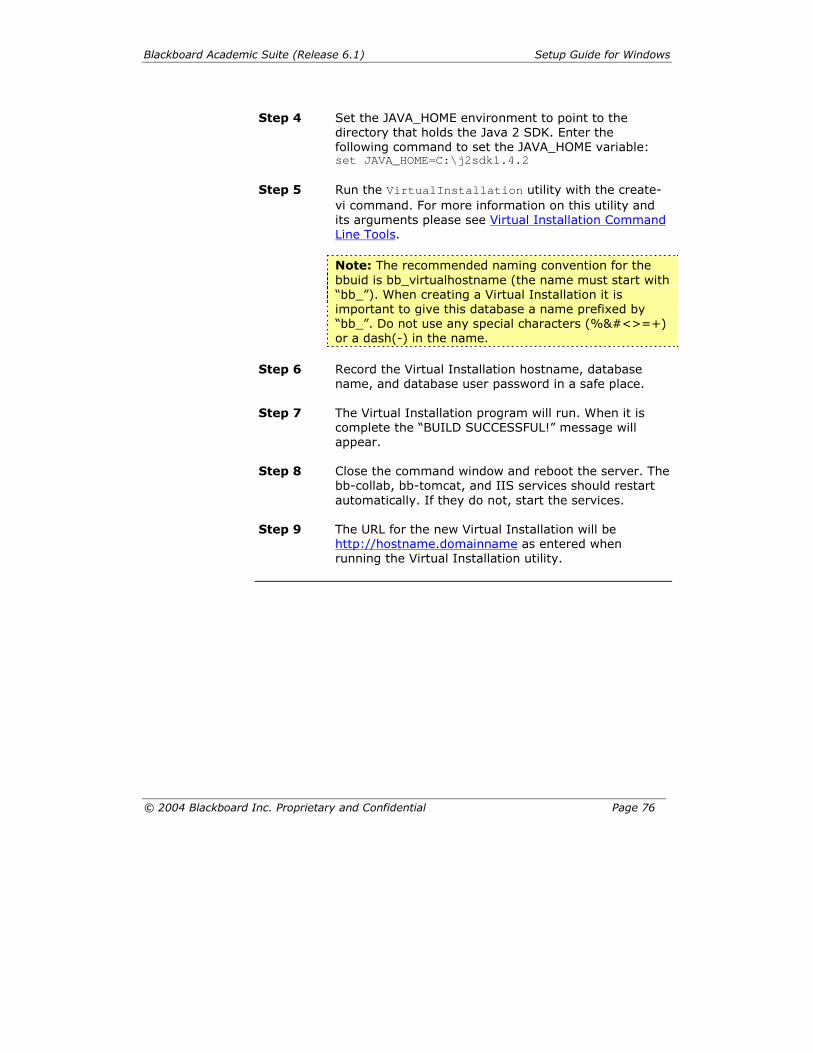
Blackboard Academic Suite (Release 6.1) Setup Guide for Windows
© 2004 Blackboard Inc. Proprietary and Confidential Page 76
Step 4 Set the JAVA_HOME environment to point to the
directory that holds the Java 2 SDK. Enter the following command to set the JAVA_HOME variable: set JAVA_HOME=C:\j2sdk1.4.2
Step 5 Run the VirtualInstallation utility with the create-
vi command. For more information on this utility and its arguments please see Virtual Installation Command Line Tools.
Note: The recommended naming convention for the bbuid is bb_virtualhostname (the name must start with �bb_�). When creating a Virtual Installation it is important to give this database a name prefixed by �bb_�. Do not use any special characters (%&#<>=+) or a dash(-) in the name.
Step 6 Record the Virtual Installation hostname, database name, and database user password in a safe place.
Step 7 The Virtual Installation program will run. When it is
complete the �BUILD SUCCESSFUL!� message will appear.
Step 8 Close the command window and reboot the server. The
bb-collab, bb-tomcat, and IIS services should restart automatically. If they do not, start the services.
Step 9 The URL for the new Virtual Installation will be
http://hostname.domainname as entered when running the Virtual Installation utility.
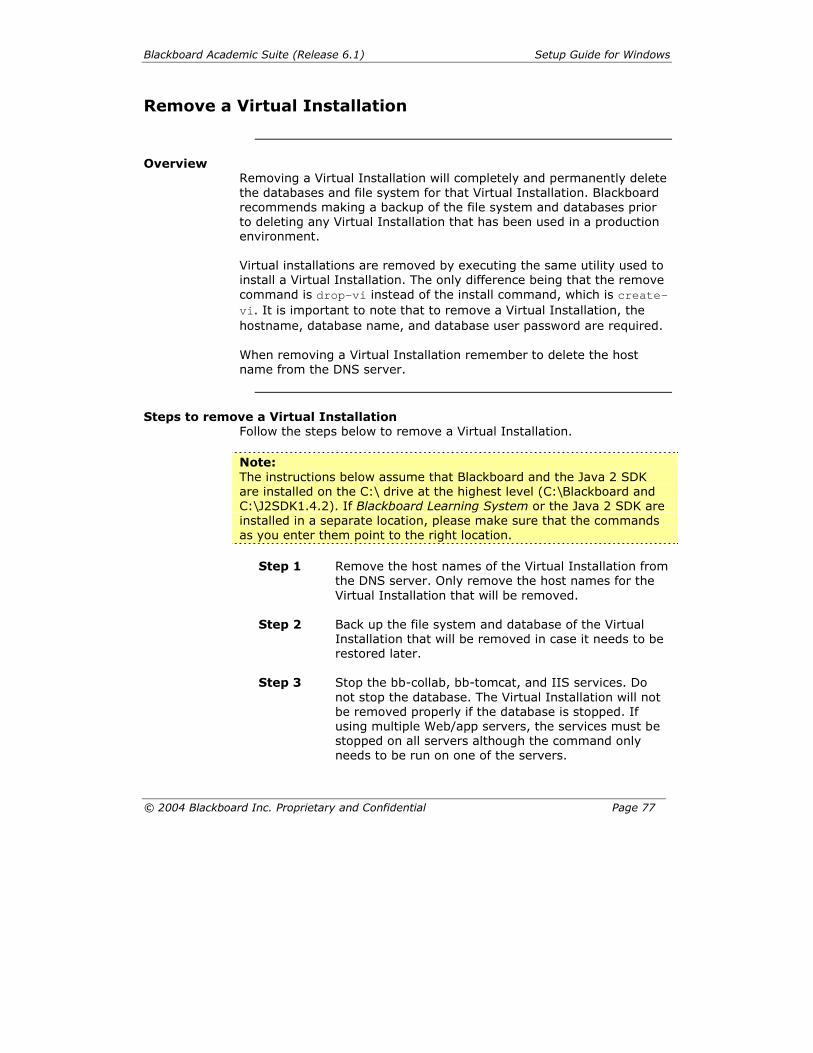
Blackboard Academic Suite (Release 6.1) Setup Guide for Windows
© 2004 Blackboard Inc. Proprietary and Confidential Page 77
Remove a Virtual Installation
Overview
Removing a Virtual Installation will completely and permanently delete the databases and file system for that Virtual Installation. Blackboard recommends making a backup of the file system and databases prior to deleting any Virtual Installation that has been used in a production environment. Virtual installations are removed by executing the same utility used to install a Virtual Installation. The only difference being that the remove command is drop-vi instead of the install command, which is create-vi. It is important to note that to remove a Virtual Installation, the hostname, database name, and database user password are required. When removing a Virtual Installation remember to delete the host name from the DNS server.
Steps to remove a Virtual Installation
Follow the steps below to remove a Virtual Installation. Note: The instructions below assume that Blackboard and the Java 2 SDK are installed on the C:\ drive at the highest level (C:\Blackboard and C:\J2SDK1.4.2). If Blackboard Learning System or the Java 2 SDK are installed in a separate location, please make sure that the commands as you enter them point to the right location.
Step 1 Remove the host names of the Virtual Installation from the DNS server. Only remove the host names for the Virtual Installation that will be removed.
Step 2 Back up the file system and database of the Virtual
Installation that will be removed in case it needs to be restored later.
Step 3 Stop the bb-collab, bb-tomcat, and IIS services. Do
not stop the database. The Virtual Installation will not be removed properly if the database is stopped. If using multiple Web/app servers, the services must be stopped on all servers although the command only needs to be run on one of the servers.
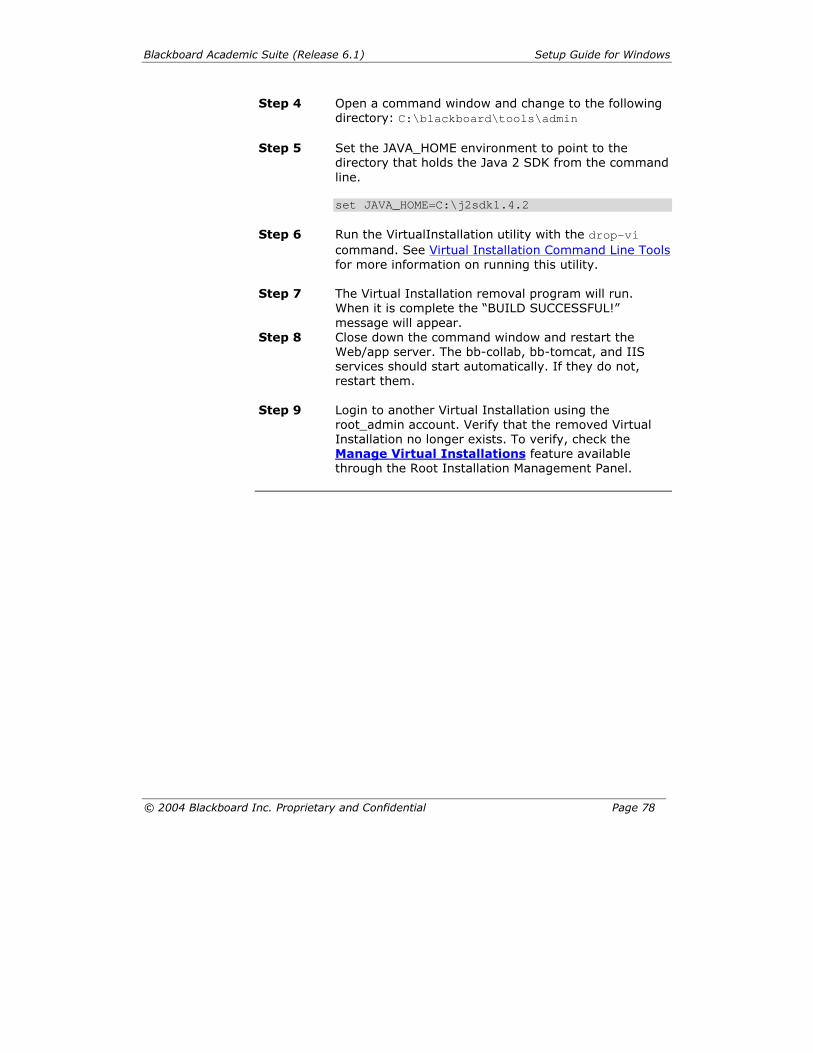
Blackboard Academic Suite (Release 6.1) Setup Guide for Windows
© 2004 Blackboard Inc. Proprietary and Confidential Page 78
Step 4 Open a command window and change to the following directory: C:\blackboard\tools\admin
Step 5 Set the JAVA_HOME environment to point to the
directory that holds the Java 2 SDK from the command line.
set JAVA_HOME=C:\j2sdk1.4.2
Step 6 Run the VirtualInstallation utility with the drop-vi
command. See Virtual Installation Command Line Tools for more information on running this utility.
Step 7 The Virtual Installation removal program will run.
When it is complete the �BUILD SUCCESSFUL!� message will appear.
Step 8 Close down the command window and restart the Web/app server. The bb-collab, bb-tomcat, and IIS services should start automatically. If they do not, restart them.
Step 9 Login to another Virtual Installation using the
root_admin account. Verify that the removed Virtual Installation no longer exists. To verify, check the Manage Virtual Installations feature available through the Root Installation Management Panel.
Blackboard Academic Suite (Release 6.1) Setup Guide for Windows
© 2004 Blackboard Inc. Proprietary and Confidential Page 79
Move Virtual Installation Databases
Overview
Moving a Virtual Installation database off of the original database server to a remote database server can help improve database performance when the Virtual Installation database becomes too large for the original database server. When moving a Virtual Installation database the statistics database associated with the main database must be moved as well. Because the first installation of the Blackboard Learning System is treated as a Virtual Installation this process can be used to move a database even if the institution is not using additional Virtual Installations. In a one server configuration this process can be used to move the main and statistics database to a remote server. Note: The bbadmin database cannot be moved. Therefore, even if all of the Virtual Installation databases are moved to a remote server the source database server cannot be shut down as it is still required to run the bbadmin database.
Moving Virtual Installation databases
Follow these steps to move the main database and the statistics database onto another server running Windows SQL Server 2000. The steps below include these assumptions:
The name of the main database is bb_bb60 and the name of the statistics database is bb_bb60_stats. �_stats� is appended to the name of the main database to create the name of the statistics database.
The name of the database user associated with each database
has the same name as the database. For example, the database user for the bb_bb60 database is bb_bb60.
Each database has only two files, one .mdf file and one .ldf
file. If a database has more than two files be sure to move all the files associated with the database.
Commands that start with > are SQL commands.
SQL Server data and log files are stored in
C:\Blackboard\mssql\data\ and C:\Blackboard\mssql\logs\
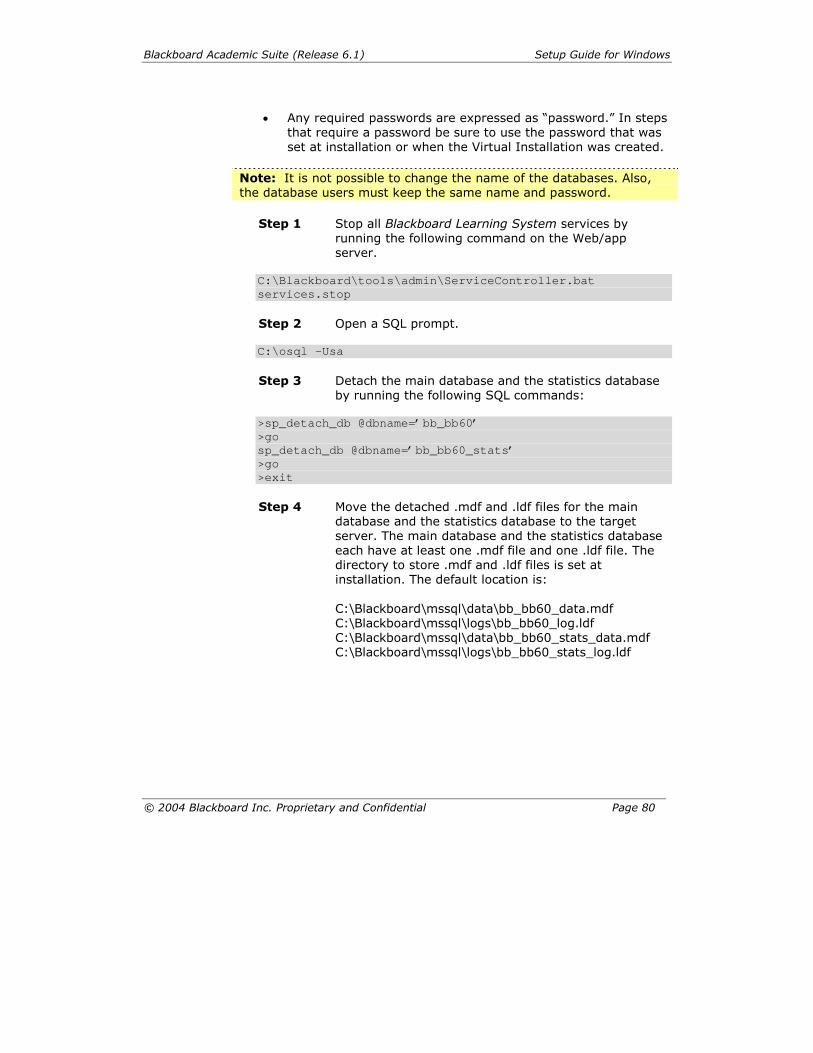
Blackboard Academic Suite (Release 6.1) Setup Guide for Windows
© 2004 Blackboard Inc. Proprietary and Confidential Page 80
Any required passwords are expressed as �password.� In steps
that require a password be sure to use the password that was set at installation or when the Virtual Installation was created.
Note: It is not possible to change the name of the databases. Also, the database users must keep the same name and password.
Step 1 Stop all Blackboard Learning System services by running the following command on the Web/app server.
C:\Blackboard\tools\admin\ServiceController.bat services.stop
Step 2 Open a SQL prompt. C:\osql -Usa Step 3 Detach the main database and the statistics database
by running the following SQL commands: >sp_detach_db @dbname=�bb_bb60� >go sp_detach_db @dbname=�bb_bb60_stats� >go >exit Step 4 Move the detached .mdf and .ldf files for the main
database and the statistics database to the target server. The main database and the statistics database each have at least one .mdf file and one .ldf file. The directory to store .mdf and .ldf files is set at installation. The default location is: C:\Blackboard\mssql\data\bb_bb60_data.mdf C:\Blackboard\mssql\logs\bb_bb60_log.ldf C:\Blackboard\mssql\data\bb_bb60_stats_data.mdf C:\Blackboard\mssql\logs\bb_bb60_stats_log.ldf
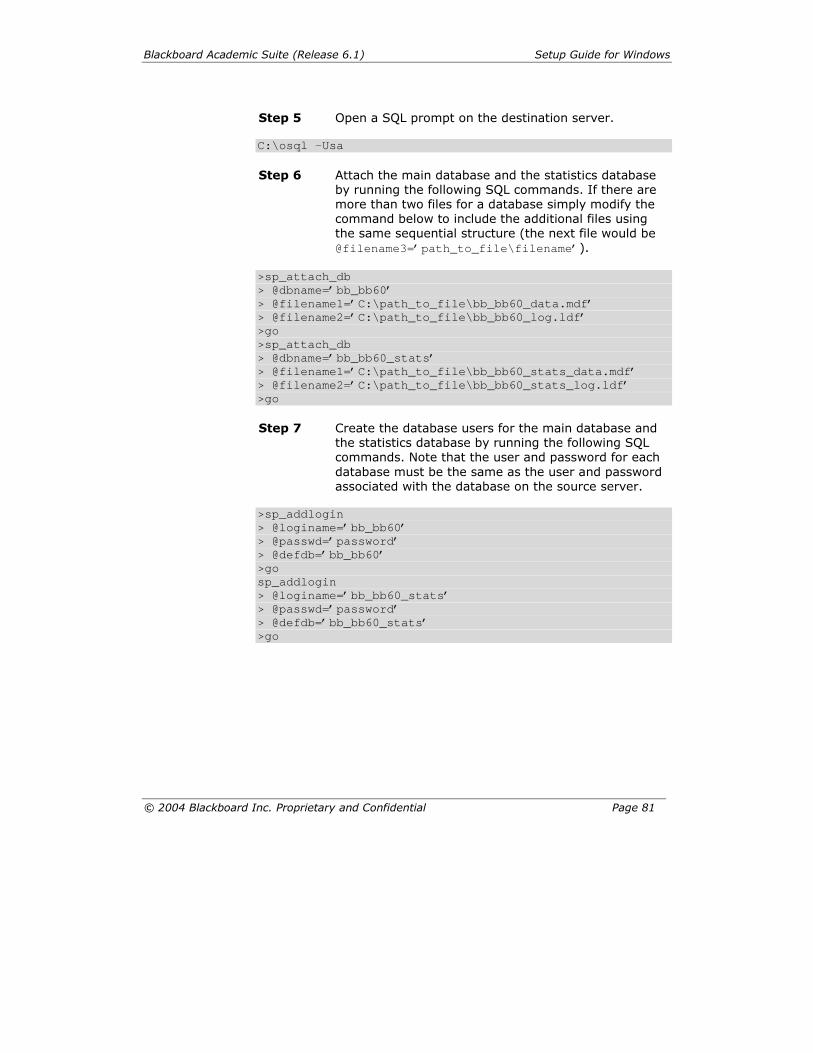
Blackboard Academic Suite (Release 6.1) Setup Guide for Windows
© 2004 Blackboard Inc. Proprietary and Confidential Page 81
Step 5 Open a SQL prompt on the destination server. C:\osql -Usa Step 6 Attach the main database and the statistics database
by running the following SQL commands. If there are more than two files for a database simply modify the command below to include the additional files using the same sequential structure (the next file would be @filename3=�path_to_file\filename�).
>sp_attach_db > @dbname=�bb_bb60� > @filename1=�C:\path_to_file\bb_bb60_data.mdf� > @filename2=�C:\path_to_file\bb_bb60_log.ldf� >go >sp_attach_db > @dbname=�bb_bb60_stats� > @filename1=�C:\path_to_file\bb_bb60_stats_data.mdf� > @filename2=�C:\path_to_file\bb_bb60_stats_log.ldf� >go Step 7 Create the database users for the main database and
the statistics database by running the following SQL commands. Note that the user and password for each database must be the same as the user and password associated with the database on the source server.
>sp_addlogin > @loginame=�bb_bb60� > @passwd=�password� > @defdb=�bb_bb60� >go sp_addlogin > @loginame=�bb_bb60_stats� > @passwd=�password� > @defdb=�bb_bb60_stats� >go
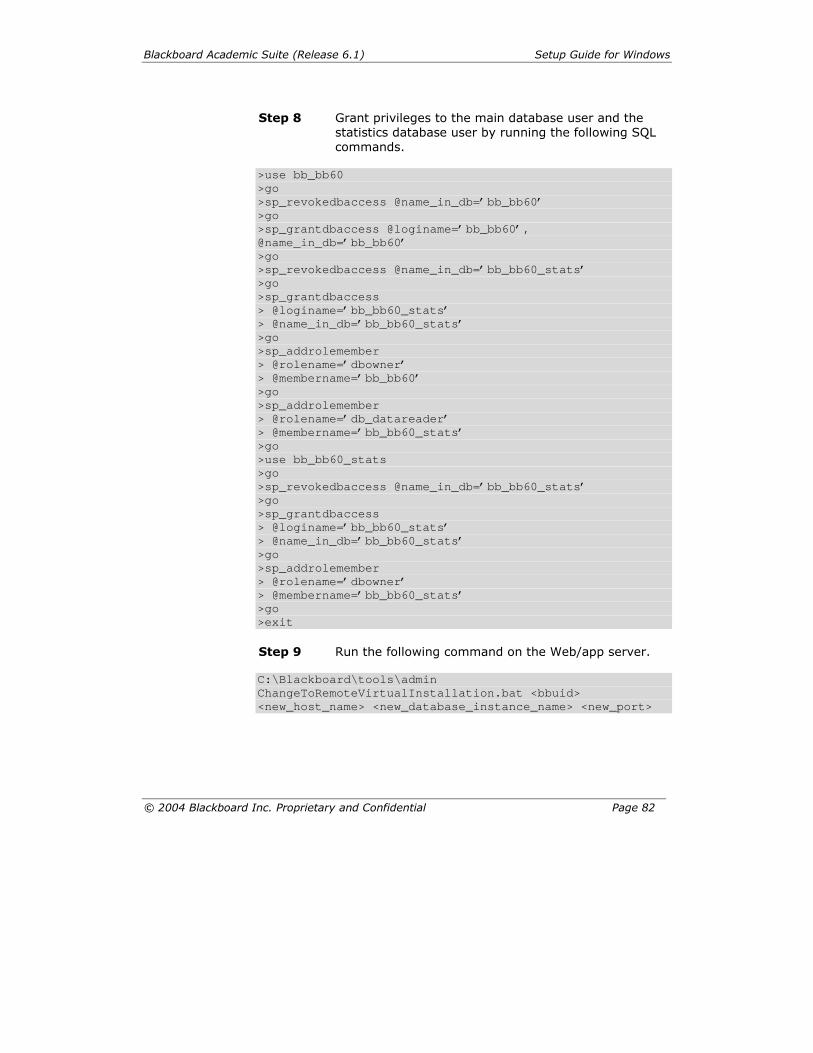
Blackboard Academic Suite (Release 6.1) Setup Guide for Windows
© 2004 Blackboard Inc. Proprietary and Confidential Page 82
Step 8 Grant privileges to the main database user and the
statistics database user by running the following SQL commands.
>use bb_bb60 >go >sp_revokedbaccess @name_in_db=�bb_bb60� >go >sp_grantdbaccess @loginame=�bb_bb60�, @name_in_db=�bb_bb60� >go >sp_revokedbaccess @name_in_db=�bb_bb60_stats� >go >sp_grantdbaccess > @loginame=�bb_bb60_stats� > @name_in_db=�bb_bb60_stats� >go >sp_addrolemember > @rolename=�dbowner� > @membername=�bb_bb60� >go >sp_addrolemember > @rolename=�db_datareader� > @membername=�bb_bb60_stats� >go >use bb_bb60_stats >go >sp_revokedbaccess @name_in_db=�bb_bb60_stats� >go >sp_grantdbaccess > @loginame=�bb_bb60_stats� > @name_in_db=�bb_bb60_stats� >go >sp_addrolemember > @rolename=�dbowner� > @membername=�bb_bb60_stats� >go >exit Step 9 Run the following command on the Web/app server. C:\Blackboard\tools\admin ChangeToRemoteVirtualInstallation.bat <bbuid> <new_host_name> <new_database_instance_name> <new_port>
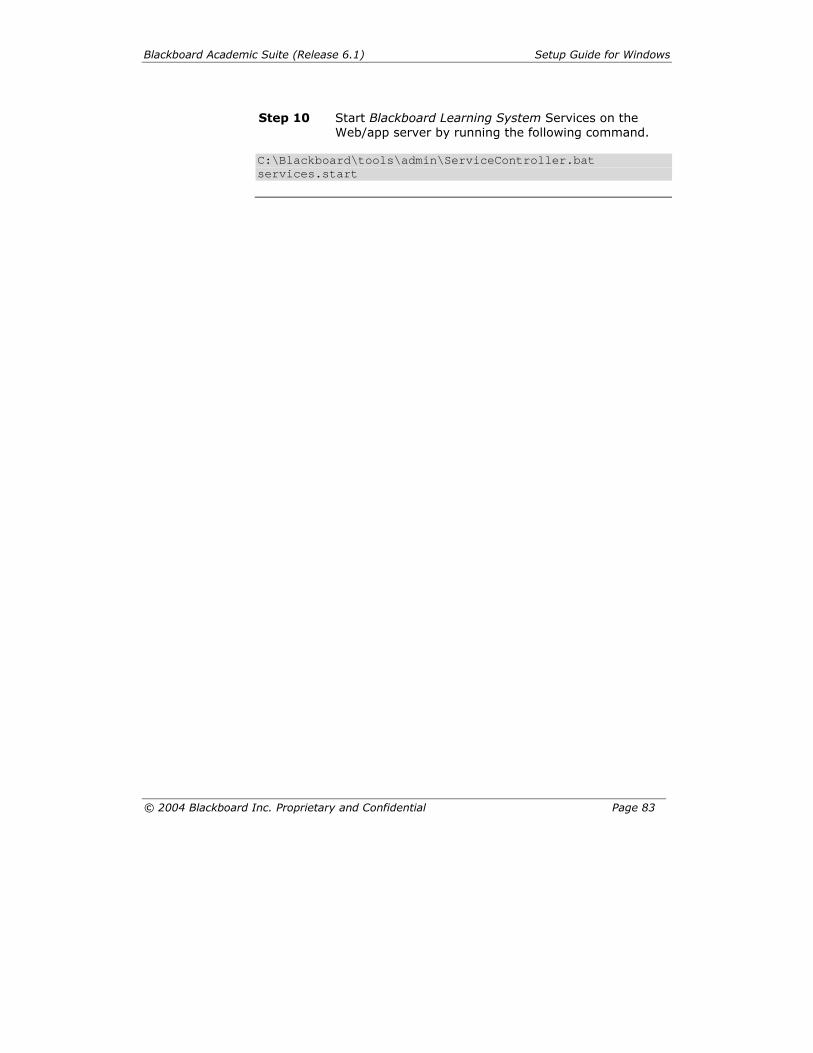
Blackboard Academic Suite (Release 6.1) Setup Guide for Windows
© 2004 Blackboard Inc. Proprietary and Confidential Page 83
Step 10 Start Blackboard Learning System Services on the
Web/app server by running the following command.
C:\Blackboard\tools\admin\ServiceController.bat services.start
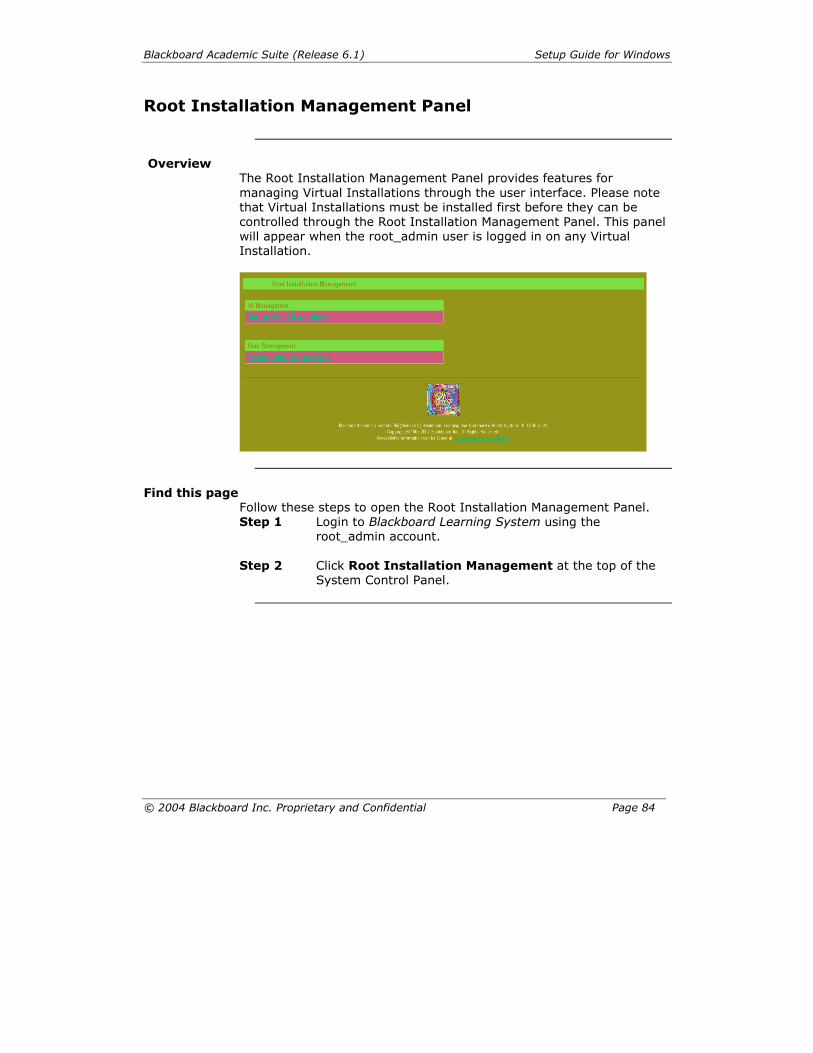
Blackboard Academic Suite (Release 6.1) Setup Guide for Windows
© 2004 Blackboard Inc. Proprietary and Confidential Page 84
Root Installation Management Panel
Overview
The Root Installation Management Panel provides features for managing Virtual Installations through the user interface. Please note that Virtual Installations must be installed first before they can be controlled through the Root Installation Management Panel. This panel will appear when the root_admin user is logged in on any Virtual Installation.
Find this page
Follow these steps to open the Root Installation Management Panel. Step 1 Login to Blackboard Learning System using the
root_admin account. Step 2 Click Root Installation Management at the top of the
System Control Panel.
Blackboard Academic Suite (Release 6.1) Setup Guide for Windows
© 2004 Blackboard Inc. Proprietary and Confidential Page 85
Functions The following functions are available through the Root Installation Configuration Panel: VI Management
Manage Virtual Installations: This page lists the Virtual Installations on the system and provides additional features for managing each Virtual Installation.
User Management
Edit Root Administrator Profile: This page is used to modify the root_admin user account.
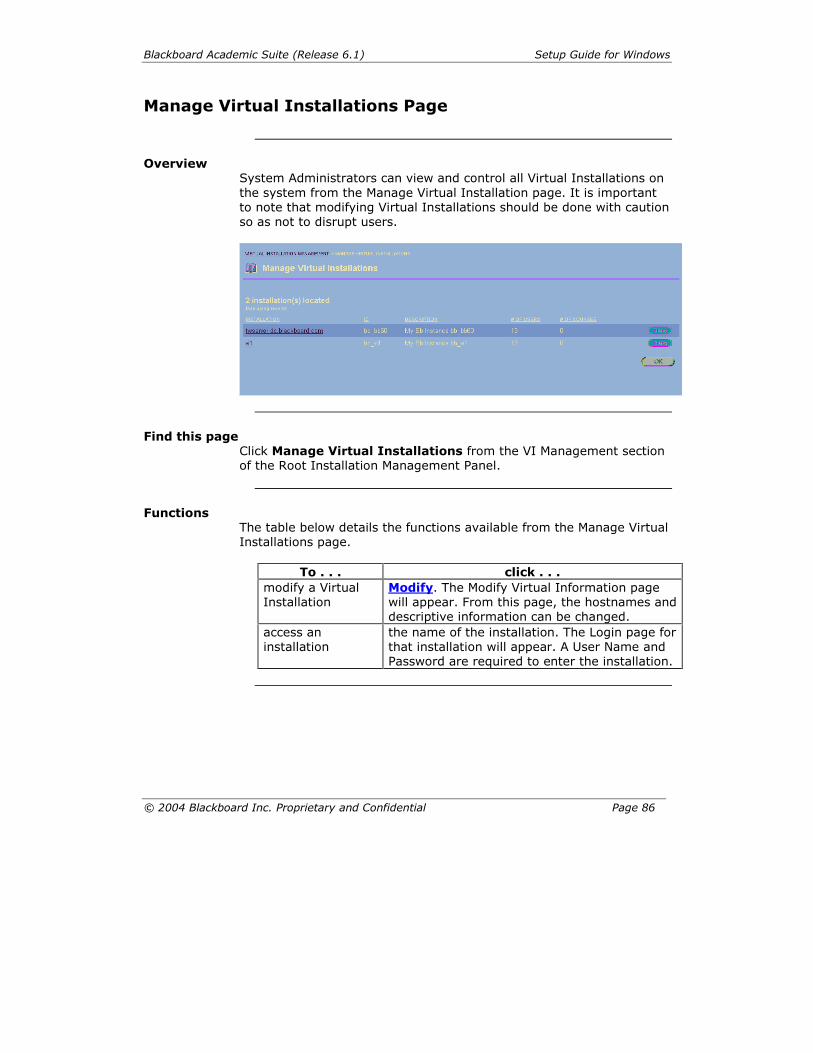
Blackboard Academic Suite (Release 6.1) Setup Guide for Windows
© 2004 Blackboard Inc. Proprietary and Confidential Page 86
Manage Virtual Installations Page
Overview
System Administrators can view and control all Virtual Installations on the system from the Manage Virtual Installation page. It is important to note that modifying Virtual Installations should be done with caution so as not to disrupt users.
Find this page
Click Manage Virtual Installations from the VI Management section of the Root Installation Management Panel.
Functions
The table below details the functions available from the Manage Virtual Installations page.
To . . . click . . . modify a Virtual Installation
Modify. The Modify Virtual Information page will appear. From this page, the hostnames and descriptive information can be changed.
access an installation
the name of the installation. The Login page for that installation will appear. A User Name and Password are required to enter the installation.
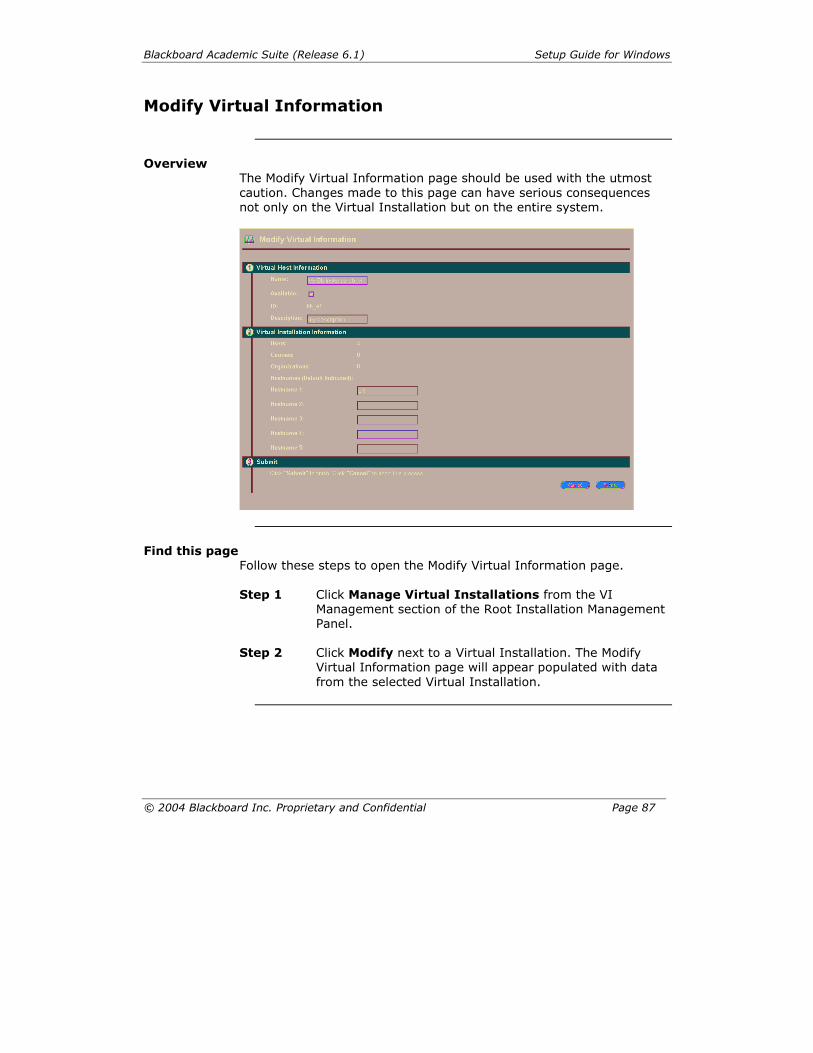
Blackboard Academic Suite (Release 6.1) Setup Guide for Windows
© 2004 Blackboard Inc. Proprietary and Confidential Page 87
Modify Virtual Information
Overview
The Modify Virtual Information page should be used with the utmost caution. Changes made to this page can have serious consequences not only on the Virtual Installation but on the entire system.
Find this page
Follow these steps to open the Modify Virtual Information page.
Step 1 Click Manage Virtual Installations from the VI Management section of the Root Installation Management Panel.
Step 2 Click Modify next to a Virtual Installation. The Modify
Virtual Information page will appear populated with data from the selected Virtual Installation.
Blackboard Academic Suite (Release 6.1) Setup Guide for Windows
© 2004 Blackboard Inc. Proprietary and Confidential Page 88
Fields The table below details the fields on the Modify Virtual Information page.
Field Description
Virtual Host Information Name: The name of the Virtual Installation, as it
appears in the bbadmin database, can be changed in this field. Changing this name will not change the hostnames associated with the Virtual Installation.
Available: This check box determines whether or not the Virtual Installation is available to users including the root_admin user. If this is deselected and the Virtual Installation is not available it will be impossible to login to the Virtual Installation. Note: If there is only one Virtual Installation on the system and it is made unavailable there is no way to get back into the Virtual Installation. The software will have to be uninstalled and a restore performed.
ID: This field displays the bbuid (name of the main Virtual Installation database).
Description: Enter or modify the description of the Virtual Installation. This description does not display to users.
Database Information Users: This field displays the number of users that
exist on this Virtual Installation. Courses: This field displays the number of courses
that exist on this Virtual Installation. Organizations: This field displays the number of
organizations that exist on this Virtual Installation.
Blackboard Academic Suite (Release 6.1) Setup Guide for Windows
© 2004 Blackboard Inc. Proprietary and Confidential Page 89
Hostnames: The different hostnames that can be used to access the Virtual Installation are shown here. Hostnames can be added or removed from these fields. When adding a hostname through this interface be sure to add it as the full hostname (hostname.domainname). To remove a hostname simply delete from the field and leave the field blank. Remember that any changes made to hostnames on this page must also be updated on the DNS server.
Note: After making any changes to the hostnames the Web/app server (or servers) must be restarted for the change to take effect.
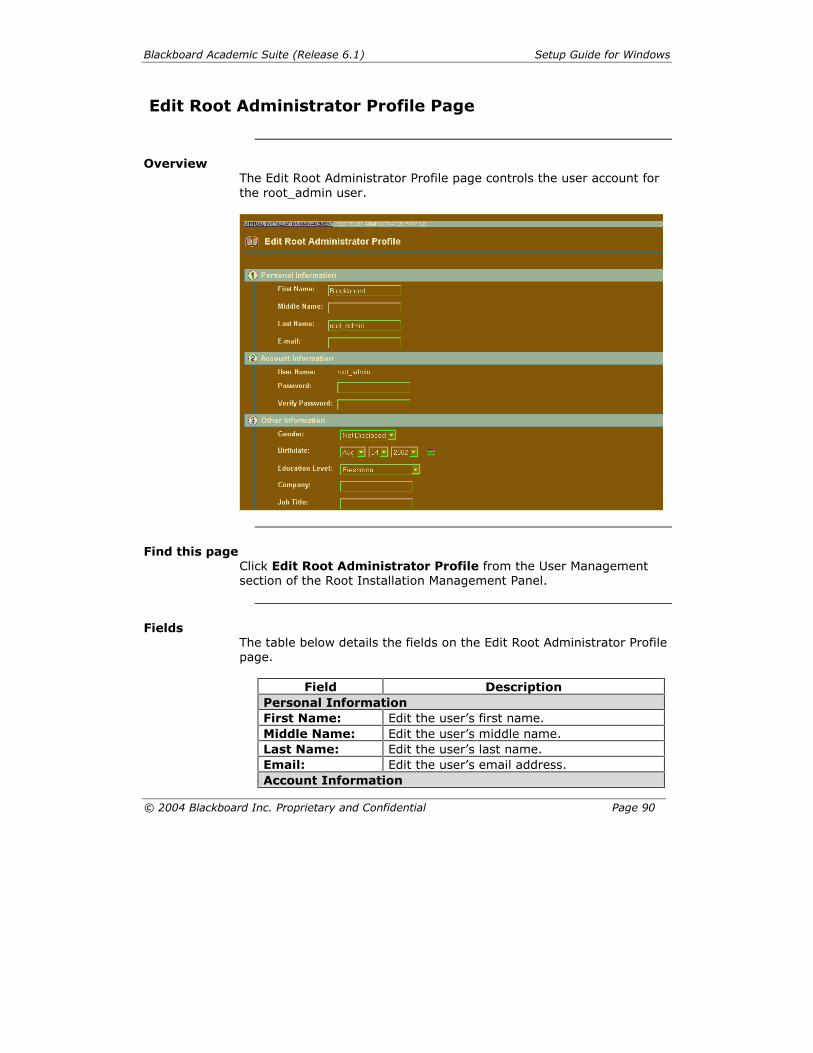
Blackboard Academic Suite (Release 6.1) Setup Guide for Windows
© 2004 Blackboard Inc. Proprietary and Confidential Page 90
Edit Root Administrator Profile Page
Overview
The Edit Root Administrator Profile page controls the user account for the root_admin user.
Find this page
Click Edit Root Administrator Profile from the User Management section of the Root Installation Management Panel.
Fields
The table below details the fields on the Edit Root Administrator Profile page.
Field Description
Personal Information First Name: Edit the user�s first name. Middle Name: Edit the user�s middle name. Last Name: Edit the user�s last name. Email: Edit the user�s email address. Account Information
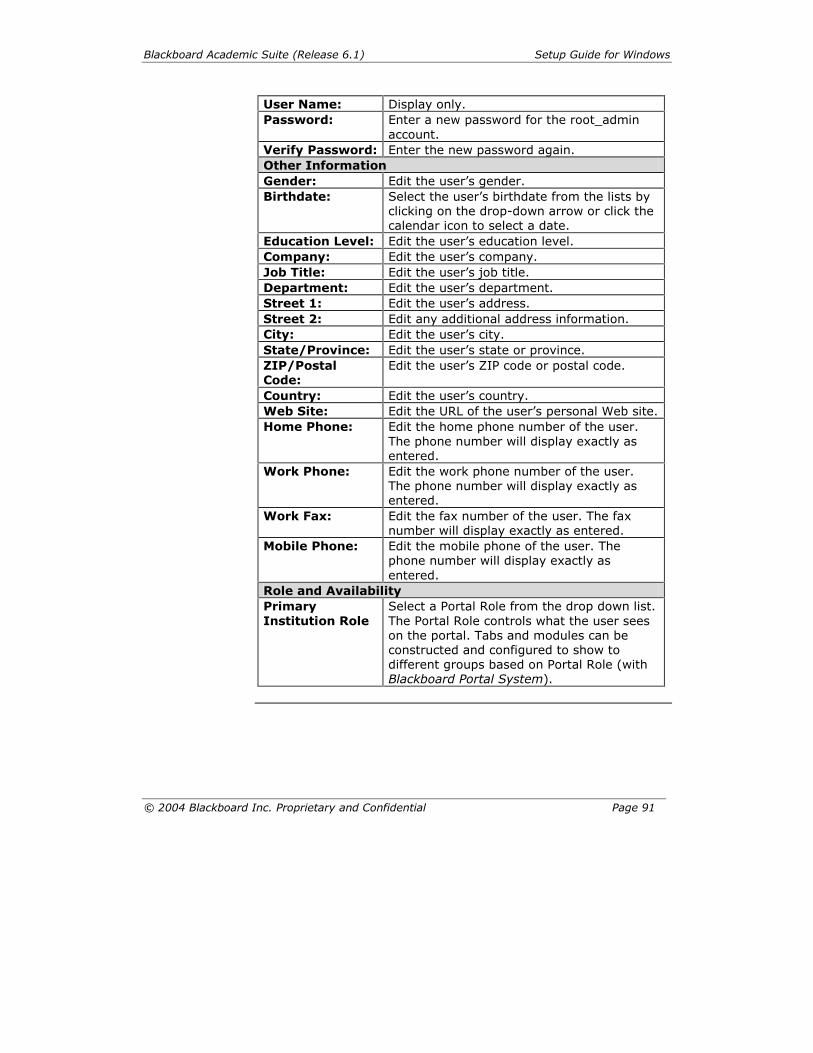
Blackboard Academic Suite (Release 6.1) Setup Guide for Windows
© 2004 Blackboard Inc. Proprietary and Confidential Page 91
User Name: Display only. Password: Enter a new password for the root_admin
account. Verify Password: Enter the new password again. Other Information Gender: Edit the user�s gender. Birthdate: Select the user�s birthdate from the lists by
clicking on the drop-down arrow or click the calendar icon to select a date.
Education Level: Edit the user�s education level. Company: Edit the user�s company. Job Title: Edit the user�s job title. Department: Edit the user�s department. Street 1: Edit the user�s address. Street 2: Edit any additional address information. City: Edit the user�s city. State/Province: Edit the user�s state or province. ZIP/Postal Code:
Edit the user�s ZIP code or postal code.
Country: Edit the user�s country. Web Site: Edit the URL of the user�s personal Web site. Home Phone: Edit the home phone number of the user.
The phone number will display exactly as entered.
Work Phone: Edit the work phone number of the user. The phone number will display exactly as entered.
Work Fax: Edit the fax number of the user. The fax number will display exactly as entered.
Mobile Phone: Edit the mobile phone of the user. The phone number will display exactly as entered.
Role and Availability Primary Institution Role
Select a Portal Role from the drop down list. The Portal Role controls what the user sees on the portal. Tabs and modules can be constructed and configured to show to different groups based on Portal Role (with Blackboard Portal System).
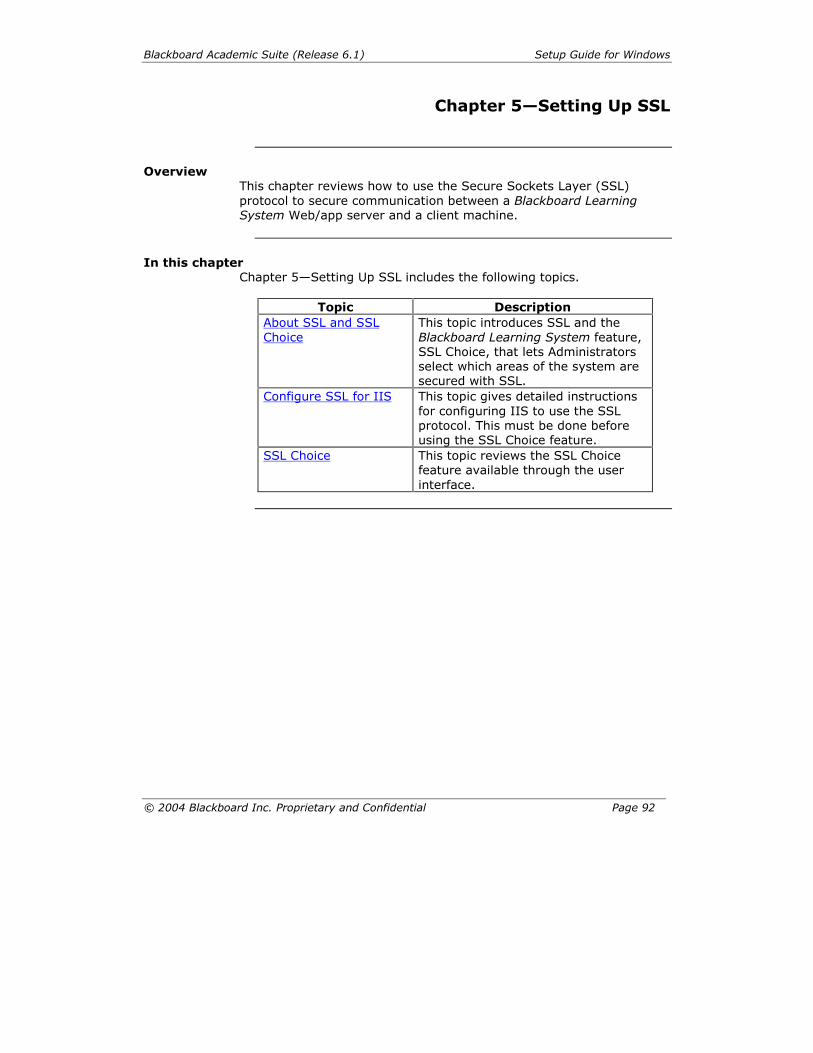
Blackboard Academic Suite (Release 6.1) Setup Guide for Windows
© 2004 Blackboard Inc. Proprietary and Confidential Page 92
Chapter 5�Setting Up SSL
Overview
This chapter reviews how to use the Secure Sockets Layer (SSL) protocol to secure communication between a Blackboard Learning System Web/app server and a client machine.
In this chapter
Chapter 5�Setting Up SSL includes the following topics.
Topic Description About SSL and SSL Choice
This topic introduces SSL and the Blackboard Learning System feature, SSL Choice, that lets Administrators select which areas of the system are secured with SSL.
Configure SSL for IIS This topic gives detailed instructions for configuring IIS to use the SSL protocol. This must be done before using the SSL Choice feature.
SSL Choice This topic reviews the SSL Choice feature available through the user interface.
Blackboard Academic Suite (Release 6.1) Setup Guide for Windows
© 2004 Blackboard Inc. Proprietary and Confidential Page 93
About SSL and SSL Choice
Overview
Secure Sockets Layer (SSL) is a protocol for protecting Internet communications. SSL ensures that a communication is not read or changed by another entity. The Blackboard Learning System uses SSL to secure all or some communications between the Web server and the client machine. This feature that allows Administrators to select which areas of the Blackboard Learning System are secured using SSL is called SSL Choice. Note: SSL may also be used to secure the connection between the Blackboard Learning System and a separate server for authentication (such as an Active Directory server). If SSL will be used both for connecting to an authentication server and for client sessions, SSL for the authentication server must be configured first. For more information on configuring SSL for securing with an integrated authentication server please see the Blackboard Learning System Authentication Manual.
How does SSL Work?
SSL encrypts transmissions using the Rivest-Shamir-Adleman (RSA) algorithm. Transmissions are decrypted and encrypted using certificates. When a user accesses a Web site secured by SSL the Web site sends a certificate to the client machine. The client machine then uses the certificate to establish a secure connection with encryption unique to that connection or session. SSL communications are more resource intensive than standard http�it is recommended that the impact of SSL on performance be tested and planned for prior to implementing.
Obtain a certificate
The simplest way to obtain a certificate for use with a Web site is through a vendor known as a Certifying Authority (CA). The process, shown in the steps below, is relatively simple.
Step 1 Generate a certificate request. Step 2 Send the request to a CA. Step 3 The CA creates and registers a certificate. Step 4 Make this certificate available to the Web Server (IIS).
Blackboard Academic Suite (Release 6.1) Setup Guide for Windows
© 2004 Blackboard Inc. Proprietary and Confidential Page 94
Certificates created in this way are usually registered and good for one year. After one year the certificate will no longer work and a new certificate must be obtained.
How does SSL appear to users?
SSL works with the Hypertext Transfer Protocol (HTTP) to secure connections between the Blackboard Learning System Web server and the client machines. It is fairly easy to see when a Web page is using SSL to secure transmissions because an �s� is appended to the http at the beginning of the address. Without SSL: http://blackboard.yourinstitution.com With SSL: https://blackboard.yourinstitution.com It is important to understand that if SSL is used to secure the Web page in this example then the first URL (without SSL) is invalid and will return a 404 error.
SSL Choice
The SSL Choice feature is available in the user interface from the System Control Panel. It allows an institution to decide if all, none, or some or the Blackboard Learning System is secured with SSL. If SSL is to be used, it is most effective when applied to the entire Web site and not just selected areas. Note: SSL must be configured on the Web Server before using the SSL Choice feature. If SSL Choice is turned on before the Web server is configured then any areas set to use SSL will be unavailable to users!
Blackboard Academic Suite (Release 6.1) Setup Guide for Windows
© 2004 Blackboard Inc. Proprietary and Confidential Page 95
Configure SSL for IIS
Overview
To use SSL to secure the Blackboard Learning System the IIS Web server must first be set to use SSL.
Note: Configuring SSL should only be done by an experienced Microsoft System Administrator. Once SSL is configured, the SSL Choice feature (accessible from the Learning System�s Administrator Control Panel) will function correctly. Trying to use the SSL Choice feature before configuring SSL for Apache can result in serious system errors.
Step by step
Follow these steps to configure SSL for the IIS Web server.
Step 1 Open the Internet Services Manager. Step 2 Right-click on the blackboard_bb_bb60 Web site and
select Properties from the menu. Step 3 Click the Directory Security tab.
Step 4 Click Server Certificate in the Secure
communications frame at the bottom of the tab.
Step 5 The Web Server Certificate Wizard will appear. The Status of your Web server should report that there is not a certificate installed and there are no pending requests. If anything else appears, there may be a certificate installed or a pending request already. Click Next to advance.
Step 6 Select Create a new certificate and click Next to
advance.
Step 7 Select Prepare the request now, but send it later and click Next to advance.
Step 8 Enter a name for the certificate (the name of the Web
site in IIS is the default) and select a bit length from the drop-down list. Blackboard recommends a bit length of 1024. Click Next to advance.
Blackboard Academic Suite (Release 6.1) Setup Guide for Windows
© 2004 Blackboard Inc. Proprietary and Confidential Page 96
Step 9 Enter the name of your Organization and your
Organizational unit in the fields. This information is important to ensure that your certificate is unique and easily identified. Click Next to advance.
Step 10 Enter the Common name of the Web site. The host
plus the domain name works best (example: blackboard_server.yourinstitution.edu). Click Next to advance.
Step 11 Enter the appropriate geographical information for
your institution. Click Next to advance.
Step 12 Enter a file name for the certificate request or click Next to select the default and advance.
Step 13 Click Finish to create the certificate request.
Step 14 Send the certificate request to a Certifying Authority.
There are several commercial vendors or you can sign your own if you have the capability. The output from the Certifying Authority will be a file with the extension .cer.
Step 15 Once you have obtained a .cer file, return to the Web
Server Certificate Server as described in Steps 1-4.
Step 16 Select Process the Pending Request and click Next to advance.
Step 17 Enter the location of the .cer file and click Next to
advance.
Step 18 Click Next to advance through the summary steps (be sure to review the summaries to make sure you are installing the correct certificate!).
Step 19 Return to the Properties box for the
blackboard_bb_bb60 Web site as described in Steps 1 and 2.
Step 20 If the Web Site tab is not active, select it.
Blackboard Academic Suite (Release 6.1) Setup Guide for Windows
© 2004 Blackboard Inc. Proprietary and Confidential Page 97
Step 21 Enter 443 for the SSL Port in the Web Site
Identification frame at the top of the tab.
Step 22 Restart the server to complete the process.
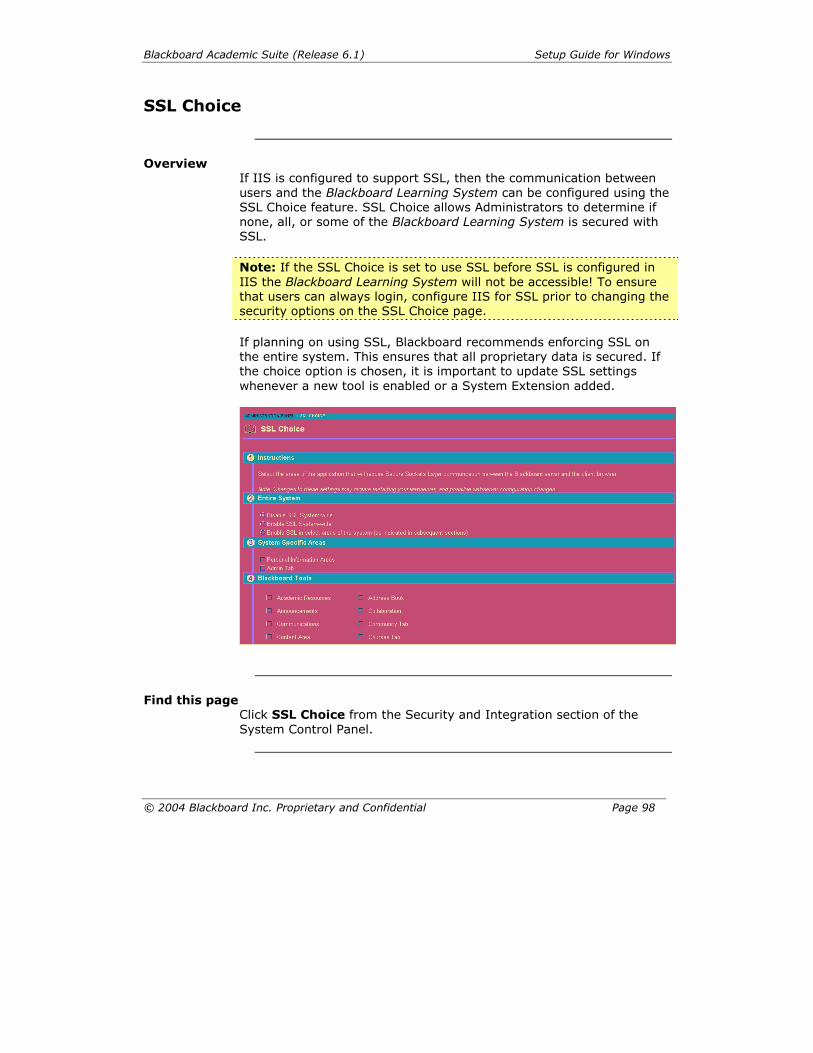
Blackboard Academic Suite (Release 6.1) Setup Guide for Windows
© 2004 Blackboard Inc. Proprietary and Confidential Page 98
SSL Choice
Overview
If IIS is configured to support SSL, then the communication between users and the Blackboard Learning System can be configured using the SSL Choice feature. SSL Choice allows Administrators to determine if none, all, or some of the Blackboard Learning System is secured with SSL. Note: If the SSL Choice is set to use SSL before SSL is configured in IIS the Blackboard Learning System will not be accessible! To ensure that users can always login, configure IIS for SSL prior to changing the security options on the SSL Choice page. If planning on using SSL, Blackboard recommends enforcing SSL on the entire system. This ensures that all proprietary data is secured. If the choice option is chosen, it is important to update SSL settings whenever a new tool is enabled or a System Extension added.
Find this page
Click SSL Choice from the Security and Integration section of the System Control Panel.
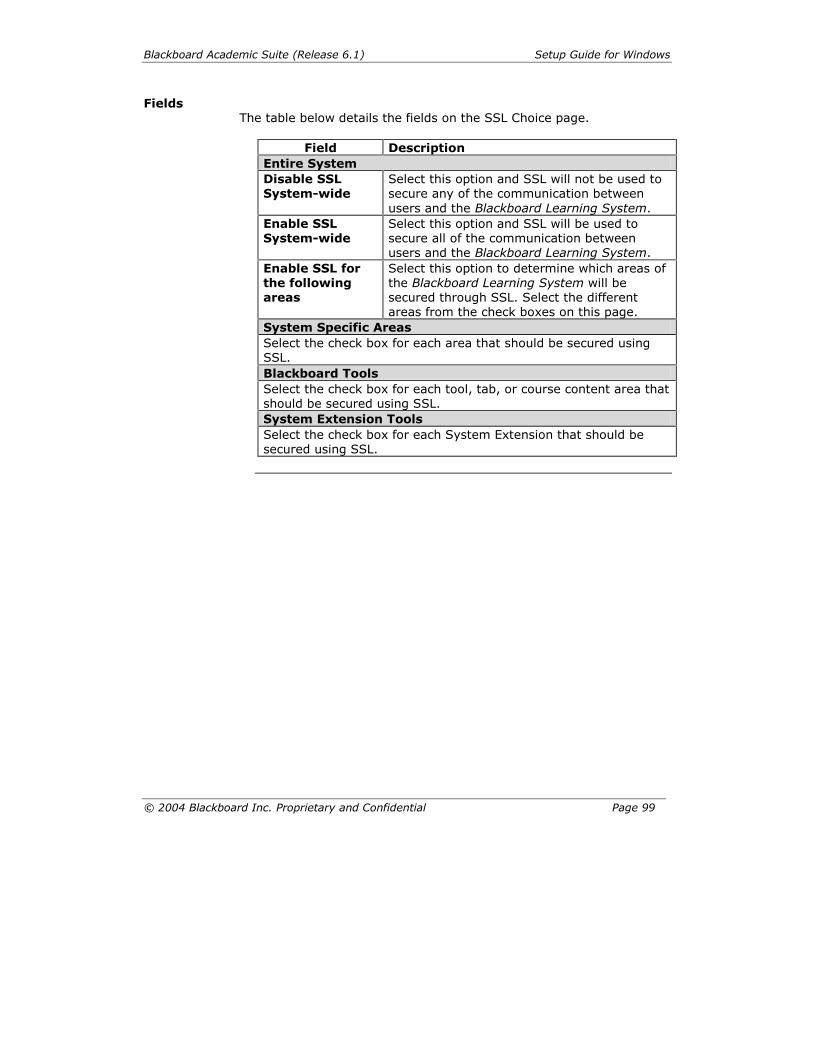
Blackboard Academic Suite (Release 6.1) Setup Guide for Windows
© 2004 Blackboard Inc. Proprietary and Confidential Page 99
Fields The table below details the fields on the SSL Choice page.
Field Description
Entire System Disable SSL System-wide
Select this option and SSL will not be used to secure any of the communication between users and the Blackboard Learning System.
Enable SSL System-wide
Select this option and SSL will be used to secure all of the communication between users and the Blackboard Learning System.
Enable SSL for the following areas
Select this option to determine which areas of the Blackboard Learning System will be secured through SSL. Select the different areas from the check boxes on this page.
System Specific Areas Select the check box for each area that should be secured using SSL. Blackboard Tools Select the check box for each tool, tab, or course content area that should be secured using SSL. System Extension Tools Select the check box for each System Extension that should be secured using SSL.
Blackboard Academic Suite (Release 6.1) Setup Guide for Windows
© 2004 Blackboard Inc. Proprietary and Confidential Page 100
Chapter 6�Web Email
Overview
This chapter reviews how to install and enable Web Email. Web Email is a front-end Email application that lets users view an email account from within the Blackboard Learning System.
In this chapter
Chapter 6�Web Email includes the following topics.
Topic Description About Web Email This topic introduces Web Email. Web Email Installation This topic details the steps for
installing and enabling Web Email.
Blackboard Academic Suite (Release 6.1) Setup Guide for Windows
© 2004 Blackboard Inc. Proprietary and Confidential Page 101
About Web Email
Overview
The Blackboard Learning System includes the Web Email feature available in previous versions. Web Email provides an interface within the Blackboard Learning System for Users to access an Email account (usually managed by the institution). Once Web Email is installed and enabled a feature for accessing Web Email will appear as a tool within the user interface. Web Email is provided as a separately licensed product. It is only available to those customers that have already licensed Web Email with a previous version. Please contact your Account Manager with any questions regarding the availability of Web Email.
How does Web Email appear to users?
Web Email appears to users as an additional tool in the Tool Panel on the user interface. When they click the link to access the tool, users are taken to a separate interface that displays the messages in an email account.
Blackboard Academic Suite (Release 6.1) Setup Guide for Windows
© 2004 Blackboard Inc. Proprietary and Confidential Page 102
Web Email Installation
Overview
Web Email is treated as System Extension within the user interface. To install Web Email, a software package must first be installed before installing and enabling the System Extension. Installing and enabling Web Email is a simple process.
Make sure that the Blackboard Learning System includes licensing for Web Email. If it does not, obtain a new license file from Blackboard and use the LicenseReplace utility to update the license.
Obtain the Web Email package. Install the Web Email package. Install and enable the Web Email System Extension.
Before installing the SMMS Web Email package
The Web Email installer will prompt for the following information. Path to the Blackboard Learning System home (blackboard)
directory. (Example: C:\blackboard or D:\applications\blackboard)
The Domain name for the mail server or mail servers that will
be used with Web Email.
The Email address of the Administrator.
If a copy of the Web Email package is not available please contact your Blackboard Account Manager.
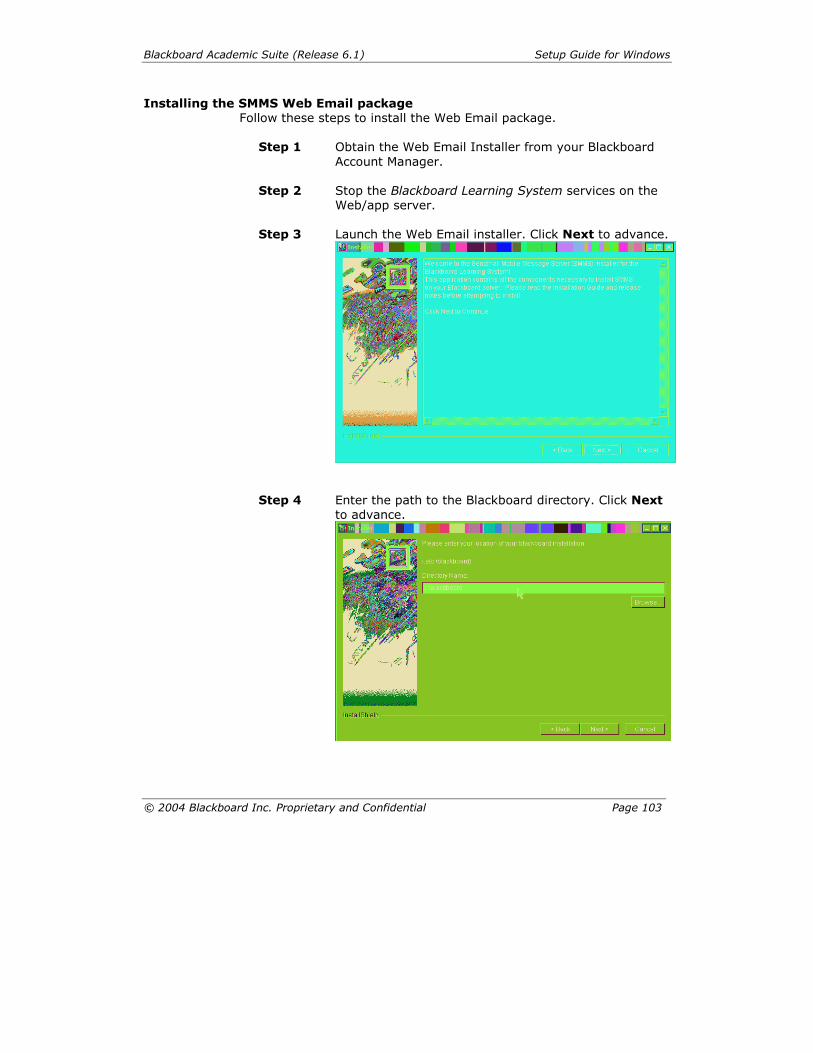
Blackboard Academic Suite (Release 6.1) Setup Guide for Windows
© 2004 Blackboard Inc. Proprietary and Confidential Page 103
Installing the SMMS Web Email package Follow these steps to install the Web Email package.
Step 1 Obtain the Web Email Installer from your Blackboard Account Manager.
Step 2 Stop the Blackboard Learning System services on the
Web/app server. Step 3 Launch the Web Email installer. Click Next to advance.
Step 4 Enter the path to the Blackboard directory. Click Next
to advance.
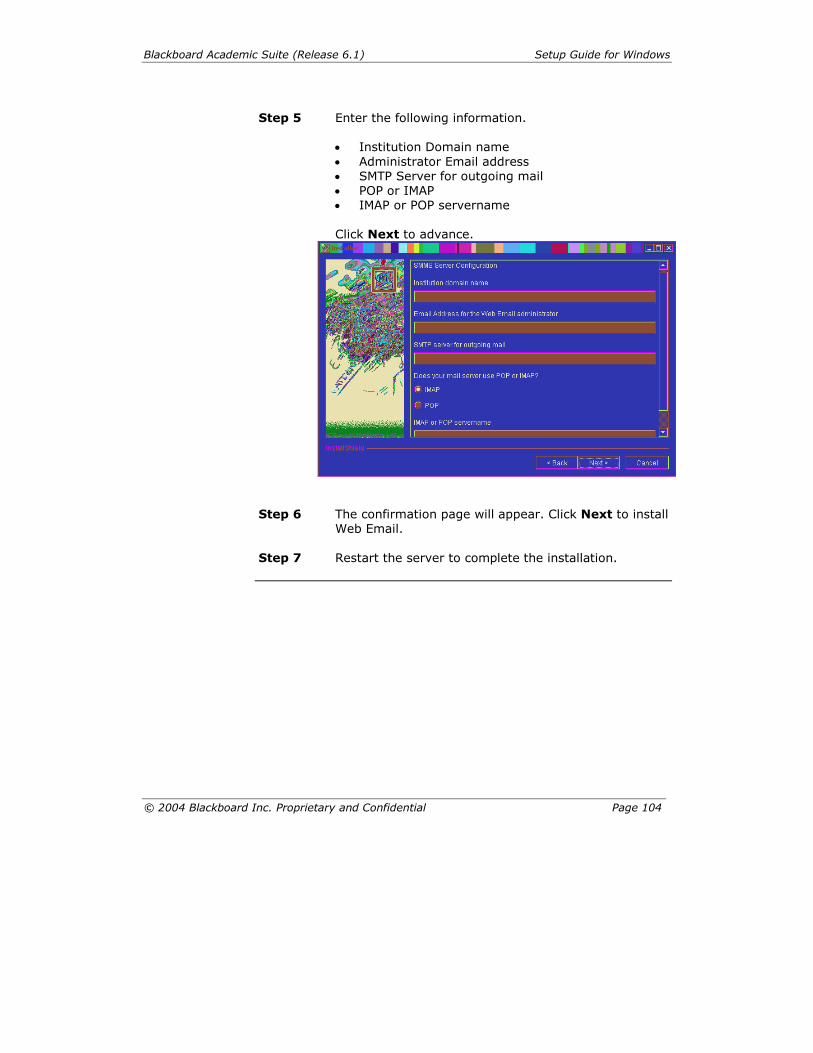
Blackboard Academic Suite (Release 6.1) Setup Guide for Windows
© 2004 Blackboard Inc. Proprietary and Confidential Page 104
Step 5 Enter the following information.
Institution Domain name Administrator Email address SMTP Server for outgoing mail POP or IMAP IMAP or POP servername Click Next to advance.
Step 6 The confirmation page will appear. Click Next to install
Web Email. Step 7 Restart the server to complete the installation.
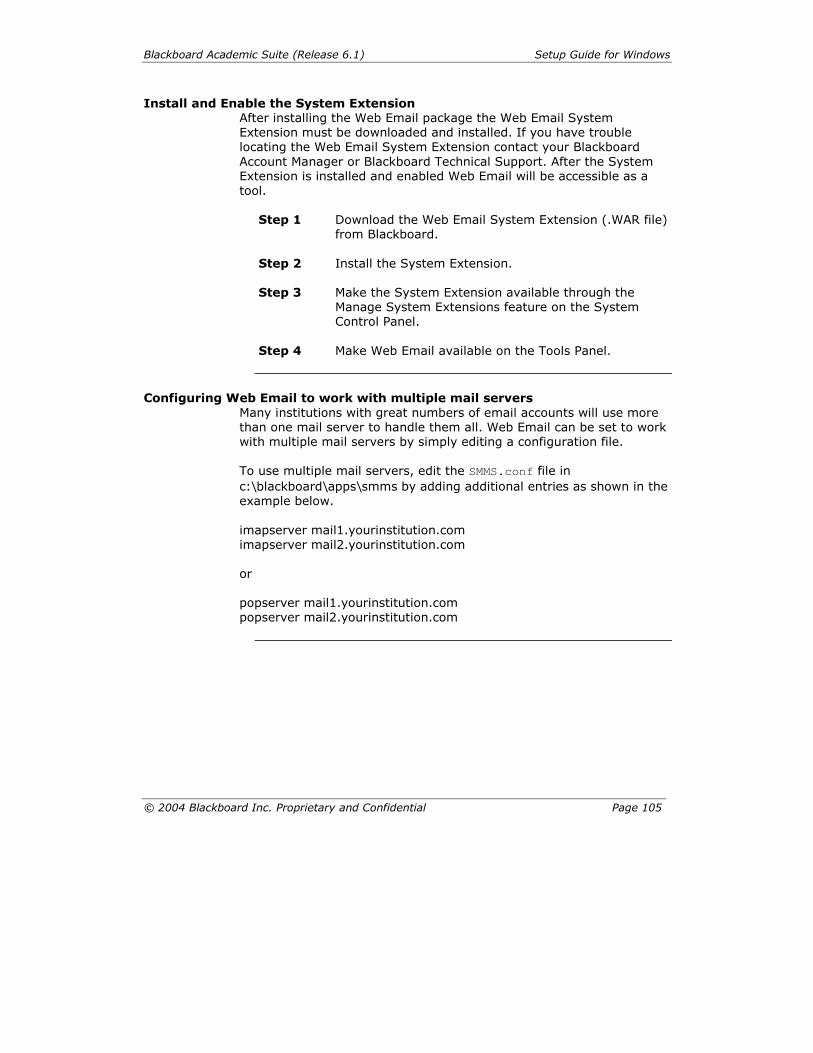
Blackboard Academic Suite (Release 6.1) Setup Guide for Windows
© 2004 Blackboard Inc. Proprietary and Confidential Page 105
Install and Enable the System Extension After installing the Web Email package the Web Email System Extension must be downloaded and installed. If you have trouble locating the Web Email System Extension contact your Blackboard Account Manager or Blackboard Technical Support. After the System Extension is installed and enabled Web Email will be accessible as a tool.
Step 1 Download the Web Email System Extension (.WAR file)
from Blackboard. Step 2 Install the System Extension.
Step 3 Make the System Extension available through the
Manage System Extensions feature on the System Control Panel.
Step 4 Make Web Email available on the Tools Panel.
Configuring Web Email to work with multiple mail servers
Many institutions with great numbers of email accounts will use more than one mail server to handle them all. Web Email can be set to work with multiple mail servers by simply editing a configuration file. To use multiple mail servers, edit the SMMS.conf file in c:\blackboard\apps\smms by adding additional entries as shown in the example below. imapserver mail1.yourinstitution.com imapserver mail2.yourinstitution.com or popserver mail1.yourinstitution.com popserver mail2.yourinstitution.com
Blackboard Academic Suite (Release 6.1) Setup Guide for Windows
© 2004 Blackboard Inc. Proprietary and Confidential Page 106
Appendix�Updates Since Publication
This document was published on February 9, 2004. There have been no updates since publication.


![6 Messen im Flexodruck · Abbildung 6.1-1 Flex 3Pro Flexo Analyzer [Quelle Abbildungen 6.1-1 bis 6.1-6: Peret/FAG] A bildung6.1-2 Messen transparenter Druckformen mit Rount A bildung6.1-3](https://img.pdfslide.org/doc/110x75/605fdd1bdf69a837ef47b037/6-messen-im-abbildung-61-1-flex-3pro-flexo-analyzer-quelle-abbildungen-61-1-bis.jpg)