Embed Size (px)
Citation preview
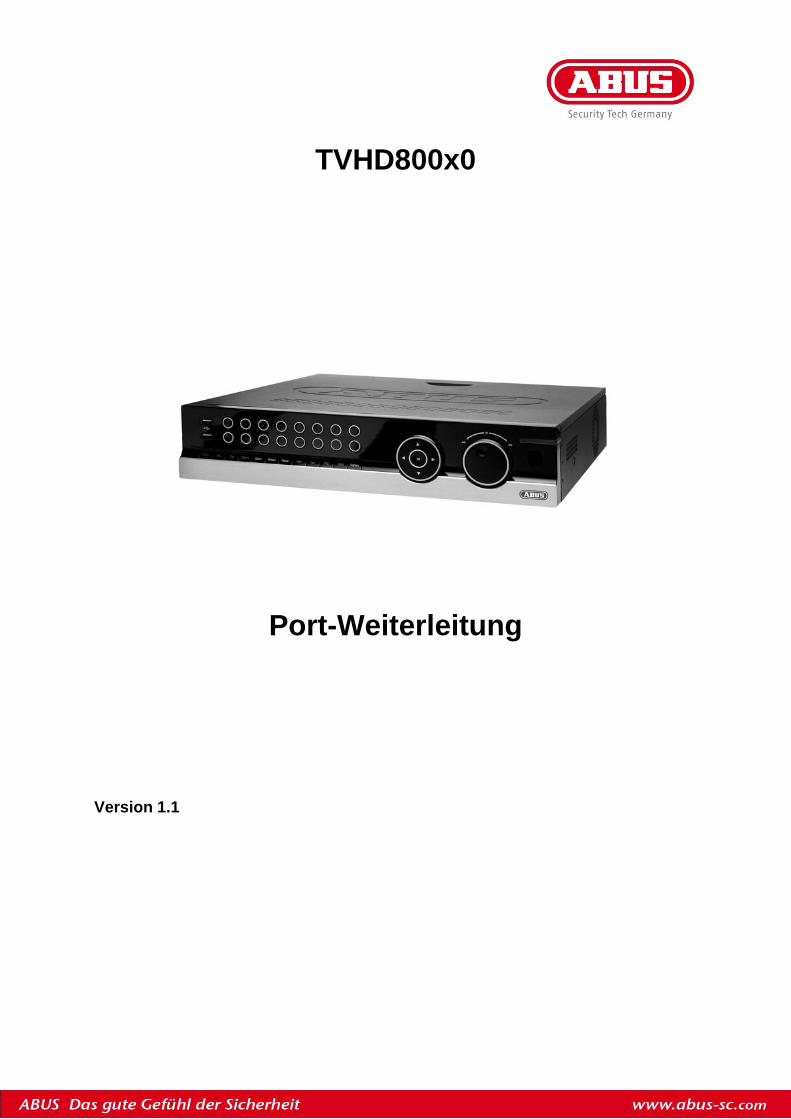
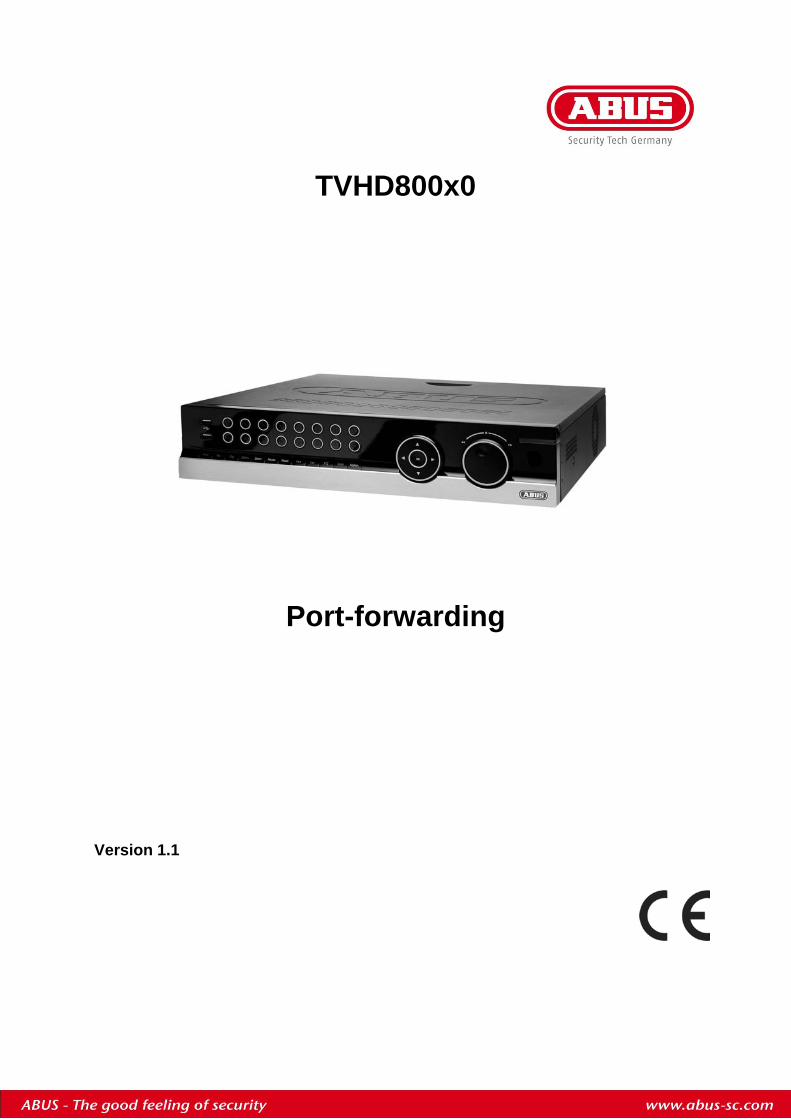
TVHD800x0
Port-Weiterleitung
Version 1.1
2
Inhalt: 1. Übersicht der Ports
2. Ein- / Umstellung der Ports
3. Sonstige Hinweise
Haftungsausschluss Diese Bedienungsanleitung wurde mit größter Sorgfalt erstellt. Sollten Ihnen dennoch Auslassungen oder Ungenauigkeiten auffallen, so teilen Sie uns diese bitte auf der letzten Seite des Handbuchs angegebener Adresse mit. Die ABUS Security-Center GmbH übernimmt keinerlei Haftung für technische und typografische Fehler und behält sich das Recht vor, jederzeit ohne vorherige Ankündigung Änderungen am Produkt und an den Bedienungsanleitungen vorzunehmen. ABUS Security-Center ist nicht für direkte und indirekte Folgeschäden haftbar oder verantwortlich, die in Verbindung mit der Ausstattung, der Leistung und dem Einsatz dieses Produkts entstehen. Es wird keinerlei Garantie für den Inhalt dieses Dokuments übernommen.
3
HTTP-Port
1. Übersicht der Ports
- Ist zuständig für die Weboberfläche des Rekorders. Wird benötigt für den Zugriff via Webbrowser.
- Standardmäßig: 80
Server-Port
- Wird für den Zugriff via CMS oder via mobiler Geräte benötigt. - Standardmäßig: 8000
RTSP-Port
- Ist für die Steuerung / Übertragung der Videodaten zuständig. Wird für den Zugriff per CMS, Weboberfläche oder mobiler Geräte benötigt.
- Standardmäßig: 554
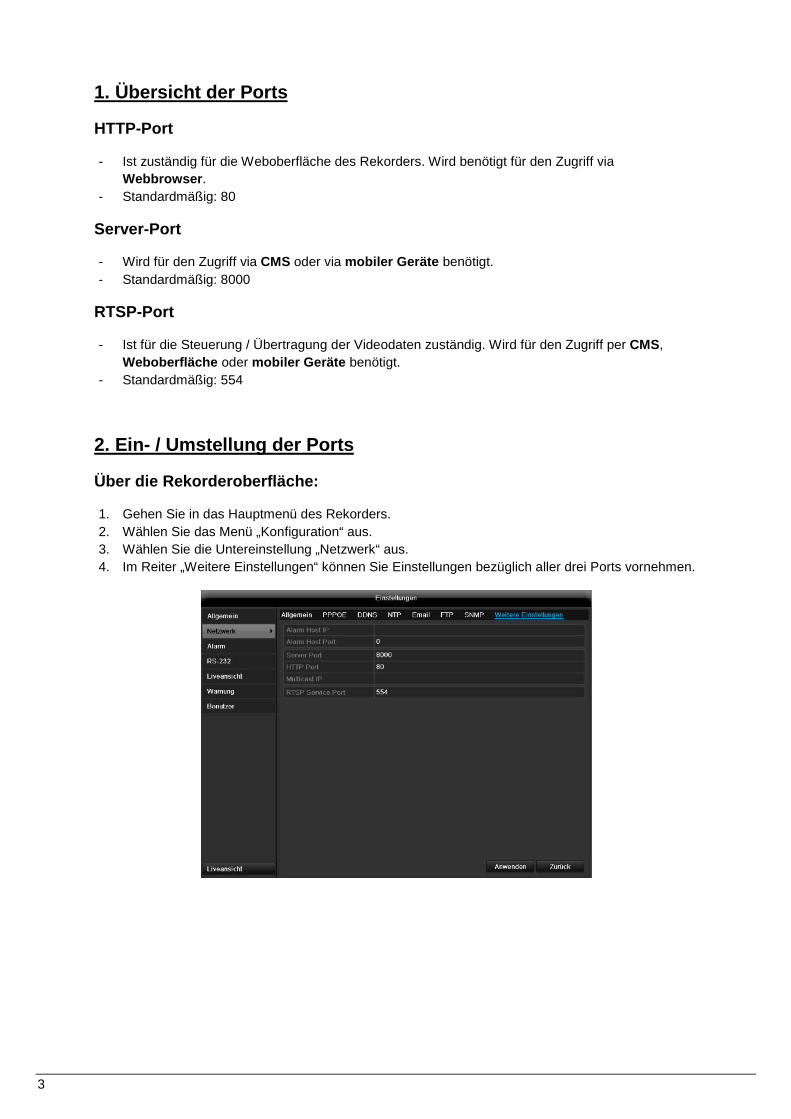
Über die Rekorderoberfläche:
2. Ein- / Umstellung der Ports
1. Gehen Sie in das Hauptmenü des Rekorders. 2. Wählen Sie das Menü „Konfiguration“ aus. 3. Wählen Sie die Untereinstellung „Netzwerk“ aus. 4. Im Reiter „Weitere Einstellungen“ können Sie Einstellungen bezüglich aller drei Ports vornehmen.
4
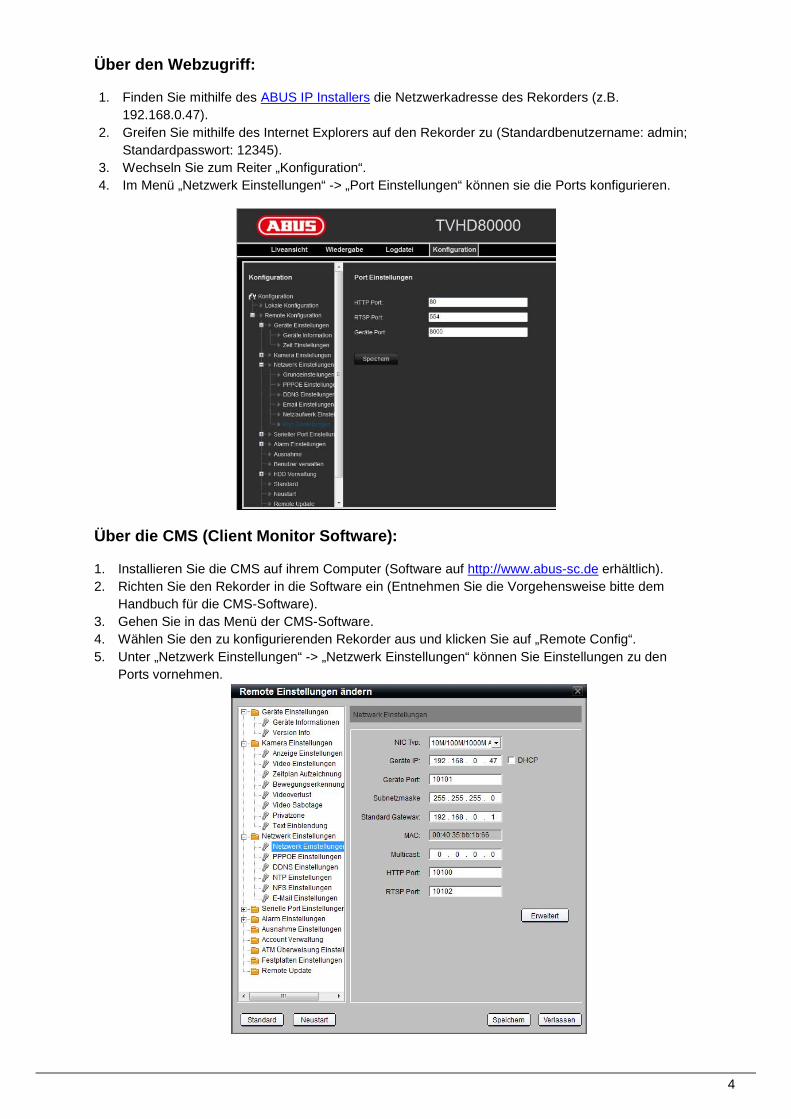
Über den Webzugriff:
1. Finden Sie mithilfe des ABUS IP Installers die Netzwerkadresse des Rekorders (z.B. 192.168.0.47).
2. Greifen Sie mithilfe des Internet Explorers auf den Rekorder zu (Standardbenutzername: admin; Standardpasswort: 12345).
3. Wechseln Sie zum Reiter „Konfiguration“. 4. Im Menü „Netzwerk Einstellungen“ -> „Port Einstellungen“ können sie die Ports konfigurieren.
Über die CMS (Client Monitor Software):
1. Installieren Sie die CMS auf ihrem Computer (Software auf http://www.abus-sc.de erhältlich). 2. Richten Sie den Rekorder in die Software ein (Entnehmen Sie die Vorgehensweise bitte dem
Handbuch für die CMS-Software). 3. Gehen Sie in das Menü der CMS-Software. 4. Wählen Sie den zu konfigurierenden Rekorder aus und klicken Sie auf „Remote Config“. 5. Unter „Netzwerk Einstellungen“ -> „Netzwerk Einstellungen“ können Sie Einstellungen zu den
Ports vornehmen.
5
Port-Range:
3. Sonstige Hinweise
- Wenn Sie Änderungen an den Ports vornehmen, beachten Sie bitte, dass nicht jeder Port vergeben werden darf. Bitte beachten Sie auch, dass in manchen Firmen nur gewisse Ports freigeschaltet sind.
- Port 0 - 1023: Reservierte Ports (Bitte nicht verwenden!)
- Port 1024 - 65535: Können frei vergeben werden (Keine doppelte Belegung möglich!)
Portfreigabe:
- Damit die Daten aus dem internen Netzwerk in das Internet gelangen, müssen die Ports im Router weitergeleitet werden. Für nähere Informationen sehen Sie bitte unser Video zur Portfreigabe (ein Film aus der Reihe zur DynDNS Einrichtung), welches die Portfreigabe einer IP-Kamera bei einem Fritz.Box Router behandelt.
Zugriff via Webbrowser:
- Wenn Sie den HTTP-port geändert haben, müssen Sie „IP-Adresse:Port“ in die Adressleiste des Browsers eingeben. Beispiel: HTTP-Portänderung auf 11010 -> http://192.168.0.47:11010
- Bei Fernzugriff über DynDNS oder eines anderen Domänennamens, müssen Sie „Domänennamen:Port“ in die Adressleiste des Browsers eingeben. Beispiel: HTTP-Portänderung auf 11010 -> http://meinDynDNS.org:11010
Hersteller ABUS Security-Center GmbH & Co. KG Linker Kreuthweg 5 86444 Affing (Germany)
TVHD800x0
Port-forwarding
Version 1.1
8
Contents: 1. Overview of the different ports
2. Modifying / Changing of the ports
3. Further information
Disclaimer These operating instructions have been produced with the greatest care. Should you discover any missing information or inaccuracies, please contact us under the address shown on the last site of the manual. ABUS Security-Center GmbH does not accept any liability for technical and typographical errors, and reserves the right to make changes to the product and operating instructions at any time and without prior warning. ABUS Security-Center GmbH is not liable or responsible for direct or indirect damages resulting from the equipment, performance and use of this product. No forms of guarantee are accepted for the contents of this document.
9
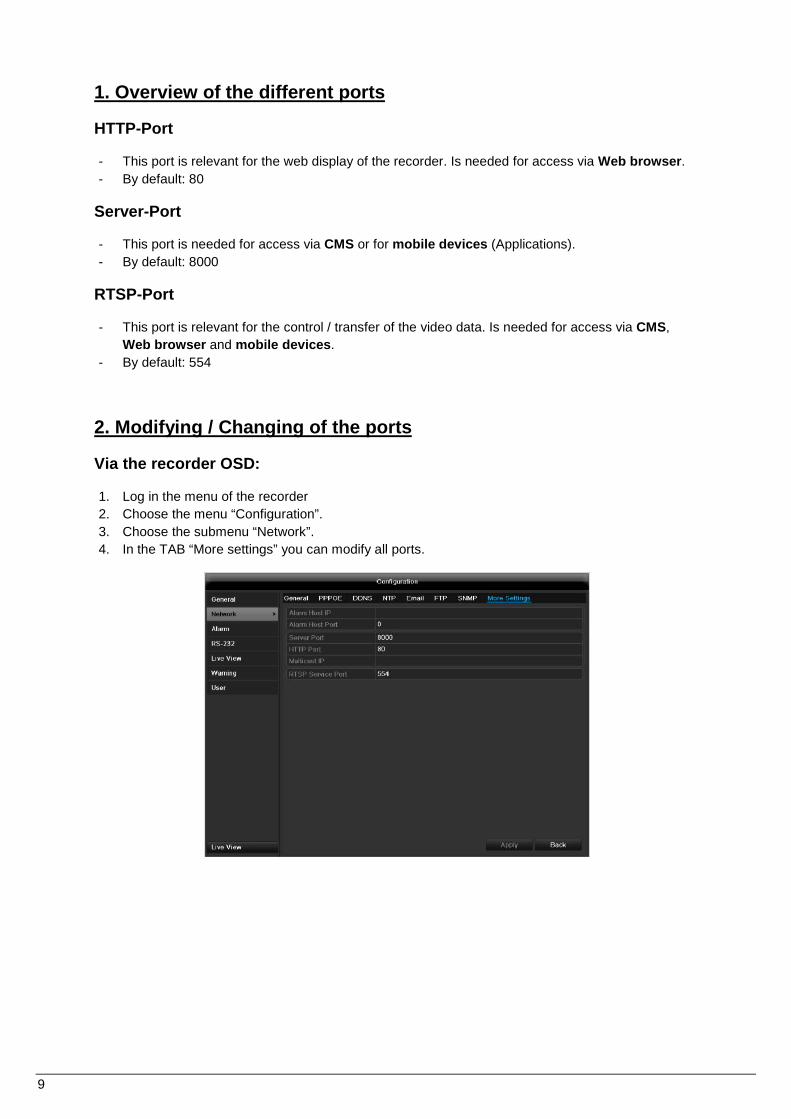
HTTP-Port
1. Overview of the different ports
- This port is relevant for the web display of the recorder. Is needed for access via Web browser. - By default: 80
Server-Port
- This port is needed for access via CMS or for mobile devices (Applications). - By default: 8000
RTSP-Port
- This port is relevant for the control / transfer of the video data. Is needed for access via CMS, Web browser and mobile devices.
- By default: 554
Via the recorder OSD:
2. Modifying / Changing of the ports
1. Log in the menu of the recorder 2. Choose the menu “Configuration”. 3. Choose the submenu “Network”. 4. In the TAB “More settings” you can modify all ports.
10
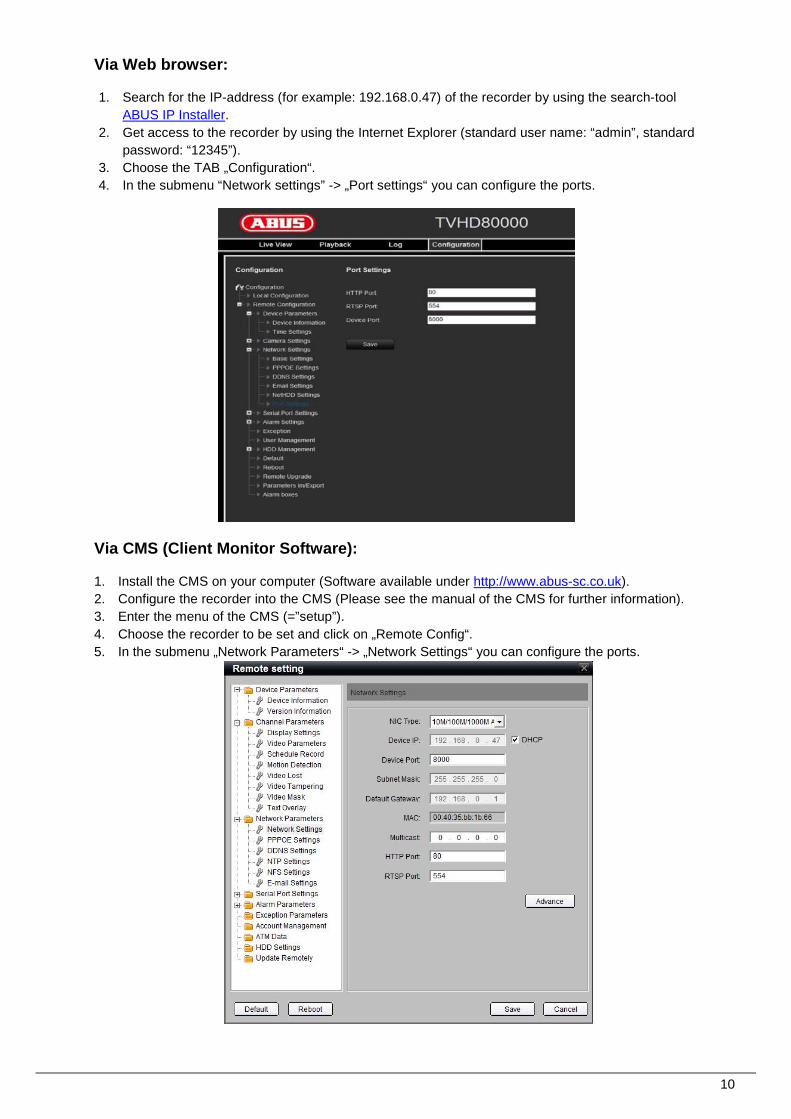
Via Web browser:
1. Search for the IP-address (for example: 192.168.0.47) of the recorder by using the search-tool ABUS IP Installer.
2. Get access to the recorder by using the Internet Explorer (standard user name: “admin”, standard password: “12345”).
3. Choose the TAB „Configuration“. 4. In the submenu “Network settings” -> „Port settings“ you can configure the ports.
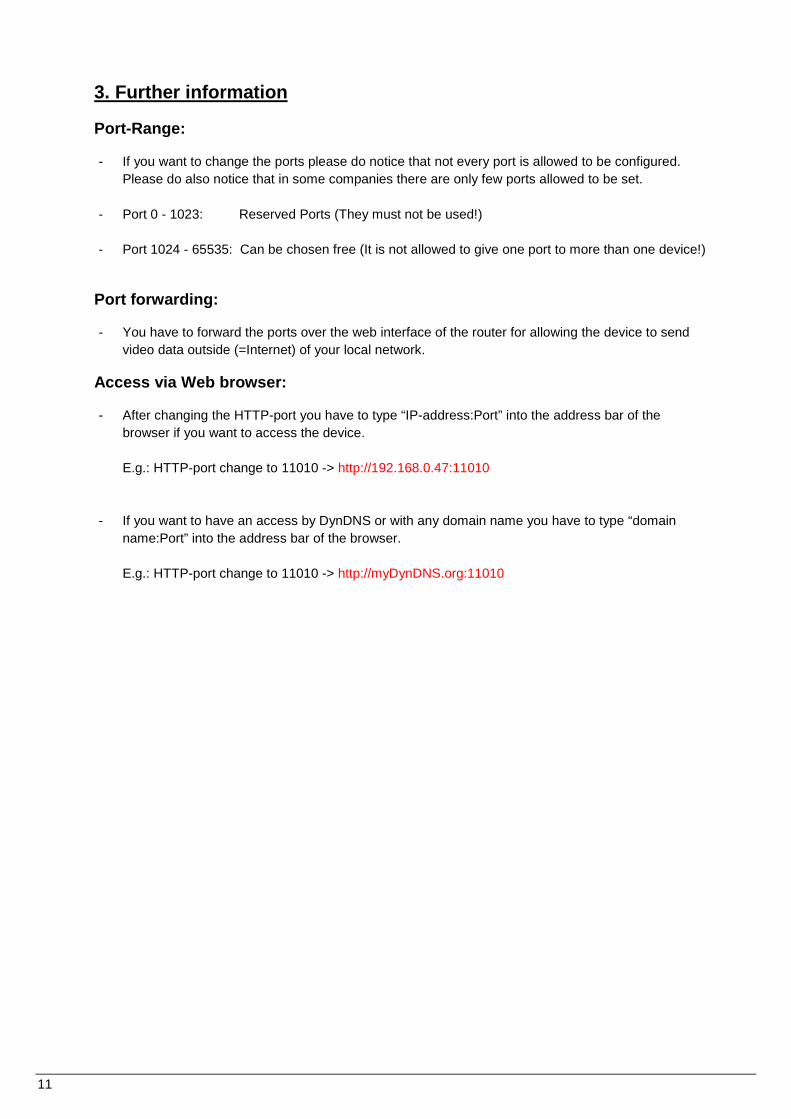
Via CMS (Client Monitor Software):
1. Install the CMS on your computer (Software available under http://www.abus-sc.co.uk). 2. Configure the recorder into the CMS (Please see the manual of the CMS for further information). 3. Enter the menu of the CMS (=”setup”). 4. Choose the recorder to be set and click on „Remote Config“. 5. In the submenu „Network Parameters“ -> „Network Settings“ you can configure the ports.
11
Port-Range:
3. Further information
- If you want to change the ports please do notice that not every port is allowed to be configured. Please do also notice that in some companies there are only few ports allowed to be set.
- Port 0 - 1023: Reserved Ports (They must not be used!)
- Port 1024 - 65535: Can be chosen free (It is not allowed to give one port to more than one device!)
Port forwarding:
- You have to forward the ports over the web interface of the router for allowing the device to send video data outside (=Internet) of your local network.
Access via Web browser:
- After changing the HTTP-port you have to type “IP-address:Port” into the address bar of the browser if you want to access the device. E.g.: HTTP-port change to 11010 -> http://192.168.0.47:11010
- If you want to have an access by DynDNS or with any domain name you have to type “domain name:Port” into the address bar of the browser. E.g.: HTTP-port change to 11010 -> http://myDynDNS.org:11010
Manufacturer ABUS Security-Center GmbH & Co. KG Linker Kreuthweg 5 86444 Affing (Germany)